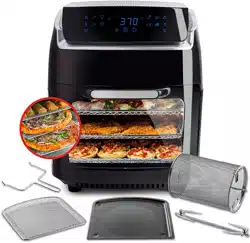
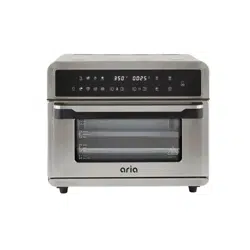
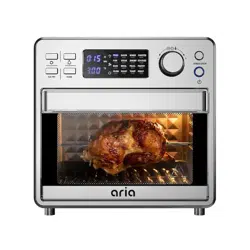
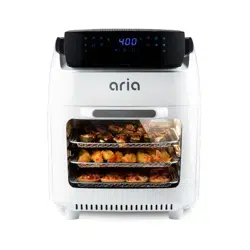
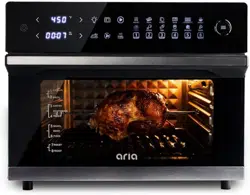
USER MANUAL Air Fryer Oven
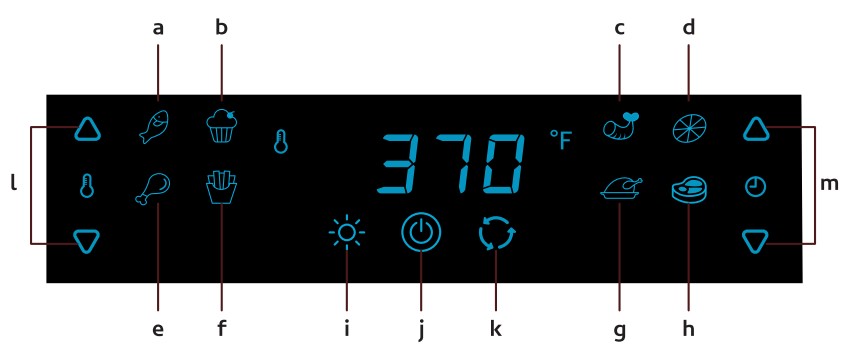
Presets
a. ) Fish
b. ) Baking
c. ) Shrimp
d. ) Dehydration
e. ) Poultry
f. ) Fries
g. ) Rotating Rotisserie Roast (this function automatically turns on the Rotation Function)
h. ) Steak
Functions
i. ) Oven Light
j. ) Power/Start Button
k. ) Rotation Function
L) Temperature Control
m.) Time Control
Set Up Air Fryer with Presets

1. After pressing the On/Off button select a preset
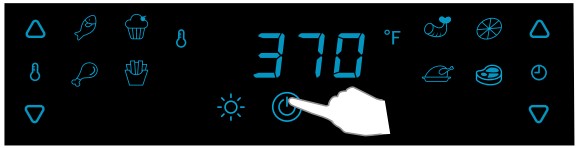
2. Once a preset is selected hit the On/Off button to start Air Fryer
Setting Cook Time & Temperature Manually

1. Pressing the On/Off button to turn on Air Fryer
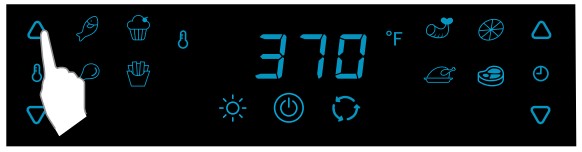
2. Tap the Arrows to adjust the Cooking Temperature

3. Tap the Arrows to adjust the Cooking Time

4. Once a Preset is selected press the On/Off button again to start cooking
Rolling Cage
 |
 |
 |
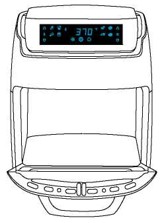
| 1. Open the Air Fryer Oven's door |
2. Slide Drip Tray into the oven's lowest position possible. |
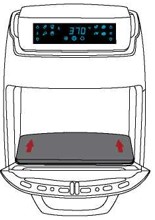
3. Slide Rolling Cage into the oven's grooves left side first. |
 |
 |
Note: Both sides of the Rolling Cage are labeled Left or Right for directional guidance. |
| 4. Select the desired time/temp and press the rotating function |
5. Press the On/Off button to start the Air Fryer |
Using Mesh Trays
 |
 |
 |
 |
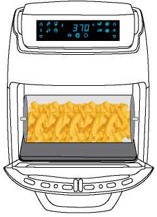
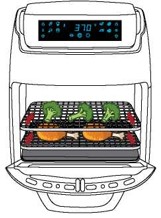
| 1. Open the Air Fryer Oven's door |
2. Slide Drip Tray into the oven's lowest postition possible. |
3. Place food on Grill Racks then slide into the Air Fryer Oven |
4. Place food on Grill Racks then slide into the Air Fryer Oven |
Note:
- This Air Fryer should only be used with the Drip Tray securely inside the appliance.
- The Drip Tray protects the bottom of the inner chamber and catches excess oil, fat, and grease that drips down, preventing it from burning. Do not operate the Air Fryer without the Drip Tray underneath your food to catch this dripping oil
Cooking Using Rotating Frying Basket
1. Open the Frying Basket door on its Right side by compressing the latch and pulling it out.
2. Load the Frying Basket with your ingredients, being sure not to overcrowd the Basket with too much, and allowing plenty air flow.
3. Close the Frying Basket door completely, making sure the latch is securely locking the door
4. Looking at the L (Left) and R (Right) markings on the Cage, place the Left side into the Left slot of the Air Fryer, then the Right side into the Right slot of the Air Fryer. You'll notice the Left slot is the one with the rotating gear for the Basket so it's easiest to place that first, then the Right side will easily slide into the Right slot.
Tip: If there's any difficulty securing the Basket into the slots, simply rotate the Basket until it fits in securely.
5. Set the time and temperature to the desired amounts, then press the Rotate button on the touchscreen. The Rotate button will flash when this feature is enabled.
6. Press the On/Off button to begin cooking and the machine will start to heat up while your Frying Basket begins to rotate.
Tip: If for some reason the Frying Basket isn't rotating, safely lift the Frying Basket out of the Air Fryer using the Handle and place it back in, Ensure the Rod is properly fit inside the rotating gear on the left side of the Air Fryer. Try gently rotating the Rod until it fits in the gear and resume.
Removing Frying Basket
With caution and oven gloves, slide the Handle underneath each side of the Rolling Cage and use the Handle to lift the Right side of the Frying Basket upward and pull the Right side out. Next, safely do the same with the Left side of the Frying Basket.
CAUTION: Please keep in mind that the Air Fryer, heating elements, and inner chamber get very hot. When using the Frying Basket, Handle, or any accessory, exercise extreme caution to prevent bodily injury.
CAUTION: Allow the Frying Basket to cool down completely, as it will still be very hot from cooking.
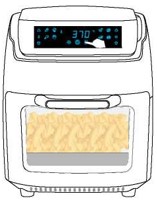
Cooking Using the Mesh Trays
- The included Mesh Trays can conveniently cook a variety of foods. When using, always be sure to use the Drip Tray at lowest possible slot to catch excess oil.
- After placing the Drip Tray to catch excess grease if needed, slide the Mesh Trays" at the next lowest available position and slide each securely and completely into the unit. The Grill Racks can be used for cooking or dehydrating fruits and vegetables, meats, toasting bread, reheating food, pizzas, frozen snacks, and a multitude of other ingredients.
Tip: When cooking using 2 trays, you may use a heat-resistant oven glove to switch the position of the trays midway through cooking for more even results. We do not recommend cooking with more than 2 trays at once.
Tip: When cooking using 2 or more slots, you may use a heat-resistant oven glove to switch the position of the trays midway through cooking for more even results.
Care, Cleaning & Maintenance
For optimal efficiency and long-term care, clean the Air Fryer after each use.
- Since the Air Fryer and internal parts get very hot during use, unplug the power cable and let the Air Fryer cool for at least 30 minutes before handling or cleaning any parts. Note: Open the Door and remove all accessories carefully to let the Air Fryer cool more quickly before cleaning.
- Clean all accessories with hot water, a minimal amount of soap, and a non-abrasive sponge To avoid damage to the parts, do not use a hard-wire cleaning tool.
- All accessories are dishwasher-safe for easier cleaning.
- Clean the inside of the Air Fryer with hot water and a non-abrasive sponge.
- Wipe the surface of the Air Fryer with a moist cloth. Do not use corrosive liquids for cleaning.
- Always keep the power cord of the Air Fryer dry and away from water to prevent electric shock and damage to the appliance.
- For long-term storage, unplug the Air Fryer, allow it to cool down, properly clean and dry all the parts, put the components into the box, and store it in a cool, dry place.
Warning
- If the appliance is used improperly, or for professional or semi-professional purposes, or if it is not used according to the instructions in the User Guide, the warranty becomes invalid and Skyline Brands refuses any liability for damage caused.
Troubleshooting
| Problem |
Solution |
| Air Fryer Not Working |
- Make sure the Air Fryer is plugged into a power outlet. If necessary try another outlet.
- Door isn't completely closed
- The Air Fryer is not on
- No preset has been selected
|
| The Air Fryer is especially noisy |
- The motor or internals aren't working correctly. Shut the Air Fryer off immediately and safely. Contact Aria Customer Care for warranty instructions
|
| Food not fully prepared when taken out |
- The Trays or accessories are overfilled with ingredients
- Temperature is set too low
- Cooking time is set too short
|
| Fried ingredients aren't crispy enough |
- Use oven snacks or brush a thin layer of oil on the surface of the ingredients before cooking for crispier results
|
| Home-made French fries are not crispy enough |
- Soak the cut potatoes in water for at least 30 minutes to remove the starch, but be sure to dry them properly before cooking. Add a brush of oil or cut the potatoes into thinner fries for crispier results.
|
| Ingredients aren't cooked evenly |
- In the middle of the cooking process, carefully flip or adjust your ingredients to separate the overlapped food, then place the Tray back inside and close door to continue
|
| The Air Fryer has shut down |
- The Air Fryer has an auto-off safety feature which protects it from overheating.
- Unplug the unit safely and allow it to cool down completely. Then plug it back in and restart cooking following instructions.
|
| Smoke is coming out of the Air Fryer |
- The accessories or inside of the Air Fryer still contain grease or oil from a previous cooking cycle.
- White smoke is caused by grease or oil. To prevent this, always clean the Air Fryer and accessories after use.
|
Note: A few ingredients with a high fat content such as bacon or some meats can release excess fat, grease, and oil which can begin to smoke. Please be mindful of this and remove all excess fat and oil inside the Air Fryer as necessary.