Loading ...
3
4
Install exterior assembly
Install interior assembly
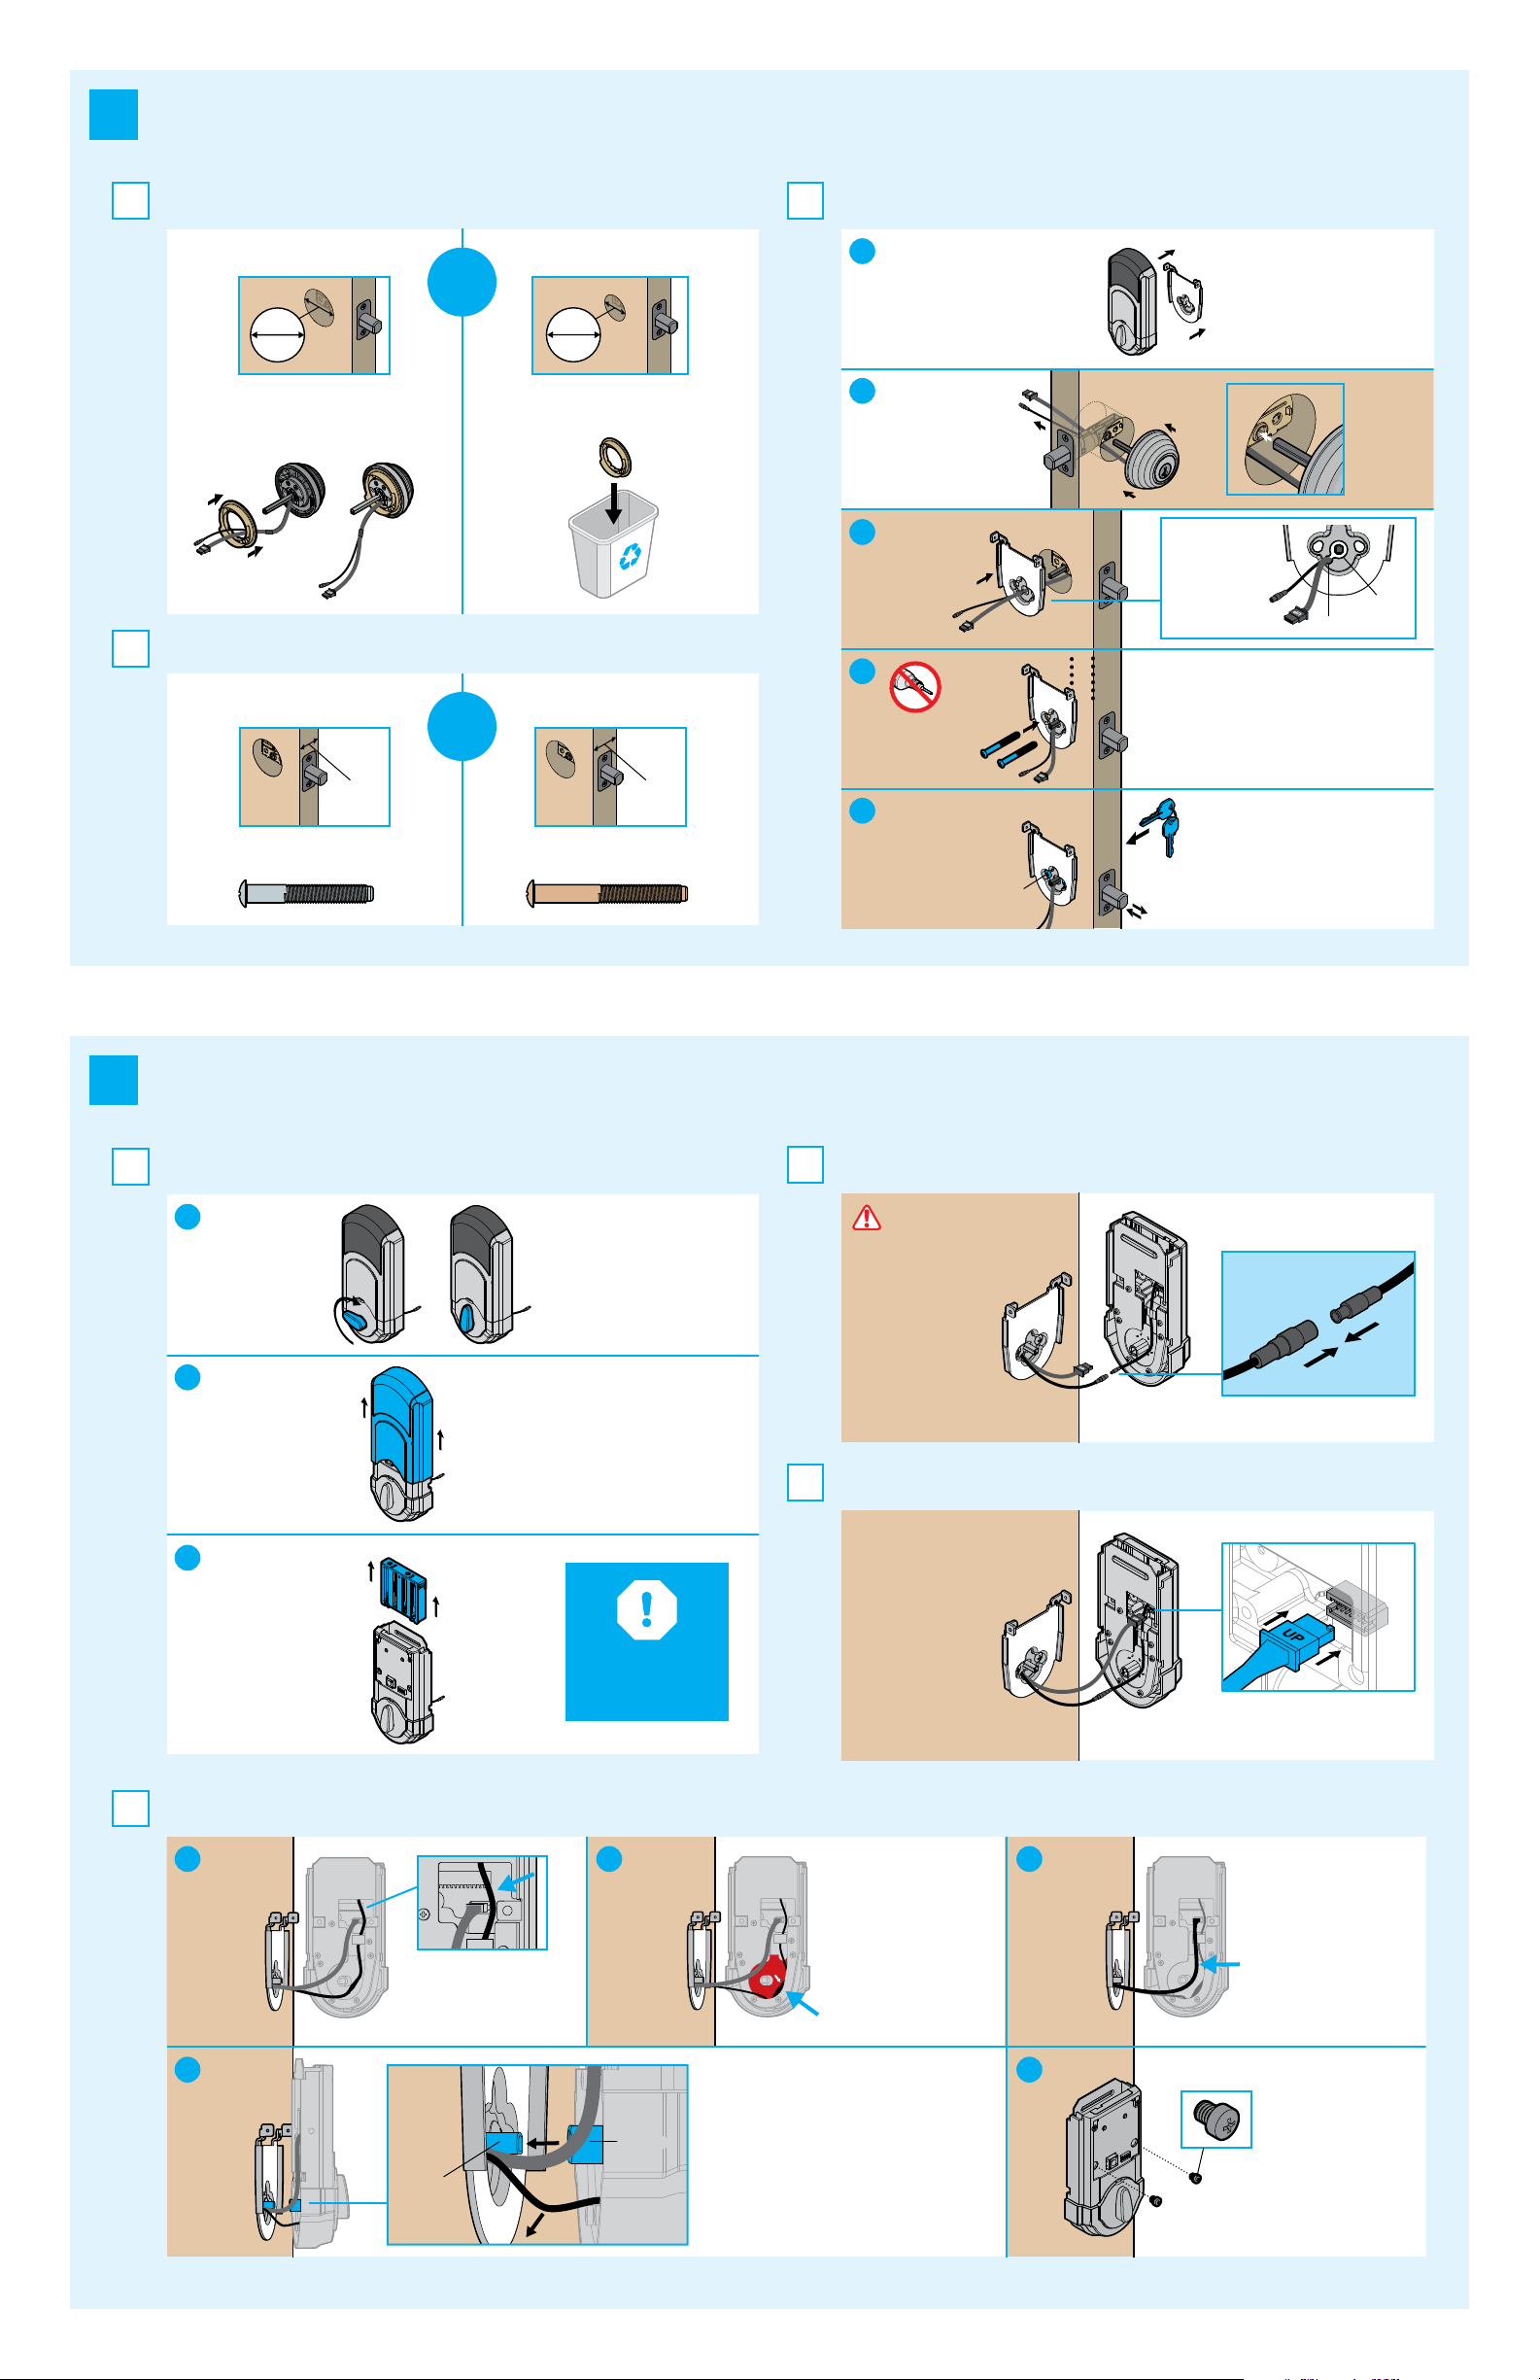
What is the diameter of the hole in the door?
Remove battery cover and battery pack from interior assembly.
Connect the thinner cable.
Properly route cables and install interior assembly.
Connect the thicker cable.
Install exterior assembly and mounting plate.
What is the thickness of your door?
A
A
B
D
C
C
B
F
E
F
2-1/8"
54 mm
1-1/2"
38 mm
or
Diameter is 2-1/8" (54 mm). Diameter is 1-1/2" (38 mm).
“F” is required for installation.
Install “F” on “E”.
“F” is not needed for installation.
Discard “F”.
a
b
c
L
M
L
N
Make sure turnpiece is
in the vertical position.
Remove
interior cover.
Remove
battery pack
Do not install
batteries yet.
L
CAUTION: Handle
cables with care
to avoid cable
damage. Do not
pull or use force.
Ensure tight cable connection.
S (2x)
a
b
c
d
e
Tuck cable here
Inserte el cable aquí
Insérez le câble ici
Lay thicker cable
at against the
interior housing.
Push the turnpiece shaft
onto the torque blade.
Avoid pinching the excess
thinner cable by pulling it
away from the torque blade.
Note: Turnpiece may
not rotate smoothly
until after step 5.
torque
blade
turnpiece
shaft
Route the thinner cable
around the outside of the
thicker cable’s square
connector.
Tuck the thinner cable’s
connector behind the
backplate (as indicated
by the sticker on the
interior assembly).
L
Ensure tight cable connection.
E
K
K
L
Q/R (2x)
G
a
b
c
d
e
Q/R
Insert key and test latch. If latch
does not extend or retract smoothly,
adjust screws (Q/R).
Remove key when nished and
make sure the latch bolt is fully
extended.
Cables go underneath latch.
Locate mounting plate (K).
Note: It may be on the back of
the interior assembly (L)
Route cables
through center
hole, then
push cables
into side hole.
Keep parallel
to edge of door
Tighten
screws evenly
center
hole
side hole
QR
or
Door is 1-3/8" (35 mm) thick. Door is 1-3/4" (44 mm) thick.
Use the shorter, silver screws.
Use the longer, gold screws.
1-3/8"
35 mm
1-3/4"
44 mm
Loading ...
Loading ...