Loading ...
Loading ...
Loading ...
16
INSTALLATION INSTRUCTIONS
IMPORTANT!
All connections must be checked for leaks.
Ensure 1/4” (6mm) tubing is routed away from sharp objects, sharp corners (beware
of kinking the tube as this will stop water flow), clear of the refrigerator rear
compartment and not in a location where it can be kinked or squashed.
Ensure all push-fit connections are firmly pushed into place. The tube should push in
5/8” (16mm) before reaching the stop.
If tubing is removed at any point, re-cut the end and re-insert. Tubing must be fully
inserted to avoid leaks.
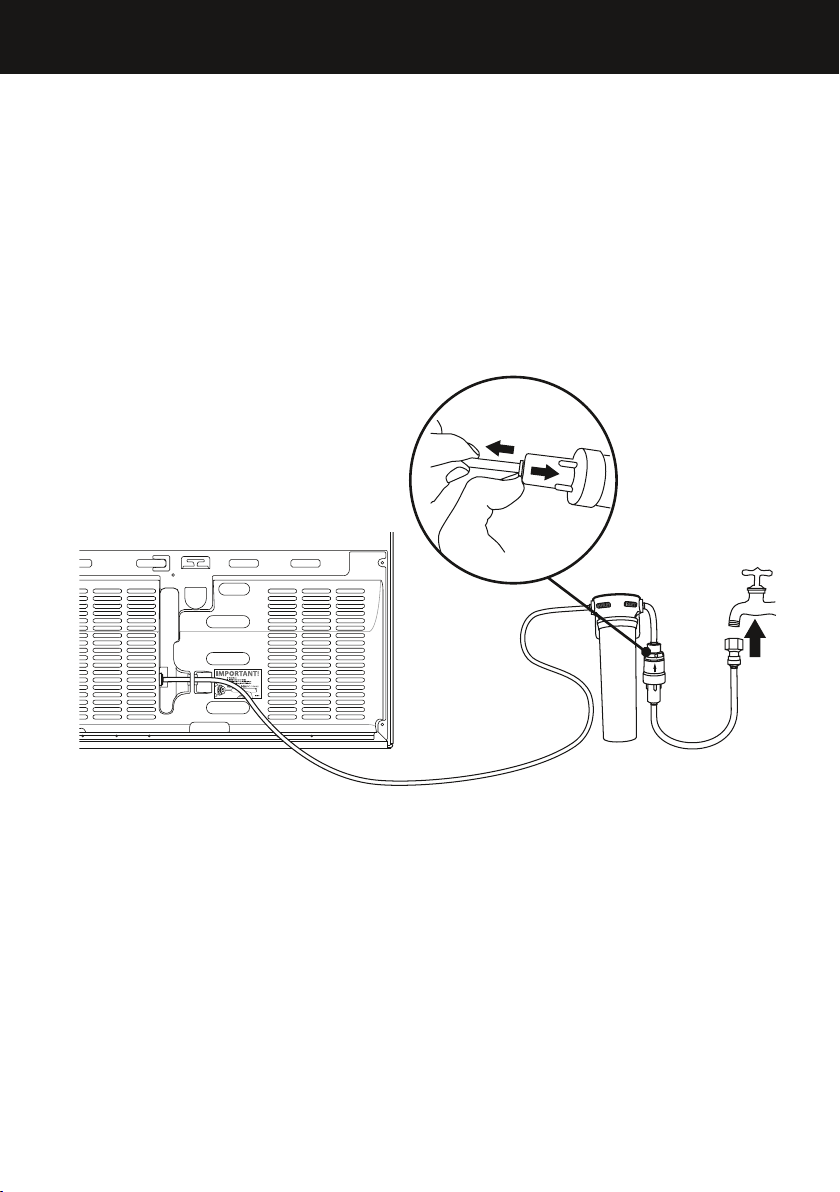
To remove tube from connection points first turn off the isolating faucet. Gently push
the dispensing pad a few times using a glass or container to remove the static line
pressure. Push in the collet firmly while pulling back on the tubing at the same time,
as shown in Diagram10.
6 7 8 9
DRAWING: 838587
PART: 838587
Diagram 11
Diagram 10
Connection to water supply
System tested and certified by NSF International against NSF/ANSI Standard 53 for the
reduction of Asbestos, Atrazine, Benzene, Cyst, Carbofuran, Lead, Lindane, Mercury,
P-Dichlorobenzene, Toxaphene & Turbidity; against Standard NSF/ANSI42 for the
reduction of Chlorine Taste and Odor and Nominal Particulate Class I to a capacity of
750gallons (2,838liters).
Loading ...
Loading ...
Loading ...