Loading ...
Loading ...
Loading ...
13
Complete Connection
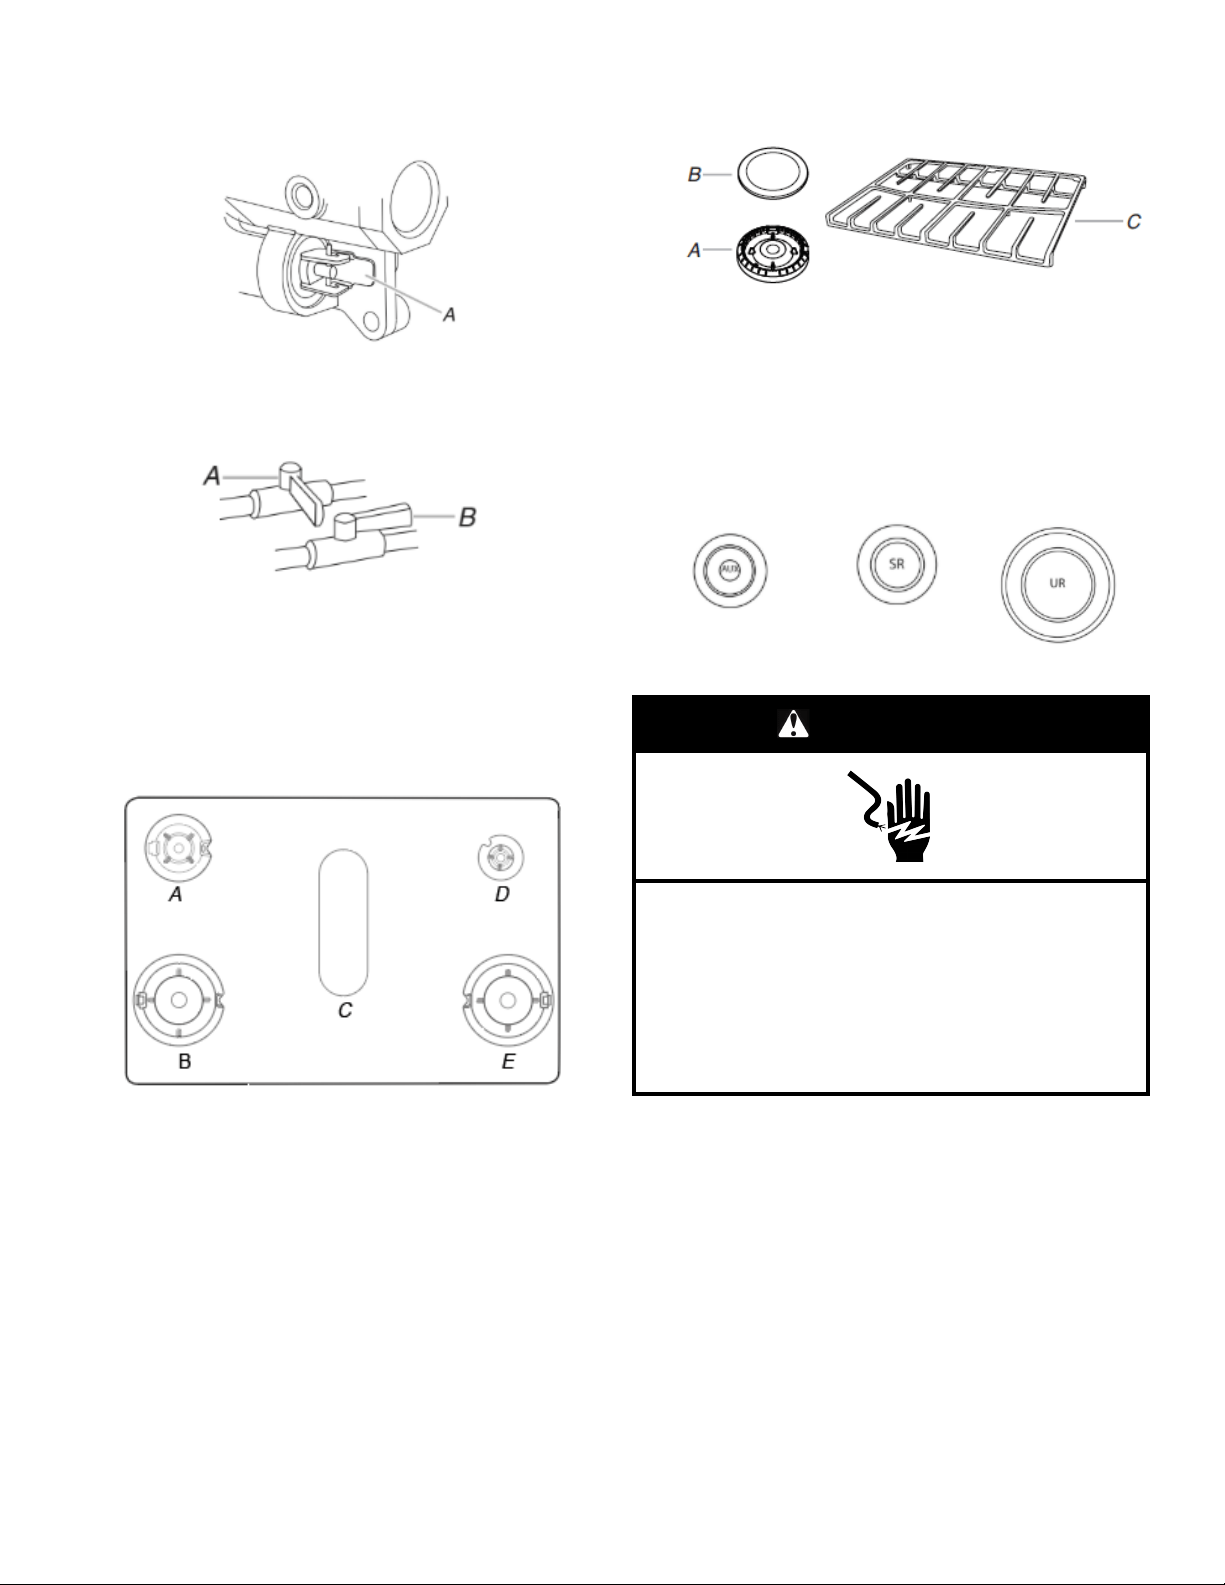
1. Check that the gas pressure regulator shut-off valve is in the
“on” position.
A. Gas pressure regulator shut-off valve shown in the “on”
position
2. Open the manual shut-off valve in the gas supply line. The
valve is open when the handle is parallel to the gas pipe.
A. Closed valve
B. Open valve
3. Test all connections by brushing on an approved noncorrosive
leak-detection solution. If bubbles appear, a leak is indicated.
Correct any leak found.
4. Remove cooktop burner caps and grates from parts package.
Place the burner bases as indicated by the following
illustration for your model:
For Model KFGG504KPS
A. Medium (Semi
Rapid)
B. Large (Ultra
Rapid)
C. Oval (OV)
D. Small (Auxiliary)
E. Large (Ultra Rapid)
5. Burner caps should be level when properly positioned. If
burner caps are not properly positioned, surface burners will
not light. Place burner grates over burners and caps
A. Burner base
B. Burner cap
C. Burner grate
Alignment: Be sure to align the gas tube opening in the
burner base with the orifice holder on the cooktop and the
igniter electrode with the notch in the burner base.
6. Place the burner caps on the appropriate burner bases.
IMPORTANT: The bottom of the small and medium caps are
different. Do not put the wrong size burner cap on the burner
base.
Small (Auxiliary) Medium (Semi Rapid) Large (Ultra Rapid)
WARNING
Electrical Shock Hazard
Plug into a grounded 3 prong outlet.
Do not remove ground prong.
Do not use an adapter.
Do not use an extension cord.
Failure to follow these instructions can result in death,
fire, or electrical shock.
7. Plug into a grounded 3-prong outlet.
8. Slide range into final location, making sure the rear leveling
leg slides into the slot of the anti-tip bracket.
Loading ...
Loading ...
Loading ...