Loading ...
Loading ...
Loading ...
©2019 Hestan Commercial Corporation
10
EN
ELECTRICAL CONNECTIONS
(CONTINUED)
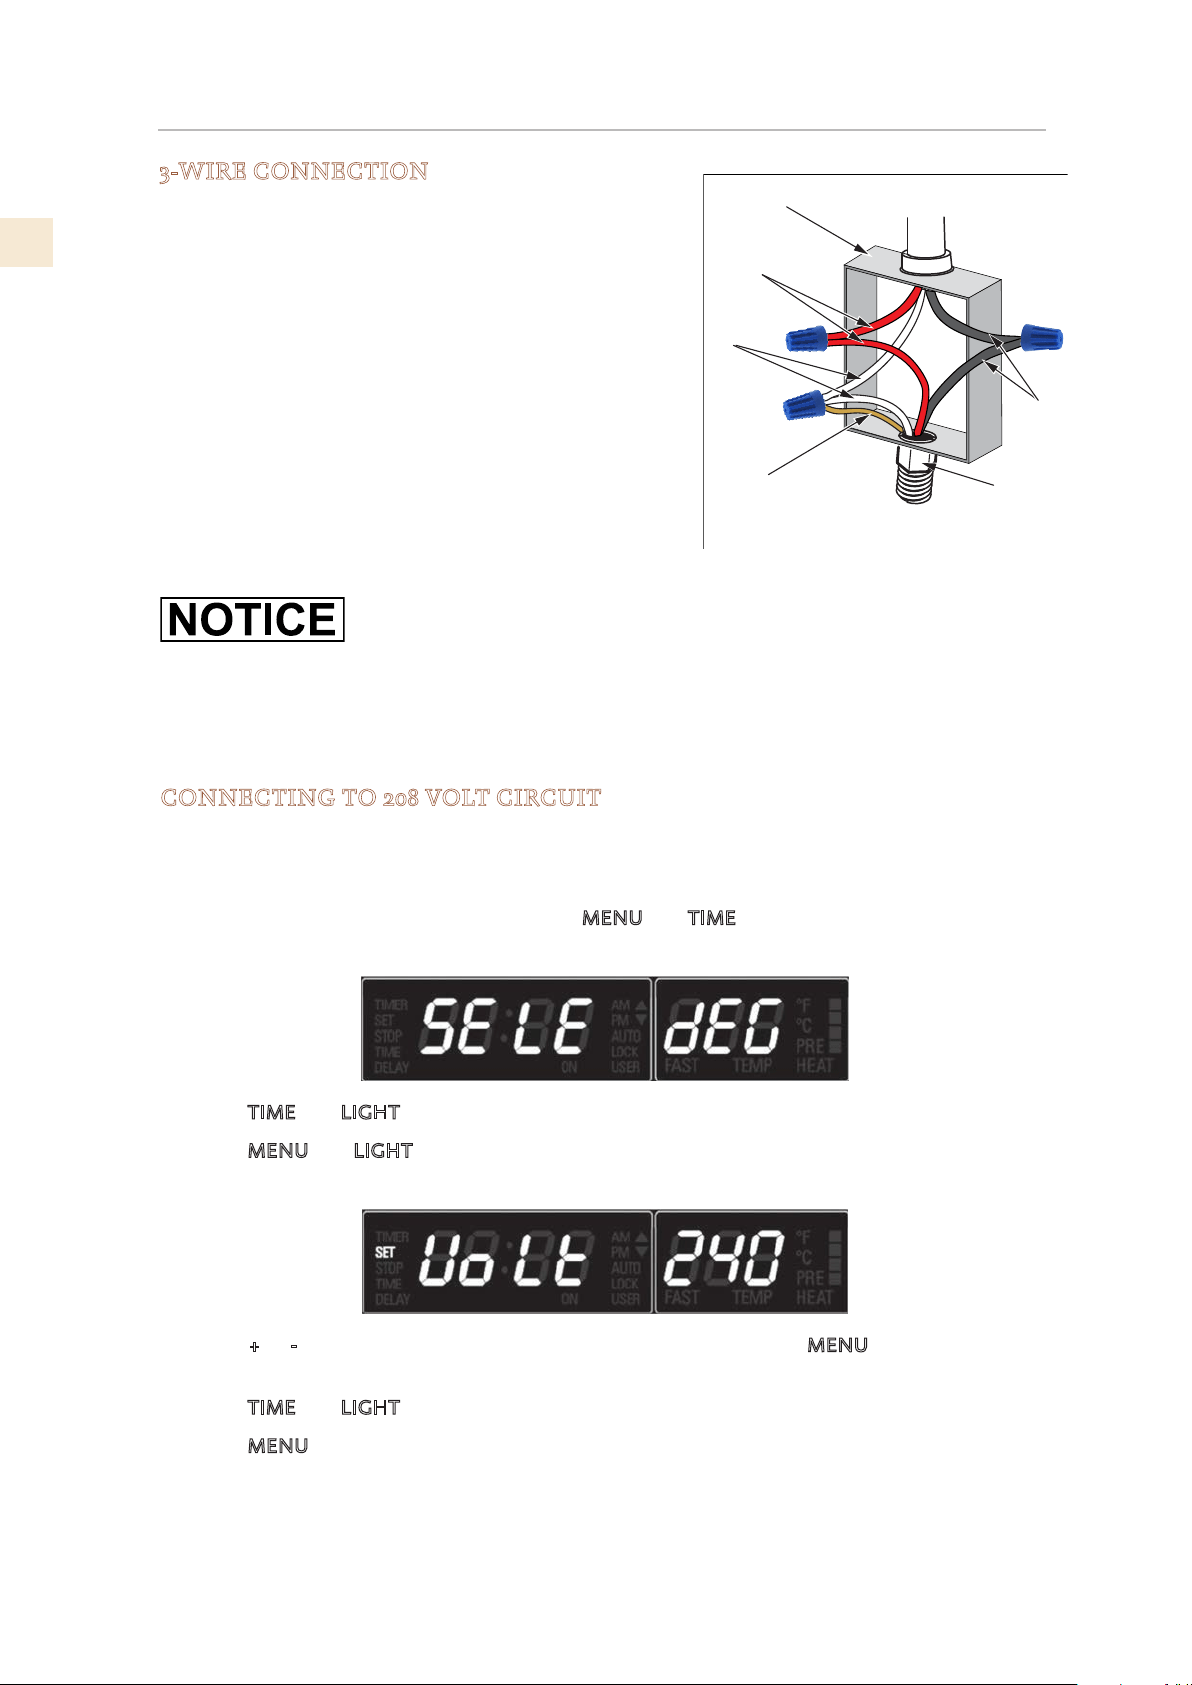
White
wires
Red wires
Junction box
Cable from power supply
Black
wires
UL listed
conduit
connector
Cable from
appliance
Bare or
green wire
THE DOOR MUST REMAIN CLOSED WHEN POWER IS SUPPLIED TO
THE APPLIANCE .
Whenever the appliance is powered up, either at installation or after a power failure, it performs
a self-test of the door locking mechanism. The lock symbol will flash during the test. The door
must remain closed until after the symbol stops flashing. If the door is open or an attempt is
made to open it during the test it may cause damage to the lock mechanism and result in an
error code.
CONNECTING TO 208 VOLT CIRCUIT
For areas where standard 240 Volt service is not available, there is the option to switch to 208
volt. This option must be accessed with the oven connected to the power source, and using the
following sequence:
1. Within five minutes from power up, hold MENU and TIME keys for 3 seconds to enter the
user option menu. The display shows as follows:
2. Hold TIME and LIGHT keys until the display becomes dark.
3. Hold MENU and LIGHT keys until the time display shows “Volt” and temperature module
shows “240” (or 208) blinking.
4. Press + or - keys to toggle between 240V and 208V options. Press MENU to confirm.
(numeric value stops blinking)
5. Hold TIME and LIGHT keys to return to the user option menu.
6. Hold MENU key for 3 seconds to quit the user option menu.
• The voltage setting is stored and kept even after a long power-off.
3-WIRE CONNECTION
For installations where grounding through the neutral
conductor is allowed.
1. Make sure power is off at the supply panel / breaker
off.
2. Attach GREEN ground appliance wire and WHITE
neutral appliance wire to WHITE neutral wire in
electrical box.
3. Connect RED (L1) appliance wire to RED red power
wire in electrical box.
4. Connect BLACK (L2) appliance wire to BLACK
power wire in electrical box.
Loading ...
Loading ...
Loading ...