If this product was purchased on the echelonfit.com website, you should have received an activation email.
Go to website and follow the on-screen instructions to choose a plan and setup your account. This info will be needed to login to your account on the Echelon FitTM App.
All account info and plans are managed at member.echelonfit.com and use the same login. After creating your account login on website, write down your login info. This will be the same login for the App.
1. Choose "sign up now"
2. Select Purchase location
Select purchase location and follow the on-screen instructions.
3. Choose your plan
Monthly / 1 Year / 2 Year
4. Set up payment method
5. ENTER PERSONAL ACCOUNT INFO
6. View YOUR ACCOUNT
Where you can edit your billing info, add family members, manage subscriptions, and (if on your mobile device) download the app and sign in.
ACCOUNT ACTIVATION
If this product was purchased on the echelonfit.com website, you should have received an activation email. Click the link in the activation email and follow the on-screen instructions. Enter your information to verify payment information. You will not be charged until the next month.
Once assembly is complete, you will be required to sign into your account, choose a class, and connect your bike.
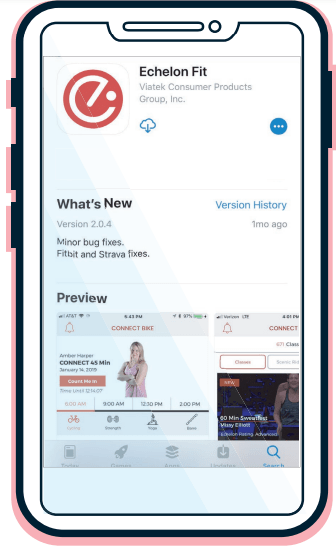
DOWNLOAD THE ECHELON FIT APP
Ensure latest version of the Echelon Fit™ App is installed from the Google Play Store or the App Store.
OPERATIONAL INSTRUCTIONS
Connect to the Echelon FitTM App to access tutorials and operation instructions.
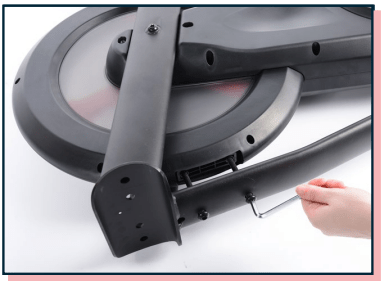
REMOVAL OF FRAME
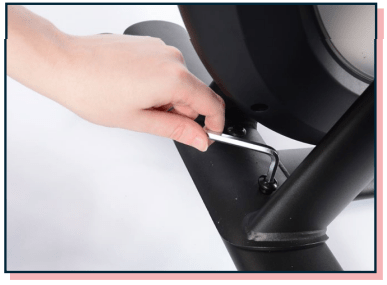
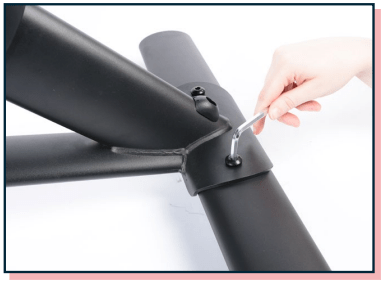
Lay the Connect Sport its side and remove wheel chock bolts with hex key and set to the side.
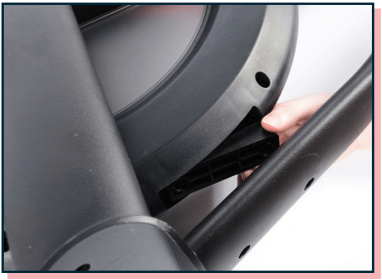
Using your wrench or fingers, pull wheel chock out and set aside.
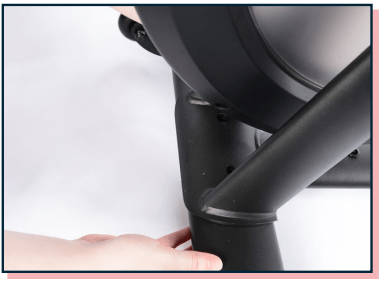
Place the front foot with wheels facing forward under the front bracket.
Insert foot bolts into front foot and tighten down with hex key.
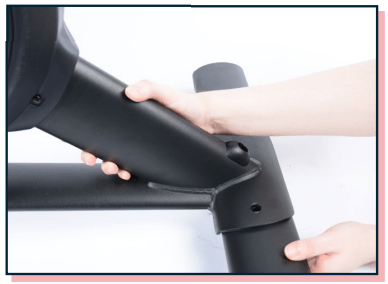
Place the rear foot under the rear bracket.
Insert foot bolts into rear foot and tighten down with hex key.
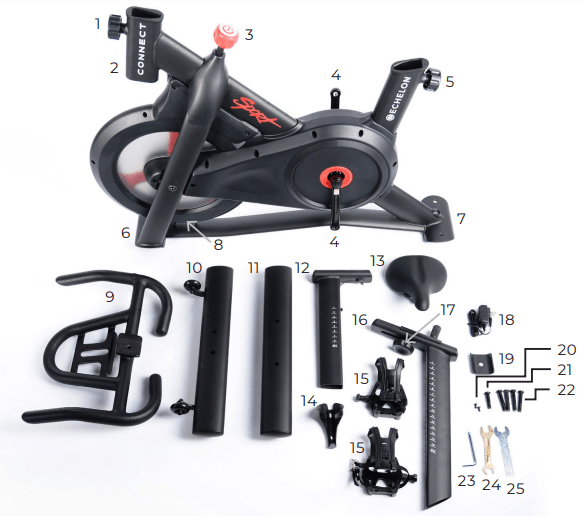
ASSEMBLY
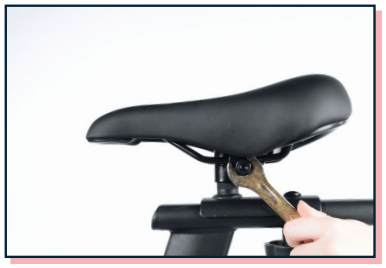
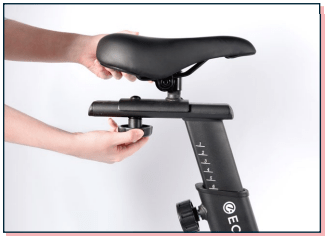
Place seat onto seat post and secure with included wrench.
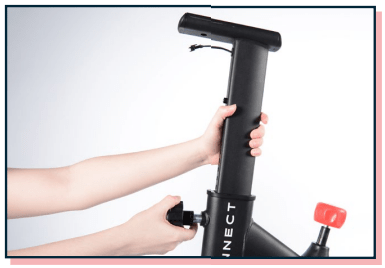
Unscrew handlebar height adjustment lever, but do not remove. Pull lever out and fully insert handlebar post into frame. Release lever and post is secure.
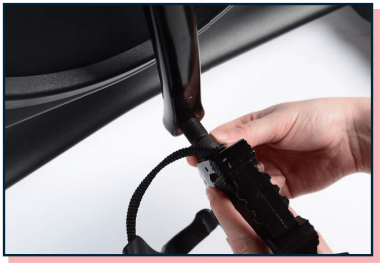
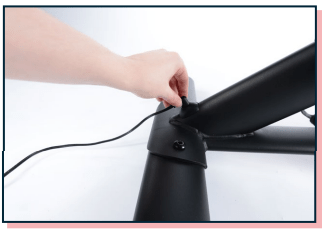
Connect the coiled wire from the bike to the wire at coming out of the handlebar post.
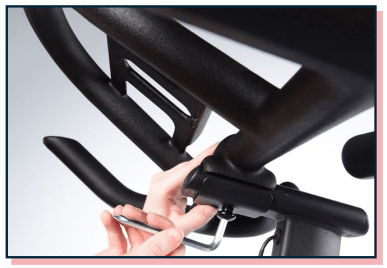
Place the handlebars on the handlebar post and the handlebar bottom bracket (shown above) and screw in the handlebar post screw with hex key.
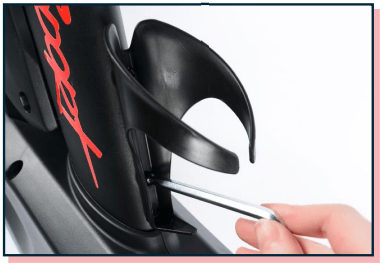
Place water bottle holder over the two screw holes near the Sport logo and secure with two water bottle holder screws.
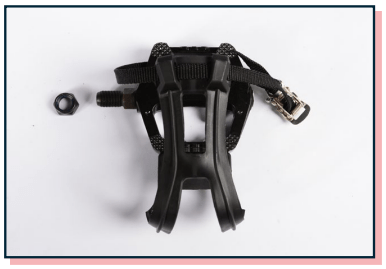
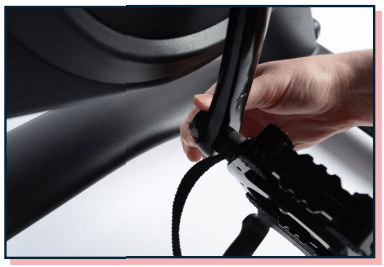
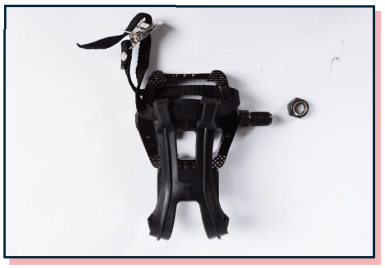
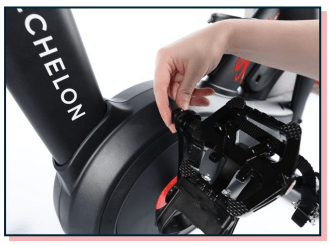
Remove nut from left pedal by turning clockwise.
The threads are reversed on LEFT pedal and nut.
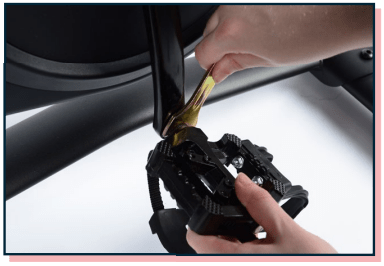
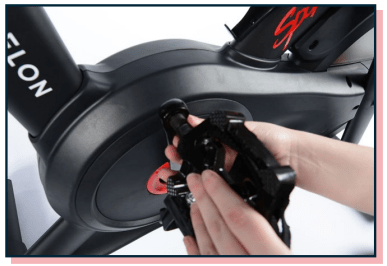
Screw left pedal onto crank arm counterclockwise.
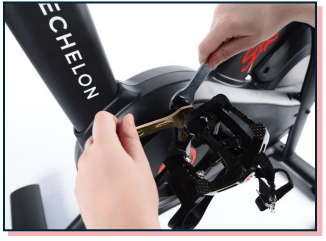
Use double sided wrench to ensure pedal is firmly seated against crank arm.
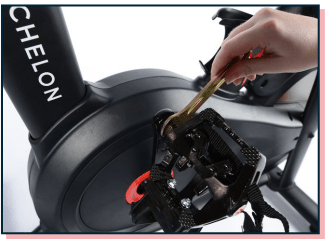
Finger tighten nut counterclockwise back onto pedal bolt.
Hold pedal with double sided wrench and use single sided wrench to tighten nut counterclockwise.
Remove nut from right pedal by turning counterclockwise.
Screw right pedal onto crank arm clockwise.
Use double sided wrench to ensure pedal is firmly seated against crank arm.
Finger tighten nut clockwise back onto pedal bolt.
Hold pedal with double sided wrench and use single sided wrench to tighten nut clockwise.
Plug power adapter into port located on the rear foot bracket, then plug into wall outlet.
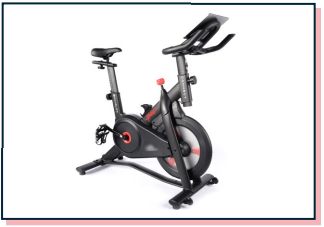
The assembly of your Echelon® Connect Sport bike is now complete!
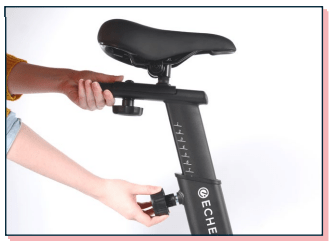
Turn seat slide adjustment lever counterclockwise to loosen. Move seat along track to desired location. Turn seat slide adjustment lever clockwise to tighten and secure in place.
Turn seat height adjustment lever counterclockwise until you are able to pull the lever halfway out. Pull and hold the seat height adjustment lever and raise the seat to desired position. Ensure lever engages one of the adjustment holes. Turn seat height adjustment lever clockwise until secure.
TROUBLE CONNECTING?
If your bike does not connect using the process above, navigate to the Settings app on the tablet and select Apps (on older versions of Android you will select ’Application’ and then ‘Application manger’). At the top right select the icon (on older versions, select ‘MORE’) and then select ‘Show system’ or ‘Show system apps’. Select ‘Bluetooth Share’, then ‘Storage’, and then either ‘Clear Data’ or ‘Clear Cache,’ depending which button is highlighted. Restart the Echelon Fit™ App and attempt connection again.
HANDLEBAR / leveling ADJUSTMENT
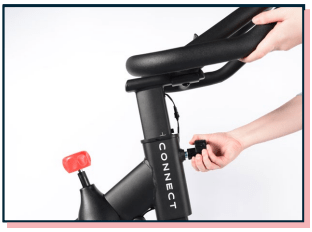
Turn handlebar adjustment lever counterclockwise until you are able to pull the lever halfway out. Pull and hold the handlebar adjustment lever and raise or lower the handlebars to desired position. Ensure lever engages one of the adjustment holes. Turn handlebar adjustment lever clockwise until secure.
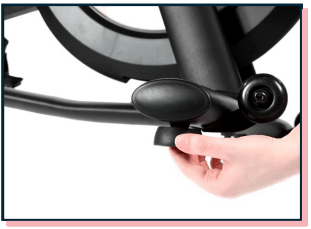
To level the Connect Sport, adjust the pads on the front and rear feet until stable.
OPERATION
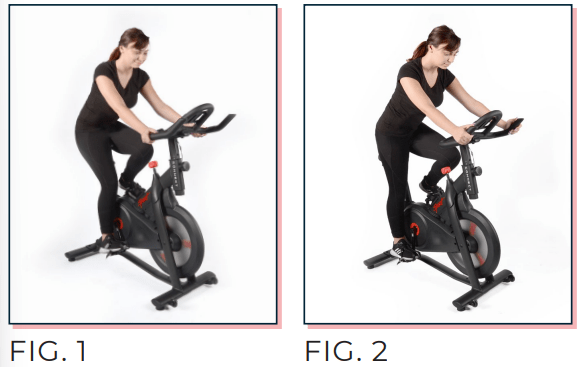
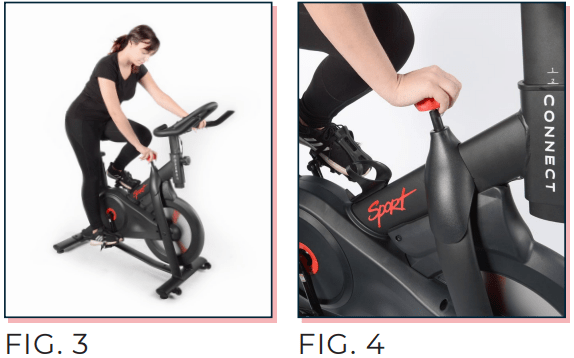
There are two different positions (shown below) you will see during classes on the Echelon Fit™ app. Fig. 1 demonstrates a relaxed upper body while in seated position. Fig. 2 demonstrates proper hand placement and weight distribution while in an upright position.
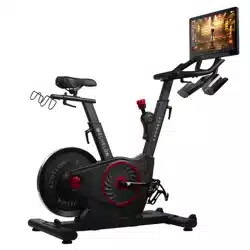
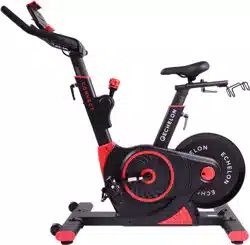
To adjust the resistance while using the Echelon® Connect Sport, turn the resistance adjustment knob to the left or right, as shown in Fig. 3. To stop the bike press down on the resistance adjustment knob, as shown in Fig. 4.
SPECS
Input: 100-240V~ 50/60Hz 0.2A
Output: 9V 0.5A
QDID: 60912
FCC ID: 2AMDBBLE002
CAN ICES-3 (B)/NMB-3(B) HVIN: 1.0
IC: 22882-BLE002
DIMENSIONS: 42" L × 20.5" W × 45" H
Changes or modifications not expressly approved by the party responsible for compliance could void the user's authority to operate this device.