Loading ...
Loading ...
Loading ...
Getting Ready
The mop pad may have already come attached
to the mop pad tray on the foot of the unit. If
not, please follow step 1 below.
For Microfiber Mop pads, please follow
these steps:
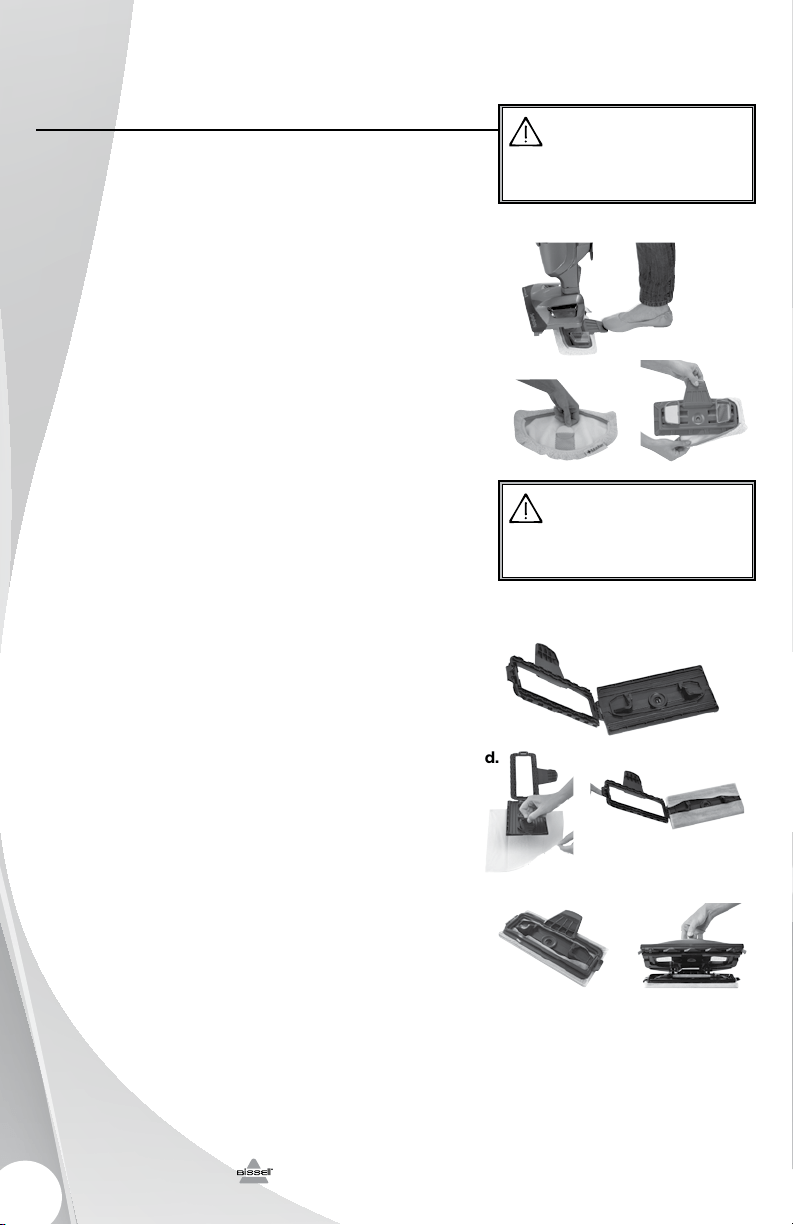
1. Attach mop pad.
a. Step on foot release for mop pad tray
and lift unit off tray.
b . Some units may come with fragrance
discs. Add fragrance disc in the mesh
pocket in the mop pad. Use the whole
disc for a refreshing scent or cut in half
for a lighter scent.
c. Wrap mop pad around the bottom of
the tray, making sure the gray stitching is
in the front and the quick release tab is in
the back.
d. Put the mop pad tray back down on
the floor and set the unit back on top. It
will click into place.
Some units may come with a disposable pad
option.
For STEAMBOOST™ disposable pads
(select units), please follow these steps:
1. Attach STEAMBOOST™ pad
a. Step on foot release for mop pad tray
and lift unit off tray.
b . Open the tray by lifting up the
release tab.
c. Undo the flaps on the pad.
d. Place opened tray on pad. Wrap pad
around the bottom of the tray, making
sure the ends of the pad are folded on
top of the tray.
e . Close the tray by folding down, snapping
into place over the pad.
f . Put the STEAMBOOST™ pad tray back
down on the floor and set the unit back
on top. It will click into place.
Operatis
www.BISSELL.com
6
WARNING
Do not operate appliance with damp or wet
filters or without all filters in place.
WARNING
Tinted plates on foot may get hot while steam
mop is in use. Do not touch while hot.
1a.
1b.
1b.
1d.
1e.
1c.
1f.
Microfiber Mop Pad
STEAMBOOST™ Pad
Loading ...
Loading ...
Loading ...