Loading ...
Loading ...
Loading ...
English - 18
6. Finalise the installation
• Refer to the washer Installation Instructions to complete the washer installation.
• Refer to the dryer Installation Instructions to complete the dryer installation.
• Carefully slide or walk the stacked washer and dryer into place. Use felt pads or other
sliding device to assist moving and to protect flooring.
Do not push on the dryer once installed to top of the washer. Pushing on the dryer may result in
pinched fingers.
DOOR REVERSAL
Depending on your requirements (installation location, space constraints), you can change the direction the
door opens.
This is done according to the customer’s needs. The qualified technician or customer can do this
themselves directly.
1. Unplug the power cord.
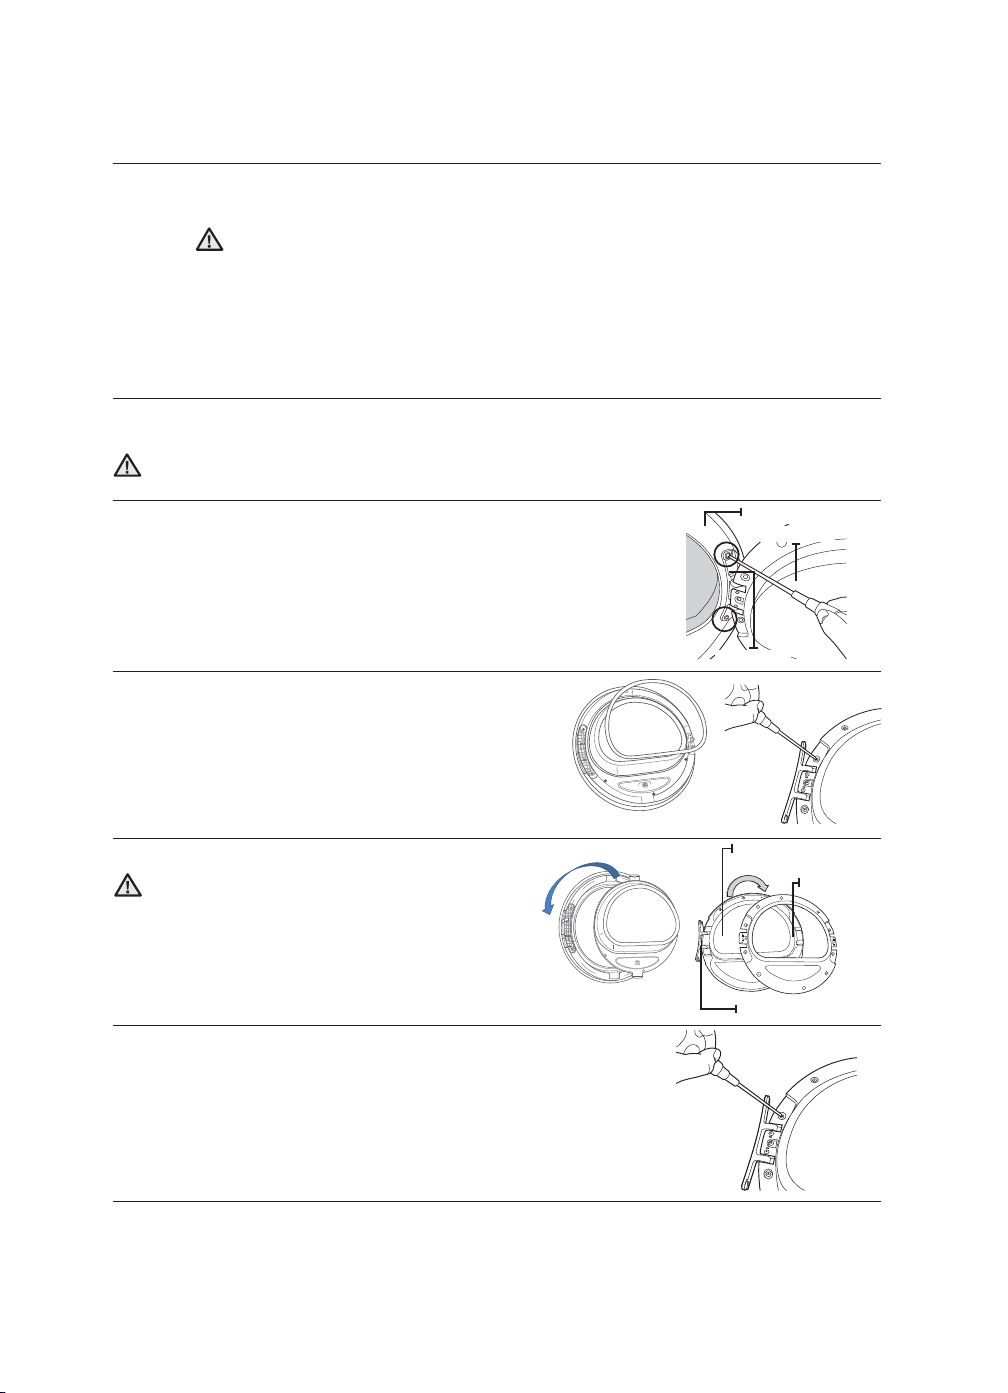
2. Remove the two screws from the door-hinge.
3. Lift the door to separate it.
4. Remove the 16 screws.
Disassemble the air seal and remove the 6 screws.
(Only for Crystal Gloss door models)
5. After removing the screw, rotate the Assy hinge door,
the handle door by 180° as shown in the figure.
•
Work carefully so that the door-seal is not removed.
6. Fasten the 16 screws in the correct positions.
Fasten the 6 screws and replace the air seal.
(Only for Crystal Gloss door models)
7. Note that two of the screws have a different length from the others.
(Use the longer screws for the door-lever.)
WARNING
WARNING
CAUTION
Frame-Front
Assy-Door
Hinge-Door
Crystal Gloss Door
Door-Glass
Assy hinge door
Handle Door
Crystal Gloss Door
installing your dryer
DV4000H_DC68-03408Q-04_EN.indd Sec3:18DV4000H_DC68-03408Q-04_EN.indd Sec3:18 2018-03-22 11:02:112018-03-22 11:02:11
Loading ...
Loading ...
Loading ...