Loading ...
Loading ...
Loading ...
18
Care & Cleaning
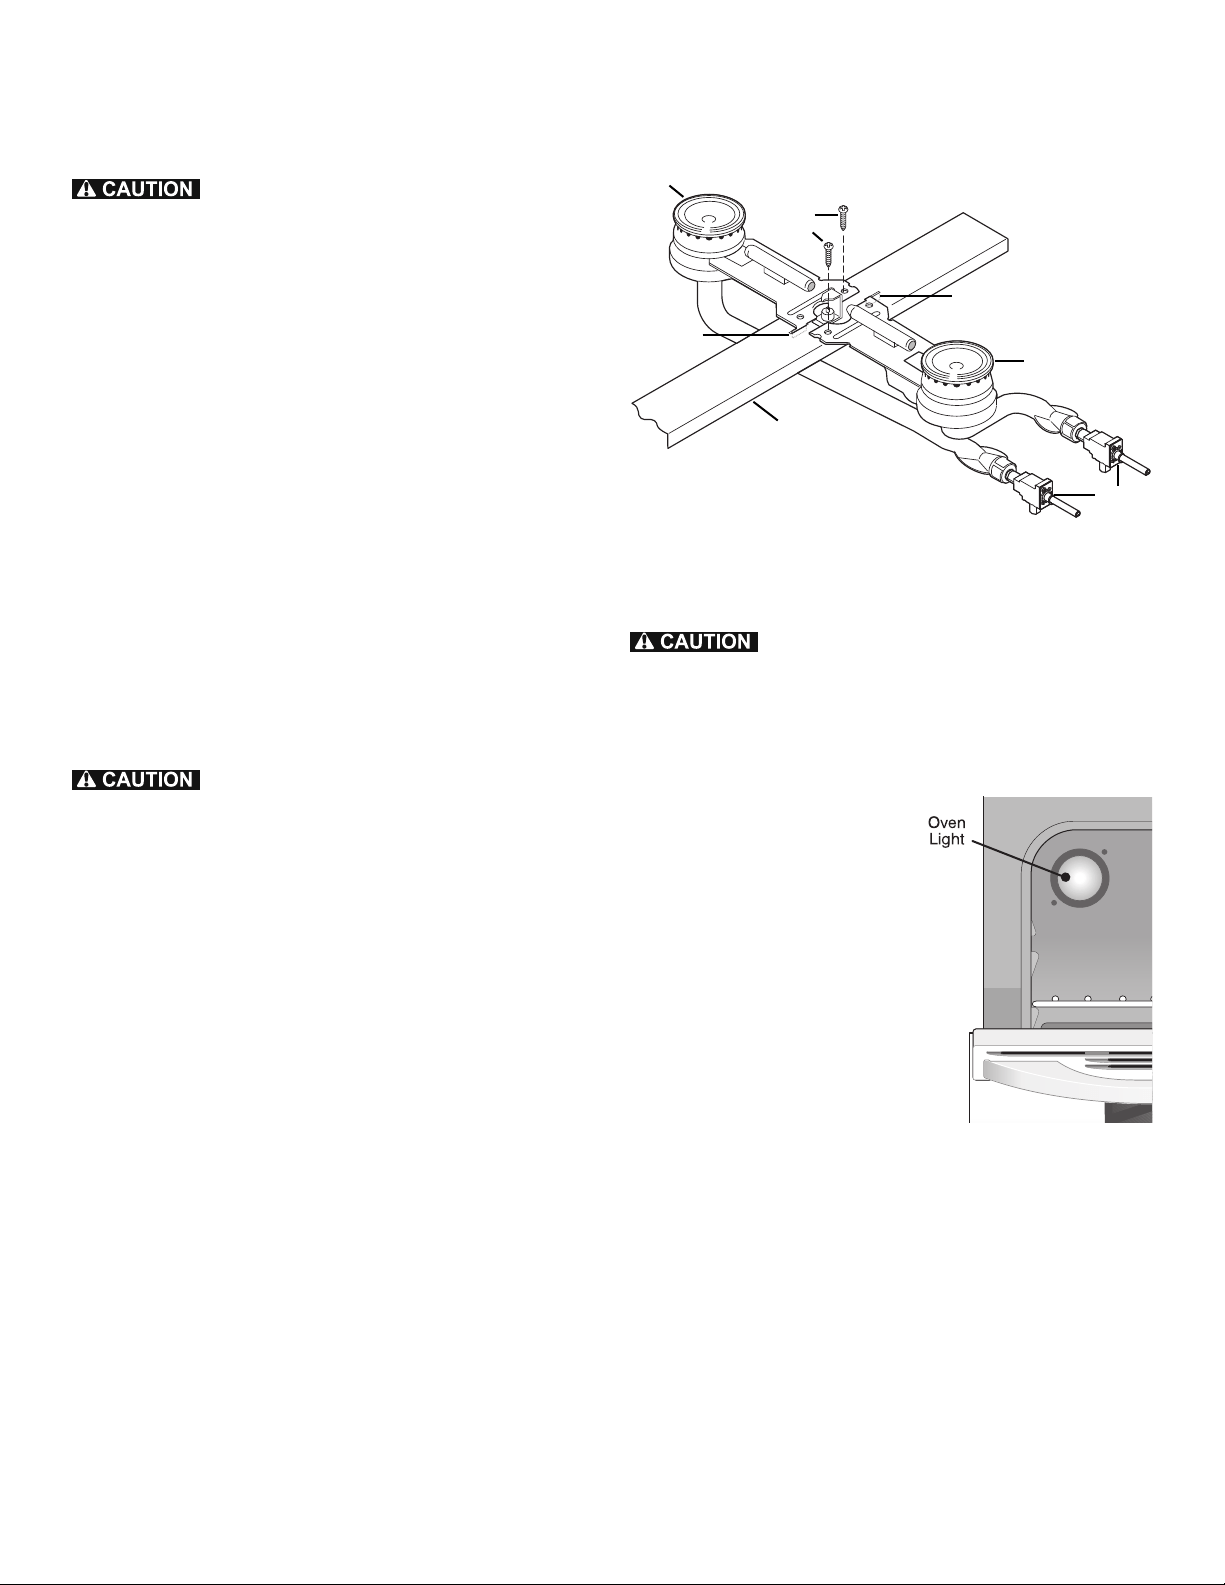
Replacing oven light (some models)
To replace oven light bulb:
1. Turn electrical power off
at the main source or
unplug the range.
2. Replace bulb with a new
40 watt appliance bulb
(See Fig. 2).
3. Turn power back on again
at the main source (or plug
the appliance back in).
4. The clock will need to be
reset with the time of day.
To reset, see the Oven
Controls section in this Use
& Care Guide.
Be sure the range is unplugged and all parts
are COOL before replacing oven light. Wear a leather-
faced glove for protection against possible broken glass.
Removing and replacing surface burners
For proper gas fl ow it may be necessary to clean the
burner ports. Before cleaning be sure the gas burners are
turned off . First use a clean DAMP cloth to soak up any
spills. Remove any food from the burner ports using a small
nonabrasive brush like a toothbrush and afterwards wipe up
using a damp cloth. For stubborn soils located in the burner
ports, use a small gauge wire or needle to clean.
Any spill on or around the electrode must be carefully
cleaned. Take care not to hit the electrode with any thing
hard or it could be damaged.
For full access to the surface burners, follow the instructions
for raising and lowering the cooktop.
burner
support bar
shipping
screws
gas
valves
locating
tab
front burners
rear burners
Cleaning surface burners
Any additions, changes or conversions
required in order for this appliance to satisfactorily meet
the application needs must be made by an authorized
qualifi ed Agency.
To remove gas burners:
1. Raise the cooktop.
2. Remove shipping screws using a Phillips Head
screwdriver. See Fig. 1 for screw locations.
3. Tilt the burner at the end closest to the support bar until
the locator tab is released (front burners tilt right, rear
burners tilt left). Move the burner toward the back of
the range. This will separate it from the gas valve at the
front of the range.
To replace gas burners:
1. Slide the burner tube over the gas valve at the front
of the range (front burners fi t over the right valve,
rear burners fi t over the left valve on each side of the
range).
2. Tilt burner so that the locating tab will slide into slot on
the support bar. Make sure burners are properly seated
on support bar and are level (See Fig. 1).
3. Replace shipping screws.
4. Lower the cooktop.
locating
tab
Fig. 1
To avoid possible burns DO NOT attempt
any of the cleaning instructions provided before turning
OFF all of the surface burners and allow them to cool.
Fig. 2
Loading ...
Loading ...
Loading ...