SI\MSUNG
Galaxy Books
User manual

i
Table of contents
F
eatures 1
M
obile continuity 1
Cortana 1
Layers of security 1
Activity history 1
Get started 2
Front view 3
Back view 4
Assemble your device 5
Install a SIM card and memory card 6
Charge the battery 6
Battery Saver 7
Start using your device 7
Restart the device 8
Add an email account 8
Mobile continuity 8
Update the device 10
Taskbar 10
VZW_W767V_EN_UM_TN_SK4_121719_FINAL

Table of contents
ii
Start menu
12
App tiles
12
Tablet mode
13
Action center
14
Multi desktop
16
Split screen view
18
Enter text
19
Keyboard backlight
20
Apps
21
Install Apps
22
Uninstall Apps
22
App Settings
22
Samsung apps
23
Samsung Flow
23
Samsung Gallery
23
Samsung Notes
24
SmartThings
26
Additional apps
26
Verizon Connection Manager
26


Table of contents
iv
Windows Hello Fingerprint
32
Windows Hello PIN
32
Security Key
33
Password
33
Picture Password
33
Require sign-in
33
Dynamic Lock
33
Sign-in privacy options
34
Privacy
34
Update and Security
35
Device Maintenance
36
System
36
Time and Language
37
Book Settings
38
Accounts
38
Accessibility
39
Ease of Access
39
Other settings
40
Phone
40

(@)
0
0
1
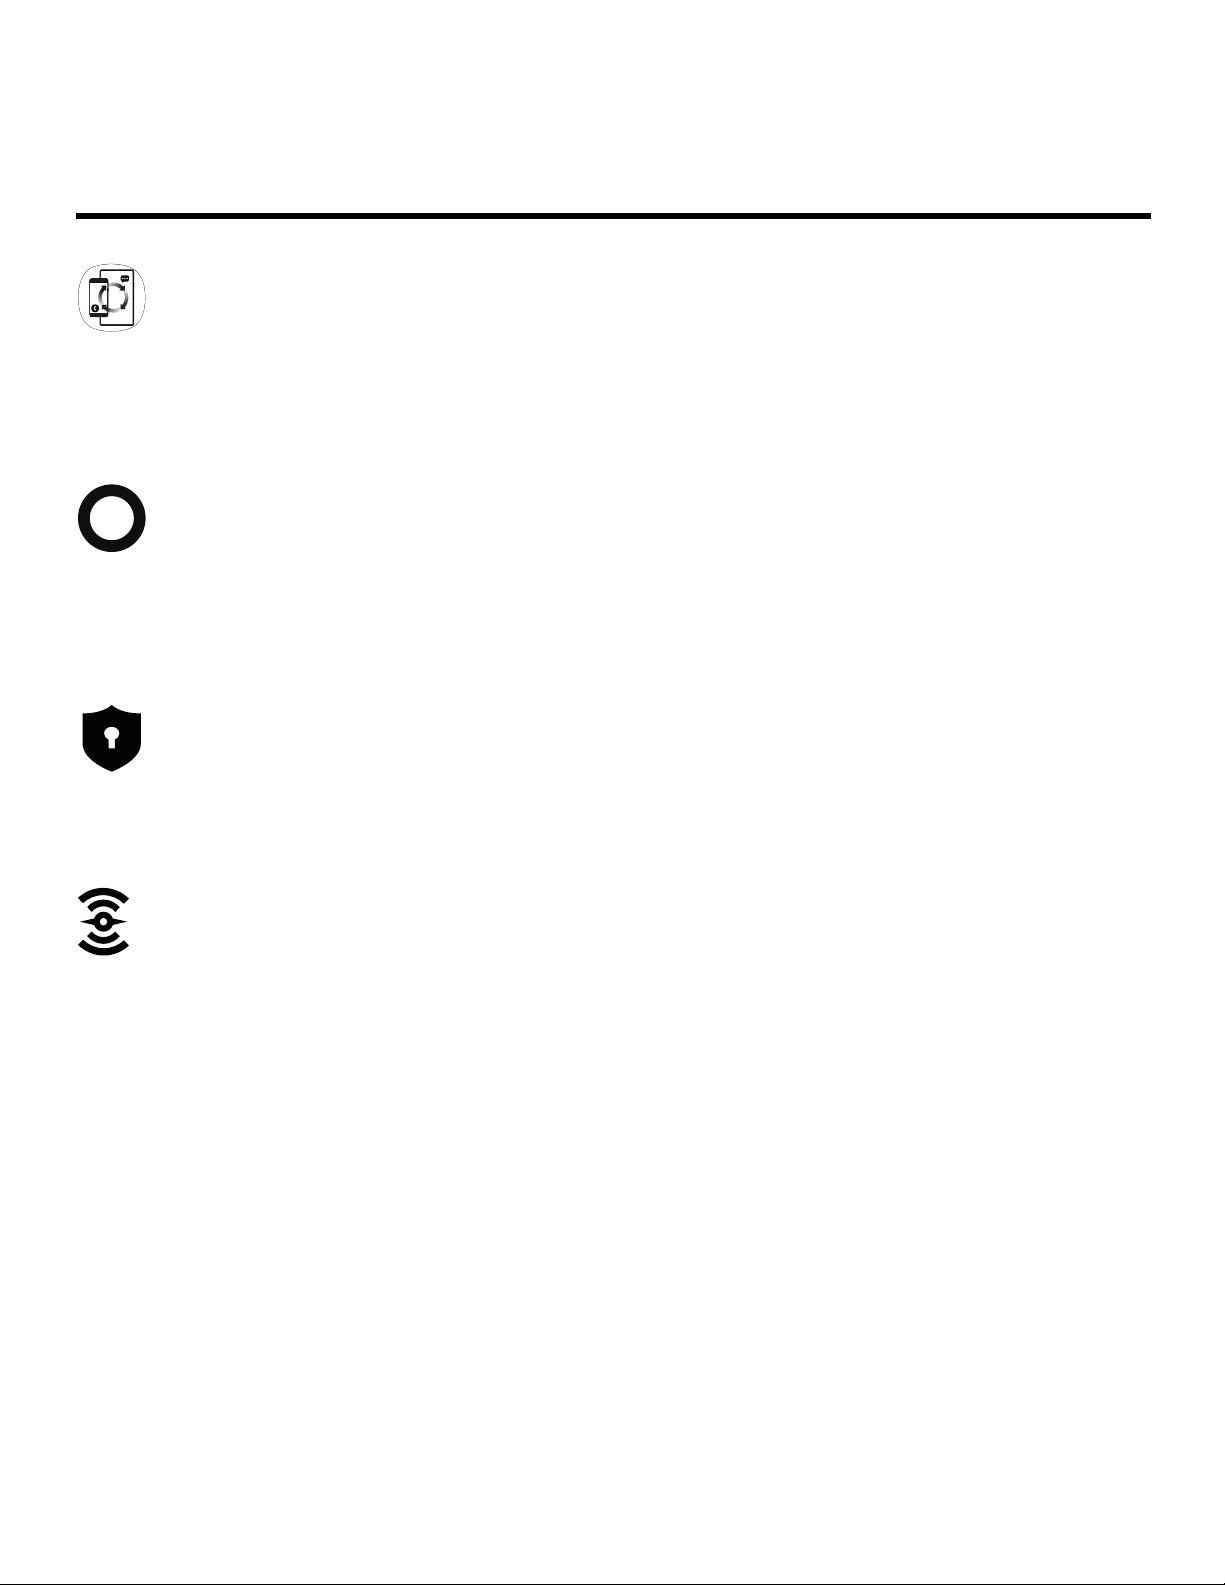
Features
Mobile continuity
Transition between your supported mobile devices and personal computers for
messaging, phone calls, receiving notifications, screen mirroring, and sharing
multimedia files. See Mobile continuity on page 8.
Cortana
Cortana is your digital agent. She’ll help you get things done. The more you
use Cortana, the more personalized your experience will be. See Cortana on
page 10.
Layers of security
Apply a variety of biometric and advanced security locks to secure your device.
See Lock Screen and Security on page 32.
Activity history
Continue what you were doing when you switch to different devices. See
support.microsoft.com/en-us/help/4468227/windows-10-activity-history-and-
your-privacy-microsoft-privacy.
Get started
3
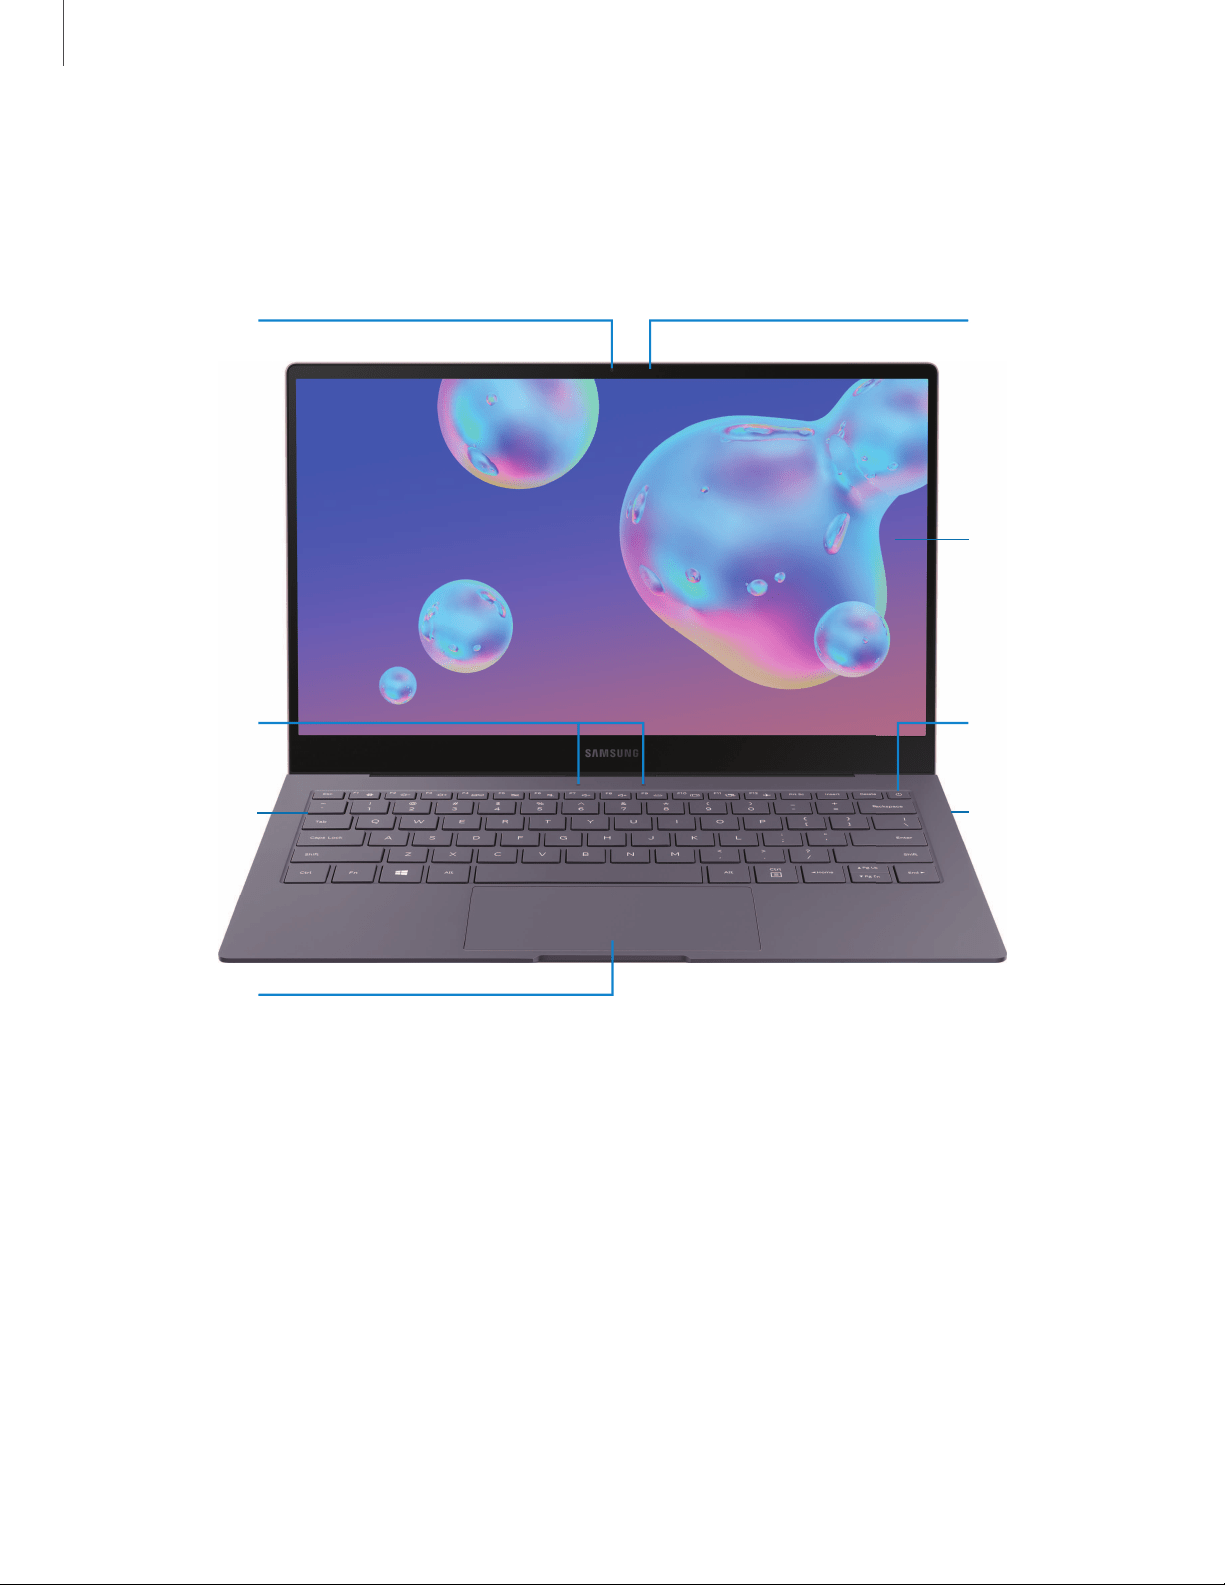
Front view
Touchscreen
Touchpad
Power key/
Fingerprint
sensor
Keyboard
Status LED
Camera
indicator
light
Camera
Microphones
Devices and software are constantly evolving — the illustrations you see here are for reference only.
Get started
4
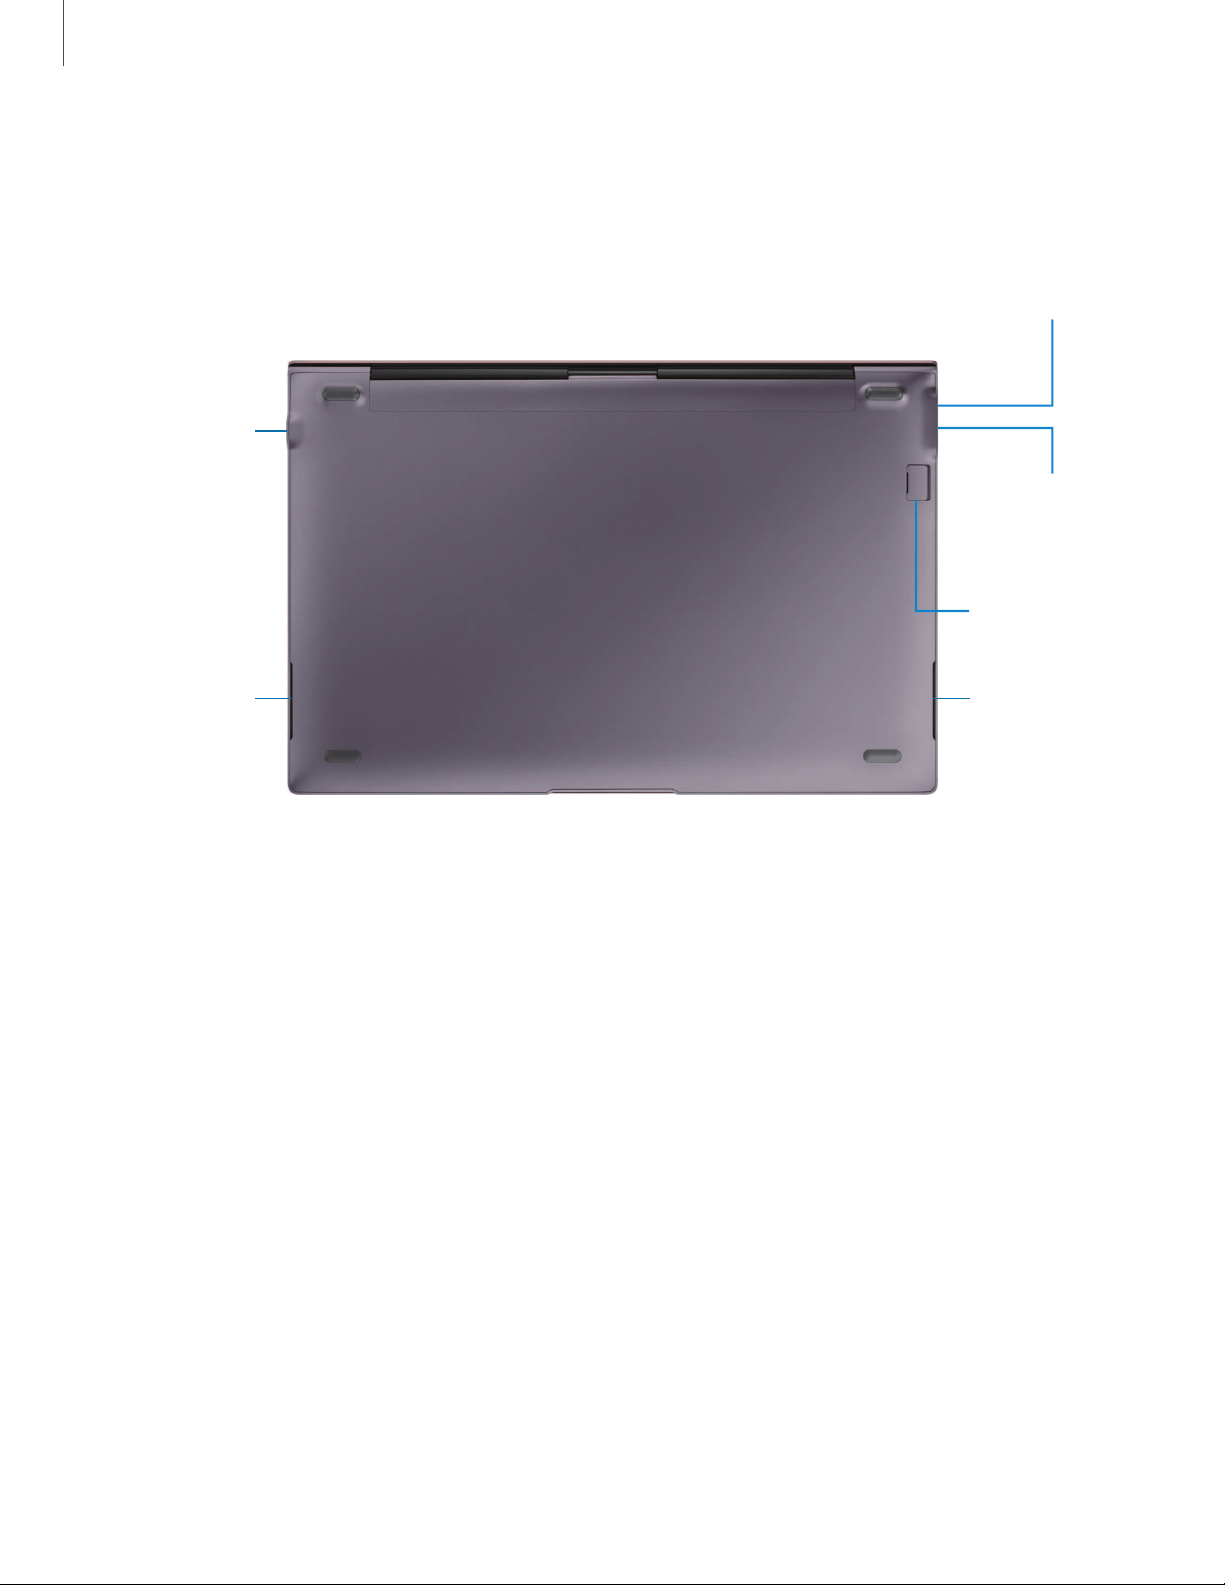
Back view
SIM and
memory card
tray
Headset jack
USB charger/
Audio port
Speaker
Speaker
USB charger/
Audio port
Devices and software are constantly evolving — the illustrations you see here are for reference only.
\
'()-
-}\:(,
Get started
5
Assemble your device
Your device uses a nano-SIM card. A SIM card may be preinstalled, or you may be able
to use your previous SIM card. Contact your carrier for more details.
Devices and software are constantly evolving — the illustrations you see here are for reference only.
NOTE Use only charging devices and batteries (if applicable) that are approved
by Samsung. Samsung charging devices and batteries are designed for your
device to maximize battery life. Using other charging devices and batteries may
void your warranty and may cause damage.
0
-:¢:-
Get started
6
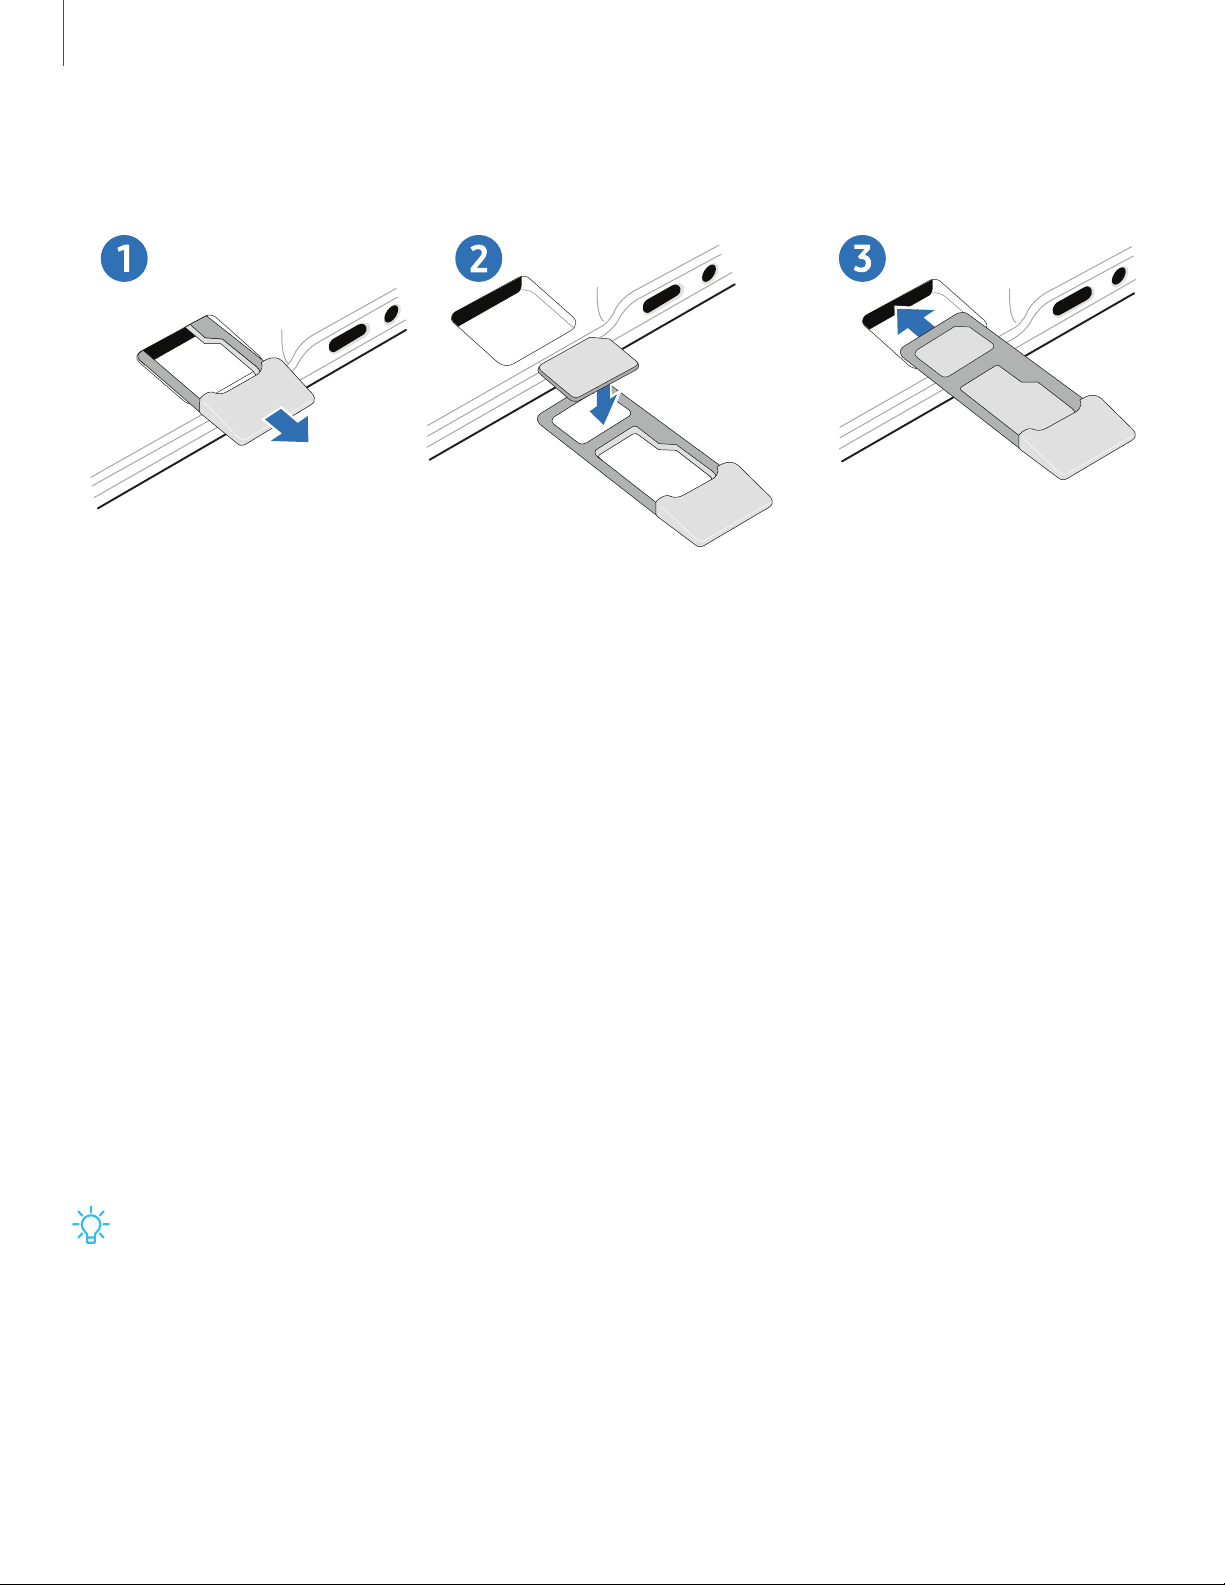
Install a SIM card and memory card
Devices and software are constantly evolving — the illustrations you see here are for reference only.
1. Slide the SIM card/Memory card tray out the slot.
2. Place the SIM card and memory card in the tray with the gold contacts facing
down.
3. Slide the SIM card/Memory card tray back into the slot.
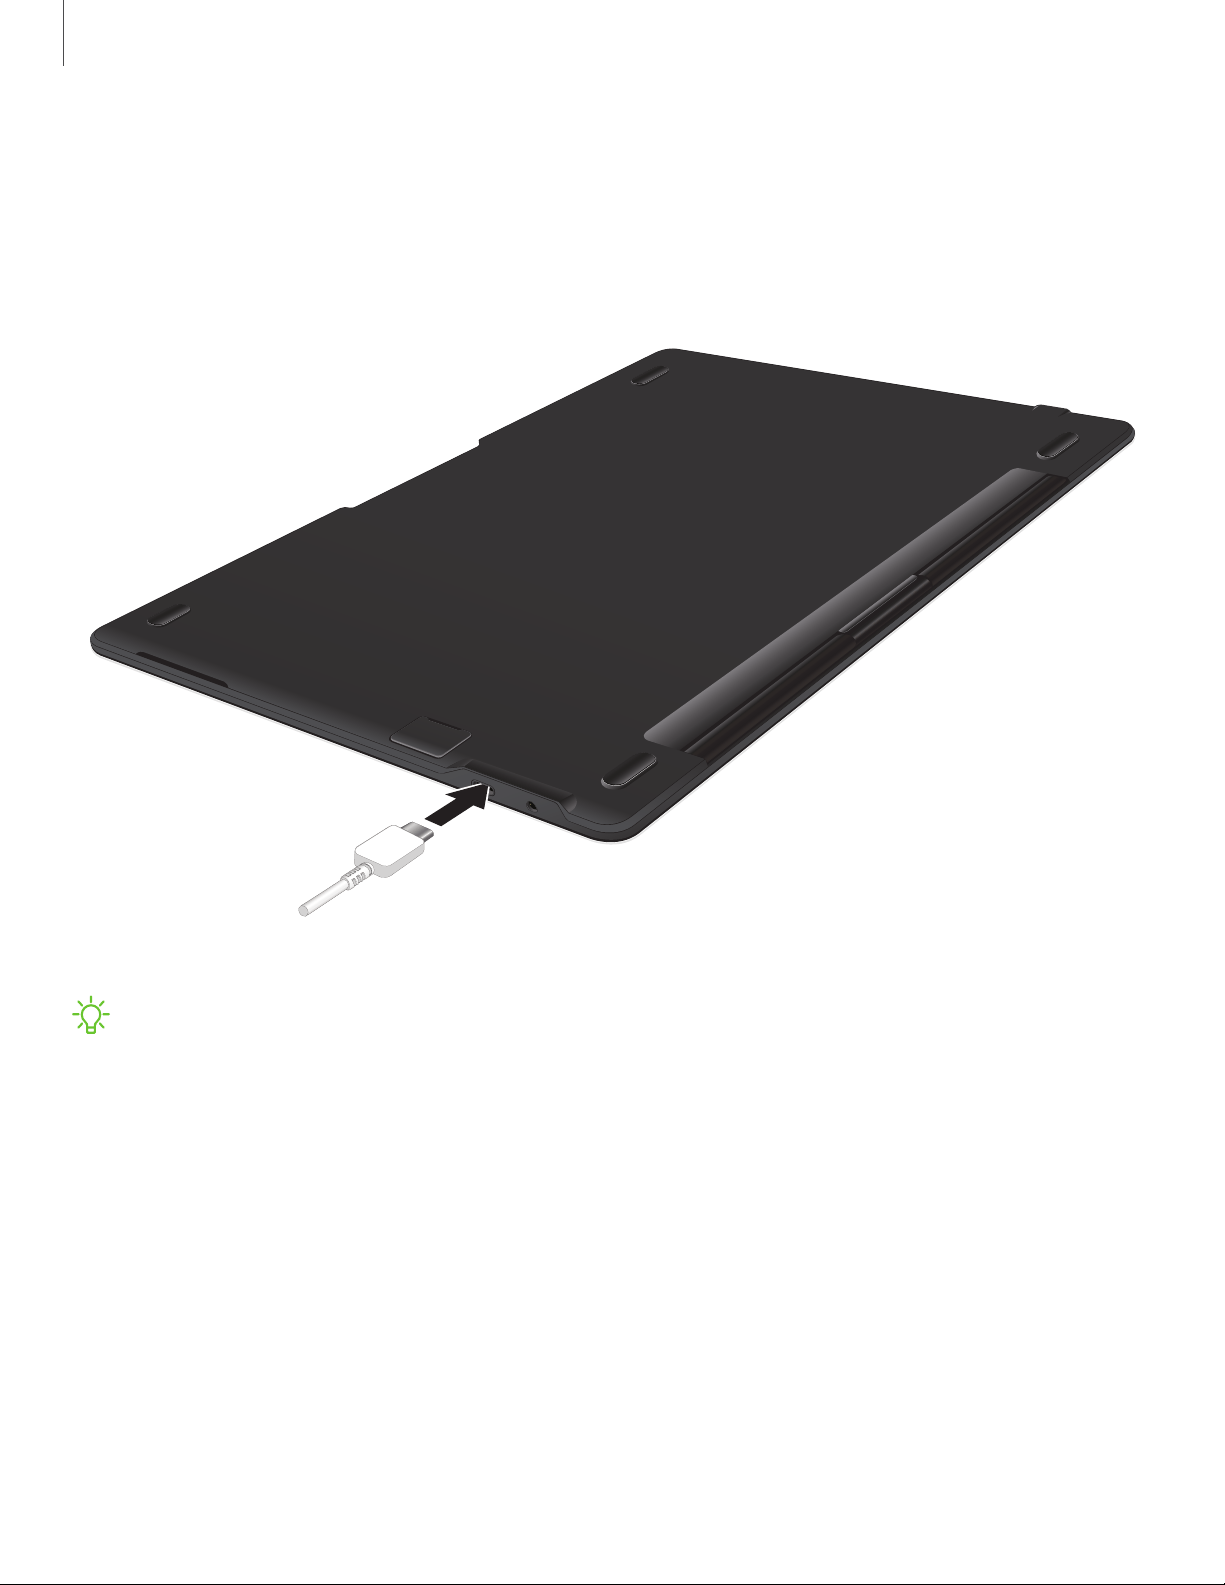
Charge the battery
Your device is powered by a rechargeable battery. A charger (charging head and USB
cable) is included with the device for charging the battery from a power outlet.
1. Insert the USB cable into the USB charger port.
2. Connect the USB cable to the charging head, and then plug the charging head
into a standard outlet.
3. Unplug the charging head from the outlet and remove the USB cable from the
device when charging is complete.
TIP While charging, the device and the charger may become hot and stop
charging. This usually does not affect the device’s lifespan or performance and is
in the device’s normal range of operation. Disconnect the charger from the device
and wait for the device to cool down. For more information, visit
samsung.com/us/support/answer/ANS00076952.
••
••
••
••
Get started
7
Battery Saver
Save battery power by limiting the device’s functions.
1.
On the taskbar, tap
Start > Settings > System > Battery.
2. Tap the checkmark next to Turn battery saver on automatically if my battery
falls below to activate it.
3. Drag the slider to the desired remaining battery percentage.
For a quick check of your battery level, view the battery charge indicator located in
the bottom right corner of your device’s display. A solid color (
) indicates a full
charge.
Start using your device
The instructions below explain how to turn your device on or off.
To turn the device on:
◌
Press and hold the Power key until the device turns on.
To turn the device off:
◌
Tap Start > Power > Shut down.
- or -
In Tablet mode, tap
Power > Shut down.
- or -
Press and hold the Power key until the locked screen appears, and then drag the
locked screen downwards.
••
••
C)
••
••
@
C)
Get started
8
Restart the device
To restart the device:
◌
Tap Start > Power > Restart.
- or -
In T
ablet mode, tap
Power > Restart.
If your device is frozen and unresponsive:
1. Press and hold the Power key for more than 10 seconds until the device turns off.
2. Press and hold the Power key again to restart it.
Add an email account
Add an email account to your device.
1.
On the taskbar, tap
Start > Settings.
2. Tap Accounts > Email & accounts.
3. Tap Add an account and follow the prompts.
Mobile continuity
Phone calls, messages, photo and video storage, and other functions of your device
can be accessed and integrated across compatible mobile devices and computers.
Link to Windows
Achieve mobile continuity between your Samsung Book S and a Samsung Galaxy
smartphone. Get instant access to your smartphone’s photos, messages, and more by
linking your devices.
This feature is only available on supported Samsung Galaxy smartphones. See
support.microsoft.com/en-us/help/4531317/setting-up-and-using-link-to-windows for
additional information.
1.
On the smartphone, from Settings, tap
Advanced features > Link to Windows.
2.
Tap
to enable this feature.
3. Sign in to your Microsoft account.

X
Get started
9
Samsung DeX
Samsung DeX is a service that allows you to use a smartphone like a computer by
connecting a Samsung Galaxy smartphone to your Galaxy Book S. Accomplish
tasks you want done on a smartphone quickly and easily on a large screen using a
keyboard and touchpad. While using Samsung DeX, you can also use the
connected smartphone. This feature is only available for smartphones that support
Samsung DeX.
Install Samsung DeX
The Samsung DeX app must be downloaded and installed on both the smartphone and
PC.
1. Connect your smartphone to the Book S with a USB cable.
2. Follow the instructions provided on your devices for downloading and installing
the DeX for PC software.
3. After the software is installed, disconnect the USB cable from one device, and
then reconnect it. The Samsung DeX window opens on the Windows screen.
Use Samsung DeX
When Samsung DeX is active, you can control the smartphone on both the PC screen
and the smartphone screen.
•
Tap icons in the Samsung DeX window or use the touchpad to interface with the
smartphone.
•
Use the keyboard enter text.
•
Drag and drop files to transfer them between the smartphone and Book S.
Exit Samsung DeX
Ending a session of Samsung DeX can be done in two ways:
•
In Windows, tap Close on the Samsung DeX window.
•
Disconnect the USB cable.

0
0
••
••
==
@
••
••
Get started
1
0
Update the device
Keep your device up to date by downloading and installing updates, such as service
packs and patches, for the operating system and other Microsoft
®
apps. You must have
a stable internet connection to use this feature.
The device is set to download and install updates automatically.
To check for available updates manually:
1.
On the taskbar, tap
Start > Settings.
2. Tap Update & security > Windows update > Check for updates.
Taskbar
The bottom area of the screen is the taskbar. You can access the Start menu,
launch
Cortana, view notification icons, and more on the taskbar.
Cortana
Search for a wide variety of content on the device or web with a keyword.
•
Tap Type here to search on the taskbar and enter a keyword in the search field.
•
Tap Talk to Cortana to use your voice.
Cortana Settings
Search for a wide variety of content on the device or web with a keyword.
◌
On the taskbar, tap Start > Settings > Cortana, and tap an option:
•
Talk to Cortana: Set up shortcuts and test your microphone.
•
Permissions: Customize your Cortana permissions and history.
•
More details: View more information about Cortana.
-'lj-
G
L.....J
I
□·
,.......,
I
••
••
••
••
X
G
Get started
1
1
Task View
Task view allows you to work on various tasks simultaneously from multiple desktops.
1.
On the taskbar, tap
Task view.
2. Select a thumbnail to activate the desktop.
NOTE You can also access Task view by swiping from the left edge of the screen.
To
add a desktop:
◌
On the desktop thumbnails list, tap New desktop.
To
delete a desktop:
◌
On the desktop thumbnails list, tap Delete on a desktop.
Manage shortcuts
To pin a shortcut to the taskbar:
1.
On the taskbar, tap
Start.
2. Touch and hold an app tile listed on the right side of the start menu, and
then tap
More options.
3. Tap M
ore > Pin to taskbar.
To
delete a shortcut:
1.
Touch and hold an app tile, and then tap
More options.
2. Tap More > Unpin from taskbar.
Manage taskbar notifications
Customize what system icons display in the notification area.
1.
On the taskbar tap
Start > Settings > Personalization.
2. Tap Taskbar, and under Notification area select system icons to display.
0
A
m,
"'
..
lil ~rnt&Clo<k
C
El
"'""'~
il
'""""
C:J
c-,
0 0
••
••
••
••
0
Get started
12
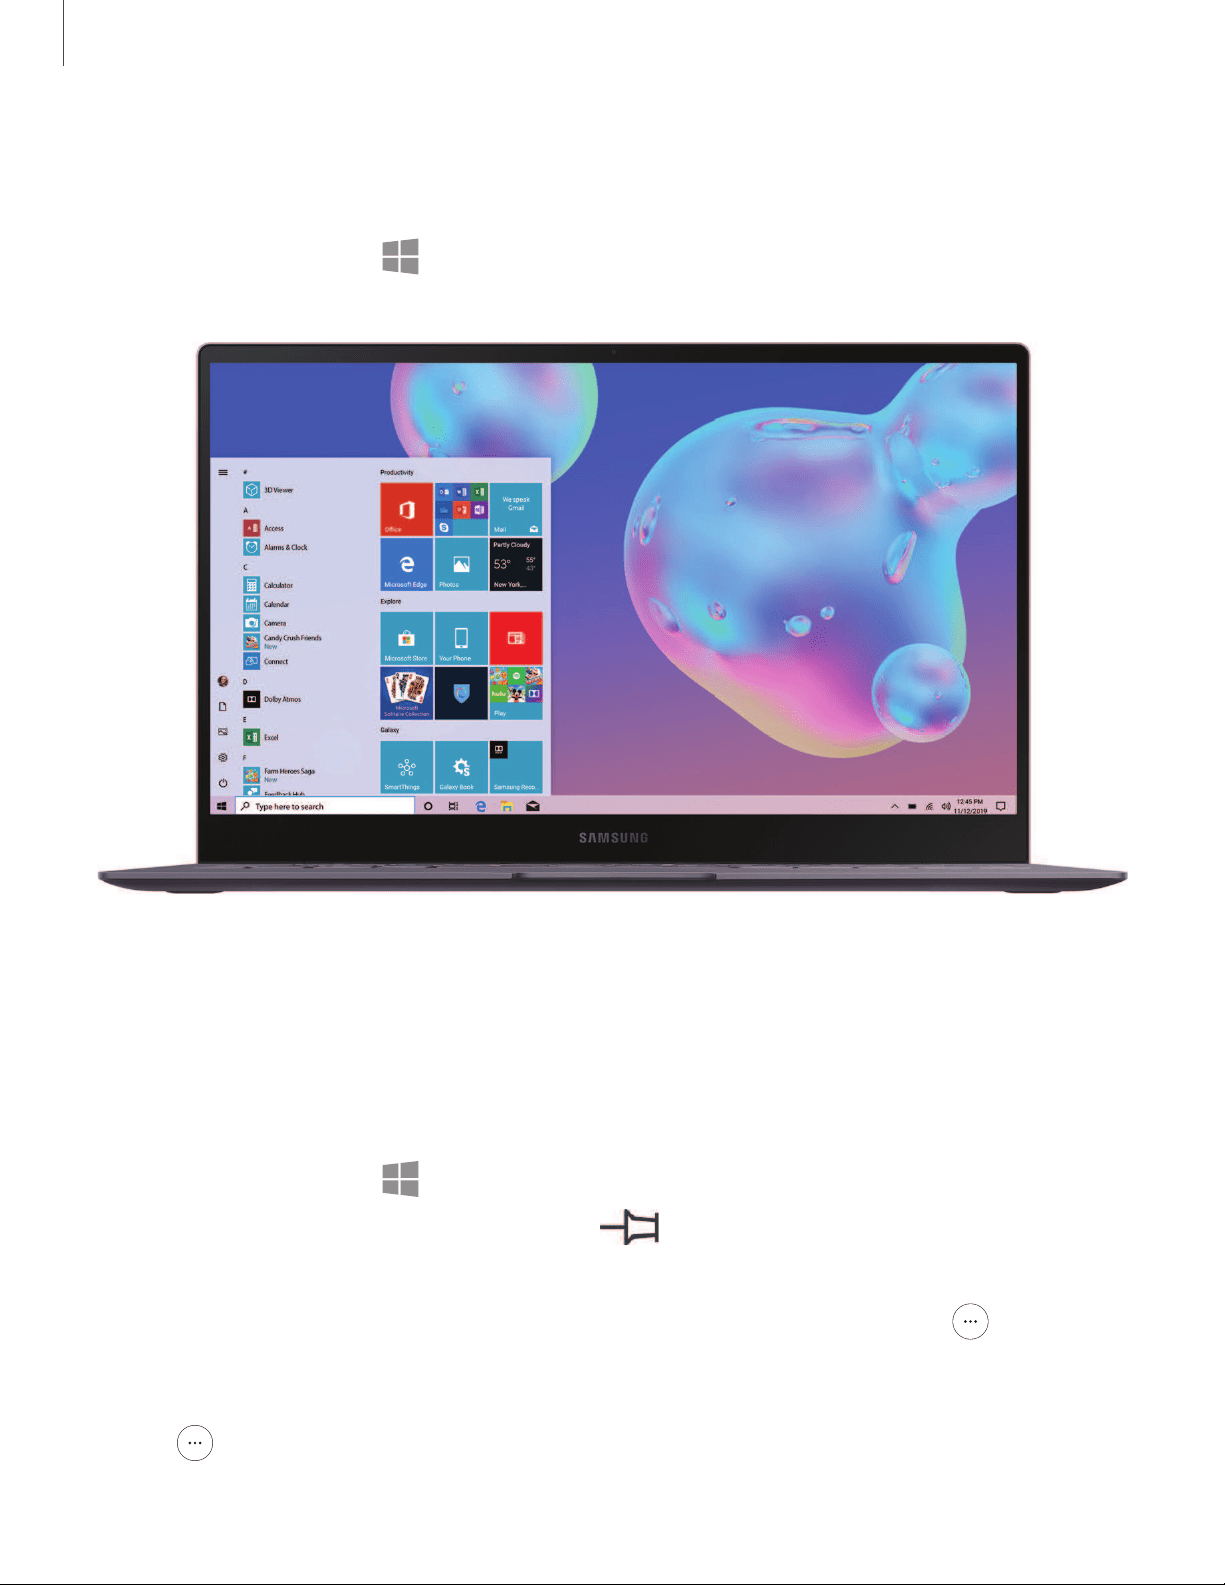
Start menu
Access frequently used apps, shortcuts to other locations on your device, and more.
◌
On the taskbar, tap Start.
Devices and software are constantly evolving — the illustrations you see here are for reference only.
App tiles
You can pin your favorite apps on the app tile area of the Start menu for quick access.
Add an App tile
1.
On the taskbar, tap
Start.
2.
Touch and hold an app, and then tap
Pin to Start.
• To move a tile, touch and hold a tile, and then drag it to a new location.
•
To adjust the size of a tile, touch and hold a tile, and then tap
More
options > Resize.
• For more options like reviewing an app, touch and hold a tile, and then tap
More options > More.

••
••
G
Get started
1
3
Remove an App tile
1.
On the taskbar, tap
Start.
2.
Touch and hold an app in the list, and then tap
More options > Unpin from
start.
Tablet mode
You can switch between PC mode and tablet mode. In Tablet mode, the full Start
menu screen will be the Start screen. Switching to tablet mode makes the device
more touch-friendly.
To switch to tablet mode, on the taskbar:
◌
Tap Action center > Tablet mode.
- or -
Swipe from the right edge of the screen towards the center of the screen, and
then tap Tablet mode.
To return t
o PC mode:
◌
Tap Tablet mode again.
Mfft
your Personal V•ult
Apliutono1e)'O.Jfmci{1~
,nd
tllW'
UH
OMgNI
<huger.
lnd\oll~I
u
lt'leM
In.I
""'""
Get started
14
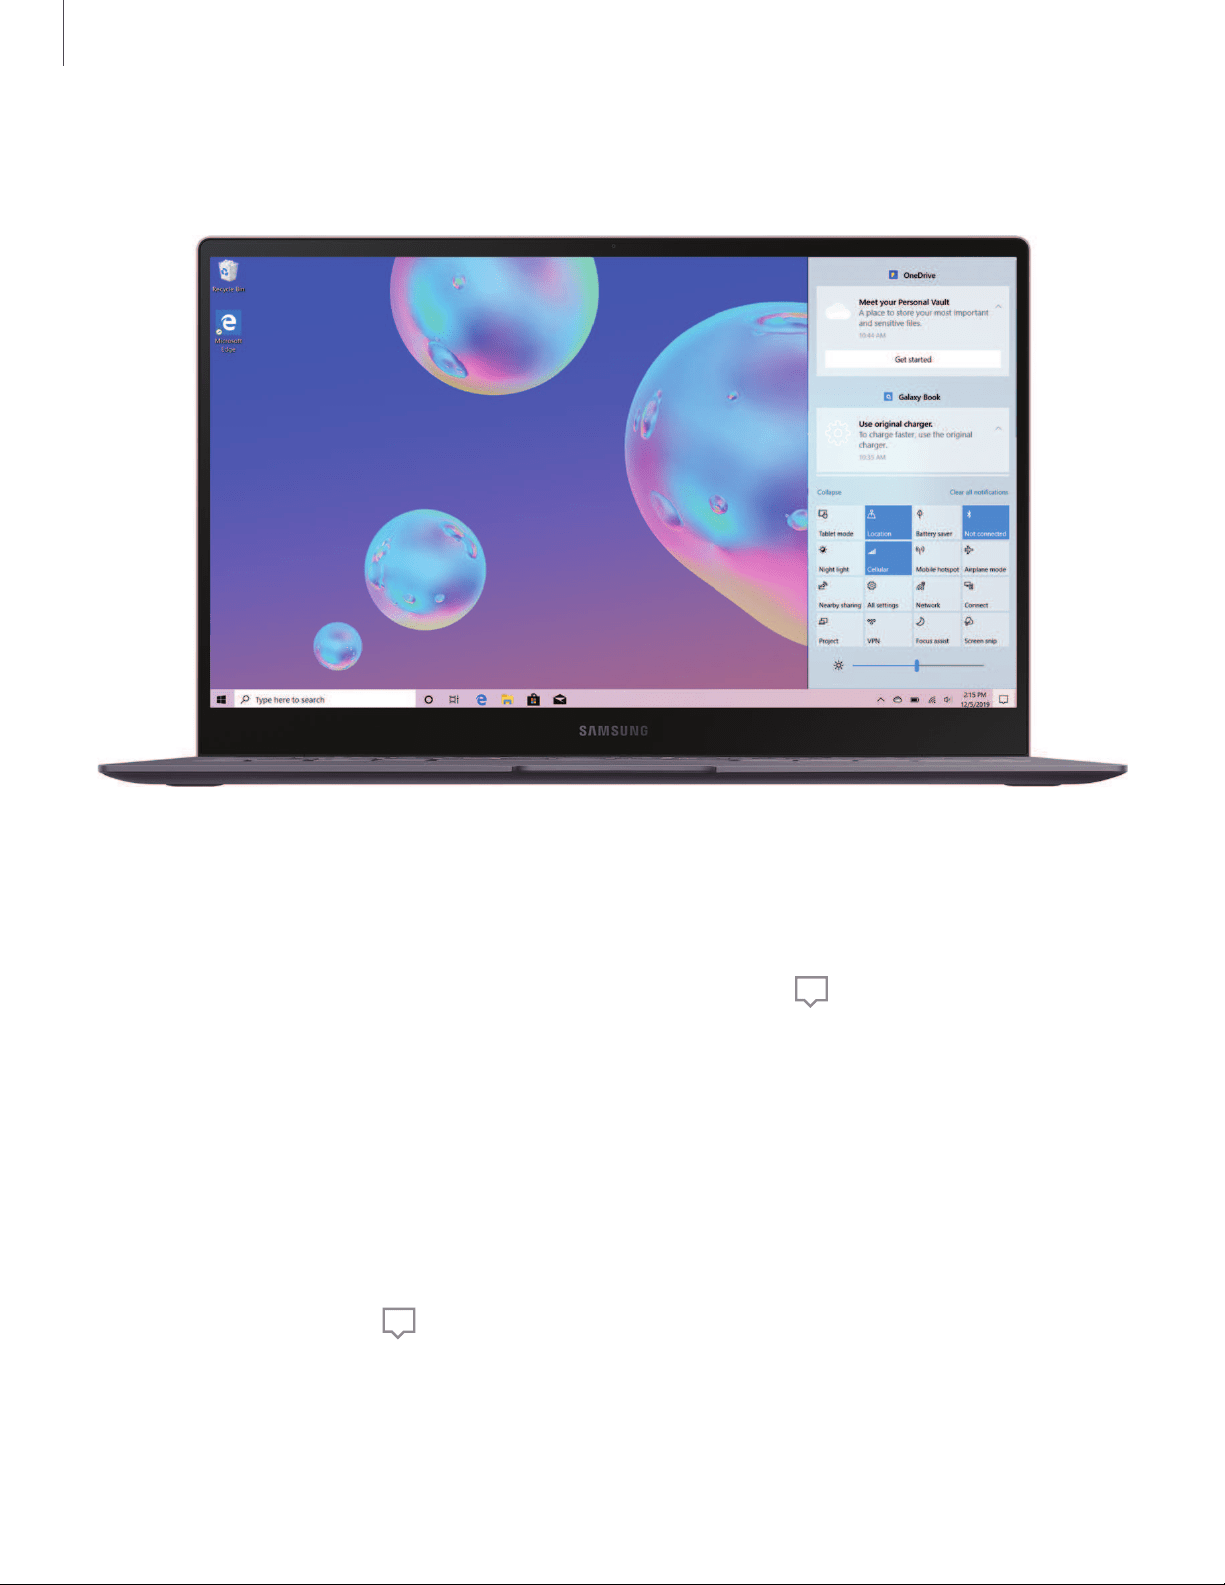
Action center
Devices and software are constantly evolving — the illustrations you see here are for reference only.
Use the Action center
You can view new notifications from Windows and apps, and use quick action buttons.
◌
To open the Action center panel, on the taskbar, tap Action center.
- or
-
Swi
pe from the right edge of the screen.
Quick action buttons
Quick action buttons allow you to easily adjust frequently used settings, such as
activating Wi-Fi.
1.
On the taskbar, tap
Action center.
2. Tap Expand to view all quick action buttons.
• Tap Collapse to hide most quick action buttons.

V
0
+
••
••
X
Get started
15
To change the available buttons:
◌
On the taskbar, tap Start > Settings > System > Notifications & actions >
Edit your quick actions.
•
Tap
Unpin
to remove a quick action.
•
Tap
Add
to add a quick action.
Notifications
View notifications notification from Windows and apps.
1.
On the taskbar, tap
Action center.
2.
Tap
Expand to view the full notification.
• To take action, tap the notification.
•
To delete the notification, tap
Clear.
• To clear all notifications, tap Clear all notifications.
Earlier Today
gmail - Bing
h1
1~,-binq.,onv~cnr
q c gmail&form , f
{X;EAR.&qs
-,-
f P&cvid ~eb92 ...
US&ptvar
,
O&P(
s
SMTS
Yesterday
Angry Birds 2
L--J
I
□·
,------,
I
L--J
I
□·
,------,
I
Minecraft
for
X
Get started
16
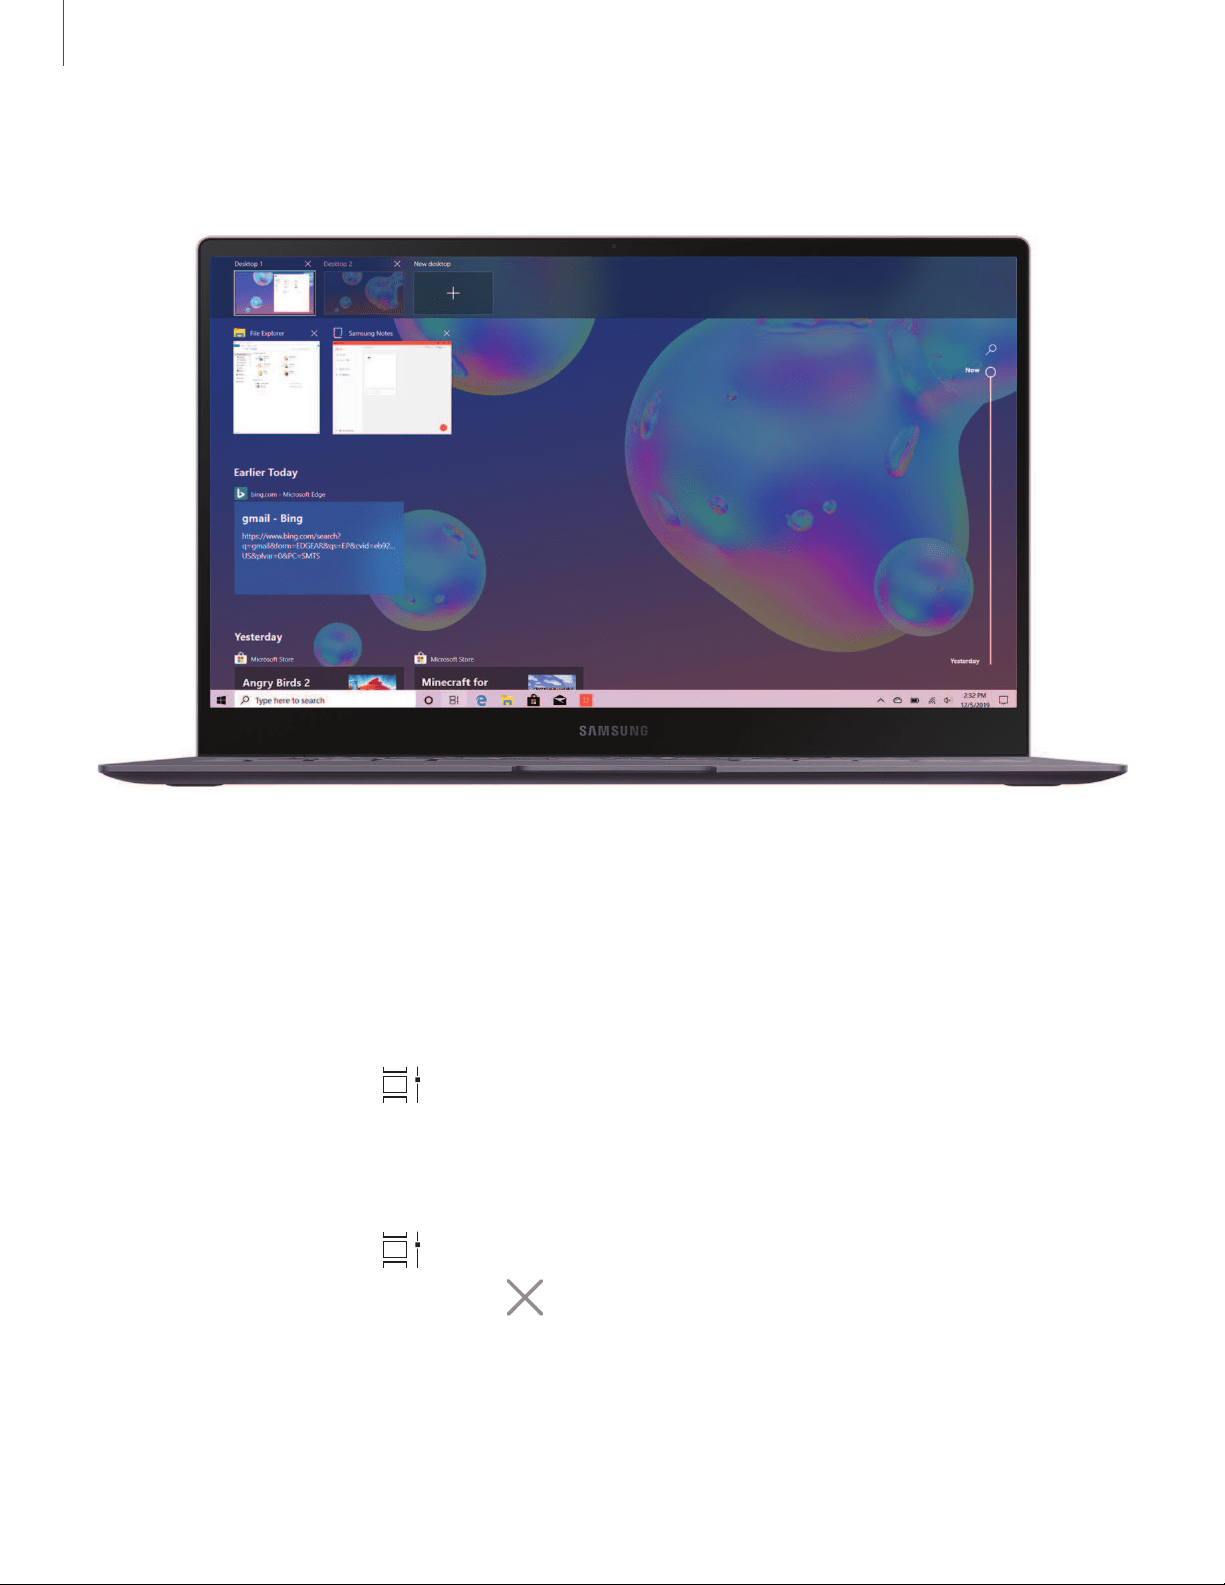
Multi desktop
Devices and software are constantly evolving — the illustrations you see here are for reference only.
Multi desktop
Work on various tasks at the same time using multiple desktops. Different desktops
can be used for different purposes.
To create a new desktop:
1.
On the taskbar, tap
Task view, or swipe from the left edge of the screen.
2.
Ta
p New desktop. A new desktop will be added.
To delete a desktop:
1.
On the taskbar, tap
Task view.
2.
On the multi desktop list, tap
Close on the desktop to delete it.

'----'
I
□·
,...,
I
Get started
1
7
T
o move windows to another desktop:
1.
On the taskbar, tap
Task view to view the current desktop’s open windows.
2. Tap and hold a window to move, and then tap Move to.
3. Select a desktop to move the window.
-
...
8
'"""
'""
-
u
o.,w
L.....J
I
□·
.---,
I
R
C
~
C<611«
..
t - t
,~,c
t
"1aurt,
□
•
-
..
,t
Qiickaa:..
•
"'-
c.-.,.,..
---
·
"""""""
...........
-
-
.:::Pinwff
>-
-
·
·-
·-
.
•
Tho1,C
>
10--
•
""-
-
·-
>-
--
■
Y-
t,otJltD,.ti(C.
•
No-1-...t.
0
.
()
--
~
-
--
....
0
1(11iattlUUN
,._
0
w,,.i.a;,,,uoAM
...
_
0
t/11J21t9ll-.l!PII
·--
0
tQNZQltlJtPM
,
-
Get started
18
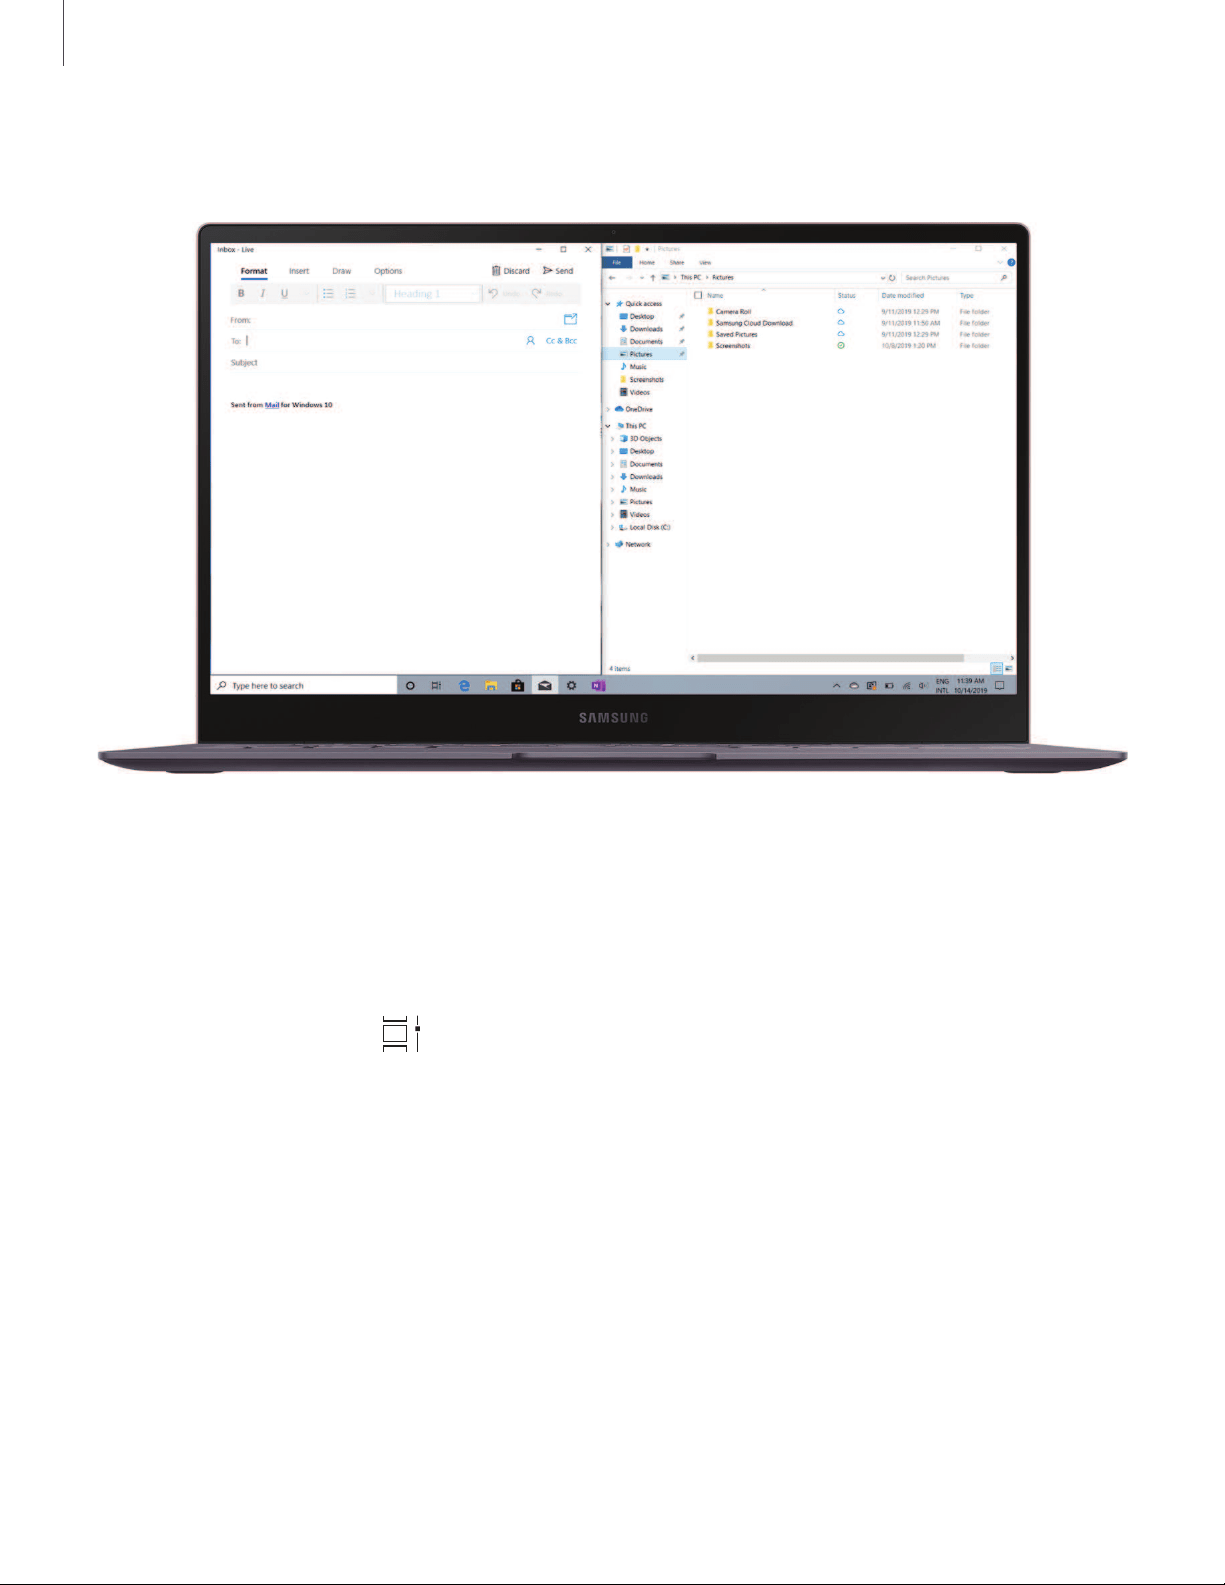
Split screen view
Devices and software are constantly evolving — the illustrations you see here are for reference only.
Use Split Screen View
In tablet mode, you can open two windows at the same time in the split screen view
by selecting windows from the task view screen. Some apps may not support this
feature.
1.
On the taskbar, tap
Task view to view currently open apps.
- or -
Swi
pe
from the left edge of the screen.
2. Tou
ch and hold an app and select Snap left or Snap right.
3. Tap another app to automatically open it on the opposite side of the screen.
To
adjust the window size:
◌
Drag the divider between the app windows left or right to adjust the size of the
windows.
-
--
---
- - -
----------
--
E
-
.-
0
.
..
·1
w
-
0
....
""""
e
~
70°
,,
.
,..
...
u
l'.tl
X
0
q
w e t
y
u 0
p
~
a s d f g h j k
f-1
t
z X C V b n m
?
t
&1
23
Ctrl
©
< >
ENG
Get started
19
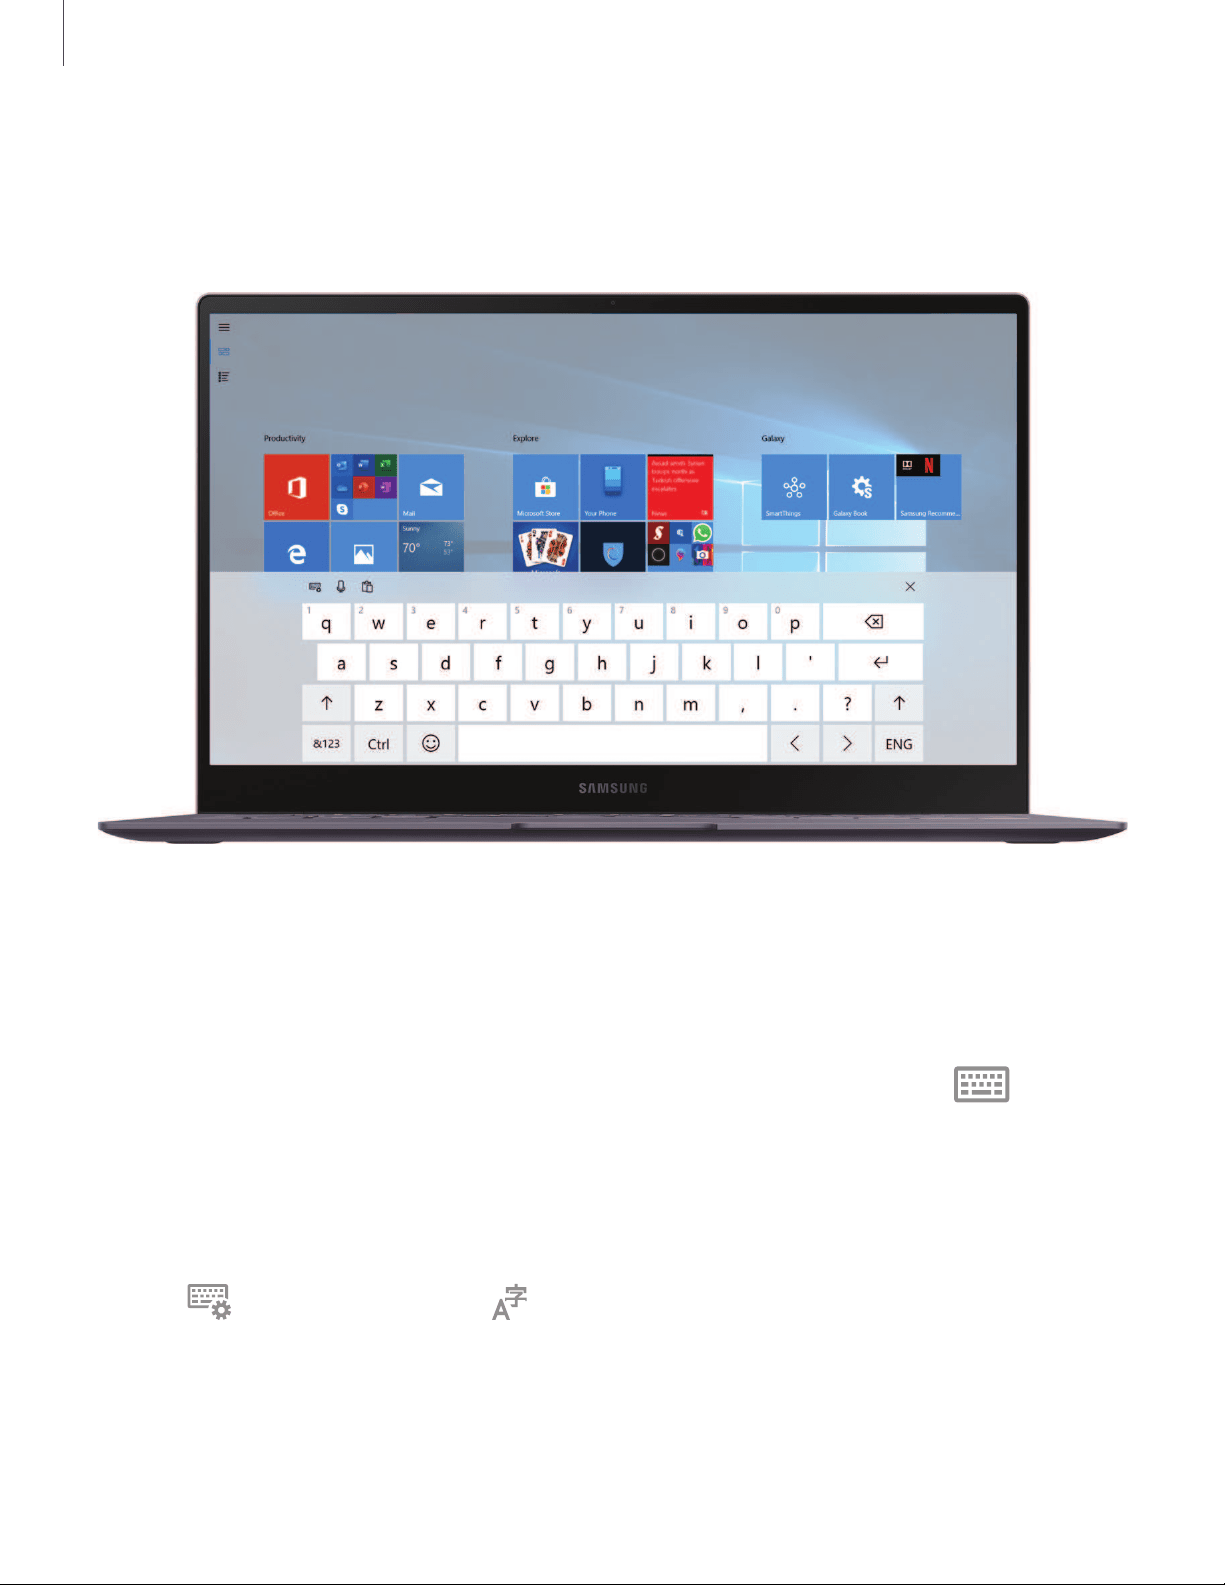
Enter text
You can enter text using the onscreen keyboard or the built in keyboard.
Devices and software are constantly evolving — the illustrations you see here are for reference only.
Onscreen Keyboard
In tablet mode, the onscreen keyboard appears automatically when you enter text to
send emails, create notes, and more.
◌
To use the onscreen keyboard in tablet mode, on the taskbar, tap Touch
keyboard.
Change the Input Language
Change the language of the keyboard.
◌
Tap Keyboard settings > Language preferences > Add a preferred
language, and then select a language to add.
•
When you add languages, you can select other input languages by tapping
the language key on the bottom right of the keyboard.

Get started
20
Keyboard display options
In tablet mode, you can change the way the keyboard displays on the screen.
◌
Tap Keyboard settings, and tap a keyboard icon to change the way the
keyboard is displayed.
Keyboard backlight
Your device features an ambient light sensor. In a dark location, the keyboard
backlight is automatically enabled.
To adjust the Keyboard backlight:
◌
Tap Fn to enable the function keys (a blue light appears on the key) and tap F9
to change the brightness of the keyboard backlight.

-'rj-
••
••
••
••
Apps
2
2
Install Apps
Browse apps by category or tap the search field to search for a keyword.
1.
On the taskbar, tap
Store.
2. Select an app to view information about it.
• To download free apps, swipe down the page to the section Top free apps.
Tap an app to view it, tap Get to download.
• To purchase and download apps where charges apply, tap Buy and follow the
prompts.
Uninstall Apps
1.
On the taskbar, tap
Start > Settings > Apps > Apps & features.
2. Tap an app, and then tap Uninstall.
3. Tap Uninstall again to confirm.
NOTE Some apps cannot be uninstalled.
App Settings
Configure app settings.
◌
On the taskbar, tap Start > Settings > Apps, and tap an option:
•
Apps & features: Configure app features.
•
Default apps: Select default apps.
•
Offline maps: Download maps and configure them for offline use.
•
Apps for websites: Associate apps with websites.
•
Video playback: Change the video settings for apps that use the video
playback platform.
•
Startup: Configure apps to open upon starting the device.
II
••
••
•• II
••
Apps
2
3
Samsung apps
The following apps are either preloaded or downloaded over-the-air to your device
during setup.
Samsung Flow
Connect your phone and device with Samsung Flow. You can then view notifications
and reply to messages from your smartphone on your connected device. You can also
use Mobile hotspot to access the Internet on your device through your phone’s
network connection when other networks are not available.
For more information, visit samsung.com/us/support/owners/app/samsung-flow.
◌
On the taskbar, tap Start > Samsung Flow.
Samsung Gallery
Go to the Gallery to look at the all the visual media stored on your device. You can
view, edit, and manage pictures and videos.
◌
On the taskbar, tap Start > Samsung Gallery.
Th
e following categories allow you to organize your content:
•
Pictures: View pictures and videos in the order they were saved. Content is
organized by date.
•
Albums: Create custom albums to organize your pictures and videos.
•
Stories: Create custom collections of related pictures and videos and share them
with your contacts.
II
■
■
••
••
■
■
0
Apps
24
Samsung Notes
Use Samsung Notes to create notes containing text, images with footnotes, voice
recordings, and music. You can share your notes easily using social networking
services.
Visit samsung.com/us/support/owners/app/samsung-notes to learn more.
◌
On the taskbar, tap Start > Samsung Notes.
Create notes
Add text, images, voice recordings and more.
1.
From
Samsung Notes, tap Create note.
2. When you are finished, tap Save.
Edit notes
Make edits to notes you create.
1.
From
Samsung Notes, tap a note to view it and make changes.
2. When you are finished, tap Save.
Notes options
You can edit, sort, or manage notes.
◌
From Samsung Notes, tap More options for the following options:
•
Edit: Select notes to share, delete, or move.
•
Sort by: Change the way notes are organized.
•
View by: Switch between Grid or Simple list.

■
■
0
Apps
2
5
Notes menu
◌
From Samsung Notes, tap one of the available options on the left side of the
screen:
•
All notes: View all of your notes.
•
Locked notes: View password protected notes.
•
Frequently used: Quick access to commonly used notes.
•
Trash: View deleted notes for up to 15 days.
•
Categories: View notes by category.
•
Manage categories: Create, reorganize, rename, and delete Notes categories.
– Tap Add category to create a new Notes category.
– Tap Edit to rename, reorganize, change category colors, or delete
categories.
Notes settings
Change the settings for Samsung Notes.
◌
From Samsung Notes, tap Samsung Notes settings for the following
options:
•
Samsung Cloud: Sign in and view more information about Samsung Cloud.
•
Backup and restore: Back up or restore your notes here.
•
Lock notes: Protect your notes by adding a password.
•
Handwriting gridlines: Select an option for how you would like gridlines to
be displayed while writing on the screen.
•
About Samsung Notes: View more information about Samsung Notes.
■
•
-'/J-
••
••
1111
-
Apps
26
SmartThings
SmartThings allows you to control, automate, and monitor your home environment
through a device to fit your specific needs. You can use the app to connect multiple
devices at once or one device at a time. Check the status of your devices by looking at
the dashboard.
1.
On the taskbar, tap
Start > SmartThings.
2. Sign in with your Samsung account.
NOTE Non-Samsung connected device errors or defects are not covered by the
Samsung warranty; contact the non-Samsung device manufacturer for support.
Additional apps
The following apps are preloaded or downloaded over-the-air to your device.
Verizon Connection Manager
The Verizon Connection Manager app gives you a centralized place to manage
your Verizon Wireless Mobile Broadband connection.
El
Apps
27
Microsoft apps
Enjoy these apps from Microsoft. Additional apps may be preloaded.
Access
Create, customize, and share database apps tailored to your business needs.
Excel
View, create, and edit spreadsheet on your device. You can unlock the full
Excel
®
experience with an Office 365
™
subscription.
Office
Create, view, edit, and share documents.
OneDrive
Store and share photos, videos, documents, and more in your free online
OneDrive
®
account—accessible from your personal computer, tablet, or phone.
OneNote
Stay organized using text, pictures, or audio notes. Create Quick Notes or review
and edit shared OneNote notebooks using OneDrive
®
.
Outlook
Manage your email and calendar.
PowerPoint
View, create, and edit presentations on your device. You can unlock the full
PowerPoint
®
experience with an Office 365 subscription.
Apps
28
Publisher
Precisely lay out and style text, pictures, border, calendars, and more.
Skype
Hold video and voice calls, and send instant messages to anyone around the
world.
Word
View, create, and edit documents on your device. You can unlock the full Word
experience with an Office 365 subscription.


••
••
••
••
Settings
30
Access Settings
Customize settings for functions and apps. You can make your device more
personalized by configuring various setting options.
◌
On the taskbar, tap Start > Settings.
•
To search for settings by entering keywords, tap the Find a setting field at
the top of the screen.
Connections
Manage connections between your device and a variety of networks and other
devices.
Devices
Change settings related to your connected devices.
◌
On the taskbar, tap Start > Settings > Devices, and tap an option:
•
Bluetooth & other devices: Activate or deactivate the Bluetooth feature. You
can search for other Bluetooth devices and pair with them.
•
Printers & scanners: Change settings and connect printers and scanners.
•
Mouse: Change the mouse settings.
•
Touchpad: Change the touchpad settings.
•
Typing: Change the typing settings for either the physical or onscreen
keyboard.
•
Pen & Windows Ink: Configure settings for using a connected pen and the
Windows Ink workspace.
•
AutoPlay: Activate or deactivate the AutoPlay feature and change related
settings.
•
USB: Set the device to notify you if there are issues when connecting to USB
devices.

••
••
••
••
Settings
3
1
Network and Internet
Change the network and Internet settings.
◌
On the taskbar, tap Start > Settings > Network & Internet, and tap an
option:
•
Status: View your network status.
•
Wi-Fi: Activate the Wi-Fi feature to connect to a Wi-Fi network and change
the related settings. Turn off Wi-Fi to save the battery when not in use.
•
Cellular: Configure mobile service settings.
•
Dial-up: Configure the dial-up settings.
•
VPN: Set up and connect to virtual private networks (VPNs).
•
Airplane mode: Activate or deactivate Airplane mode. This disables all
wireless functions on your device. You can use only non-network services.
•
Mobile hotspot: Configure your device to be used as a mobile hotspot to share
your mobile data connection with other devices.
•
Data usage: Keep track of your data usage amount.
•
Proxy: Configure the proxy settings.
Display
Change the display settings, such as a wallpaper, color, and theme.
◌
On the taskbar, tap Start > Settings > Personalization, and tap an option:
•
Background: Change the wallpaper and related settings.
•
Colors: Change the colors of the taskbar, items on the Start menu, and more.
•
Lock screen: Change the lock screen wallpaper and select items to show on
the lock screen.
•
Themes: Select a theme to apply and change related settings.
•
Fonts: Change the system font.
•
Start: Change the settings related to the Start menu.
•
Taskbar: Configure settings for the taskbar.

••
••
••
••
••
••
••
••
Settings
3
2
Lock Screen and Security
You can change the way that you lock the screen to prevent others from accessing
your personal information.
◌
On the taskbar, tap Start > Settings > Accounts > Sign-in options, and then
select a screen lock method.
•
You must add a password before you can use the other lock methods.
Windows Hello Face
Use the camera to register an image of your face to use in place of passwords.
1.
On the taskbar, tap
Start > Settings > Accounts > Sign-in options >
Windows Hello Face.
2. Tap Set up, and follow the prompts to register your face.
Windows Hello Fingerprint
Register your fingerprint to use in place of passwords.
1.
On the taskbar, tap
Start > Settings > Accounts > Sign-in options >
Windows Hello Fingerprint.
2. Tap Set up, and follow the prompts to register your fingerprint.
Windows Hello PIN
Create a PIN to use in place of passwords.
1.
On the taskbar, tap
Start > Settings > Accounts > Sign-in options >
Windows Hello PIN.
2. Tap Add, enter a PIN, and enter the PIN again to verify it.

••
••
••
••
••
••
••
••
••
••
@
@
@
@
@
Settings
3
3
Security Key
Sign in with a physical security key that can log you into applications. You need a USB
security key to use this feature.
1.
On the taskbar, tap
Start > Settings > Accounts > Sign-in options > Security
key.
2. Tap Manage, and follow the prompts to register your USB security key.
Password
Create your Microsoft account password.
1.
On the taskbar, tap
Start > Settings > Accounts > Sign-in options.
2. Tap Add, and enter a password, enter the password again to verify it, and then
enter a password hint.
Picture Password
Use a favorite picture to sign in to Windows, apps, and services. Choose the picture
and gestures to create a unique password.
1.
On the taskbar, tap
Start > Settings > Accounts > Sign-in options.
2. Tap Add, and follow the prompts to set up your picture password.
Require sign-in
Set a time limit on how long you can be away from your device before being prompted
to sign in.
1.
On the taskbar, tap
Start > Settings > Accounts > Sign-in options.
2. Tap the drop down menu and select a time limit.
Dynamic Lock
Windows can lock when devices paired to your PC go out of range.
1.
On the taskbar, tap
Start > Settings > Accounts > Sign-in options.
2. Tap Allow Windows to automatically lock your device when you're away.

••
••
••
••
Settings
3
4
Sign-in privacy options
Customize your privacy options when signing in to an account or your device.
1.
On the taskbar, tap
Start > Settings > Accounts > Sign-in options.
2. Under Privacy tap On/Off for each option:
l Show account details (e.g. email address) on the sign-in screen.
l Use my sign-in info to automatically finish setting up my device and reopen
my apps after an update or restart.
Privacy
Change the privacy settings.
◌
On the taskbar, tap Start > Settings > Privacy, and tap an option:
•
General: Change the general privacy settings.
•
Speech: Use your voice for dictation, for talking to Cortana, and for use with
other apps that use Microsoft’s cloud-based speech recognition.
•
Inking & typing personalization: Use your typing and handwriting patterns to
create a local user dictionary for improved suggestions.
•
Diagnostics & feedback: Set the frequency of Windows feedback and select
an option to send the device’s diagnostic and usage data to Microsoft.
•
Activity history: Access what you are working on from apps, docs, or other
activities on supported devices.
•
Location: Change settings for location information permissions.
•
Camera: Activate or deactivate the camera feature. Select apps to allow
them to use the camera feature.
•
Microphone: Activate or deactivate the microphone. Select apps to allow
them to use the microphones.
•
Voice activation: Choose whether apps can listen for a spoken keyword and
continue to listen after a keyword is detected.
•
Notifications: Choose apps that can access your notifications.
•
Account info: Set apps to access and use your account information.
•
Contacts: Select apps to allow them to access your contacts.

••
••
Settings
3
5
•
Calendar: Activate or deactivate the calendar app. Select apps to allow them
to access the calendar app.
•
Phone calls: Enable Windows and apps to use the cellular service of a phone
linked to this device.
•
Call history: Select apps to allow them to access your call logs.
•
Email: Activate or deactivate the email app. Select apps to allow them to
access the email app and send emails.
•
Tasks: Allow access to tasks on your device.
•
Messaging: Activate or deactivate the messaging app. Select apps to allow
them to access the messaging app and send messages.
•
Radios: Change the settings to allow apps to use radios, such as Bluetooth.
•
Other devices: Change the settings for external devices, such as wireless
devices or hardware.
•
Background apps: Select apps to run in the background.
•
App diagnostics: Let apps access diagnostic information.
•
Automatic file downloads: Let Windows automatically download online-only
files from your online storage provider.
•
Documents: Allow access to document libraries on your device.
•
Pictures: Allow access to picture libraries on your device.
•
Videos: Allow access to video libraries on your device.
•
File system: Allow access to the file system on your device.
Update and Security
Change the Windows update, data backup, and device security settings.
◌
On the taskbar, tap Start > Settings > Update & security, and tap an
option:
•
Windows update: Check for available updates and update Windows to the
latest version.

••
••
Settings
3
6
•
Delivery optimization: Allow Windows and Store app updates to be
downloaded from and uploaded to other PCs on the same network. This
feature is useful when your Internet connection is unreliable or you are
updating multiple devices.
•
Windows security: Activate the Windows Defender Security feature to scan
for malware. You can also set the device to send security problems to
Microsoft automatically.
•
Troubleshoot: Run a troubleshooter to find and fix common problems.
•
Recovery: Reset the device or restart it using the advanced start-up feature.
•
Activation: View the Windows activation information. You can change your
Windows product key.
•
Find my device: Activate or deactivate the Find My Device feature to help
locate your device when it is lost or stolen. Access the Microsoft webpage to
track your device’s last known location and control the device.
•
For developers: Change the development settings.
•
Window Insider Program: Get previews of future updates, improvements to
Windows, and provide feedback.
•
Device encryption: Protect your files and folders from unauthorized access.
Device Maintenance
Device maintenance provides an overview of the status of your device’s battery,
storage, RAM, and device security. You can also automatically optimize your device’s
system resources.
System
Change the system settings.
◌
On the taskbar, tap Start > Settings > System, and tap an option:
•
Display: Change the display settings, such as the font size and the brightness
of the display.
•
Sound: Configure the sound settings.

••
••
Settings
3
7
•
Notifications & actions: Select Quick action buttons to display on the action
center panel and change the notification settings.
•
Focus assist: Choose which notifications to prioritize and configure rules to
limit which notifications you receive.
•
Power & sleep: Set the device’s backlight timer. You can also set the Wi-Fi
settings for when the device is in sleep mode.
•
Battery: View battery power information and change the power saving
options.
•
Storage: View memory information for your device and select where new
apps and data are saved by default. The actual available capacity of the
internal memory is less than the specified capacity because the operating
system and default apps occupy part of the memory. The available capacity
may change when you update the device.
•
Tablet mode: Switch to tablet mode and change the related settings.
•
Multitasking: Change settings for multitasking.
•
Projecting to this PC: Project connected devices to this device.
•
Shared experiences: Authorize actions across devices to share content.
•
Clipboard: Manage the clipboard, which stores content that you copy or cut
in Windows.
•
Remote desktop: Connect to and control your device from a remote device.
•
About: Access device information and change the device name or other
settings.
Time and Language
Change settings to control how the device displays the time and date, and select your
country or region.
◌
On the taskbar, tap Start > Settings > Time & language, and tap an option:
•
Date & time: Change the time and date settings.
•
Region: Set your country or region.
•
Language: Add your preferred languages.
•
Speech: Change the settings for the text-to-speech feature.

_w_
,\j,
••
••
••
••
Settings
38
NOTE I
f the battery remains fully discharged or is removed from the device, the
time and date resets.
Book Settings
Configure settings for the following features provided by Samsung.
◌
On the taskbar, tap Start > Galaxy Book, and tap an option:
•
Battery Life Extender: Prolong your battery life by setting a maximum
battery charge level.
•
Power button: View Power button actions.
•
Legal information: View legal information.
•
Help: View the user manual on your device.
•
About device: View information about your device.
Accounts
Set up and manage accounts, including email and social networking accounts.
◌
On the taskbar, tap Start > Settings > Accounts, and tap an option:
•
Your info: View and edit your account information.
•
Email & accounts: Add your Microsoft account and manage your app accounts.
•
Sign-in options: Change the device sign-in options. You can select a screen
lock method to prevent others from accessing your personal information. See
Lock Screen and Security on page 32.
•
Access work or school: Add a work or school account to access to your
organization’s resources, such as apps and network.
•
Family & other users: Add additional accounts for your family members or
other users to use the device with their own personalized settings.
•
Sync your settings: Change settings to sync your settings with other devices
using your Microsoft account.

••
••
Settings
39
Accessibility
Accessibility services are special features that make using the device easier for those
with certain physical disabilities.
For more information about Accessibility for Samsung products, please contact us at
accessibility@sea.samsung.com.
Ease of Access
Change settings to improve the device’s accessibility.
◌
On the taskbar, tap Start > Settings > Ease of Access, and tap an option:
•
Display: Make your display easier to see.
•
Cursor & pointer: Customize your pointer, cursor, and touch feedback to make
them easier to see.
•
Magnifier: Activate a magnifier and change the related settings. When you
activate this feature you can zoom in on the screen to view a larger version
of the content.
•
Color filters: Make photos and colors easier to see by applying a color filter to
the screen.
•
High contrast: Apply high contrast themes to the display to improve screen
visibility.
•
Narrator: Activate the screen reader and change the related settings. When
you activate this feature, the device reads aloud all the elements on the
screen, such as text and buttons.
•
Audio: Make your device easier to hear, use it without sound, or enable visual
audio alerts.
•
Closed captions: Change the caption settings.
•
Speech: Make your device easier to use if you have limited reach or strength.
•
Keyboard: Change the on-screen keyboard settings.
•
Mouse: Change the pointer and mouse settings.
•
Eye control: Use eye tracking technology to control the mouse, type using an
on-screen keyboard, and communicate with people using text-to-speech.

••
••
••
••
Settings
40
Other settings
Configure features on your device that make it easier to use.
Phone
You can mirror your phone to your device.
◌
On the taskbar, tap Start > Settings > Phone > Add a phone, and tap an
option to configure.
Gaming
Configure gaming features on your device.
◌
On the taskbar, tap Start > Settings > Gaming, and tap an option:
•
Game bar: Control how game bar opens and recognizes your game and add or
edit keyboard shortcuts.
•
Captures: Control how you capture your game through screenshots and game
clips.
•
Broadcasting: Control your game’s audio and visual settings when you
broadcast.

••
••
42
Legal information
READ THIS INFORMATION BEFORE USING YOUR DEVICE.
Arbitration Agreement - This Product is subject to a binding arbitration agreement
between you and SAMSUNG ELECTRONICS AMERICA, INC. (“Samsung”). You can opt
out of the agreement within 30 calendar days of the first consumer purchase by
emailing optout@sea.samsung.com or calling 1-800-SAMSUNG (726-7864) and
providing the applicable information.
The full Arbitration Agreement, Standard One-year Limited Warranty, End User
License Agreement (EULA), and Health & Safety Information for your device are
available online:
This information can also be found on the device in the “About device” or “About
phone” or “About tablet” section, for example:
•
Tap Start > Galaxy Book > Legal information > Samsung legal
•
Or, search “Legal”
If your device required Federal Communications Commission (FCC) approval, you can
view the FCC certification by tapping
Start > Galaxy Book > About device.
End User License Agreement for Software
(EULA)
The online version of the End User License Agreement (EULA) for your device can be
found online at www.samsung.com/us/Legal/WindowsTabletEULA.

1-11=
HEVc\dvance TM
"II
C
Covered
by
Patents
at
patentlist.hevcadvance.com
Legal information
43
Restricting children’s access to your
device
Your device is not a toy. Do not allow children to play with it because they could hurt
themselves and others, damage the device, or make calls that increase your device
bill. Keep the device and all its parts and accessories out of the reach of small
children.
Samsung Electronics America, Inc.
Address:
85 Challenger Road
Ridgefield Park
New Jersey 07660
Phone: 1-800-SAMSUNG (726-7864)
Internet: samsung.com
©2019 Samsung Electronics America, Inc. Samsung, and Samsung Galaxy are all
trademarks of Samsung Electronics Co., Ltd.
Other marks are the property of their respective owners.
Manufactured under license from Dolby Laboratories. Dolby, Dolby Atmos, and the
double-D symbol are trademarks of Dolby Laboratories.
Some multimedia (audio/video) files contain Digital Rights Management (DRM)
technology to verify you have the right to use the files. Preloaded apps on your
device may not be compatible with DRM-protected files.
Screen images are simulated. Appearance of device may vary.

Legal information
44
The actual available capacity of the internal memory is less than the specified
capacity because the operating system and default applications occupy part of the
memory. The available capacity may change when you upgrade the device.
Please check with your service provider to verify qualifying services/features.