Loading ...
Loading ...
Loading ...
OMEGA ALTISE
CONTROLS
FUNCTION BUTTONS:
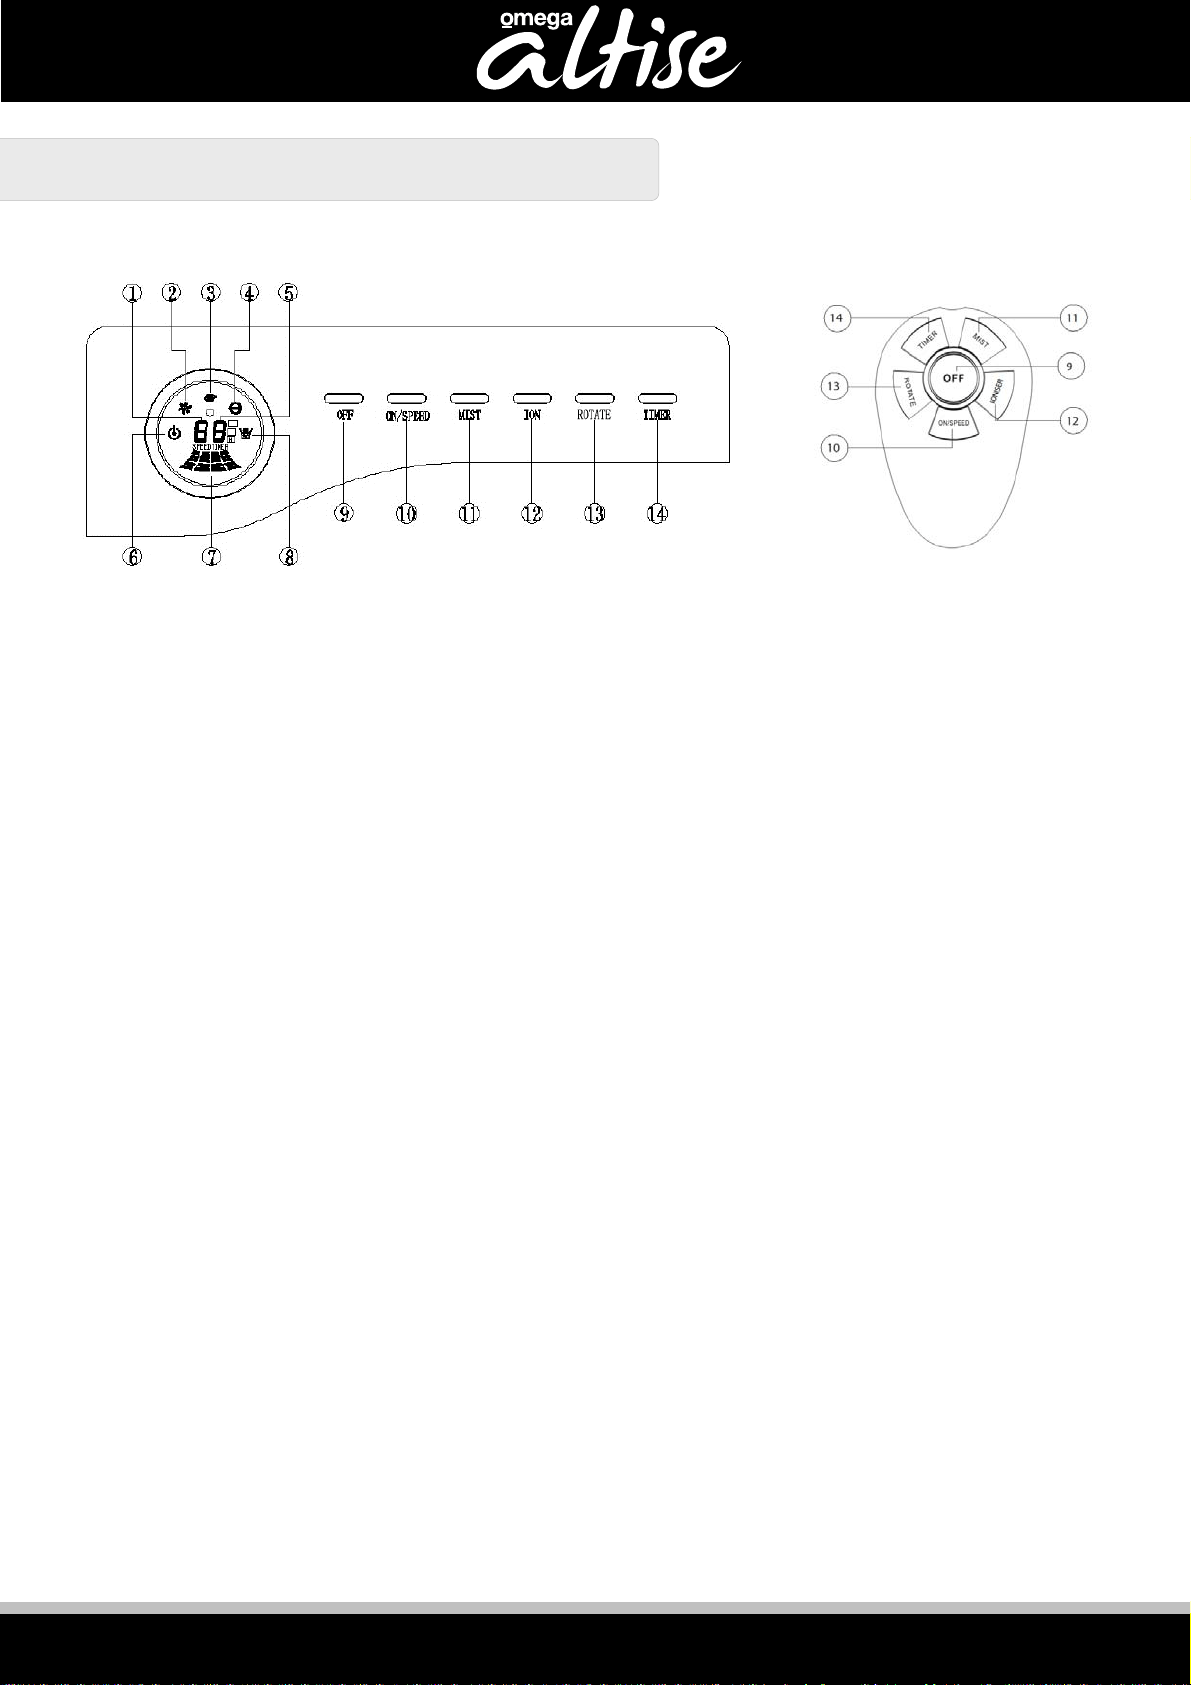
CONTROL PANEL ON FRONT OF BODY REMOTE CONTROL
There are 6 function buttons on the control panel at the front of the main body and on the remote control. Make sure the
power has been connected (indicator 6 will light up to indicate this) and the water tank has been filled.
1) Off button (9): This button turns the fan off when pressed. The Fan Function icon will turn off.
2) On/Speed button (10): When connected to the power supply, the “Power on” indicator (6) will light up. Press the
On/Speed button to start the fan on slow speed. The digital display (1) will show the low speed as “1”. The Fan Function
icon (2) will also light up. Press the button a second time for medium speed (shown as “2”) and a third time for high
speed (displayed as “3”). Pressing once more will cycle the speed back to low.
3) Mist button: This button turns the mist function on and off. Press the button (11) once to start the misting function (with
or without the fan working) and the mist will start to come out of the misting plate. The Misting Function icon (8) will also
light up. Press the button another time and the mist will stop (Misting Function icon (8) will turn off). Note that the
amount of mist may start off a little low, which is normal.
4) Ioniser button: This button turns the Ioniser on and off. Press the Ioniser button (12) once to turn the function on (the
Ioniser function button (4) will light up). Press a second time to turn the function off.
5) Rotate button: This button turns the rotation of the front venting on and off. With the fan running, press the Rotate
button (13) once to start the venting rotating (the Rotation icon (3) will light up), and again to turn it off.
6) Timer: This button is used to set up the timer for the fan and mist functions (the Ioniser function is not affected by the
timer). First start the fan and/or mist function. Press the Timer button (14) once. The first digital display (1) will change
to “H” and the Timer display (5) will show the current timer period (1). The Timer button can be pressed again to
increase the timer period for up to 9 hours (in 1 hour increments). Pressing once more after the timer has reached 9
hours will reset the timer to zero. Once set, the misting will fan can be left to run, with the timer counting down &
stopping the function(s) at the end of the set time. The appliance can still be turned off with the Off button.
OPERATING THE MISTING FAN:
With the power cord plugged in, the power switched on, and the water tank full, the misting fan is now ready for operation.
a) To use the fan, press the On/Speed button (starts at low speed). Press again to cycle through the speeds. To turn the
fan off, press the Off button.
b) To start the fan vent rotating, press the Rotate button once…press a second time to turn it off. The direction of the
venting can be adjusted in the same way, or by hand.
c) The misting function can be turned on & off using the Mist button. This forces water droplets through the mist cover, to
increase the humidity of the air. This can be used with the fan running to spread the moisture faster, or with the fan off.
Make sure that the water tank is full (this can be seen through the water level indicator at the front of the main body).
Note that it takes a little while for the full force of the misting function to start up – a lower amount of mist at start-up
is normal.
d) The Ioniser function can be turned on & off with the Ioniser button. This function creates negatively charged ions which
float through the air, attracting airborne particles & acting as an air purifier.
e) A timer for the fan and/or mist function can be set by pressing the timer button (each press of the button increases the
time by an hour up to 9 hours. One more press resets the timer to 0 (continuous)). The display shows the remaining
time when the timer is active. The timer function does not affect the other functions.
Loading ...
Loading ...
Loading ...