Loading ...
Loading ...
Loading ...
19
ENGLISH
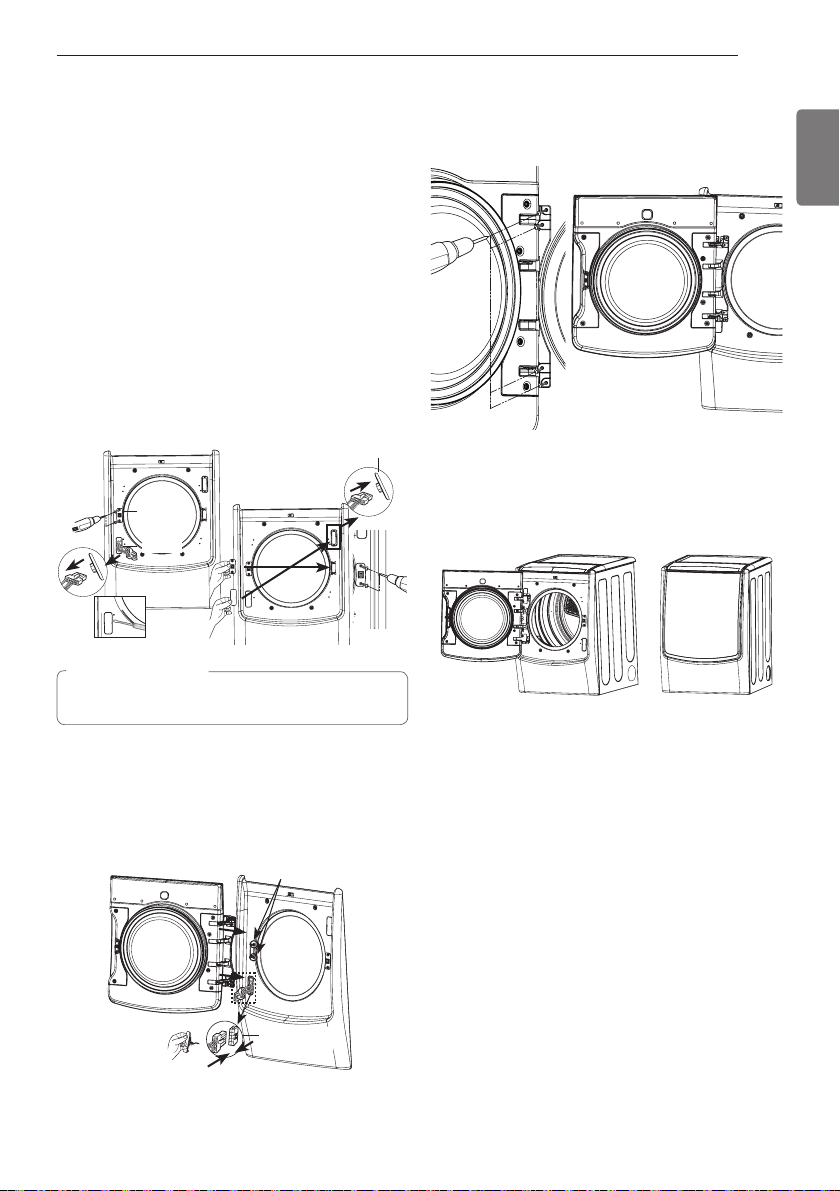
1. Remove the two screws and the latch assembly from
the left side of the opening.
2. Rotate the latch assembly and remount it on the right
side of the opening with the two screws.
3. Switch the two caps. Untie the twist tie and remove
the small cap from the side of the wire harness on the
top right of the cabinet. Make sure the wire harness
does not slip back into the cabinet.
4. Remove the left cap by gently prying it up with a flat
blade screwdriver, being careful not to scratch the
paint. Disconnect the wire harness attached to the
cap by pressing the tabs on either side.
5. Attach the left cap to the wire harness on the top right
of the cabinet. Snap the cap into place.
6. Attach the twist tie and the small cap removed in step
1 to the side of the wire harness on the bottom left of
the cabinet. The wire harness will be attached to the
harness in the door.
7. Unscrew the four decorative screws from the left side
of the cabinet and insert them into the matching
holes on the right side of the cabinet.
Latch
Cap L
Cap L
w
WARNING
Be sure to support the weight of the door while
inserting the hinge screws.
1. While supporting the door, move the door into
position with the hinge on the left side.
2. Connect the wire harness from the hinge to the
connector on the lower left side of the cabinet.
Harness
Connector
Hinge Hole
1. Align the hinge with the mounting holes.
2. While supporting the door, fasten the four hinge
screws.
1. Check that the door closes and latches properly.
INSTALLATION
MFL67731067_en_160511.indd 19 2016.5.11 10:50:30 AM
Loading ...
Loading ...
Loading ...