Loading ...
Loading ...
Loading ...
5
USING YOUR BLENDER
1. Make sure appliance is OFF and the jar is securely
situated on the base.
2. Place foods to be blended into jar. For best results,
place ingredients in the jar in the following order: liquids,
powders, soft foods, hard foods, ice.
3. Place lid on jar; make sure lid cap is in place.
4. Plug power cord into outlet.
Note: When in use, do not leave blender unattended.
When using hard foods, such as ice, cheese, nuts and coffee
beans, keep one hand on the lid to keep blender in place.
5. Press the High or Low button; then select the speed that best suits your desired
task. To switch speeds, press the High or Low button and the new speed
desired. (See SPEED CHART.)
6. When blending thick mixtures, such as smoothies, protein drinks and milkshakes
press the PULSE button several times to begin the blending process. Use
Pulse for no more than 5 seconds at a time, allowing the blender to rest briefly
between each pulse, for no more than 2 minutes total. This helps break up the
ice and distribute the ingredients.
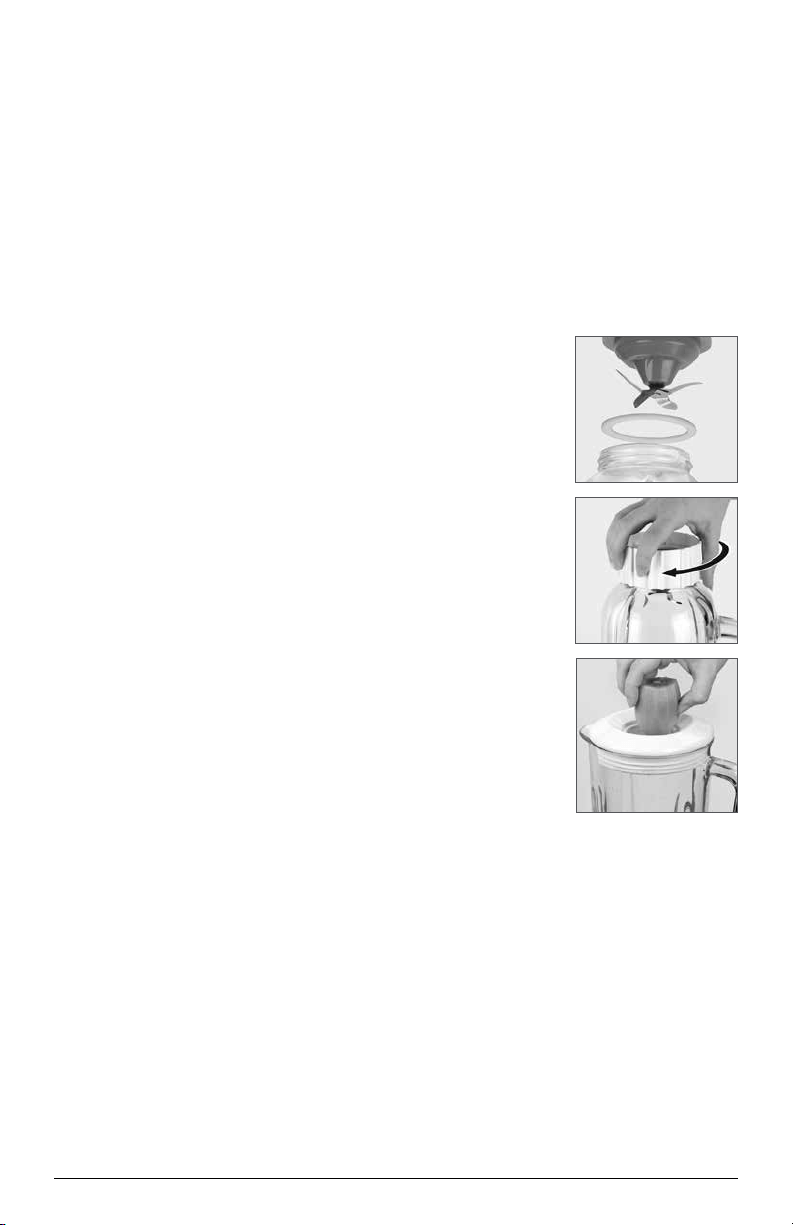
7. Open the lid cap to add ingredients while the blender is running and drop
ingredients through the opening (C).
Important: Do not remove the lid while the blender is running.
8. When finished, press the Pulse/Off button. Make sure blades have completely
stopped before attempting to remove the blending jar from the base.
9. To remove the jar, grasp the handle and lift straight up. Do not twist the jar.
10. Remove lid to pour.
11. Always unplug the appliance when not in use.
BLENDER JAR ASSEMBLY
1. Turn blending jar upside down and place flat on countertop or work surface.
2. Place the gasket against the glass jar.
Important: Gasket MUST be between the jar and blade
assembly or the blender will not function properly.
3. Place the blade assembly, blade first, into the jar. (A).
4. Place jar base onto jar and rotate clockwise until it is tight (B).
5. Turn assembled jar right side up.
6. Place lid with lid cap onto blending jar.
Note: Do not plug in the cord.
7. Place jar on base, making sure it is pressed firmly into place. (Jar
base should not extend more than 1⁄8-inch above the rim at the
top of the base.)
HOW TO USE
This appliance is intended for household use only.
GETTING STARTED
• Remove all packing material, any stickers from the product, and the plastic band
around the plug.
• Remove and save literature.
• Please go to www.prodprotect.com/applica to register your warranty.
• Wash all removable parts as instructed in Care & Cleaning Section of this manual.
B
A
C
Loading ...
Loading ...
Loading ...