Loading ...
Loading ...
English-4 English-5
Ho w To Us e Yo U r el e c T r i c sk i l l e T
Before use, wash the SKILLET PAN and LID in warm soapy water or
in the dishwasher and dry completely.
CAUTION: Do not immerse HEATING BASE in water or other liquids.
1. Set the skillet on a flat, dry, heat resistant surface.
2. Make sure that the SKILLET PAN is sitting securely on the HEATING
BASE. If the SKILLET PAN is not secure on the HEATING BASE, the
product may not function properly.
3. Turn TEMPERATURE CONTROL DIAL to “OFF”. Plug skillet into
standard 120V AC outlet. NOTE: The Power Indicator light will
illuminate indicating that the skillet is plugged into a power source.
During cooking, the power indicator light will remain on.
4. Turn TEMPERATURE CONTROL DIAL to desired setting. WARM is
recommended for keeping already hot, fully cooked food at the perfect
serving temperature. We do not recommend using the WARM setting for
more than 4 hours.
5. Preheat the skillet with the LID on for 10–15 minutes. NOTE: Due to
manufacturing process, during initial use of this appliance, some slight
smoke and/or odor may be detected. This is normal with many heating
appliances and will not recur after a few uses.
6.
The STEAM VENT allows steam to escape while cooking with the LID in
place. CAUTION: Escaping steam is HOT! Be careful when removing or
lifting LID. Oven mitts are required when handling the LID or SKILLET PAN.
7. When cooking is complete turn TEMPERATURE CONTROL DIAL to “OFF”.
8. Prior to removing pan from HEATING BASE, turn TEMPERATURE
CONTROL DIAL to “OFF” and remove plug from wall outlet.
9. The SKILLET PAN can be removed from the HEATING BASE and placed
in the oven for baking or roasting. Note: The LID must be removed when
using the SKILLET PAN in the oven.
10. The SKILLET PAN can be used as a serving piece.
When placing the SKILLET PAN on a countertop,
kitchen table or other surface, place a hot plate or
trivet that measures at least
3
⁄
8
” high under the pan
to prevent burning or discoloration of the surface.
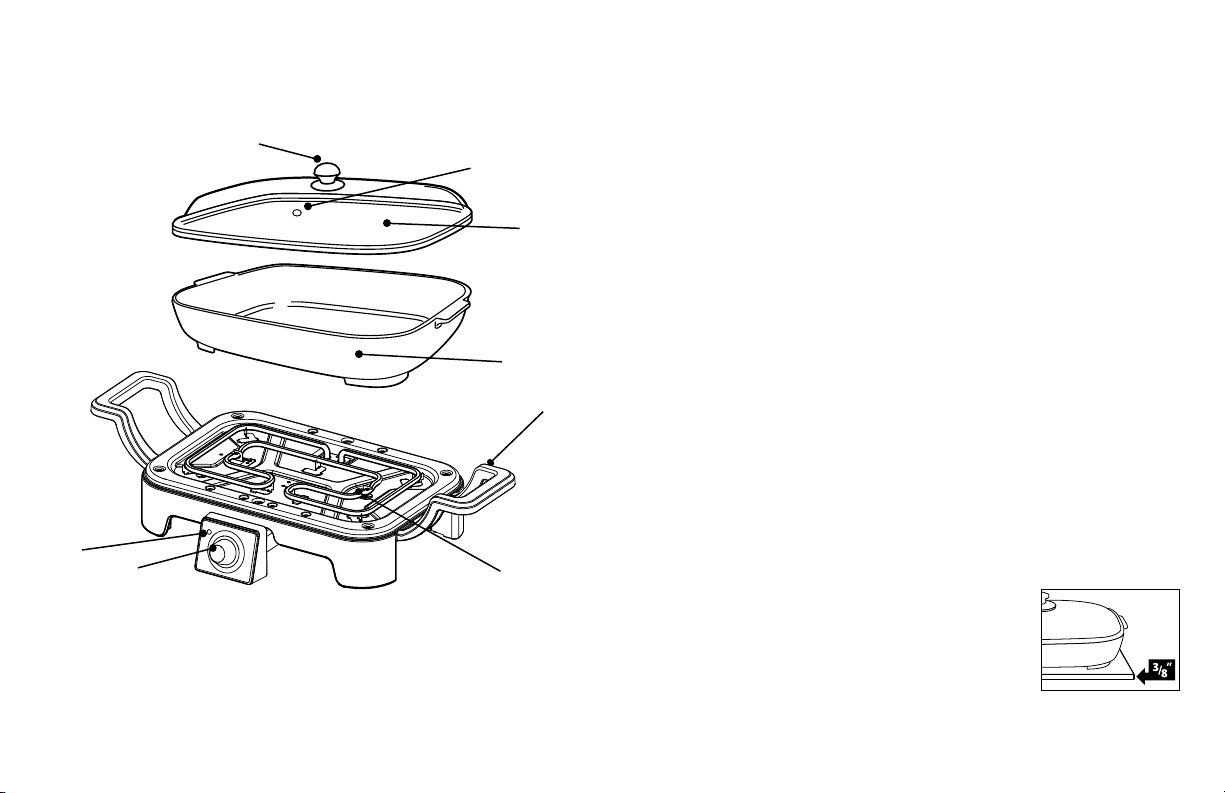
Pa r T s id e n T i f i c a T i o n
kn o w Yo U r el e c T r i c sk i l l e T
1. Lid Handle
2. Steam Vent
3. Glass Lid
4. Skillet Pan
6
2
1
5. Handle
6. Heating Base
7. Temperature Control Dial
8. Power Indicator Light
3
4
5
7
8
Loading ...
Loading ...
Loading ...