Loading ...
Loading ...
3
2.1. Description of “AUTO RESTART FUNCTION”
• This unit is equipped with the auto restart function. When the main power is
turned on, the air conditioner will start operation automatically in the same
mode as set with the remote controller before the shutoff of main power.
• If the unit was set to off with the remote controller before the shutoff of
main power, it will remain stopped even after the main power is turned on.
• If the unit was in the TEST RUN before the shutoff of main power, it will
start operation, at main power on, in the same mode as set with the
remote controller before the TEST RUN.
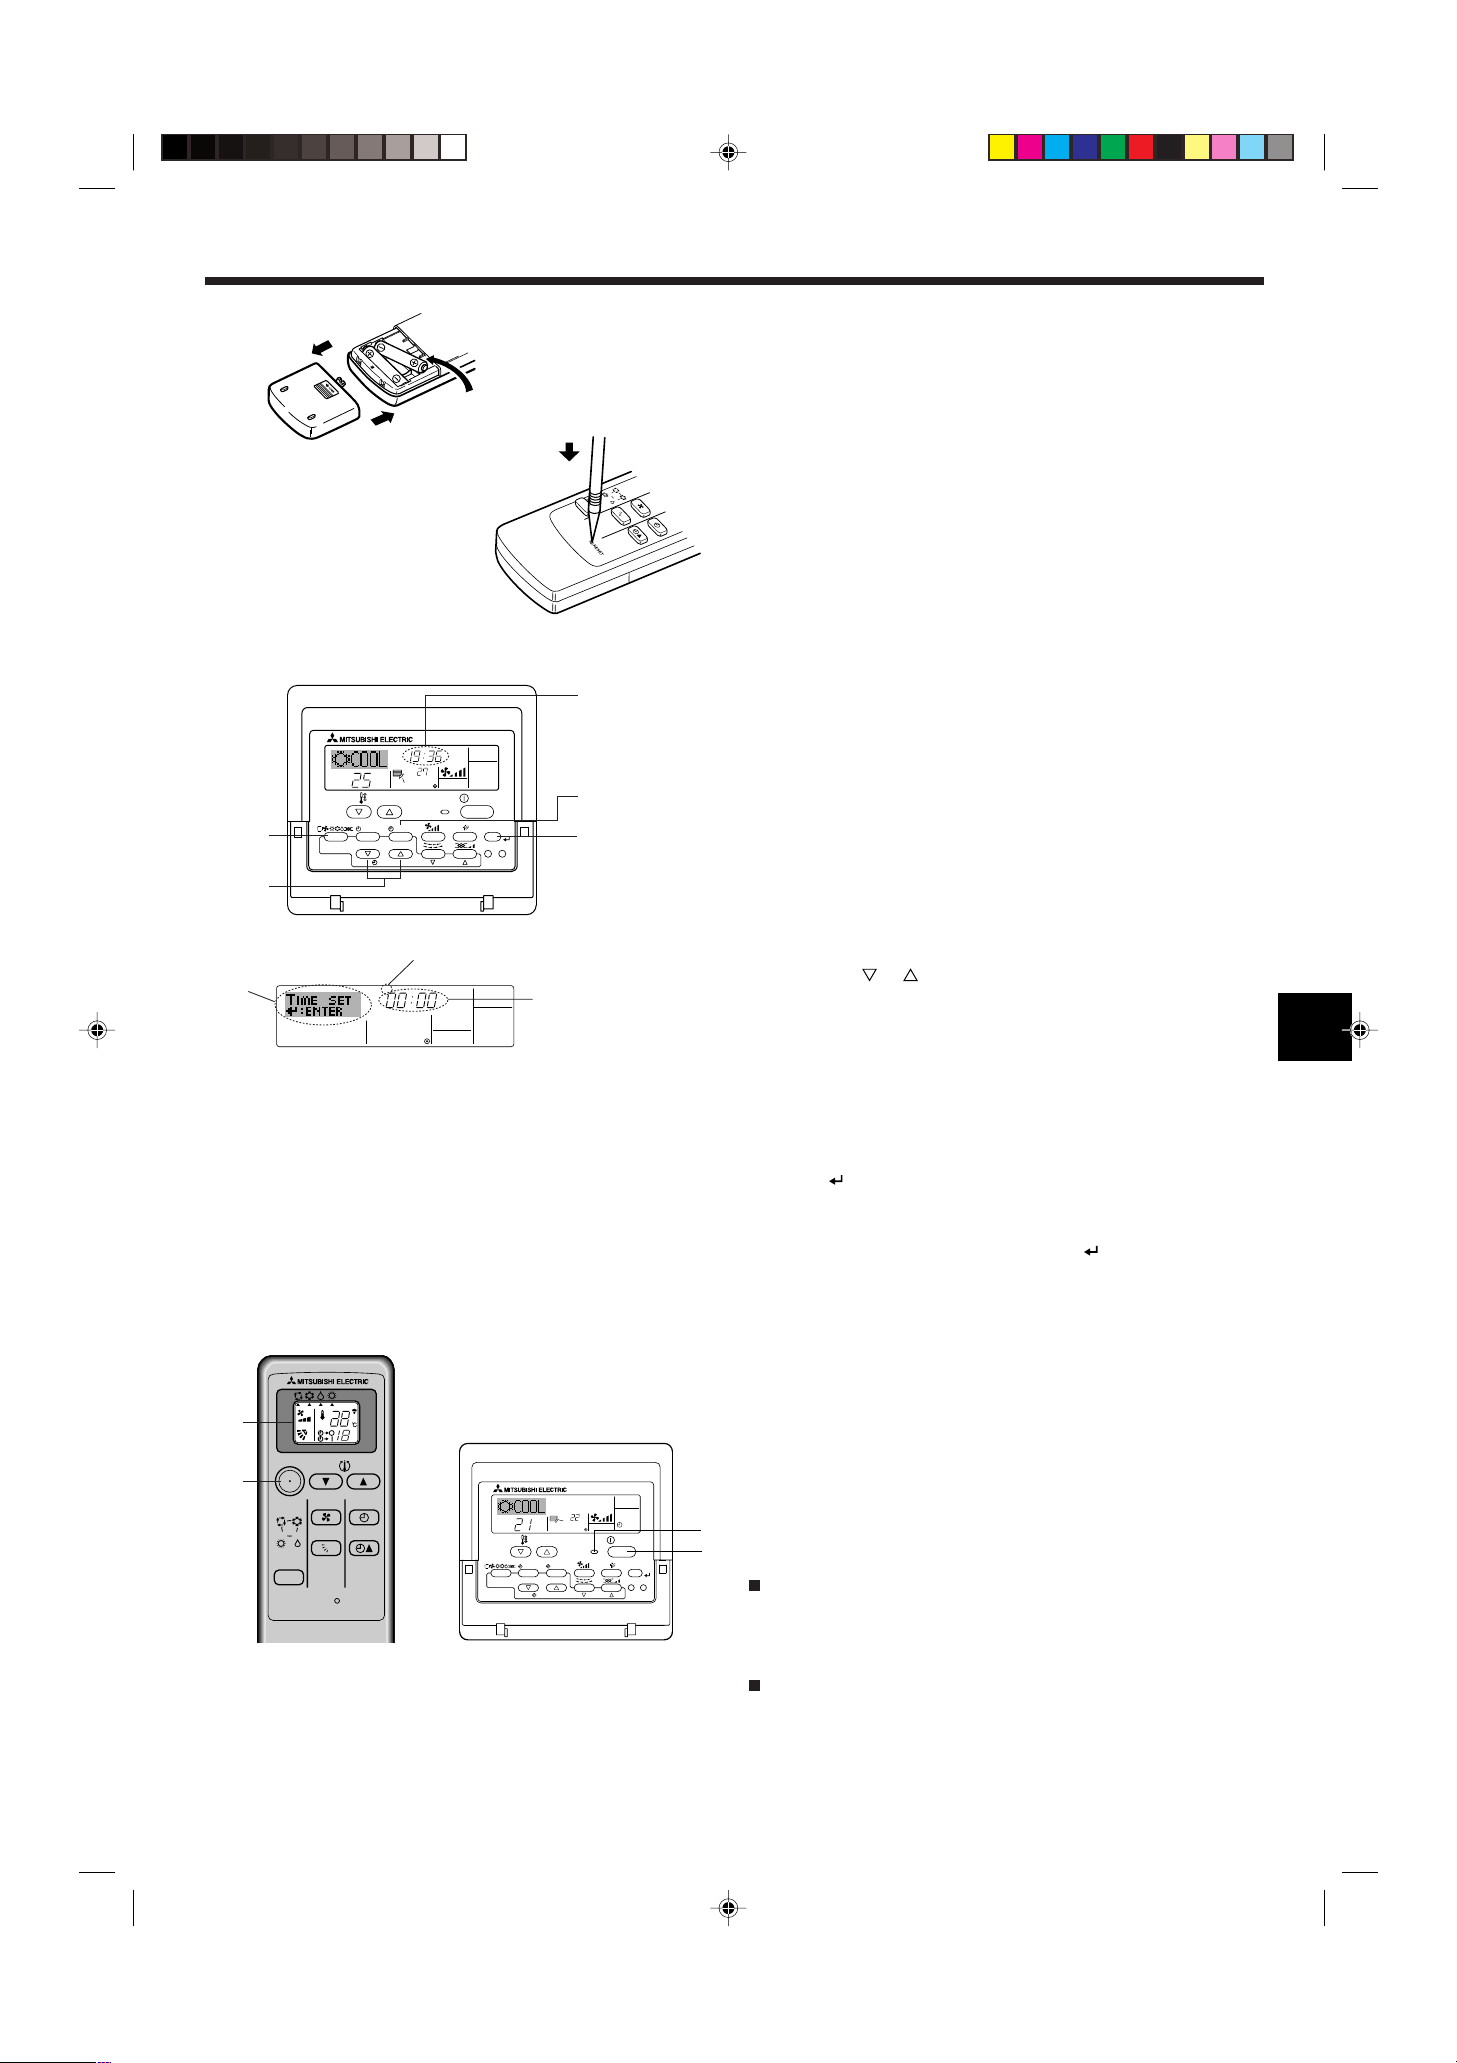
2.2. Wireless remote controller (How to set the batteries)
1Remove the back lid and insert batteries. Then reattach the back lid.
• Insert the minus pole of the batteries first.
• Check if the polarity of the batteries is correct.
2Press the RESET button.
• If the RESET button is not pressed, the remote controller may not oper-
ate correctly.
• Press using a thin stick.
2.3. Setting the day of the week and time
■ Use this screen to change the current day of the week and time setting.
Note:
The day and time will not appear if clock use has been disabled at Function
Selection of remote controller.
2. Operation
AUTO
COOL
DRY
HEAT
FAN
VANE
SELECT
TIME
1
2
Day of the Week &
Time display
˚C
˚C
TIME SUN
PAR-21MAA
ON/OFF
FILTER
CHECK
OPERATION
CLEAR
TEST
TEMP.
MENU
BACK DAY
MONITOR/SET
CLOCK
ON/OFF
2
4
9
1
A
Time Setting
TIME SUN
2
3
4
Day of the Week Setting
ss
ss
sHow to Set the Day of the Week and Time...
1. Press the or Set Time button A to show display 2.
2. Press the Timer On/Off (Set Day) button 9 to set the day.
* Each press advances the day shown at 3 : Sun → Mon → ... → Fri
→ Sat.
3. Press the appropriate Set Time button A as necessary to set the
time.
* As you hold the button down, the time (at 4) will increment first in
minute intervals, then in ten-minute intervals, and then in one-hour
intervals.
4. After making the appropriate settings at Steps 2 and 3, press the
Filter button 4 to lock in the values.
Note:
Your new entries at Steps 2 and 3 will be cancelled if you press the Mode
(Return) button 2 before pressing the Filter
button 4.
5. Press the Mode (Return) button 2 to complete the setting proce-
dure. This will return the display to the standard control screen, where
1 will now show the newly set day and time.
2.4. Switching the unit on/off
• The power supply should not be turned off while the air conditioner is in
use. This can cause the unit to break down.
1 Press the ON/OFF button.
B The ON indicator should light up.
• Even if you press the ON/OFF button immediately after shutting down the
operation in progress, the air conditioner will not start for about three min-
utes. This is to prevent the internal components from being damaged.
A For the after-mentioned operating functions of the remote controller,
all items are indicated in this illustration.
For wired remote controller
• If the operation stops due to a power failure, the unit will not automati-
cally restart until the power has been restored. Press the ON/OFF but-
ton to restart.
For wireless remote controller
Note:
The signal can travel up to approximately 7 meters (in a straight line) within 45
degrees to both right and left of the center line of the receiver.
In addition, the signal may not be received if there is interference of light of
fluorescent lights or strong sunlight.
For wireless remote controller
ON/OFF
RESET
TOO
WARM
TOO
COOL
MODE
AUTO COOL
DRY
HEAT
FAN
VANE
SELECT
TIME
h
1
A
˚C
˚C
SIMPLE
PAR-21MAA
ON/OFF
FILTER
CHECK
OPERATION
CLEAR
TEST
TEMP.
MENU
BACK DAY
MONITOR/SET
CLOCK
ON/OFF
1
B
For wired remote controller
Loading ...
Loading ...
Loading ...