Loading ...
Loading ...
Loading ...
2. PRODUCT DESCRIPTION
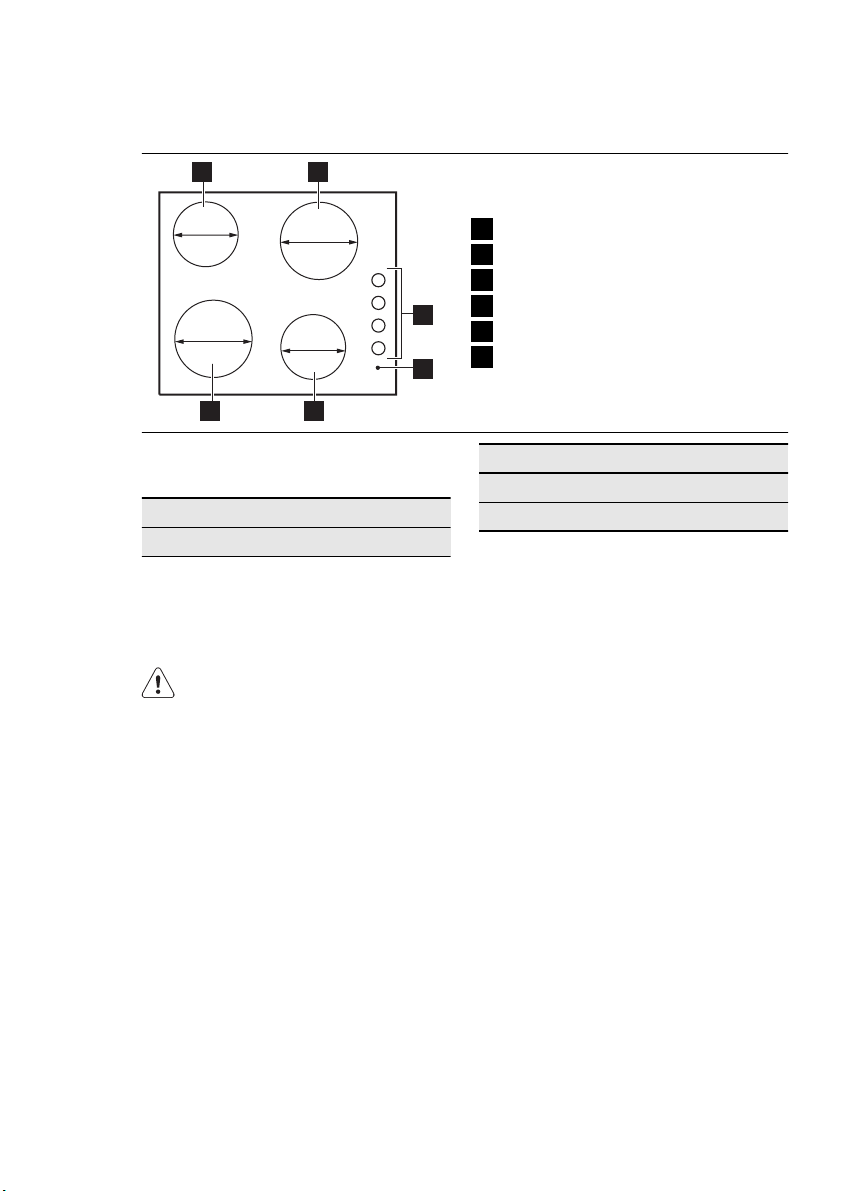
2.1 Cooking surface layout
3
6
1 2
5
4
180 mm
180 mm
145 mm
145 mm
1
Single cooking zone 1500 W
2
Single cooking zone 2000 W
3
Control knobs
4
Power indicator
5
Single cooking zone 1500 W
6
Single cooking zone 2000 W
2.2 Electric cooking zones
control knobs
Symbol Function
0 off position
Symbol Function
1
minimum heat
6 maximum heat
3. DAILY USE
WARNING!
Refer to "Safety information"
chapter.
To switch on and increase the heat set-
ting turn the knob counterclockwise. To
decrease the heat setting turn the knob
clockwise. To switch off turn the knob to
the 0.
Power indicator is activated when either
of the zones are turned on, and will stay
on until the cooking zones are switched
off.
3.1 Before first use
Put cookware containing water on each
cooking zone, set the maximum position
and operate the appliance for 10 min.
This is to burn off the residue in the appli-
ance. After that, operate the appliance at
minimum position for 20 min. During this
period, an odour and smoke can occur.
This is normal. Make sure that the airflow
is sufficient.
After this operation, clean the appliance
with a soft cloth soaked in warm water.
3.2 Rapid hot plate
A red dot in the middle of the plate shows
a rapid hot plate. A rapid hot plate heats
up faster than usual plates.
The red dot is painted on the surface and
can come off after some time. It does not
have an effect on the performance of the
appliance.
The rapid hot plate can smoke and make
an odour when you use it for the first time.
The smoke and an odour will go off after a
while.
ENGLISH 5
Loading ...
Loading ...
Loading ...