User Manual AEG IPE64571FB Pure FlexiBridge
INSTALLATION
Before the installation
Before you install the hob, write down the information bellow from the rating plate. The rating plate is on the bottom of the hob.
Built-in hobs
Only use the built-in hobs after you assemble the hob into correct built-in units and work surfaces that align to the standards.
Connection cable
- The hob is supplied with a connection cable.
- To replace the damaged mains cable, use the cable type: H05V2V2-F which withstands a temperature of 90°C or higher. Speak to your local Service Centre.

Assembly

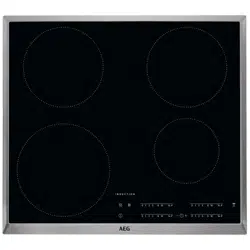
PRODUCT DESCRIPTION
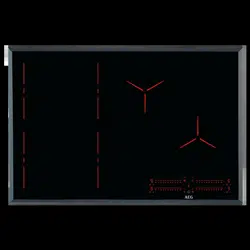
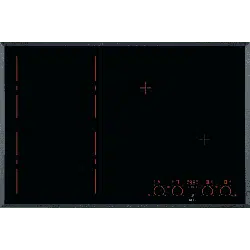
Cooking surface layout

- Induction cooking zone
- Control panel
- Flexible induction cooking area consisting of four sections
Control panel layout

To see the control panel and the zone positions activate the appliance with
Use the sensor fields to operate the appliance. The displays, indicators and sounds tell which functions operate.
OptiHeat Control (3 step Residual heat indicator)
WARNING!
There is a risk of burns from residual heat. The indicators show the level of the residual heat for the cooking zones you are currently using. The indicators may also come on for the neighbouring cooking zones even if you are not using them.
The induction cooking zones produce the heat necessary for the cooking process directly in the bottom of the cookware. The glass ceramic is heated by the heat of the cookware.
When the hob is deactivated, the indicators are still visible. When the hob is cold enough, they disappear.
DAILY USE
WARNING!
Refer to Safety chapters.
Activating and deactivating
Touch  for 1 second to activate or deactivate the hob. The control bars come on after you activate the hob and go off after you deactivate the hob. When the hob is deactivated you can only see .
Automatic Switch Off
The function deactivates the hob automatically if:
- you do not place any cookware on the hob for 50 seconds
- you do not set the heat setting for 50 seconds after you place the cookware
- you spill something or put something on the control panel for more than 10 seconds (a pan, a cloth). When you hear the acoustic signal, the hob deactivates. Remove the object or clean the control panel.
- the hob gets too hot (e.g. when a saucepan boils dry). Let the cooking zone cool down before you use the hob again.
- you do not deactivate a cooking zone or change the heat setting. After some time, the hob deactivates.
The relation between the heat setting and the time after which the hob deactivates:

Using the cooking zones
CAUTION!
Do not place hot cookware on the control panel. There is a risk of damage to the electronic parts.

Place the cookware in the centre of the selected zone. Induction cooking zones adapt to the dimension of the bottom of the cookware automatically.
Once the pot is detected, the heat setting 0 comes on.
The heat setting
Touch the control bar at the desired heat setting or move your finger along the control bar to set or change the heat setting for a cooking zone.

Once you place a pot on the cooking zone and set the heat setting, it remains the same for 50 seconds after you remove the pot. The control bar blinks for the second half of that time. If you place the pot on the cooking zone again within this time, the heat setting reactivates. Otherwise the cooking zone deactivates.
Power management function
- Cooking zones are grouped according to the location and number of the phases in the hob. See the illustration.
- Each phase has a maximum electricity loading of 3680 W.
- The function divides the power between cooking zones connected to the same phase.
- The function activates when the total electricity loading of the cooking zones connected to a single phase exceeds 3680 W.
- The function decreases the power of the other cooking zones connected to the same phase.
- For cooking zones that have a reduced power, the control panel shows the maximum possible heat settings.
- If a higher heat setting is not available reduce it for the other cooking zones first.
- The activation of the function depends on the number and size of pots.

PowerBoost
This function activates more power for the appropriate induction cooking zone, depending on the cookware size. The function can be activated only for a limited period of time.
Touch to activate the function for the cooking zone.
Timer
Count Down Timer
Use this function to specify how long a cooking zone should operate during a single cooking session.
Set the heat setting for the appropriate cooking zone and then set the function.
 to activate the function or change the time.
 and the indicators
  and
and  come on the display. If the timer is not set,
 and disappear after 3 seconds.
2. Touch or to set the time (00 - minutes).
, and disappear. When the time comes to an end, a signal sounds and flashes. To stop the signal, touch . . The indicators  and come on. Use or
  to set on the display.
Minute Minder
You can use this function when the hob is activated but the cooking zones do not operate. Place a pot on a cooking zone to see symbol.
1. Touch to activate the function.
or to set the time. flashes. Touch to stop the signal. . The indicators and light up. Use or to set on the display. The function has no effect on the operation of the cooking zones.
Pause
 , or symbols can be used. to activate the function. The heat setting is lowered to 1. . The previous heat setting comes on.
Lock
 to activate the function. .
Child Safety Device
until signal sounds and the indicator comes on to activate the function.To deactivate the function for only one cooking time: Activate the hob with . comes on. Touch until signal sounds and the indicator comes off. The control bar appears. Set the heat setting within 50 seconds.You can operate the hob. When you deactivate the hob with the function is still active.
To deactivate the function permanently: Activate the hob and do not set the heat setting. Touch until signal sounds and the indicator comes off. The control bars appear. Deactivate the hob.
OffSound Control (Deactivating and activating the sounds)
Deactivate the hob first.
1. Touch for 3 seconds to activate the function. The display comes on and goes out.
2. Touch for 3 seconds. or
or  comes on.
3. Touch of the timer to choose one of the following:
- - the sounds are off
- - the sounds are on
4. Wait until the hob deactivates automatically to confirm your selection.
When the function is set to you can hear the sounds only when:
- you touch
- Minute Minder comes down
- Count Down Timer comes down
- you put something on the control panel.
Hob2Hood
It is an advanced automatic function which connects the hob to a special hood. Both the hob and the hood have an infrared signal communicator. Speed of the fan is defined automatically on the basis of the mode setting and temperature of the hottest cookware on the hob. You can also operate the fan from the hob manually.
For most of the hoods, the remote system is originally deactivated. Activate it before you use the function. For more information refer to the hood user manual.
Operating the function automatically
To operate the function automatically set the automatic mode to H1 – H6. The hob is originally set to H5. The hood reacts whenever you operate the hob. The hob recognizes the temperature of the cookware automatically and adjusts the speed of the fan.
Activating the light
You can set the hob to activate the light automatically whenever you activate the hob. To do so set the automatic mode to H1 – H6.
The light on the hood deactivates 2 minutes after deactivating the hob.

- The hob detects the boiling process and acti- vates the fan speed in accordance with the auto- matic mode.
- The hob detects the frying process and acti- vates the fan speed in accordance with the auto- matic mode.
- This mode activates the fan and the light and does not rely on the temperature.
Changing the automatic mode

- Deactivate the appliance.
- Touch for 3 seconds. The display comes on and goes off.
- Touch for 3 seconds.
- Touch a few times until comes on.
- Touch of the Timer to select an automatic mode.
When you finish cooking and deactivate the hob, the hood fan may still operate for a certain period of time. After that time the system deactivates the fan automatically and prevents you from an accidental activation of the fan for the next 30 seconds.
To operate the hood directly on the hood panel deactivate the automatic mode of the function.
Operating the fan speed manually
You can also operate the fan from the hob manually.
Touch when the hob is active. This deactivates automatic operation of the function and allows you to change the fan speed manually.
When you press , you raise the fan speed by one. When you reach an intensive level and press again, you set the fan speed to 0 which deactivates the hood fan. To start the fan again with the fan speed 1 touch .
To activate an automatic operation of the function, deactivate the hob and activate it again.
FLEXIBLE INDUCTION COOKING AREA
WARNING!
Refer to Safety chapters.
FlexiBridge function
The flexible induction cooking area consists of four sections. The sections can be combined into two cooking zones with different size, or into one large cooking area. The sides of the zones which operate together light up, and they are linked with shorter illuminated lines. You choose the combination of the sections by choosing the mode applicable to the size of the cookware you want to use. There are three modes: Standard (activated automatically when you activate the hob), Big Bridge and Max Bridge.
To set the heat setting use two left side control bars.
Switching between the modes
To switch between the modes use sensor field:

When you switch between the modes the heat setting is set back to 0.
Diameter and position of the cookware
Choose the mode applicable to the size and the shape of the cookware. The cookware should cover the selected area as much as possible. Place the cookware centrally on the selected area!

Place the cookware with the bottom diameter smaller than 160 mm centrally on a single section.

Place the cookware with the bottom diameter larger then 160 mm centrally between two sections.
FlexiBridge Standard mode
This mode is active when you activate the hob. It connects the sections into two separate cooking zones. The sides of the zones which operate together in this mode light up, and they are linked with shorter illuminated lines. You can set the heat setting for each zone separately. Use two left side control bars.

Correct cookware position:

Incorrect cookware position:

FlexiBridge Big Bridge mode
To activate the mode touch until you see the correct mode indicator . This mode connects three rear sections into one cooking zone. The front section is not connected and operates as a separate cooking zone. You can set the heat setting for each zone separately. Use two left side control bars.

Correct cookware position:
To use this mode you have to place the cookware on the three connected sections. If you use cookware smaller than two sections the control bar blinks and after 2 minutes the zone switches off.

Incorrect cookware position:

FlexiBridge Max Bridge mode
To activate the mode touch until you see the correct mode indicator . This mode connects all sections into one cooking zone. To set the heat setting use any of the two control bars on the left side.

Correct cookware position:
To use this mode you have to place the cookware on the four connected sections. If you use cookware smaller than three sections the control bar blinks and after 2 minutes the zone switches off.

Incorrect cookware position:

PowerSlide
This function allows you to adjust the temperature by moving the cookware to a different position on the induction cooking area.
The function divides the induction cooking area into three areas with different heat settings. The hob detects the position of the cookware and adjust the heat setting corresponding with the position. You can place the cookware in the front, middle or rear position. If you place the cookware in the front you get the highest heat setting. To decrease it, move the cookware to middle or rear position.

Use only one pot when you operate the function. If you want to change the heat setting, lift up the cookware and place it on a different zone. Sliding the cookware can cause scratches and discolouration of the surface.
General information:
- 160 mm is the minimum bottom diameter of the cookware for this function.
- If you place the pot in the front position
 , lights up on the control panel. The control bar displays the default heat setting
 .
. - If you place the pot in the middle position
 , lights up on the control panel. The control bar displays the default heat setting
 .
. - If you place the pot in the rear position
 , lights up on the control panel. The control bar displays the default heat setting
 .
.

- To change the default heat setting use left front control bar. You may change the default heat setting only if the function is active. You can change the heat settings for each position separately. The hob will remember your settings next time you activate the function.
Touch to activate the function. The indicator comes on and the control bar displays the default heat setting. To deactivate the function, touch .
HINTS AND TIPS
WARNING!
Refer to Safety chapters.
Cookware
For induction cooking zones a strong electro-magnetic field creates the heat in the cookware very quickly.
Use the induction cooking zones with suitable cookware.
Cookware material
- correct: cast iron, steel, enamelled steel, stainless steel, multi-layer bottom (with a correct marking from a manufacturer).
- not correct: aluminium, copper, brass, glass, ceramic, porcelain.
Cookware is suitable for an induction hob if:
- water boils very quickly on a zone set to the highest heat setting.
- a magnet pulls on to the bottom of the cookware.
The bottom of the cookware must be as thick and flat as possible. Ensure pan bases are clean and dry before placing on the hob surface.
Cookware dimensions
Induction cooking zones adapt to the dimension of the bottom of the cookware automatically.
The cooking zone efficiency is related to the diameter of the cookware. The cookware with a diameter smaller than the minimum receives only a part of the power generated by the cooking zone. www.aeg.com
Refer to "Technical data".
The noises during operation
If you can hear:
- crack noise: cookware is made of different materials (a sandwich construction).
- whistle sound: you use a cooking zone with a high power level and the cookware is made of different materials (a sandwich construction).
- humming: you use a high power level. clicking: electric switching occurs.
- hissing, buzzing: the fan operates.
The noises are normal and do not indicate any malfunction.
ko Timer (Eco Timer)
To save energy, the heater of the cooking zone deactivates before the count down timer sounds. The difference in the operation time depends on the heat setting level and the length of the cooking operation.
Examples of cooking applications
The correlation between the heat setting of a zone and its consumption of power is not linear. When you increase the heat setting, it is not proportional to the increase of the consumption of power. It means that a cooking zone with the medium heat setting uses less than a half of its power.
The data in the table is for guidance only.


Hints and Tips for Hob2Hood
When you operate the hob with the function:
- Protect the hood panel from direct sunlight.
- Do not spot halogen light on the hood panel.
- Do not cover the hob control panel.
- Do not interrupt the signal between the hob and the hood (e.g. with the hand, a cookware handle or a tall pot). See the picture.
The hood in the picture is only exemplary.
Other remotely controlled appliances may block the signal. Do not use any remotely controlled appliances at the time when you use the function on the hob.
Cooker hoods with the Hob2Hood function
To find the full range of cooker hoods which work with this function refer to our consumer website. The AEG cooker hoods that work with this function must have the symbol

CARE AND CLEANING
WARNING!
Refer to Safety chapters.
General information
- Clean the hob after each use.
- Always use cookware with a clean base.
- Scratches or dark stains on the surface have no effect on how the hob operates.
- Use a special cleaner suitable for the surface of the hob.
- Use a special scraper for the glass.
The printing on the flexible induction cooking area may become dirty or change its colour from sliding the cookware. You can clean the area in a standard way.
Cleaning the hob
- Remove immediately: melted plastic, plastic foil, sugar and food with sugar, otherwise, the dirt can cause damage to the hob. Take care to avoid burns. Use a special hob scraper on the glass surface at an acute angle and move the blade on the surface.
- Remove when the hob is sufficiently cool: limescale rings, water rings, fat stains, shiny metallic discoloration. Clean the hob with a moist cloth and a non-abrasive detergent. After cleaning, wipe the hob dry with a soft cloth.
- Remove shiny metallic discoloration: use a solution of water with vinegar and clean the glass surface with a cloth.
TROUBLESHOOTING
WARNING!
Refer to Safety chapters.
What to do if...
You cannot activate or oper- ate the hob.
The hob is not connected to an electrical supply or it is connected incorrectly.
- Check if the hob is correctly connected to the electrical supply. Refer to the connec- tion diagram.
The fuse is blown.
- Make sure that the fuse is the cause of the malfunction. If the fuse is blown again and again, contact a quali- fied electrician.
You do not set the heat set- ting for 50 seconds.
- Activate the hob again and set the heat setting in less than 50 seconds.
You touched 2 or more sen- sor fields at the same time.
- Touch only one sensor field.
Pause operates.
- Refer to "Daily use".
There is water or fat stains on the control panel.
- Clean the control panel.
You cannot select the maxi- mum heat setting for one of the cooking zones.
The other zones consume the maximum available pow- er. Your hob works properly.
- Reduce the heat setting of the other cooking zones connected to the same phase.
- Refer to "Power manage- ment".
An acoustic signal sounds and the hob deactivates. An acoustic signal sounds when the hob is deactivated.
You put something on one or more sensor fields.
- Remove the object from the sensor fields.
The hob deactivates.
You put something on the sensor field .
- Remove the object from the sensor field.
Residual heat indicator does not come on.
The zone is not hot because it operated only for a short time or the sensor is dam- aged.
- If the zone operated suffi- ciently long to be hot, speak to an Authorised Service Centre.
Hob2Hood does not work.
You covered the control panel.
- Remove the object from the control panel.
You use a very tall pot which blocks the signal.
- Use a smaller pot, change the cooking zone or operate the hood manually.
The sensor fields become hot.
The cookware is too large or you put it too near to the controls.
- Put large cookware on the rear zones, if possible.
There is no sound when you touch the panel sensor fields.
The sounds are deactivated.
- Activate the sounds. Refer to Daily use".
The flexible induction cook- ing area does not heat up the cookware.
The cookware is in a wrong position on the flexible in- duction cooking area.
- Place the cookware in the correct position on the flexi- ble induction cooking area. The position of the cook- ware depends on the activa- ted function or function mode. Refer to "Flexible in- duction cooking area".
The diameter of the bottom of the cookware is incorrect for the activated function or function mode.
- Use cookware with a diame- ter applicable to the activa- ted function or function mode. Use cookware with a diameter smaller than 160 mm on a single section of the flexible induction cook- ing area. Refer to "Flexible induction cooking area".
comes on.
Child Safety Device or Lock operates.
- Refer to "Daily use".
The control bar blinks.
There is no cookware on the zone or the zone is not fully covered.
- Put cookware on the zone so that it fully covers the cook- ing zone.
The cookware is unsuitable.
- Use suitable cookware. Refer to "Hints and tips".
The diameter of the bottom of the cookware is too small for the zone.
- Use cookware with correct dimensions. Refer to "Tech- nical data".
FlexiBridge operates. One or more sections of the func- tion mode which operates are not covered by the cook- ware.
- Place the cookware on the correct number of sections of the function mode which operates or change the func- tion mode. Refer to "Flexi- ble induction cooking area".
 comes on.
PowerSlide operates. Two pots are placed on the flexi- ble induction cooking area.
- Use only one pot. Refer to "Flexible induction cooking area".
 and a number come on.
There is an error in the hob.
- Deactivate the hob and acti- vate it again after 30 sec- onds. If comes on again, disconnect the hob from the electrical supply. After 30 seconds, connect the hob again. If the problem contin- ues, speak to an Authorised Service Centre.
You can hear a constant beep noise.
The electrical connection is incorrect.
- Disconnect the hob from the electrical supply. Ask a quali- fied electrician to check the installation.
If you cannot find a solution...
If you cannot find a solution to the problem yourself, contact your dealer or an Authorised Service Centre. Give the data from the rating plate. Make sure, you operated the hob correctly. If not the servicing by a service technician or dealer will not be free of charge, also during the warranty period. The instructions about the Service Centre and conditions of guarantee are in the guarantee booklet.
TECHNICAL DATA
Cooking zones specification

The power of the cooking zones can be different in some small range from the data in the table. It changes with the material and dimensions of the cookware. For optimal cooking results use cookware no larger than the diameter in the table.
ENERGY EFFICIENCY
Product information according to EU 66/2014 valid for EU market only


EN 60350-2 - Household electric cooking appliances - Part 2: Hobs - Methods for measuring performance
Energy saving
You can save energy during everyday cooking if you follow below hints.
- When you heat up water, use only the amount you need.
- If it is possible, always put the lids on the cookware.
- Before you activate the cooking zone put the cookware on it.
- Put the smaller cookware on the smaller cooking zones.
- Put the cookware directly in the centre of the cooking zone.
- Use the residual heat to keep the food warm or to melt it.
ENVIRONMENTAL CONCERNS
Recycle materials with the symbol . Put the packaging in relevant containers to recycle it. Help protect the environment and human health by recycling waste of electrical and electronic appliances. Do not dispose of appliances marked with the symbol with the household waste. Return the product to your local recycling facility or contact your municipal office.