User Guide Coffee Maker
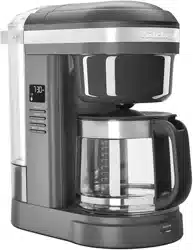
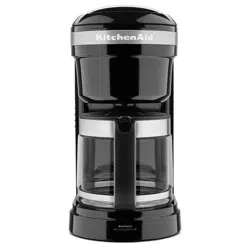
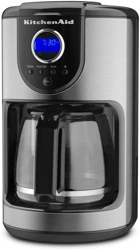
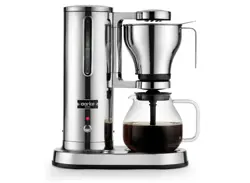
PARTS AND FEATURES
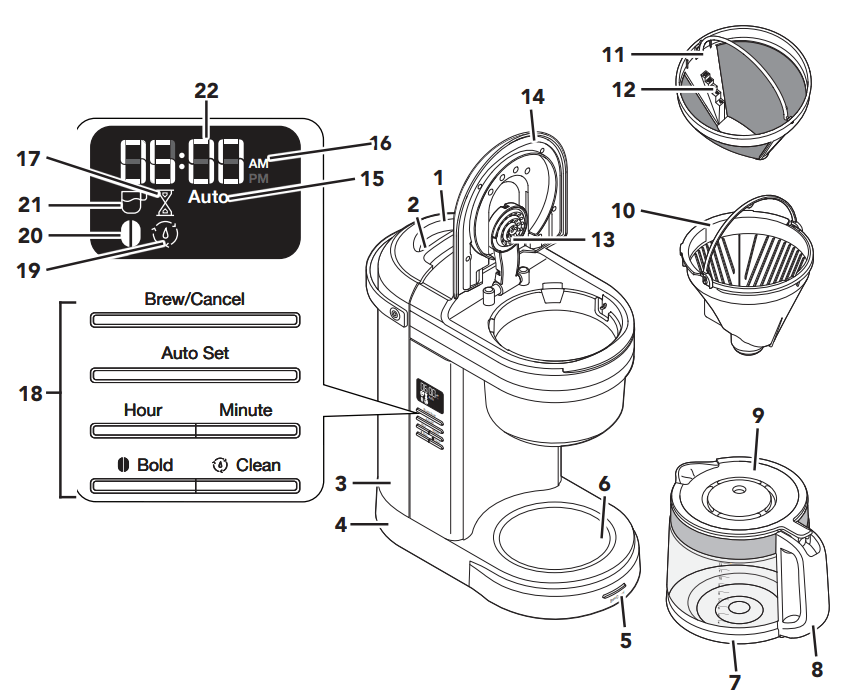
- Water Tank Lid
- Water Tank Handle
- Water Tank
- Cord Storage in Base (not shown)
- Brew/Cancel Button
- Warming Plate
- Glass Carafe
- Carafe Handle
- Carafe Lid
- Brew Basket
- Gold Tone Filter
- Dosage Ladder
- Showerhead
- Brew Basket Lid
- Auto Icon
- A.M./P.M. Indicator
- Remaining Keep Warm Time Icon
- Control Panel
- Clean Icon
- Bold Icon
- Brew Icon
- Clock
NOTE: Default measurement for 1 cup = approximately 5 oz (147 ml).
GETTING STARTED
SETTING THE CLOCK
NOTE: When the Coffee Maker is first plugged in or when power is restored after an interruption, the display will initially show 12:00 AM.

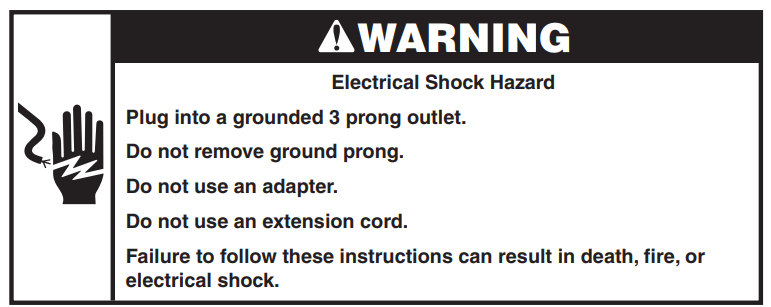
Cord is stored in base. If needed, gently pull cord outwards. Plug into a grounded 3 prong outlet.
To set the hour: Press Hour.
The hour digits will change with each press; or press and hold to scroll rapidly

To set the minutes: Press Minute.
The minutes digits will change with each press; or press and hold to scroll rapidly.
To save the current displayed time and exit clock setup: Press any other button or do not press any button for 10 seconds.
SETTING THE BREW STRENGTH
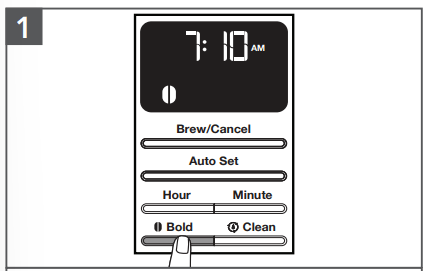
To switch between Regular and Bold brew strengths: Press the Bold button.
NOTE: Regular is the default setting.
TIP: While brewing small batches (2-4 cups), using the “Bold Setting” is recommended.
FILLING WATER FOR BREWING
TIP: Brew 2 Carafe of fresh, cool water and discard before brewing the first Carafe of coffee.
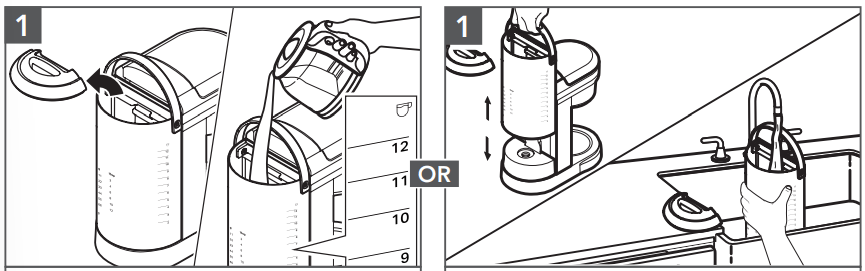
Pour fresh water in the Water Tank. Use the level markings. Then, close the lid properly. OR
Lift the Water Tank up gently. Pour fresh water in the Water Tank. Place the Water Tank back in position properly
NOTE: Fill the Water Tank with only the amount of water needed to brew your desired number of cups. If you put in 12 cups of water, the Coffee Maker will brew all 12 cups.
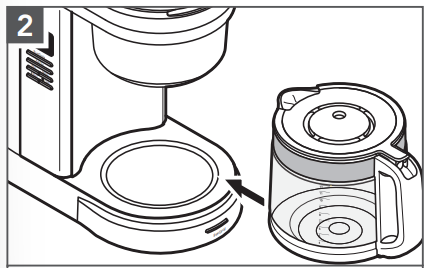
Place the Carafe in the Coffee Maker. Make sure the Carafe lid is in place and bottom of the Carafe is fully seated.
PRODUCT USAGE

Raise the Brew Basket lid and remove the Brew Basket.
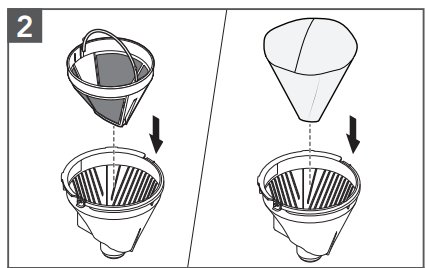
Insert the Gold Tone permanent filter or cone paper filter into the Brew Basket.
TIP: The coffee filter can also be inserted and coffee grounds added with or without removing the Brew Basket from the Coffee Maker.
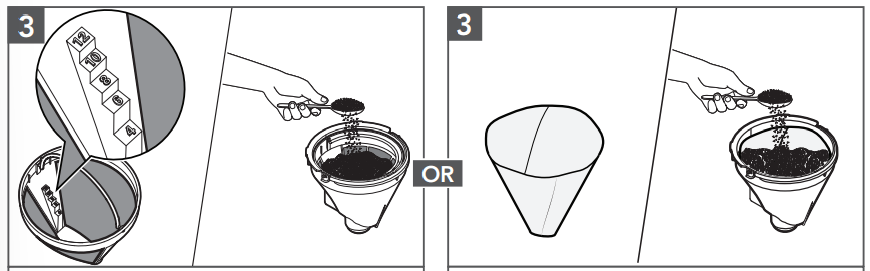
Gold tone permanent filter: Add coffee grounds. Use the “Dosage Ladder”. For example: If you need 12 cups of Brew Coffee, then add coffee grounds till 12 cups scale level. OR
Cone paper coffee filter: Add desired coffee grounds. Use the “coffee dosage chart” on the back of the Water Tank as a guide for how much coffee grounds to use. Pre-wetting the paper is not required.
IMPORTANT: Do not use both types of filters at the same time. Using both filters might cause water and coffee to overflow the Brew Basket
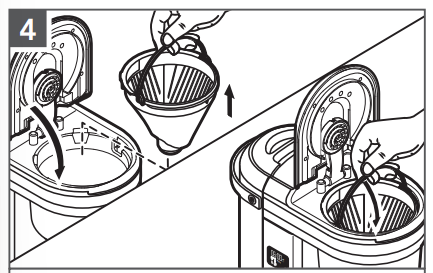
Place the basket into the Coffee Maker aligning with the slot. Be sure the brew basket lid is fully closed before brewing.
NOTE: Use a medium grind appropriate for automatic Drip Coffee Makers. Too fine grind will produce bitterness and may clog the coffee filter.
NOTE: Do not operate the Coffee Maker without the brew basket in place.
PROGRAMMING THE AUTO SET FEATURE
NOTE: When the Coffee Maker is first plugged in or when power is restored after an interruption, the display will initially show 12:00 A.M.
IMPORTANT: Set the correct time as per the instructions in “Setting the clock” before using the Auto Set feature.

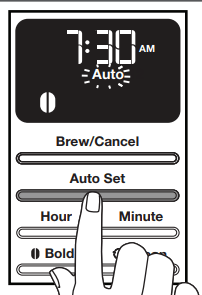
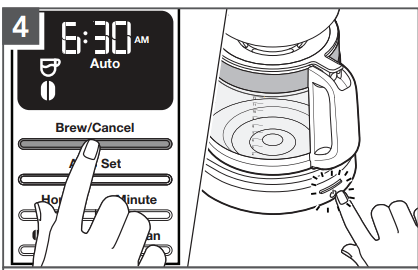
Press the Auto Set button one time. The Auto indicator light will flash and the time display will change to the currently set Auto Set time (12:00 A.M. is the default time).
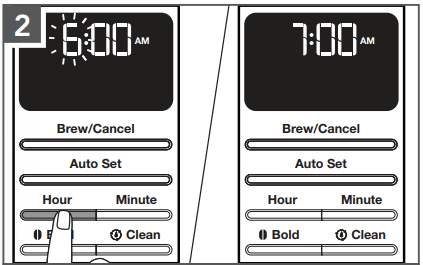
To set the time the Coffee Maker should begin brewing: Press the Hour button. The hour digits will change with each press; or press and hold to scroll rapidly.
Next, press the Minute button. The hour setting will stay solid and the minute setting will begin to blink.
To save the Auto set time and exit set-up: Press any other button or do not press any button for 10 seconds. The Auto indicator will remain lit and the time display will go back to the current time.
TIP: To cancel the Auto Set time after programming is complete: Press Auto Set button again; or press the Brew/Cancel button
NOTE: Default standard brewing cycle time for a full Carafe (12 cups) is approximately 10-minutes.
USING THE PREVIOUSLY PROGRAMMED AUTO SET TIME
These steps can be followed to save the Auto Set time after following the steps in the “Programming the Auto Set feature” section.
1. Press the Auto Set button. The Auto indicator will flash and the time display will show the previously set Auto time.
2. To save the current displayed time and exit Auto Set: Wait for 10 seconds, or press any button. The Auto indicator will remain lit and the time display will go back to the current time.
BREWING COFFEE
TIP: Brew 2 pots of fresh, cool water and discard before brewing the first pot of coffee.
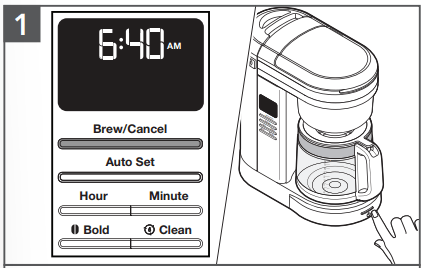
Press any of the Brew/Cancel buttons provided on side or on front to begin brewing coffee.
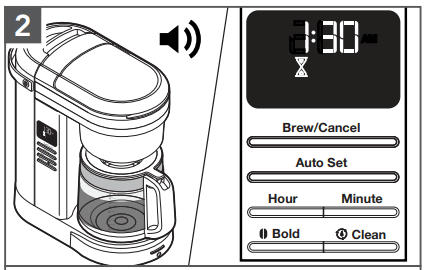
The Coffee Maker will beep 3 times when the Brew cycle is complete. Then, 2-hour Warm mode will start.
NOTE: Default Standard Brewing cycle time for a full pot (12 cups) is approximately 10-minutes.
IMPORTANT: Allow the Coffee Maker to cool for 5 minutes before starting next brew cycle
After Warm mode end, the Coffee Maker will automatically turn off. To Cancel Brew cycle or Warm mode, press the Brew/Cancel button once.
TIP: Opening the Brew Basket while coffee is brewing will interrupt the brew process and impair the flavor.
PAUSE AND POUR FEATURE
The “Pause and pour” feature enables you to remove the Carafe and pour a cup of coffee before brewing is finished. When the Carafe is removed, a special valve stops the flow of coffee from the Brew Basket. However, brewing does not stop.
Make sure to place the Carafe back in the place within 25 seconds to avoid the overflow of the water and coffee grounds from the Brew Basket.
CARE AND CLEANING
NOTE: Unplug and allow the Coffee Maker to cool down before cleaning.
|

|
|
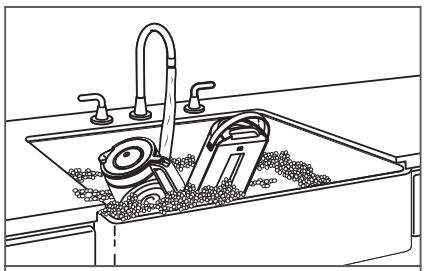
| Dishwasher-safe parts, top rack only: Brew Basket and Gold Tone Permanent filter. Wipe the Showerhead with a damp cloth to remove any coffee splashes. |
Wash by hand in warm and soapy water. Dry thoroughly: Carafe and Water Tank. |
REMOVING MINERAL DEPOSITS WITH VINEGAR
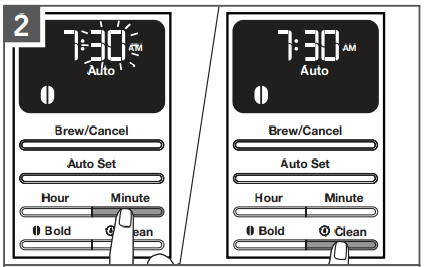
Mineral deposits (scale) from water will build up in the Coffee Maker over the time and impair brewing efficiency and coffee quality. The “Clean icon” will flash in display after completing 100 brew cycles. Then, it is time to descale the Coffee Maker.
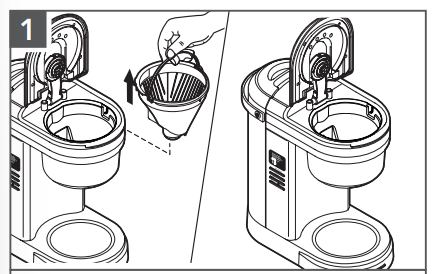
Empty the Brew Basket
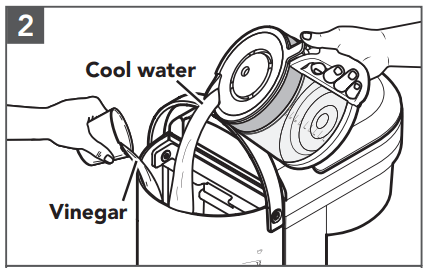
Fill the Water Tank with 6 cup vinegar and 6 cup cool water.

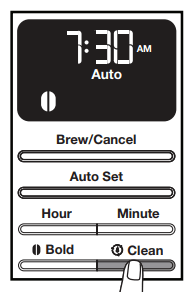
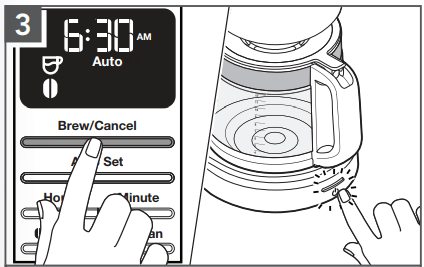
Press the Clean button. Then, press the Brew/Cancel button to begin the Clean cycle. After the Clean cycle ends (approximately 30 minutes), 3 beeps will sound, and the “Clean icon” will turn off.
Run 2-3 fresh, cool water-only cycles after the Clean cycle is complete.
TROUBLESHOOTING GUIDE
| Problem |
Solution |
| If the display is not illuminated: |
Plug into a grounded outlet. If you have a circuit breaker box, make sure the circuit is closed. |
| If only a portion of the water added to the Coffee Maker actually brews: |
The Coffee Maker requires immediate descaling. Please refer to the “Care and cleaning” section. |
| If you hear 3 rapid tones: |
There is no water in the Water Tank. See the “Filling water for brewing” section |
| If “Er1” flashes on the display and you hear 1 tone: |
A button may be jammed. Unplug and press each button several times. Plug the Coffee Maker. If “Er1” appears again on the display, repeat this procedure. |
| If coffee overflows the Brew Basket: |
The Brew Basket is not correctly in place. See the “Assembly Of Brew Basket” section. |
| Too much coffee ground was placed into the Brew Basket. |
| Used both Gold tone filter and paper filter together |
| If water exits from the back of the Coffee Maker: |
Too much water was poured into the Water Tank. |
| If the problem is not due to one of the above items: |
See the “Arranging for Service” chapter in the “Warranty and Service” section. Do not return the Espresso Machine to the retailer as they do not provide service. |