Loading ...
Loading ...
Loading ...
EN
4
INSTALLATION INSTRUCTIONS:
The hood is supplied with all the necessary
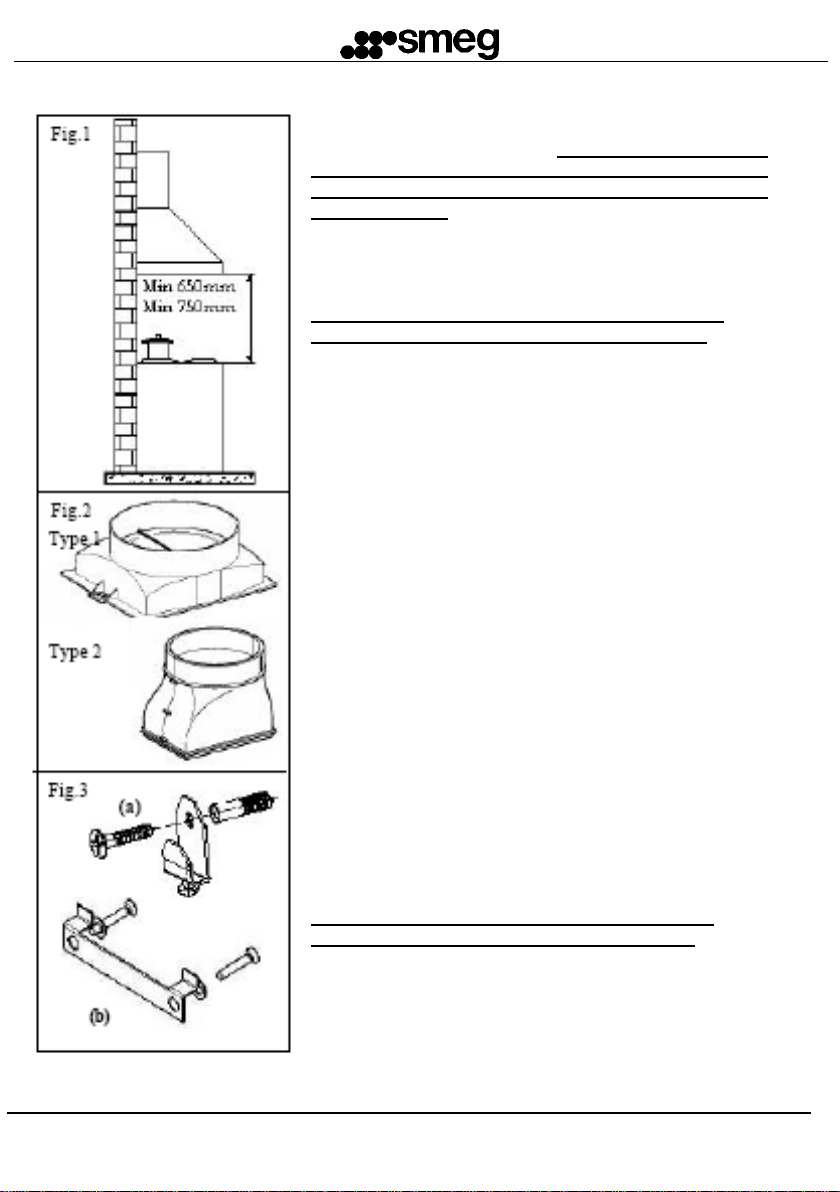
accessories for installation. The minimum distance
between the cooker and the lower part of the hood
must be 750 mm for gas cookers and 650 mm for
electric cookers (Fig.1). The hood is supplied with a
motor intake (Fig 2). If it has not been assembled by
the manufacturer, you can assemble it using the
supplied screws (for type 1) or pushing (for type 2)
If the motor intake is equipped with a non-return
valve, make sure it opens and closes perfectly.
The following instructions will assist installation:
a) The hood should be centred with respect to the
cooker.
b) The hood is supplied with two supports/hooks (a)
(Fig 3) or bracket (b) that need to be fixed to the
wall by means of wall anchors . The L1 holes for
these supports are on the back of the hood (fig.4)
c) Remove the anti-grease filters, put the hood on
the wall and mark the position of the holes for the
supports/hooks.
d) Drill the two previously marked holes after
removing the hood from the wall.
e) Fix the two supports/hooks to the wall.
f) Mark the L2 holes on the wall to fix the hood
safely. (fig. 4) Drill and put the anchors in the
holes.
g) Hang the hood on to the supports/hooks (fig. 5)
and level by means of the adjusting screw
(fig.3).
l) Fix the hood safe by tightening both wall anchors.
Ducted mode or Recirculation mode installation:
Ducted mode:
In the ducted mode, connect the motor outlet to the
fumes outlet duct not less than 120mm diameter.
Warning: if the hood is equipped with an active
carbon filter, it must be removed (see page7)
Loading ...
Loading ...
Loading ...