Loading ...
Loading ...
Loading ...
Installation
16
ENGLISH
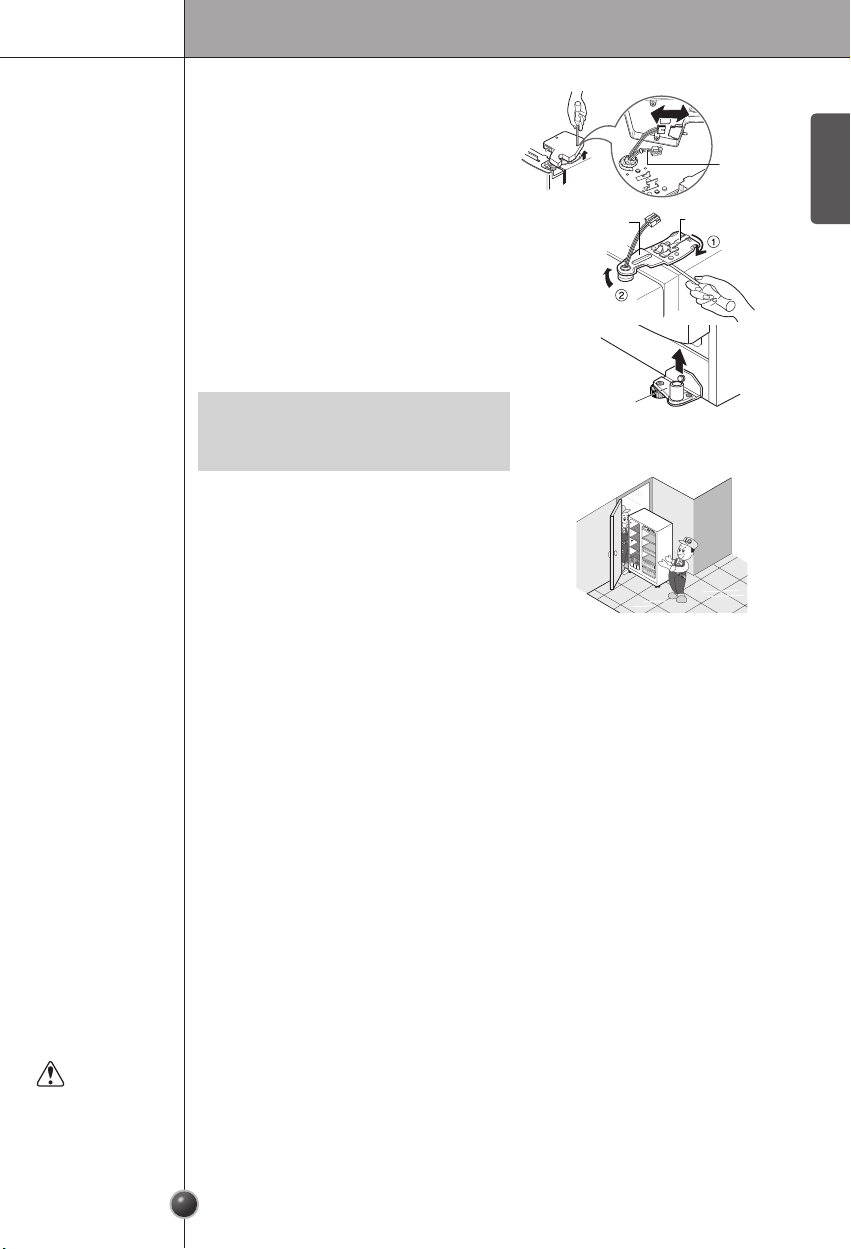
Remove the
refrigerator
door
1) Loosen the hinge cover screws and
remove the cover. Remove connection
wire.
2) Remove keeper by rotating it clockwise (c)
and then remove the upper hinge by lifting
it up (d ).
3) Remove the refrigerator compartment door
by lifting it up.
•
Do not remove the grease on the surface of
gasket or hinge.
NOTE
Lower hinge
Connection
wires
Keeper
Upper
hinge
Move the refrigerator laterally through the
access door as shown in the right figure.
Move the
refrigerator
1
2
3
4
5
Ma
x
FR
Z
TEMP
REF
TEMP
M
i
n
5
4
3
2
1
Ma
x
Door replacement
Mount them in the reverse sequence of removal after they pass through the
access door.
Connect to potable water supply only.
Refer to instructions with water filter kit for installation.
IMPORTANT : Use only new hose-sets supplied whit the appliance and do not
reuse old hose-sets.
Water supply installation
Automatic icemaker operation needs water pressure of 21~121 psi
(1.5~8.5 kgf/cm
2
) (That is, a paper cup (6 oz. or 180 cc) will be fully filled within
3 seconds.)
If water pressure does not reach the rating 21 psi (1.5 kgf/cm
2
) or below, it is
necessary to purchase a separate pressure pump for normal automatic icemaking
and cool water feed.
Keep the total length of the feed water pipe tube within 26 ft (8 m). Be careful for
the tube to avoid being kinked. If the tube is 26 ft (8 m) or longer it may cause
trouble in water feed.
Install the water supply line where it will not be affected by heat.
Before
installation
WARNING
Loading ...
Loading ...
Loading ...