Loading ...
Loading ...
Loading ...
8
INITIAL INSTALLATION
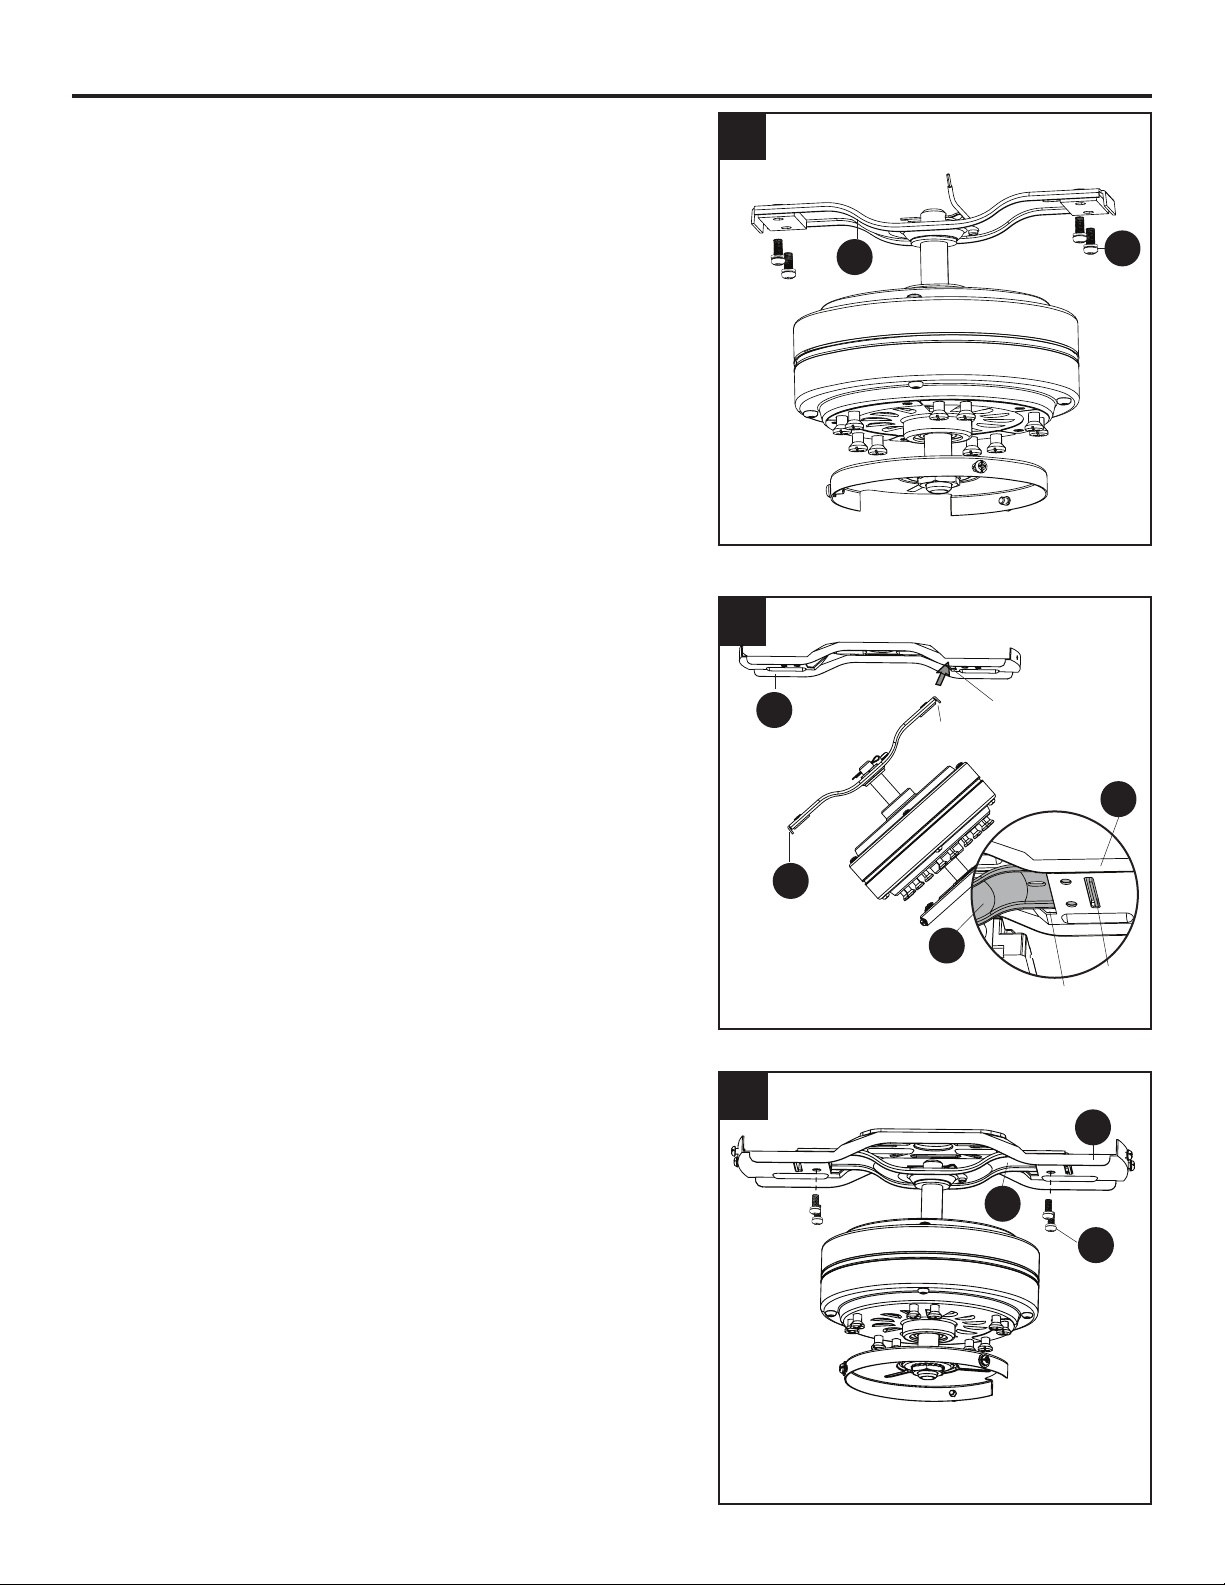
5. Remove the lower bracket screws (M) from
underneath the lower mounting bracket (D).
Note: Make sure to keep loose hardware separate to
avoid confusion during installation.
6. Place one tab of the lower mounting bracket (D) into a
slot in the upper mounting bracket (B). Then slide the
second tab of the lower mounting bracket (D) into the
second slot on the upper mounting bracket (B) until all
four holes are in alignment.
7. Re-install the previously removed lower bracket
screws (M) to secure the lower mounting bracket (D)
and the upper mounting bracket (B).
5
6
5
M
D
7
M
D
B
B
B
D
Tab
Tab
Slot
Slot
D
Loading ...
Loading ...
Loading ...