Loading ...
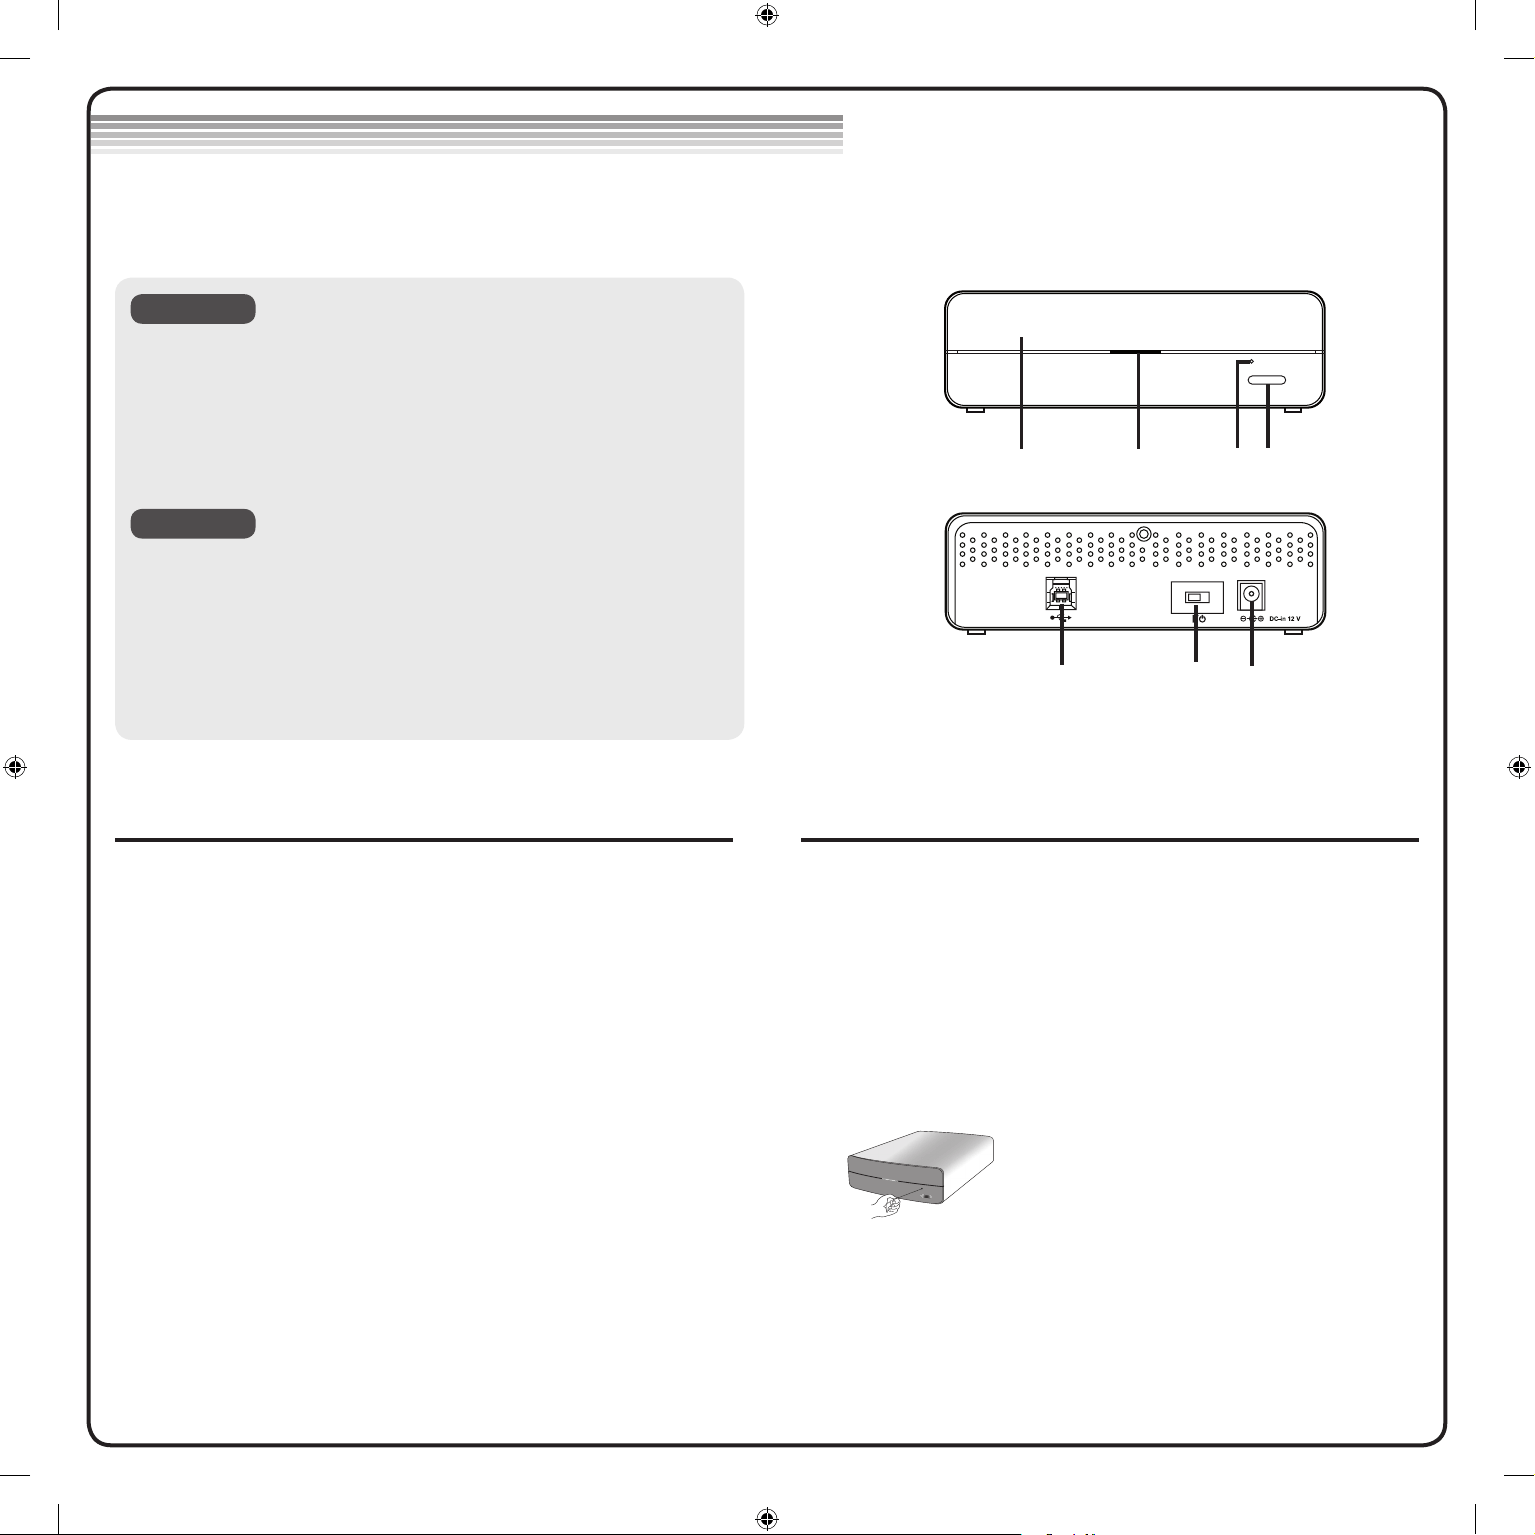
Location and function of controls
This following is the general gure of the design of the drive.
The drive’s appearance and specications may change without prior notice.
Remember - AC adapter must be connected.
Make sure the power is turned on.
Loading a disc
1. Touch the Eject Button to open the Disc tray.
2. Load a disc. (Label facing up.)
3. Close the Disc tray.
Ejecting a disc
1. Touch the Open/Close Button to open the Disc tray.
2. Removing the disc.
3. Close the Disc tray after removing the disc.
This drive has a feature that allows the CD to be ejected manually in case
of a drive failure or a power outage.
NOTE: Don’t use this feature except in an emergency.
1) Turn the power switch OFF.
2) Poke a ne-tipped object (such as a straightened heavy duty paper clip)
into the small hole above the eject button. The front door will pop open
and the disk tray will come partway out.
3) Pull the front door to open it all the way, then grip the disc tray
between thumb and forenger and gently pull it straight out.
* If you cannot get a good grip on the disc tray with your ngers, use a
steel binder clip or spring clamp to pull it out.
NOTE: Use this feature for an emergency
purpose only. Using it excessively will
cause malfunction.
Front View
Rear View
1. Disc Tray
2. Drive activity indicator (LED)
3. Emergency Eject Hole
4. Open/Close button
1. USB Connector
This connector is used to connect to the USB cable.
2. Power Switch
Use this switch to turn the drive on and off.
3. Power Connector
This connector is used to connect to the AC Power adapter cord.
1
2 43
3
NOTES
1
2
1
2 43
3
NOTES
1
2
Loading and ejecting a disc Emergency Eject
Loading ...
Loading ...