Loading ...
Loading ...
Loading ...
7
Installing the Valves (Continued)
Most valves have a flush mode which allows a little extra water through the valve to clean it out. To
flush valve to clear debris: Turn the bleed screw counter-clockwise ONLY 1 turn. Flush one minute
and turn clockwise to close. Test and flush each line before sprinklers are attached.
How to Operate
Several models of Rain Bird 24 Volt valves are available for home use. Minimum current require-
ments for opening the smaller valves is .30 amps and for holding the valve open is .19 amps. Larger
valve models have slightly higher requirements. All Rain Bird valves are designed to work with Rain
Bird controllers and other controllers that have a power output sufficient to activate the valve. Your
Rain Bird valve offers some simple features you should be familiar with. Note: Some valves have
only part of these features.
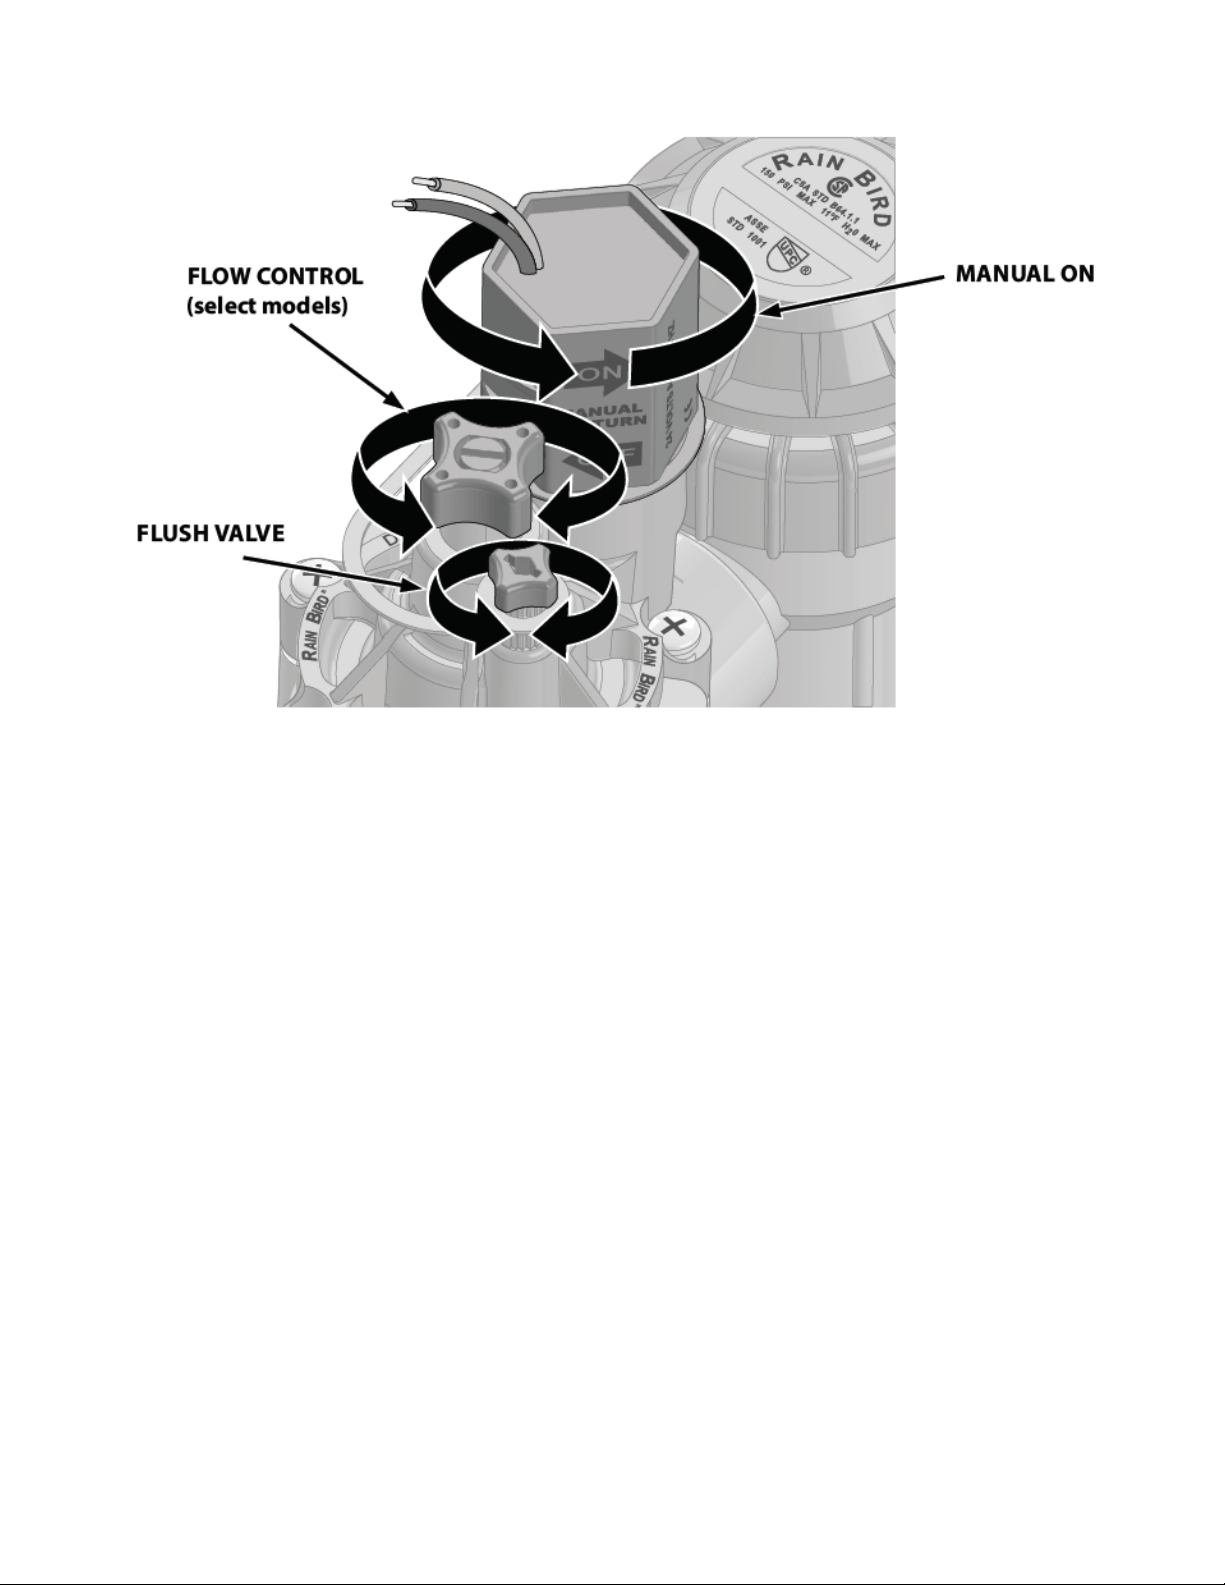
See the diagram above for information on flushing the valves.
a. Flow control - Regulates the amount of water passing through the valve. Does not turn on or off
the valve. (Not available on all models.)
b. Flush Valve / Manual bleed - Turns the valve on manually by "bleeding" water off of the dia-
phragm. External bleed valve models have a knob or screw to turn and the water sprays out of the
top of the valve.
c. Manual On/Off - Turn solenoid 1/4 turn counterclockwise to turn valve on manually. Do not turn
past 1/4 turn or the Solenoid may come loose and release pressurized water.
Loading ...
Loading ...
Loading ...