Loading ...
2
c
/
c
25
5
/
16
"
(64.3 cm)
24"(64.3cm)Max.
23
5
/
8
"(60cm)Min.
c
/
c
12
21
/
32
"
(32.15cm)
Figure1
Important Notes to the Installer
1. Readallinstructionscontainedintheseinstallation
instructionsbeforeinstallingappliance.
2. Removeallpackingmaterialfromappliancebefore
connectingtheelectricalsupply.
3. Observeallgoverningcodesandordinances.
4. Besuretoleavetheseinstructionswiththe
consumer.
Important Note to the Consumer
Keeptheseinstructionsforfuturereference.
IMPORTANT SAFETY
INSTRUCTIONS
• Besureyourapplianceisinstalledandplugged
intoa120Voltgroundedoutlet.
• Thisappliancemustbeelectricallygroundedin
accordance with the National Electrical Code
ANSI/NFPA No. 70—latest edition in the United
States, or CSA C22.1, Part 1 in Canada, and local
code requirements.
Tools You Will Need
Phillips®Screwdriver,
Pencil
RulerorTapeMeasureandStraight-edge
HandSaworSaberSaw
SpiritLevel
Warm & Serve Drawer Installation
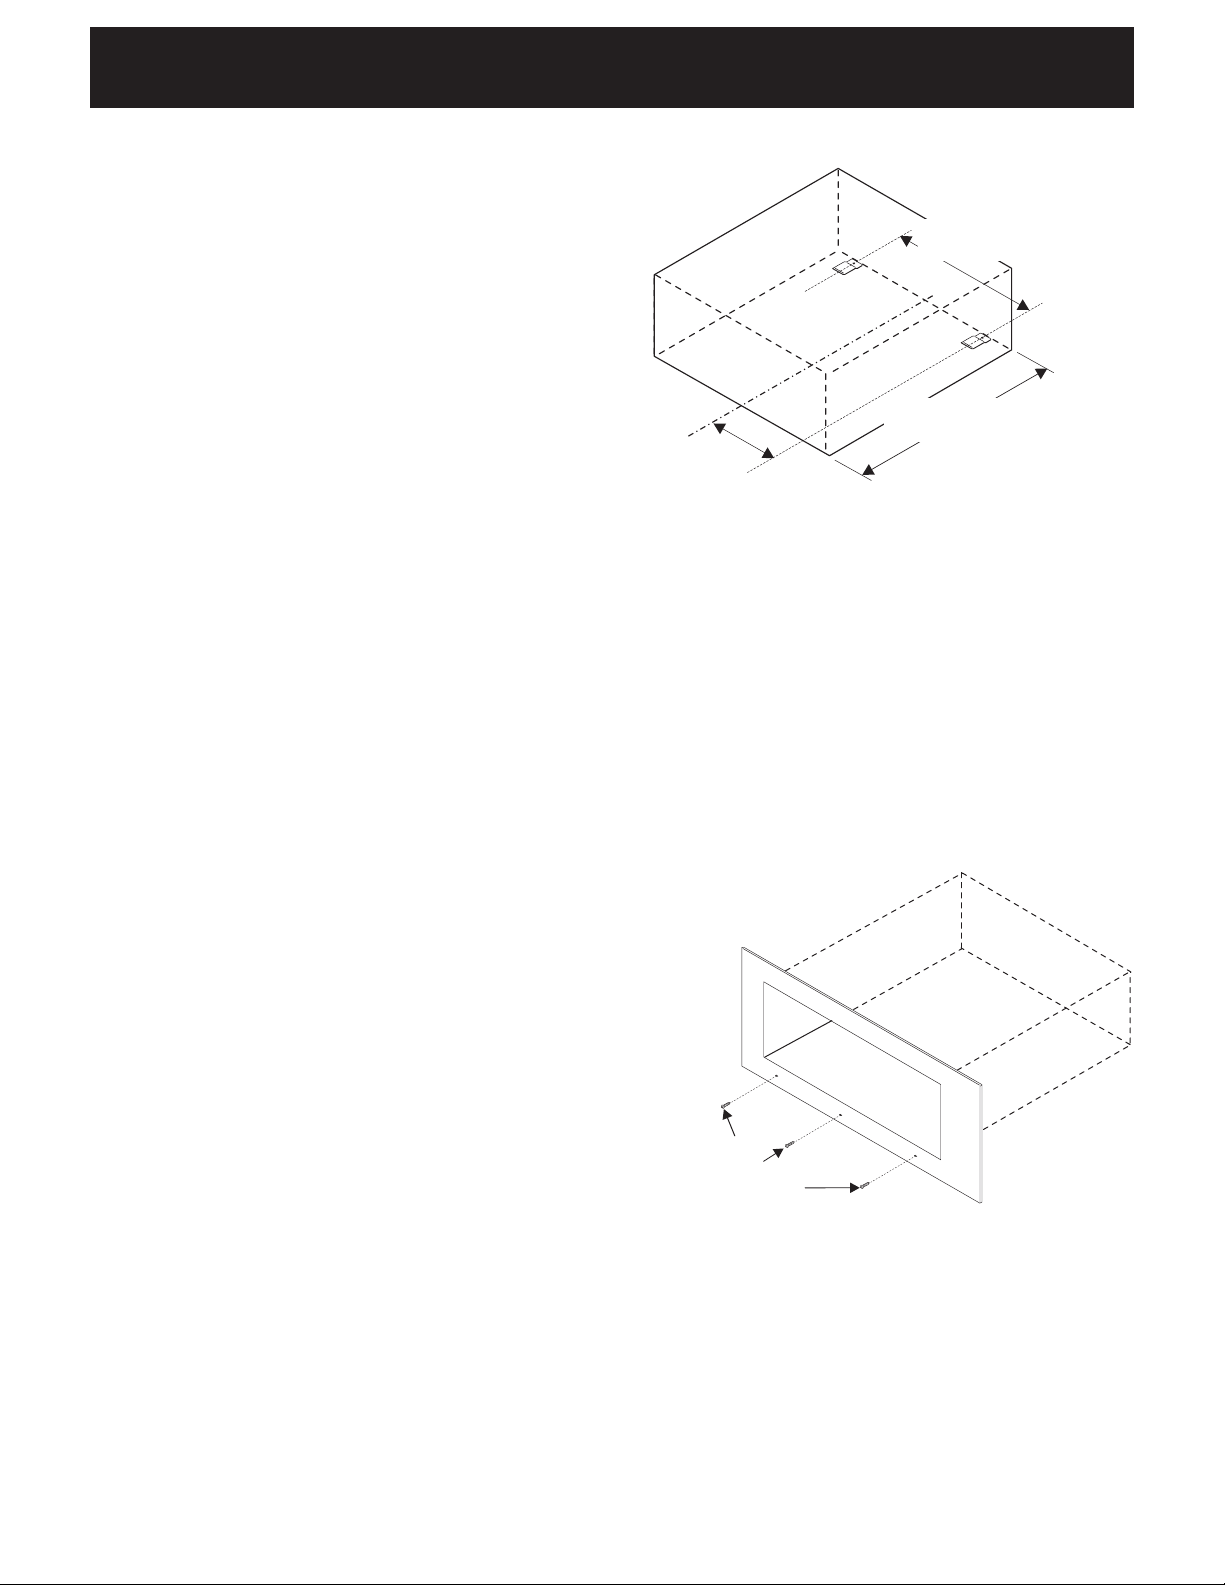
1.Locatethe2anti-tipbracketssuppliedasshownin
gure1.
Figure2
Usescrews
suppliedtoattach
drawertofrontof
cabinet.
WARM & SERVE DRAWER INSTALLATION INSTRUCTIONS
2.Slidedrawerintocutoutopeninguntilfrontframeof
drawerisushagainstcabinet.Becarefulnottopinch
electricalcord.
3.RemovethedrawerasinstructedintheUse&Care
Guideandsecuredrawerhousingtocabinetusingthe
3nickel-platedscrewssupplied(seeFigure2).Donot
overtightenscrews.
4.The60"(152cm)appliancepowercordcannowbe
connectedintothe120Voltoutlet.
5.Proceedwithmountingbuilt-inovenabovethe
drawer(ifapplicable).Followinstallationinstructions
providedwithbuilt-inoven.Makesuretouseanti-tip
bracketssuppliedwiththebuilt-inoven.
Loading ...
Loading ...
Loading ...