Loading ...
Loading ...
Loading ...
Page:
5
User Manual:
2
2.1 Location
Whenselectingapositionforyourunityoushouldmakesurethefloorisflatandfirm,andthe
roomiswellventilated.Avoidlocatingyourunitnearaheatsource,e.g.cooker,boilerorradiator.
Alsoavoiddirectsunlightas it mayincrease the electricalconsumption. Extreme cold ambient
temperaturesmayalsocausetheunitnottoperformproperly.Thisunitisnotdesignedforusein
agarageoroutdoorinstallation.Donotdrapetheunitwithanycovering.
Wheninstallingtheunit,ensurethat20cmoffreespaceisleftatbothsides,15cmattherear
and20cmatthetopoftheunit.Thiswillallowcoldairtocirculatearoundthewinecoolerand
improve theefficiencyofthecoolingprocess.The doorcanbeopenedtotherightortheleft,
dependingonwhatbettersuitsthelocation.Pleaseensurethereisadequatespaceforthedoor
tofullyopen.
2.2 ReversingtheDoorSwing
ToolsRequired:Phillipsstylescrewdriver/Flatblatedscrewdriver/Hexagonalspanner
◆ If you want to have the door swing reversed, we recommend that you contact a
qualifiedtechnician.Youshouldonlytrytoreversethedooryourselfifyoubelievethat
youarequalifiedtodoso.
◆ Ensuretheunitisunpluggedandempty.
◆ Adjustthetwolevellingfeettotheirhighestposition.
◆ To takethedoorofitisnecessarytotilttheunitbackwards.Youshouldresttheuniton
somethingsolidsothatitwillnotslipduringthedoorreversingprocess.
◆ Allpartsremovedmustbesavedtodothereinstallationofthedoor.
◆ Donotlaytheunitfatasthismaydamagethecoolantsystem.
◆ Werecommendthat2peoplehandletheunitduringassembly.
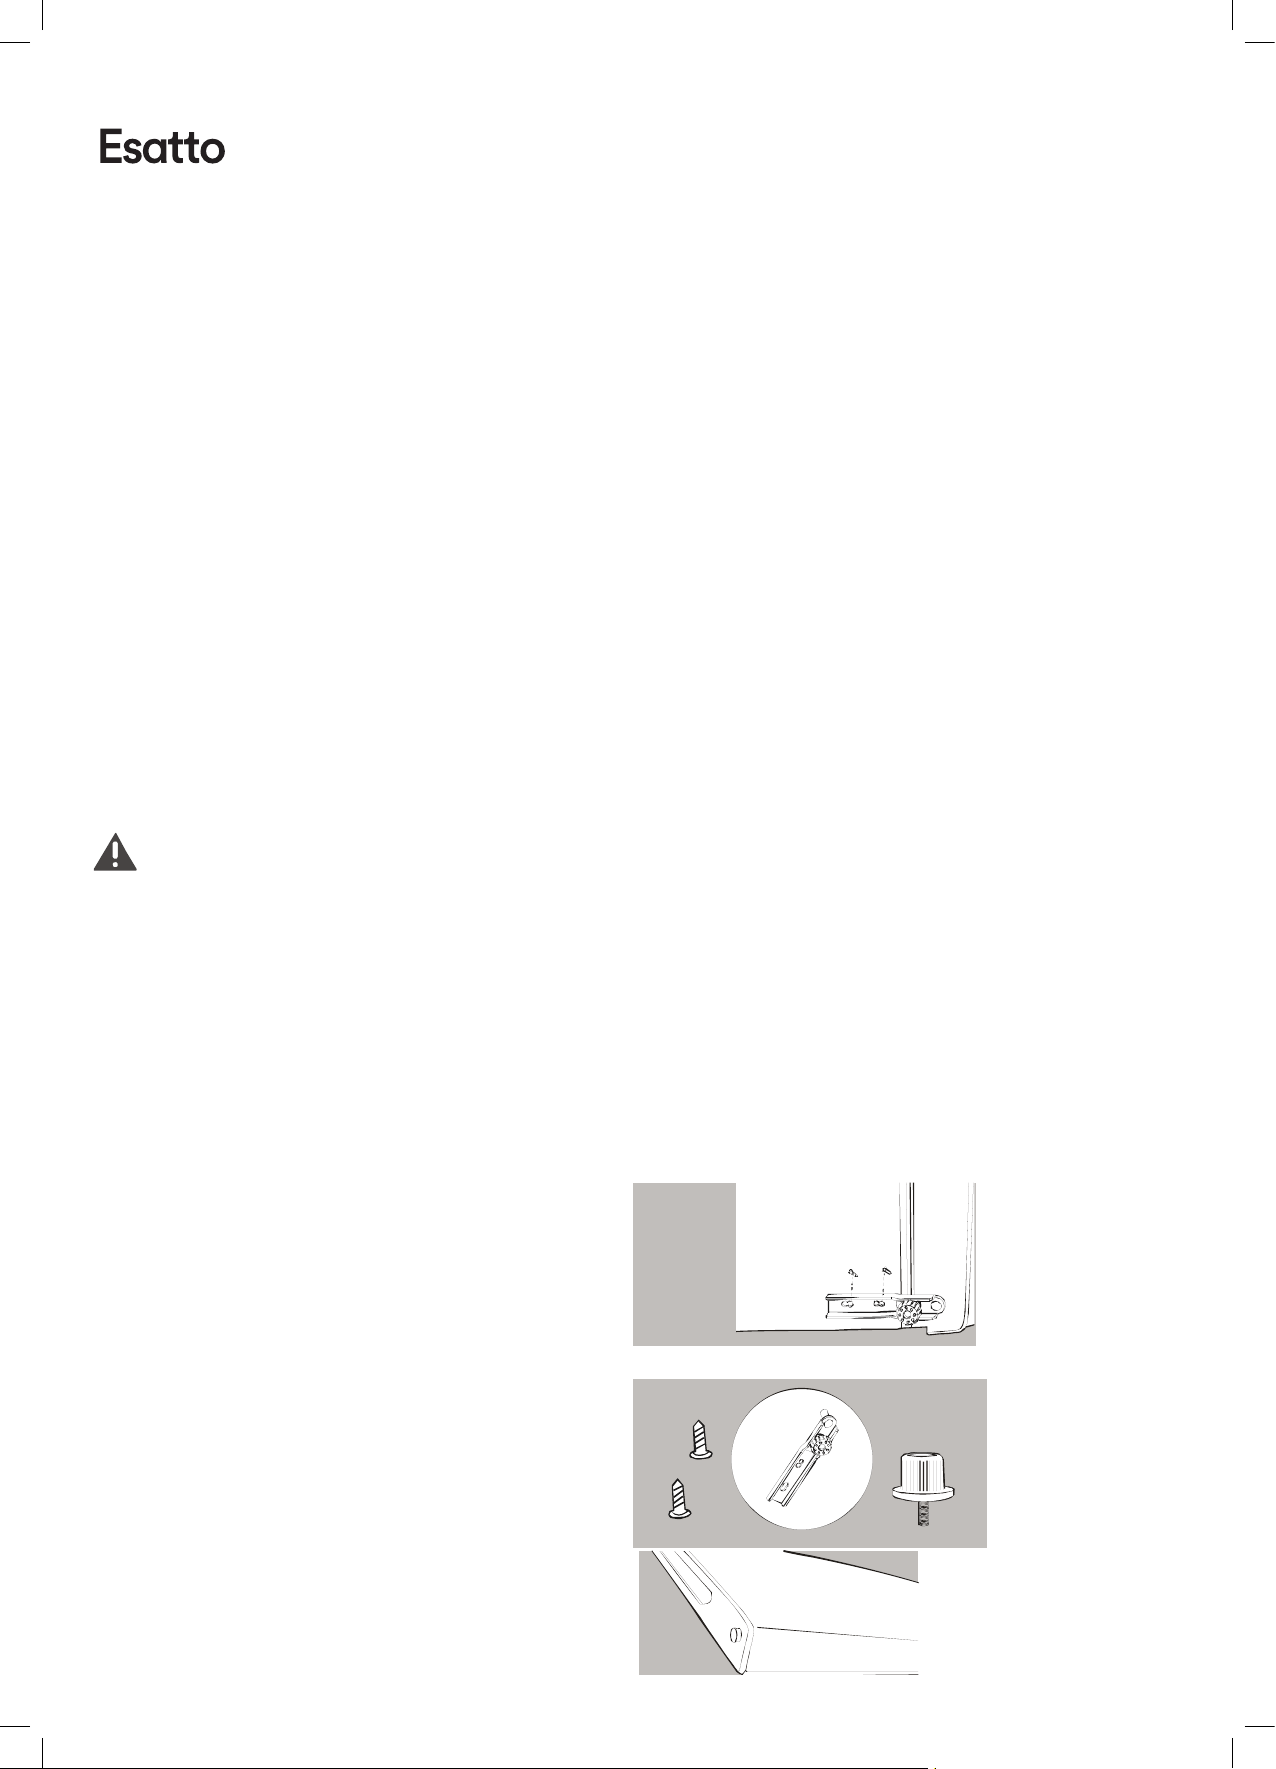
1) Startbyremovingthebracketfromthebottomofthe
refrigerator.Unscrewthetwoscrewsfromthebottom
bracket.Removethefootfromoppositeside.
2) Self-TappingScrews/BottomBracket/Foot
3) Slidethedoordown,awayfromthehingepinlocated
onthetopofthedoor.
2. Installation Instructions
Loading ...
Loading ...
Loading ...