Loading ...
Loading ...
Loading ...
E-9
CD-BK147V(S)E1.fm01/9/28
ENGLISH
CD-BK147V
Preparation for Use
- System connections -
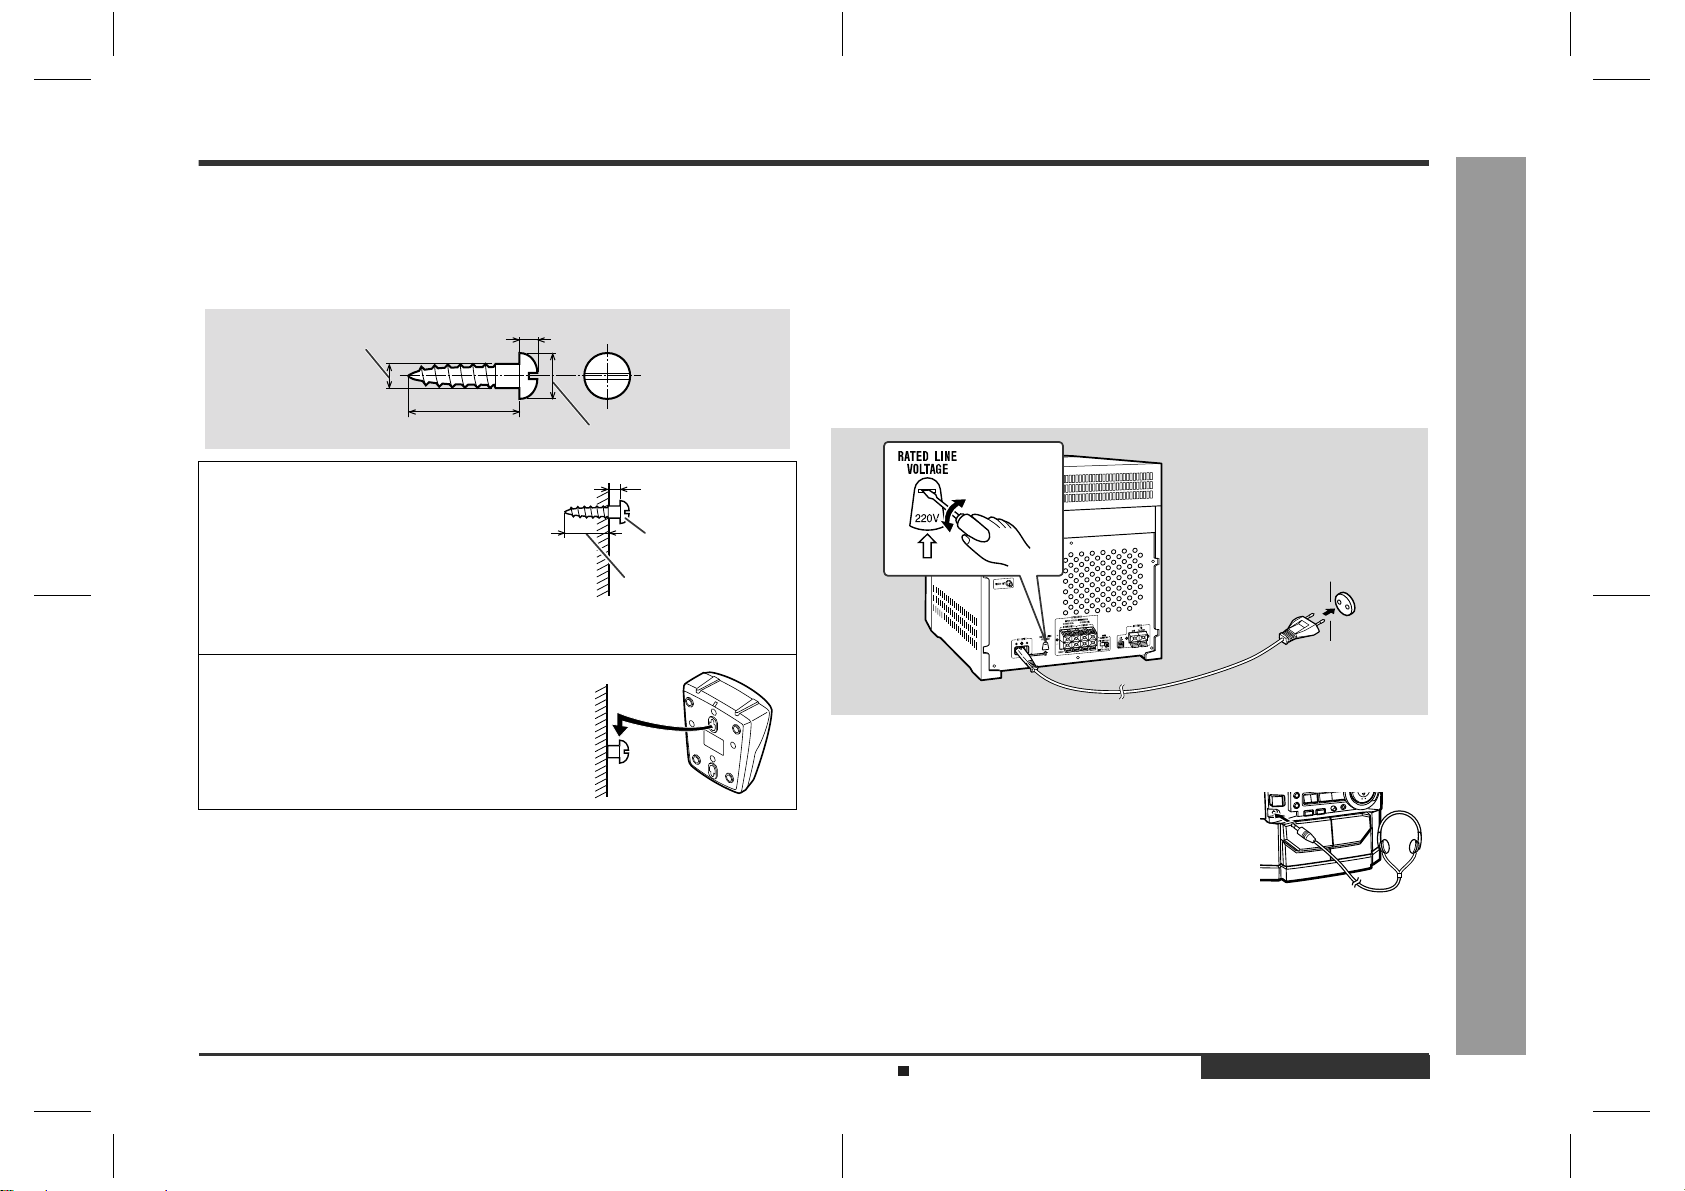
„
To mount the surround speakers on the
wall
The design of the surround speakers allows them to be hung on the wall. Be sure to
use the type and size of screw that is shown to the below.
„
Setting the AC voltage selector
Check the setting of the AC voltage selector located on the rear panel before plug-
ging the unit into an AC socket. If necessary, adjust the selector to correspond to the
AC power voltage used in your area.
Turn the selector with a screwdriver until the appropriate voltage num-
ber appears in the window (110 V, 127 V, 220 V or 230 V - 240 V AC).
„
Connecting the AC power lead
After making all connections, connect the AC power lead to the unit
and then into the wall socket. If you plug in the unit first, it will enter
the demonstration mode.
Notes:
z
Unplug the AC power lead from the AC socket if the unit will not be in use for a pro-
longed period of time.
z
Never use a power lead other than the one supplied. Use of a power lead
other than the one supplied may cause an electric shock or fire.
„
Headphones
1
Drive one screw through the
wall for each speaker.
z
Make sure that both the screw
and the wall can support a load
of 20 kg (45 lbs.).
z
Drive the screws, so there is
about a 5 mm (3/16") space be-
tween the wall and the head of
the screw.
2
Mount the surround speaker
on the wall so that the screw
head is inserted into the slot
on the surround speaker.
5 mm (3/16")
3.2 mm (1/8")
Min. 22 mm (7/8")
9 mm (3/8")
5 mm (3/16")
Wall mounting screw
Min. 17 mm (11/16")
Wall surface
Wall surface
z
Before plugging in or unplugging the headphones, reduce
the volume.
z
Be sure your headphones have a 3.5 mm (1/8") diameter
plug and are between 16 ohms and 50 ohms impedance.
The recommended impedance is 32 ohms.
z
Plugging in the headphones disconnects the speakers
automatically. Adjust the volume using the VOLUME but-
tons.
Wall socket
Demonstration mode (See page 11.)
Downloaded from: http://www.usersmanualguide.com/
Loading ...
Loading ...
Loading ...