Loading ...
Loading ...
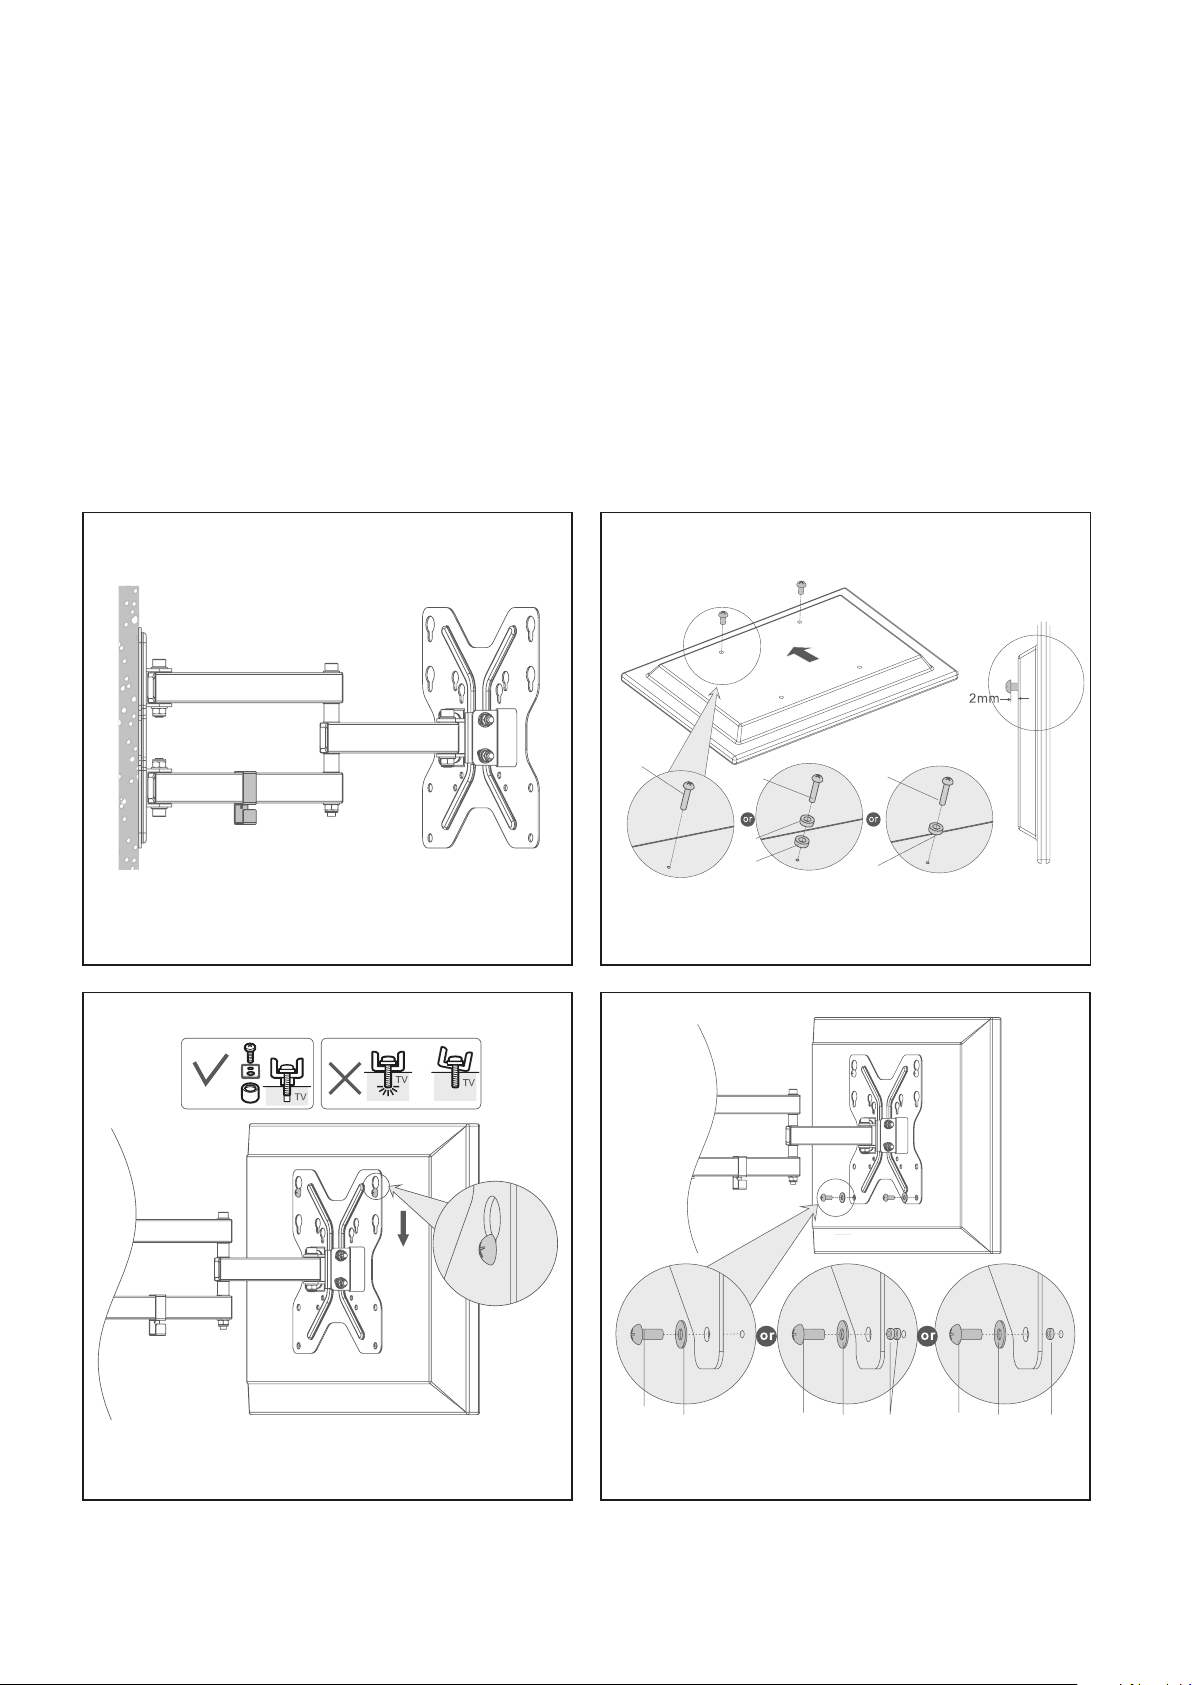
Step 2: Attach Mounting Arm to TV
1. Hang the cable clip (B) on the lower arm of the wall mount (see Figure 3).
2. Using a second person for assistance, lay your TV face down on something soft so as not to scratch the TV screen.
3. Check the back of your TV to find the appropriate mounting pattern.
4. Sort through the provided bolts (M-A to M-D) until you find the correct size that easily fits into the back of your TV and fits snugly
(the bolt must turn at least 3 full turns) or use spacers. Insert the top two bolts and partially tighten leaving at least a 2mm
gap from the back panel (see Figure 4). If you feel resistance stop immediately and select a smaller bolt.
The Crest Company is not responsible for any damage caused by screwing the bolt too far into the back of the TV.
Once you have selected the correct bolts, find the corresponding washers (M-E to M-F). If no bolts fit you will need to go
to your local hardware supplier to find the correct bolt and washer sizes.
5. Lift the TV and align the slots on the mounting arm with the two bolts and lower the TV into place (see Figure 5).
6. Using the remaining correct mounting bolts, insert these through corresponding washers (M-E to M-F) to attach the bottom
holes of the mounting Wall Plate to the rear of the TV (see Figure 6). If the larger bolts are selected (M-D) then use the hole
spacer (M-G) to fill out the Wall Plate hole and reduce its size for a snugger fit (see Figure 6). To avoid damaging TV,
do not overtighten bolts.
Figure 3 Figure 4
Figure 5 Figure 6
M-G
M-G
M-D
M-D
M-A
M-B
M-C
M-D
M-D M-F M-G
M-D M-F M-G
M-C
M-D
M-F
Loading ...