Loading ...
Loading ...
Loading ...
Installation en
17
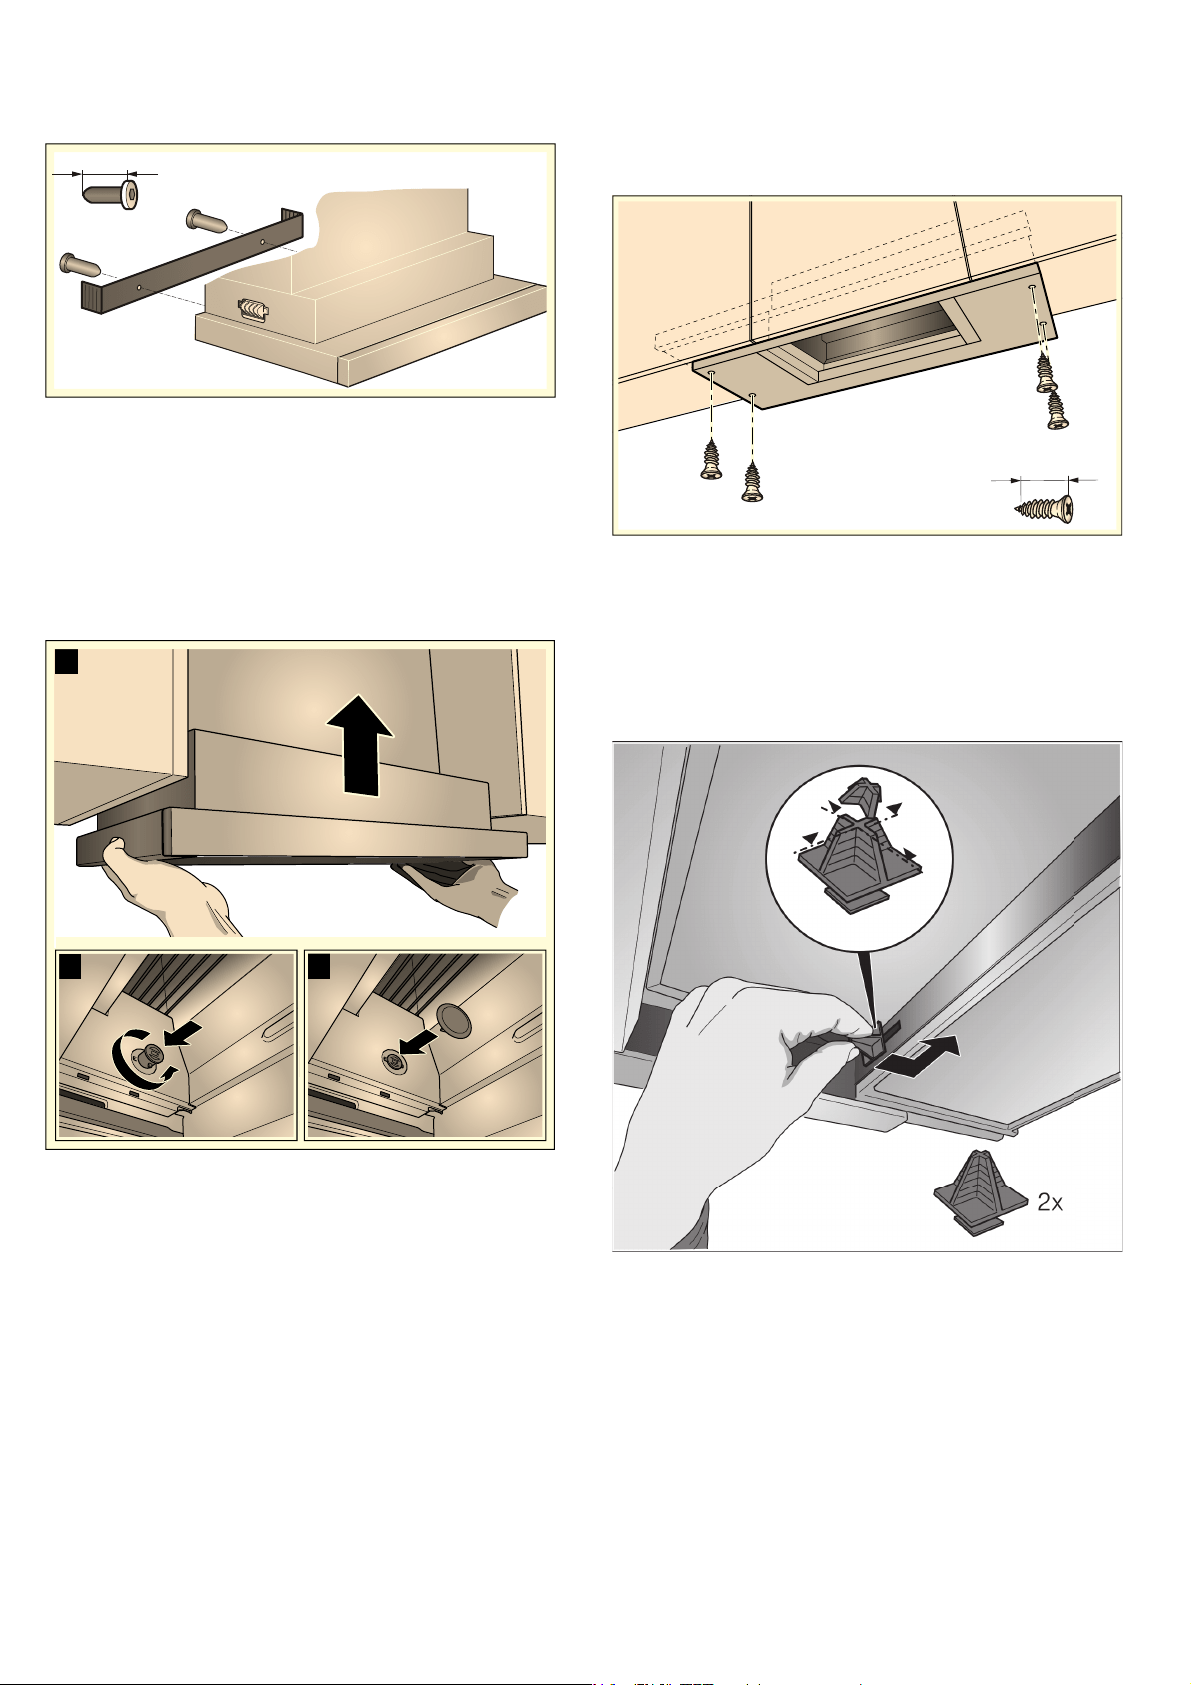
4. Screw in the filler strip fully.
5. Push in the fastening bolt and turn it 90°.
Note: The fastening pieces on the left and right of
the appliance must be able to move.
Final fitting stage
1. Slide the appliance up into place. ¨
2. Lock the fastening bolts on the left and right. ©
3. Fit the protective caps on the left and right. ª
4. Establish the electrical connection.
Note: The extractor hood's housing can be concealed
within the upper cabinet. In doing so, you must observe
the following:
■ The intermediate floor must not be placed on the
extractor hood's housing.
■ The front panel must not be secured to the housing.
■ Access must be available in order to change the
filter and for the after-sales service.
Appliance width 90 cm:
You must also screw the appliance to the wall-hanging
cupboards either side of it.
Changing the filter pull-out's limit stop
On some versions of the appliance, the limit stop for the
filter pull-out can be changed. Spacers are included
with these appliances in order to position the
appliance's handle strip flush with the fitted unit.
1. Pull the filter pull-out towards you.
2. Shorten the spacer to the required dimension and
insert it into the slot specified.
PP
[
%
$
&
[
PP
Loading ...
Loading ...
Loading ...