Loading ...
Loading ...
Loading ...
Page |10
The partitions can be used to organize the contents of
your refrigerator, or provide a secondary surface to
store and display items above the main storage space.
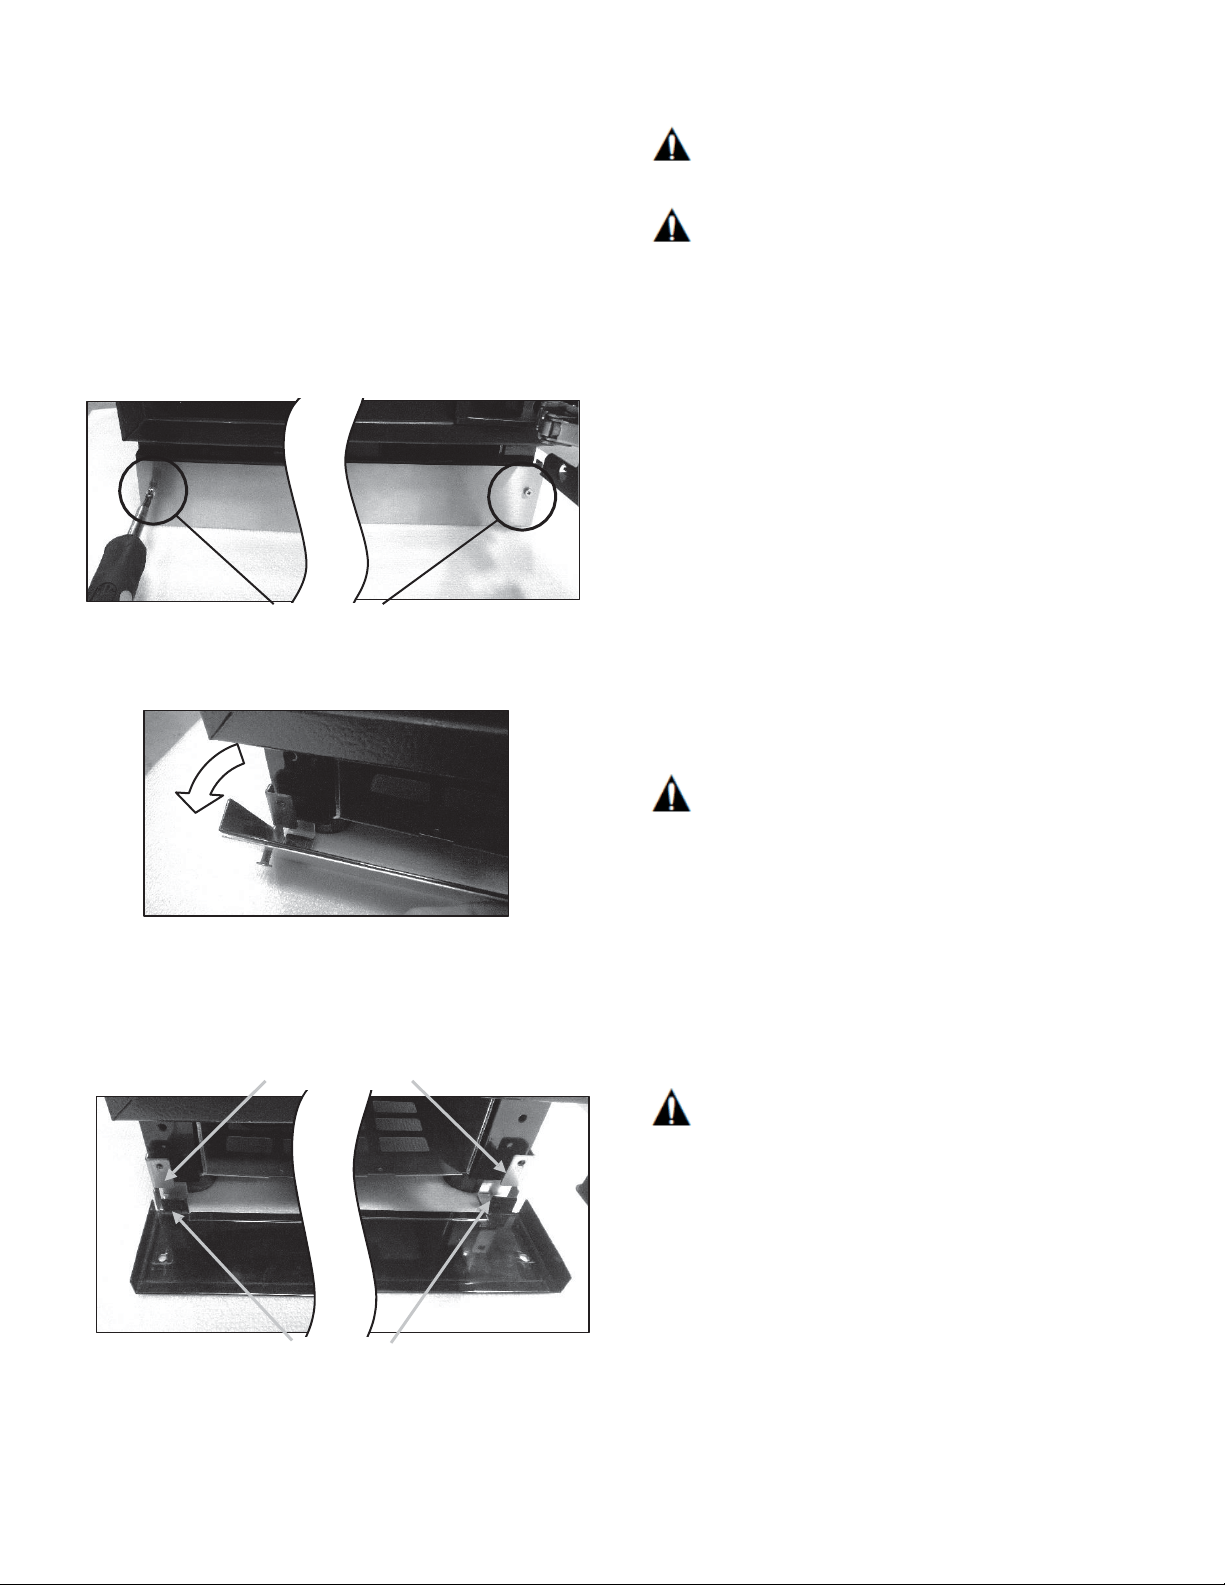
Toe-Kick
The Toe-Kick itself can be removed for service or
cleaning (see “Cleaning behind the Toe-Kick” in the
next section).
1. Remove the stainless steel Toe-Kick by
unscrewing and removing the two front screws with a
Philips screwdriver.
Front
screws
2. You can remove the Toe-Kick by simply pulling it
out of the left and right mounting brackets.
3. To reattach the Toe-Kick, slide over the left and right
mounting brackets, such that bottom tabs of the Toe-
Kick rest on top of the bracket bases. This will allow
the Toe-Kick and mounting bracket screw holes
to
align.
Bracket
bases
Bottom
tabs
Cleaning the appliance
WARNING:
Never clean the appliance with a steam cleaner!
CAUTION:
• Do not use abrasive or acidic cleaning agents and
solvents.
• Do not use scouring or abrasive sponges. The
metallic surfaces could corrode.
• Never clean the aluminum partitions in the
dishwasher. The parts may be damaged.
Proceed as follows:
1. Before cleaning: switch the appliance off. For
instructions, see “Off Mode” section on the “Special
Functions” page.
2. Remove food and/or frozen food items and store in a
cool location.
3. Clean the appliance with a soft cloth, lukewarm
water and a little pH neutral detergent.
4. Wipe the drawer seals with clear water only and
then wipe dry thoroughly.
5. After cleaning switch the appliance back on.
CAUTION:
When rinsing, water must not enter the interior drawer
light recesses located on the upper side of both the top
and bottom drawers. Water must also not spill out from
the bottom of the cabinet.
Cleaning behind the Toe-Kick
1. Before cleaning: switch the appliance off.
2. Remove the Toe-Kick. See “Toe-Kick” section on
the previous page.
WARNING:
Do not remove the electrical box cover behind the
Toe-Kick. Risk of electric shock!
3. Use a vacuum cleaner with an extended attachment
to clean the accessible areas when they are dusty or
dirty.
4. Replace the Toe-Kick.
5. Switch the appliance on.
Loading ...
Loading ...
Loading ...