Loading ...
Loading ...
Loading ...

Installation-Related Menu Settings
160
Here, you can use the following settings in the edge blending menu.
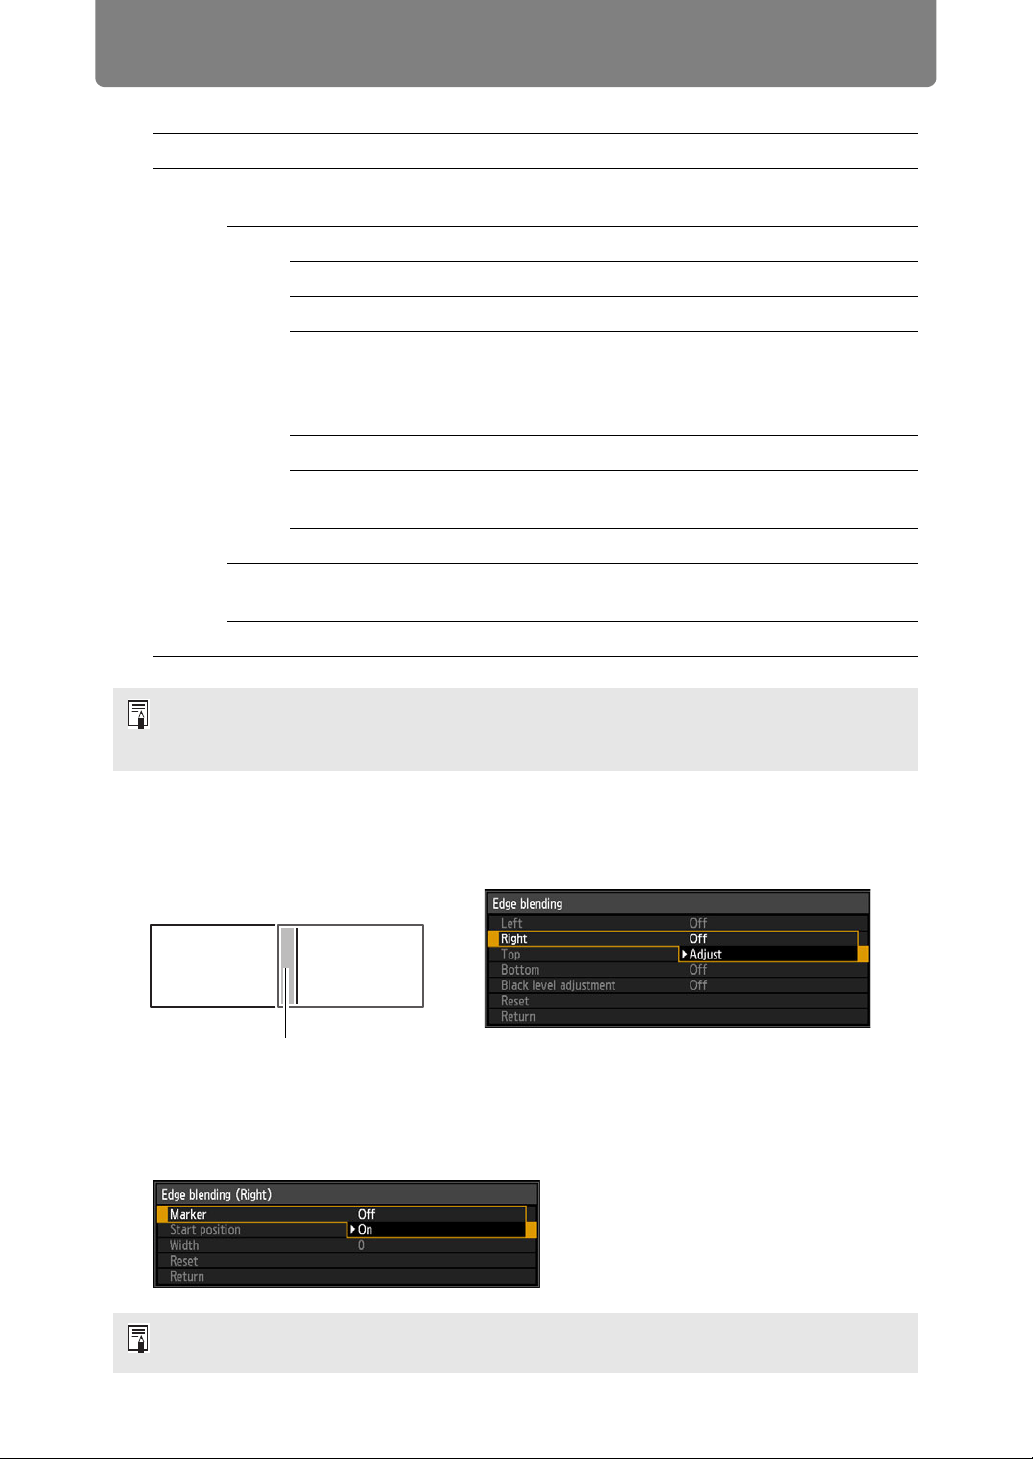
3 Select the position where the images overlap.
When you are adjusting the left image, this area is along the right edge of the
image. In the edge blending window, select [Right] > [Adjust].
4 Set [Marker] to [On].
Marker lines are projected on the images. The red marker indicates the start
position for adjustment, and the green marker, the end position.
Off Does not blend overlapping areas.
Adjust Displays the menu for blending overlapping
areas.
Left, Right, Top, Bottom
Off Projects an image with no correction.
Adjust Marker Off Hides the markers.
On Displays markers showing the adjustable
blending area, with one line indicating the start
position (in red) and another, the end position (in
green).
Start position Moves the marker for the start position.
Width Specifies the width between the start and end
markers.
Reset Resets the marker settings.
Black level adjustment Adjusts the black level of non-overlapping image
areas. (P162)
Reset Resets any adjustments you have made.
• If you have already completed edge blending settings, selecting [Adjust] will apply
them.
• To restore the default settings before adjustment, select [Reset].
By default, the green and red markers are displayed in the same position, so only the red
marker is visible.
Overlapping area
Left image Right image
Loading ...
Loading ...
Loading ...