Loading ...
Loading ...
Loading ...
16
Installation
Fig. 3
The minimum distance between the supporting surface for the cooking equipment on
the hob and the lowest part of the range hood must be not less than 50cm from electric
cookers and 65cm from gas or mixed cookers.
If the instructions for installation for the gas hob specify a greater distance, this must be
adhered to.
Electrical connection
The mains power supply must correspond to the rating indicated on the plate situated
inside the hood. If provided with a plug connect the hood to a socket in compliance with
current regulations and positioned in an accessible area, after installation. If it not fitted
with a plug (direct mains connection) or if the plug is not located in an accessible area,
after installation, apply a double pole switch in accordance with standards which
assures the complete disconnection of the mains under conditions relating to over-
current category III, in accordance with installation instructions.
WARNING!
Before re-connecting the hood circuit to the mains supply and checking the efficient
function, always check that the mains cable is correctly assembled.
Mounting
Before beginning installation:
• Check that the product purchased is of a suitable size for the chosen installation
area.
• Remove the charcoal (*) filter/s if supplied (see also relative paragraph). This/these
is/are to be mounted only if you want lo use the hood in the filtering version.
• Check (for transport reasons) that there is no other supplied material inside the
hood (e.g. packets with screws (*), guarantees (*), etc.), eventually removing them
and keeping them.
Expansion wall plugs are provided to secure the hood to most types of walls/ceilings.
However, a qualified technician must verify suitability of the materials in accordance
with the type of wall/ceiling. The wall/ceiling must be strong enough to take the weight
of the hood.
Do not tile, grout or silicone this appliance to the wall. Surface mounting only.
Note: The parts marked with the symbol "(*)" are optional accessories supplied only
with some models or otherwise not supplied, but available for purchase.
Maintenance
Cleaning
Clean using ONLY the cloth dampened with neutral liquid detergent. DO NOT CLEAN
WITH TOOLS OR INSTRUMENTS. Do not use abrasive products. DO NOT USE
ALCOHOL!
Always wear work gloves for all maintenance operations.
Grease filter
Fig. 1
Traps cooking grease particles.
The grease filter must be cleaned once a month using non aggressive detergents,
either by hand or in the dishwasher, which must be set to a low temperature and a short
cycle. When washed in a dishwasher, the grease filter may discolor slightly, but this
does not affect its filtering capacity.
To remove the grease filter, pull the spring release handle.
Charcoal filter (Optional)
Fig. 2
It absorbs unpleasant odors caused by cooking.
The saturation of the charcoal filter occurs after more or less prolonged use,
depending on the type of cooking and the regularity of cleaning of the grease filter.
In any case it is necessary to replace the cartridge at least every four months.
The charcoal filter may NOT be washed or regenerated.
Remove the grease filters.
Fit the charcoalfilters over the motor.
Align the pins R on the cowl with the slots S, then turn the filter clockwise until it locks
in place.
Reverse the above procedure to remove the charcoal filters.
Refit the grease filters.
Buying charcoal filters
The Charcoal filter can be bought at Samsung Service Website and Service Center.
Please refer to the last page of manual.
Replacing lamps
Fig. 1
Disconnect the appliance from the electricity.
Warning! Prior to touching the light bulbs ensure they are cooled down.
Replace the old light bulb with the one of the same type as specified in the feature label
or near the light lamp on the hood.
Remove cover A to access the lamp housing A.
Replace with a new 28W max (E14) halogen light SUITABLE FOR USE IN OPEN
LUMINAIRES. Follow package directions and do not touch new light with bare hands.
If the lights do not work, make sure that the lamps are fitted properly into their housings
before you call for technical assistance.
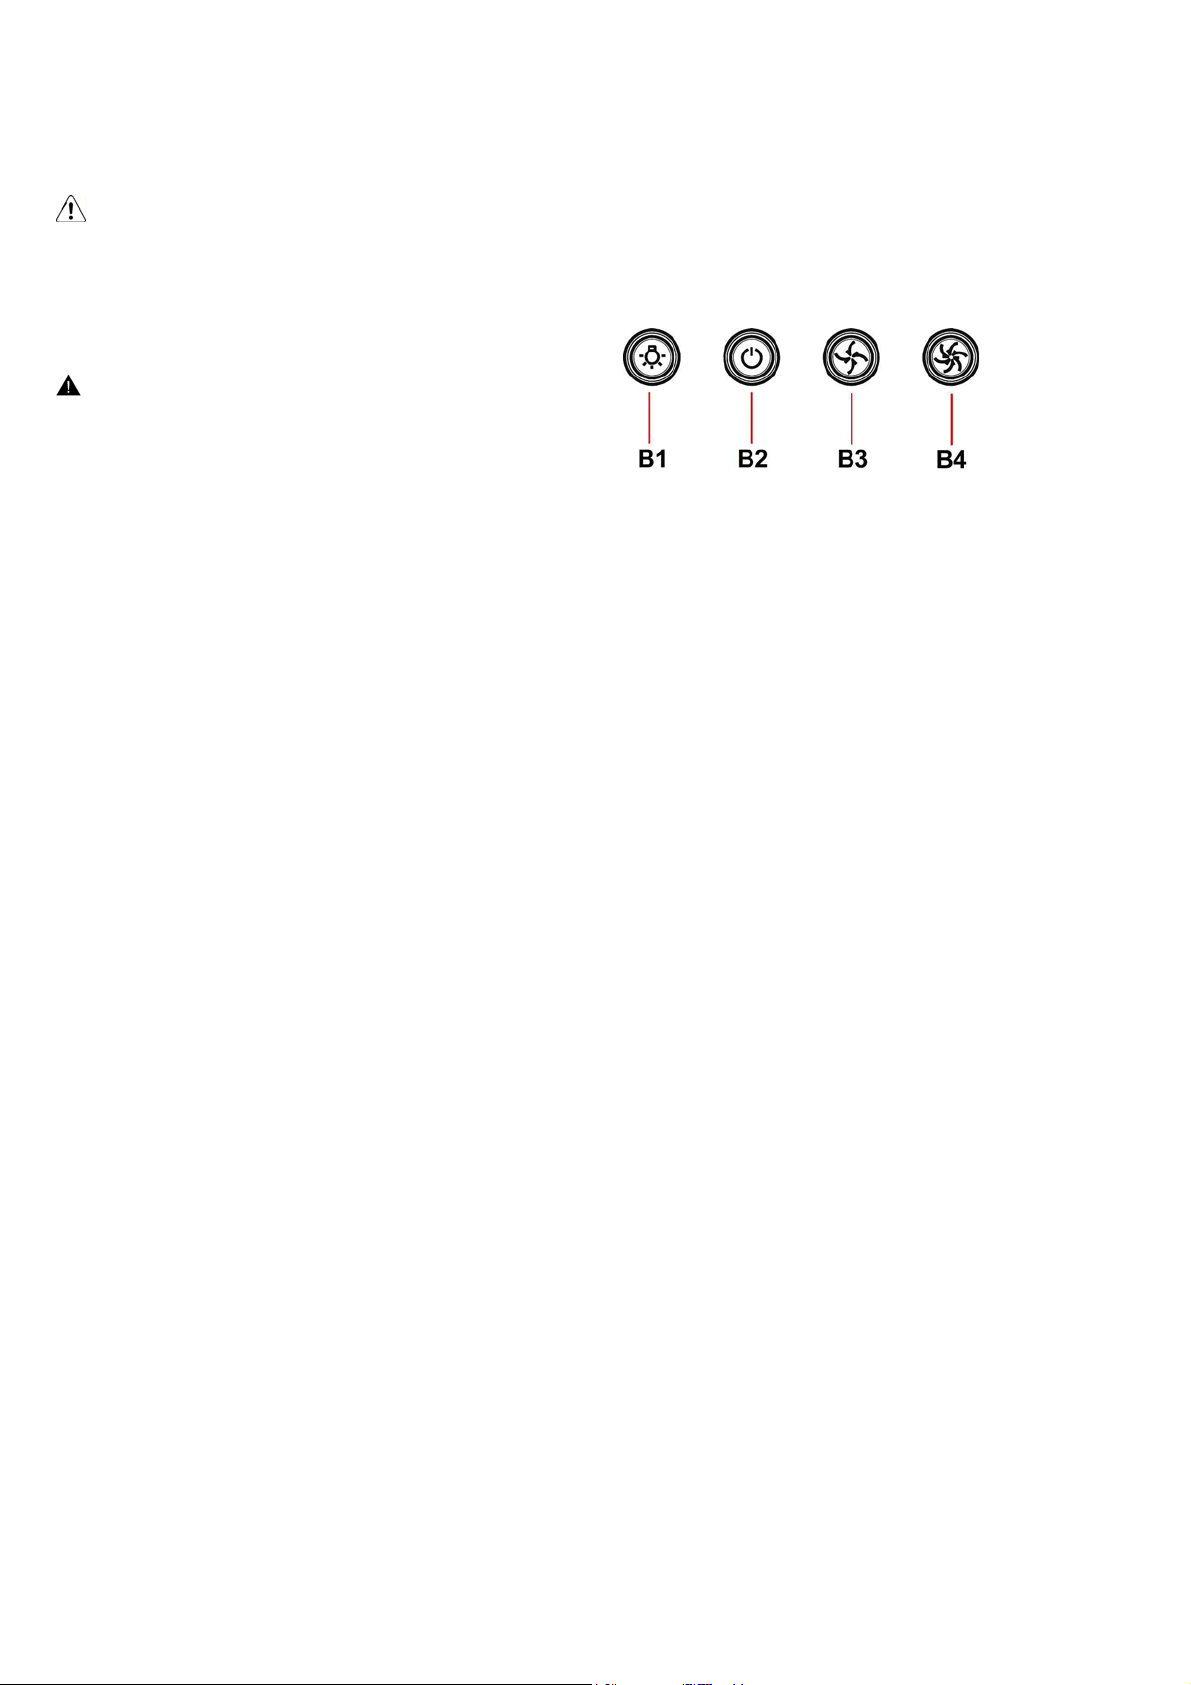
Operation
The hood is fitted with a control panel with aspiration speed selection control and a light
switch to control cooking area lights.
B1. Light ON/OFF
Press the Light button and the lamps will turn on.
Press the Light button again and the lamps will turn off.
B2. Motor ON/OFF
Press the POWER button and the hood will be activated at default speed.
Press again and the hood will be turned off.
B3. Medium Speed
Press the button “C” and the hood will be activated at medium speed
B4. High Speed
Press the button “D” and hood will be activated at high speed.
Loading ...
Loading ...
Loading ...