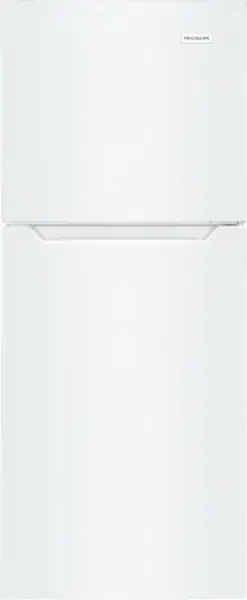
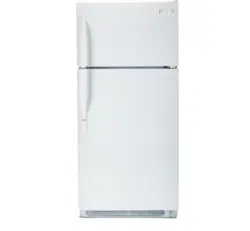
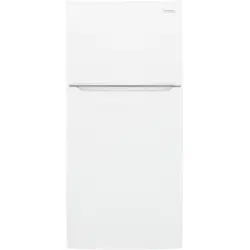
Use & Care of your Refrigerator
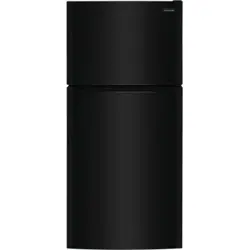
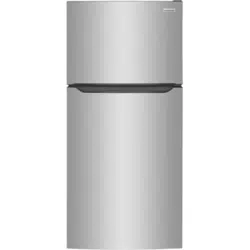
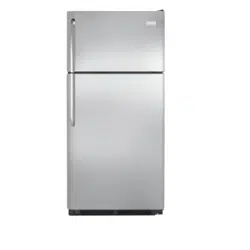
FEATURES AT A GLANCE
Features may vary according to model
 INSTALLATION
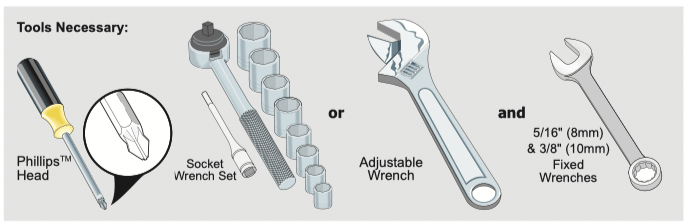
This Use & Care Guide provides general operating instructions for your model. Use the refrigerator only as instructed in this Use & Care Guide. Before starting the refrigerator, follow these important first steps.
Location
• Choose a place that is near a grounded electrical outlet. Do Not use an extension cord or an adapter plug.
• If possible, place the refrigerator out of direct sunlight and away from the range, dishwasher or other heat sources.
• The refrigerator must be installed on a floor that is level and strong enough to support a fully loaded refrigerator.
CAUTION
Do not install the refrigerator where the surrounding air temperature may fall to 50°F (10°C) or below. The refrigerator compartment contents may freeze. Do not install the refrigerator where the surrounding air temperature may reach 110°F (43°C) or above. The refrigerator and freezer compartments may rise to above normal operating temperatures.
Do not block the lower front of your refrigerator. Sufficient air circulation is essential for the proper operation of your refrigerator.
Installation
Installation clearances
• Allow the following clearances for ease of installation, proper air circulation, and plumbing and electrical connections:
Sides & Top. 3 inches
Back. 4 inches
Guidelines for final positioning of your refrigerator:
• All four corners of the cabinet must rest firmly on the floor.
• The cabinet should be level at the front and rear.
To level the cabinet using the front leveling feet:
• Lower the leveling feet on each side clockwise until they contact the floor.
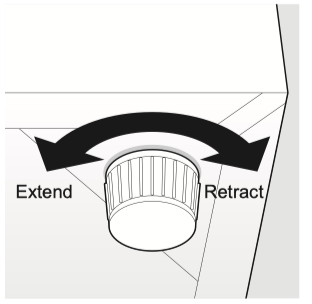
• Use the leveling feet (located on the front) ensure that all 4 corners of the unit are resting firmly on a solid floor. Turn the leveling feet clockwise to retract the feet and counterclockwise to extend the feet. Ensure the floor is strong enough to support a fully loaded unit.
DOOR REMOVAL/REVERSAL INSTRUCTIONS
NOTE
The direction in which your refrigerator doors open (door swing) can be reversed, from left to right or right to left, by moving the door hinges from one side to the other. Reversing the door swing should be performed by a qualified person.
IMPORTANT
Before you begin, turn the refrigerator temperature control to “OFF” and remove the electrical power cord from the wall outlet. Remove any food from door shelves.
Door removal and reversal instructions:
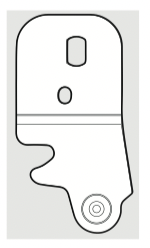
• Locate the Door Reversal Kit (parts are for the left side):
- top hinge cover
- bottom hinge
• Ensure the unit is unplugged and empty.
• All parts removed must be saved for reinstallation of the door.
• Do not lay the unit flat as this may damage the coolant system.
• It is better that 2 people handle the unit during assembly.
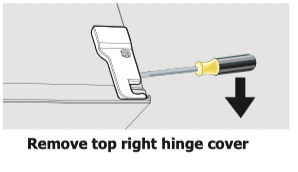
1. Remove the top right hinge cover.
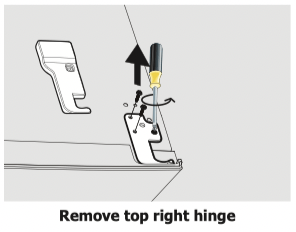
2. Remove screws from top right hinge and lift freezer door off. Place on a soft pad to avoid damage.
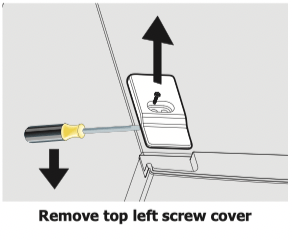
3. Remove the top left screw cover.
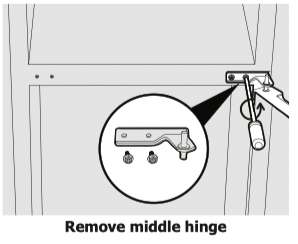
4. Hold the door in place while unscrewing the middle hinge, then lift the lower door and place it on a soft pad to avoid damage
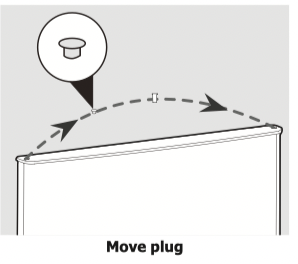
5. Move pin hole plug (top of refrigerator door) from left side to right side.
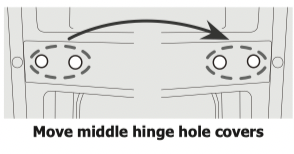
6. Move the middle hinge hole covers from left side to right side.
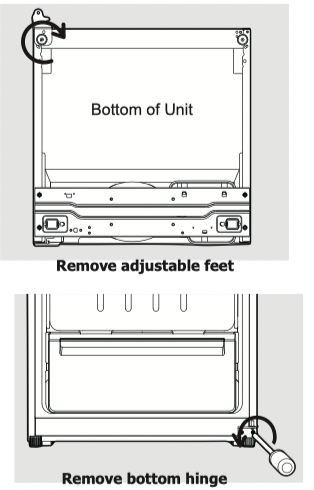
7. Tilt the unit back, remove the adjustable feet from both sides then unscrew bottom hinge.
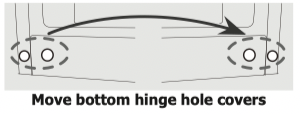
8. Move the bottom hinge hole covers from left side to right side.
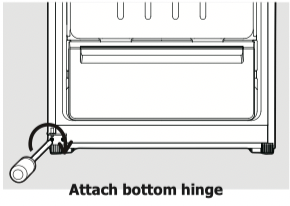
9. Locate left bottom hinge (in accessory bag).
10. Attach the left bottom hinge. Replace both adjustable feet. Stand the unit upright.
11. Place the refrigerator door on the lower hinge. Hold in place while attaching the middle hinge and then tighten screws.

12. Place the upper door on the center hinge. Ensure the door is aligned horizontally and vertically so that the seal is closed on all sides.
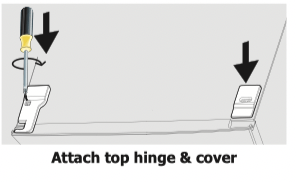
13. Locate the top hinge, remove the pin with a screwdriver and flip the hinge over. Refit the pin in the hinge then attach hinge to the top of the cabinet. Locate the top left hinge cover (in the accessory bag) and attach to the unit. On the right side of cabinet attach the screw cover.
14. Plug in electrical power cord and turn refrigerator temperature control to center position. Adjust setting as necessary.
CONTROLS
Freezer Temperature Adjustment
The freezer control can be left at the factory pre-set (RECOMMENDED) or adjusted as desired.
• Adjust temperature gradually: adjust the knob in small increments, allowing the temperature to stabilize.
• For colder temperatures, adjust the knob towards COLDER.
• For warmer temperatures, adjust the knob towards COLD.

Refrigerator Temperature Adjustment
The refrigerator control can be left at the factory pre-set (RECOMMENDED) or adjusted as desired.
• Adjust temperature gradually allowing the temperature to stabilize.
• For colder temperatures, use the SET key and choose COLDER.
• For warmer temperatures, use the SET key and choose COLD.
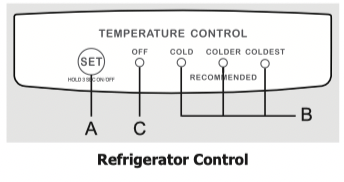
A SET - Push the SET key to change between COLD, COLDER (RECOMMENDED), and COLDEST temperatures.
B COLD, COLDER (RECOMMENDED), COLDEST - Indicates the setting of the refrigerator compartment by LED indicator lights.
C OFF - To turn the power off, press and hold the SET key for 3 seconds. The OFF indicator light will be on.
To turn the power on, press and hold the SET key for 3 seconds. The power will turn on and the power indicator light on the control panel will turn off.
OPTIONAL FEATURES
CAUTION
Do not clean glass shelves or covers with warm water when they are cold. Shelves and covers may break if exposed to sudden temperature changes or impact, such as bumping. Tempered glass is designed to shatter into many small, pebble-size pieces. This is normal. Glass shelves and covers are heavy. Use both hands when removing them to avoid dropping.
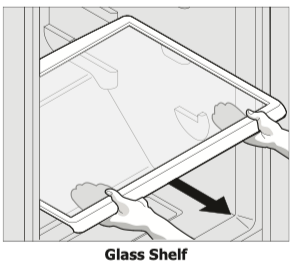
Shelf Adjustment
Refrigerator shelves are easily adjusted to suit individual needs. Before adjusting the shelves, remove all food.
To adjust shelves:
1. Remove shelf by raising the back of the shelf out of side rail, then continue to remove shelf by pulling forward.
2. To replace shelf, rest side edges on any pair of shelf rails and carefully push shelf back into position and engage in the side rail stop.
Door storage
Door bins, shelves, and racks are provided for convenient storage of jars, bottles, and cans. Frequently used items can be quickly selected.
The dairy compartment, which is warmer than the general food storage section, is intended for short term storage of cheese, spreads, or butter.
Crisper Humidity Controls
The crisper humidity controls, present on the crisper drawers of some models, allows you to adjust the humidity within the crisper. This can extend the life of fresh vegetables that keep best in high humidity.
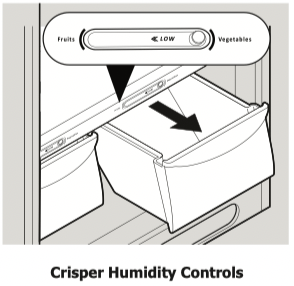
NOTE
Leafy vegetables keep best when stored with the Humidity Control set on High Humidity, or in a drawer without a Humidity Control. This keeps incoming air to a minimum and maintains maximum moisture content. Store non-leafy vegetables and fruits still in their skins at the low humidity setting.
Crispers
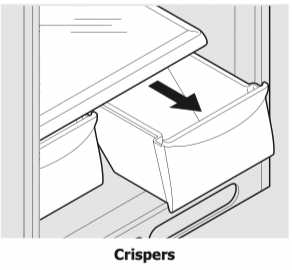
The crispers, located under the bottom refrigerator shelf, are designed for storing fruits, vegetables, and other fresh produce. Wash items in clear water and remove excess water before placing them in the crispers. Items with strong odors or high moisture content should be wrapped before storing.
CARE & CLEANING
|
Care & Cleaning Tips
|
|
Part
|
What To Use
|
Tips and Precautions
|
|
Interior & Door Liners
|
• Soap and water
• Baking soda and water
|
Use 2 tablespoons of baking soda in 1 quart of warm water. Be sure to wring excess water out of sponge or cloth before cleaning around controls, light bulb or any electrical part.
|
|
Door Gaskets
|
• Soap and water
|
Wipe gaskets with a clean soft cloth.
|
|
Drawers & Bins
|
• Soap and water
|
Use a soft cloth to clean drawer runners and tracks.
|
|
Glass Shelves
|
• Soap and water
• Glass cleaner
• Mild liquid sprays
|
Allow glass to warm to room temperature before immersing in warm water.
|
|
Exterior
|
• Soap and water
• Non Abrasive Glass Cleaner
|
Do not use commercial household cleaners containing ammonia, bleach or alcohol to clean. Use a soft cloth to clean. DO NOT use a dry cloth to clean smooth doors.
|
|
Exterior
(Stainless Steel Models Only)
|
• Soap and water
• Stainless Steel Cleaners
|
Never use CHLORIDE or cleaners with bleach to clean stainless steel.
Clean stainless steel front with non-abrasive soapy water and a dishcloth. Rinse with clean water and a soft cloth. Use a non-abrasive stainless steel cleaner. These cleaners can be purchased at most home improvement or major department stores. Always follow manufacturer’s instructions. Do not use household cleaners containing ammonia or bleach.
NOTE: Always clean, wipe and dry with the grain to prevent scratching. Wash the rest of the cabinet with warm water and mild liquid detergent. Rinse well, and wipe dry with a clean soft cloth.
|
BEFORE YOU CALL
1-800-944-9044 (United States)
1-800-265-8352 (Canada)
|
Common Occurrences
|
Before calling for service, review this list. It may save you time and expense. This list includes common occurrences that are not the result of defective workmanship or materials in this appliance.
|
|
Refrigerator does not run.
|
• Ensure plug is tightly pushed into electrical outlet.
• Check/replace fuse with a 15 amp time-delay fuse. Reset circuit breaker.
• The refrigerator/freezer control is turned to “0” (Mechanical controls) or “OFF” (Electronic controls).
• Refrigerator may be in defrost cycle. Wait 20 minutes and check again.
|
|
Freezer temperature is colder than preferred. Refrigerator temperature is satisfactory.
|
• Set freezer control to a warmer setting until freezer temperature is satisfactory. Allow 24 hours for the temperature to stabilize.
|
|
Refrigerator temperature is too cold. Freezer temperature is satisfactory.
|
• Set refrigerator/freezer control to a warmer setting. Allow 24 hours for temperature to stabilize. Then check freezer temperatures and adjust as needed.
|
|
Freezer temperature is warmer than preferred. Refrigerator temperature is satisfactory.
|
• Set freezer control to a colder setting until freezer temperature is satisfactory. Allow 24 hours for the temperature to stabilize.
|
|
Refrigerator temperature is too warm. Freezer temperature is satisfactory.
|
• Set refrigerator/freezer control to a colder setting.
Allow 24 hours for temperature to stabilize. Then check refrigerator temperatures and adjust as needed.
|
|
Refrigerator is noisy or vibrates.
|
• The cabinet is not level.
• Floor is weak.
• See Normal Operating Sounds and Sights section.
|
|
Odors in refrigerator.
|
• Interior needs to be cleaned.
• Foods that produce odors should be covered or wrapped.
|
|
Cabinet light not working.
|
• Replace light bulb.
• Ensure plug is tightly pushed into electrical outlet.
• Light switch may be stuck. Push in light switch, located on the refrigerator control box, to release.
|
MAJOR APPLIANCE WARRANTY
Your appliance is covered by a one year limited warranty. For one year from your original date of purchase, Electrolux will pay all costs for repairing or replacing any parts of this appliance that prove to be defective in materials or workmanship when such appliance is installed, used and maintained in accordance with the provided instructions.
Exclusions
This warranty does not cover the following:
1. Products with original serial numbers that have been removed, altered or cannot be readily determined.
2. Product that has been transferred from its original owner to another party or removed outside the USA or Canada.
3. Rust on the interior or exterior of the unit.
4. Products purchased “as-is” are not covered by this warranty.
5. Food loss due to any refrigerator or freezer failures.
6. Products used in a commercial setting.
7. Service calls which do not involve malfunction or defects in materials or workmanship, or for appliances not in ordinary household use or used other than in accordance with the provided instructions.
8. Service calls to correct the installation of your appliance or to instruct you how to use your appliance.
9. Expenses for making the appliance accessible for servicing, such as removal of trim, cupboards, shelves, etc., which are not a part of the appliance when it is shipped from the factory.
10. Service calls to repair or replace appliance light bulbs, air filters, water filters, other consumables, or knobs, handles, or other cosmetic parts.
11. Surcharges including, but not limited to, any after hour, weekend, or holiday service calls, tolls, ferry trip charges, or mileage expense for service calls to remote areas, including the state of Alaska.
12. Damages to the finish of appliance or home incurred during installation, including but not limited to floors, cabinets, walls, etc.
13. Damages caused by: services performed by unauthorized service companies; use of parts other than genuine Electrolux parts or parts obtained from persons other than authorized service companies; or external causes such as abuse, misuse, inadequate power supply, accidents, fires, or acts of God.
DISCLAIMER OF IMPLIED WARRANTIES; LIMITATION OF REMEDIES
CUSTOMER’S SOLE AND EXCLUSIVE REMEDY UNDER THIS LIMITED WARRANTY SHALL BE PRODUCT REPAIR OR REPLACEMENT AS PROVIDED HEREIN. CLAIMS BASED ON IMPLIED WARRANTIES, INCLUDING WARRANTIES OF MERCHANTABILITY OR FITNESS FOR A PARTICULAR PURPOSE, ARE LIMITED TO ONE YEAR OR THE SHORTEST PERIOD ALLOWED BY LAW, BUT NOT LESS THAN ONE YEAR. ELECTROLUX SHALL NOT BE LIABLE FOR CONSEQUENTIAL OR INCIDENTAL DAMAGES SUCH AS PROPERTY DAMAGE AND INCIDENTAL EXPENSES RESULTING FROM ANY BREACH OF THIS WRITTEN LIMITED WARRANTY OR ANY IMPLIED WARRANTY. SOME STATES AND PROVINCES DO NOT ALLOW THE EXCLUSION OR LIMITATION OF INCIDENTAL OR CONSEQUENTIAL DAMAGES, OR LIMITATIONS ON THE DURATION OF IMPLIED WARRANTIES, SO THESE LIMITATIONS OR EXCLUSIONS MAY NOT APPLY TO YOU. THIS WRITTEN WARRANTY GIVES YOU SPECIFIC LEGAL RIGHTS. YOU MAY ALSO HAVE OTHER RIGHTS THAT VARY FROM STATE TO STATE.
If You Need Service
Keep your receipt, delivery slip, or some other appropriate payment record to establish the warranty period should service be required. If service is performed, it is in your best interest to obtain and keep all receipts. Service under this warranty must be obtained by contacting Electrolux at the addresses or phone numbers below.
This warranty only applies in the USA and Canada. In the USA, your appliance is warranted by Electrolux Major Appliances North America, a division of Electrolux Home Products, Inc. In Canada, your appliance is warranted by Electrolux Canada Corp. Electrolux authorizes no person to change or add to any obligations under this warranty. Obligations for service and parts under this warranty must be performed by Electrolux or an authorized service company. Product features or specifications as described or illustrated are subject to change without notice.