Loading ...
Loading ...
Loading ...
18
INSTALLATION
Engaging the Anti-tip Device
•
Move the range close enough to the opening to
plug into the receptacle.
•
Slide the range into position ensuring that the back
leg slides under the anti-tip bracket. The range
should sit flush against the back wall when properly
installed.
•
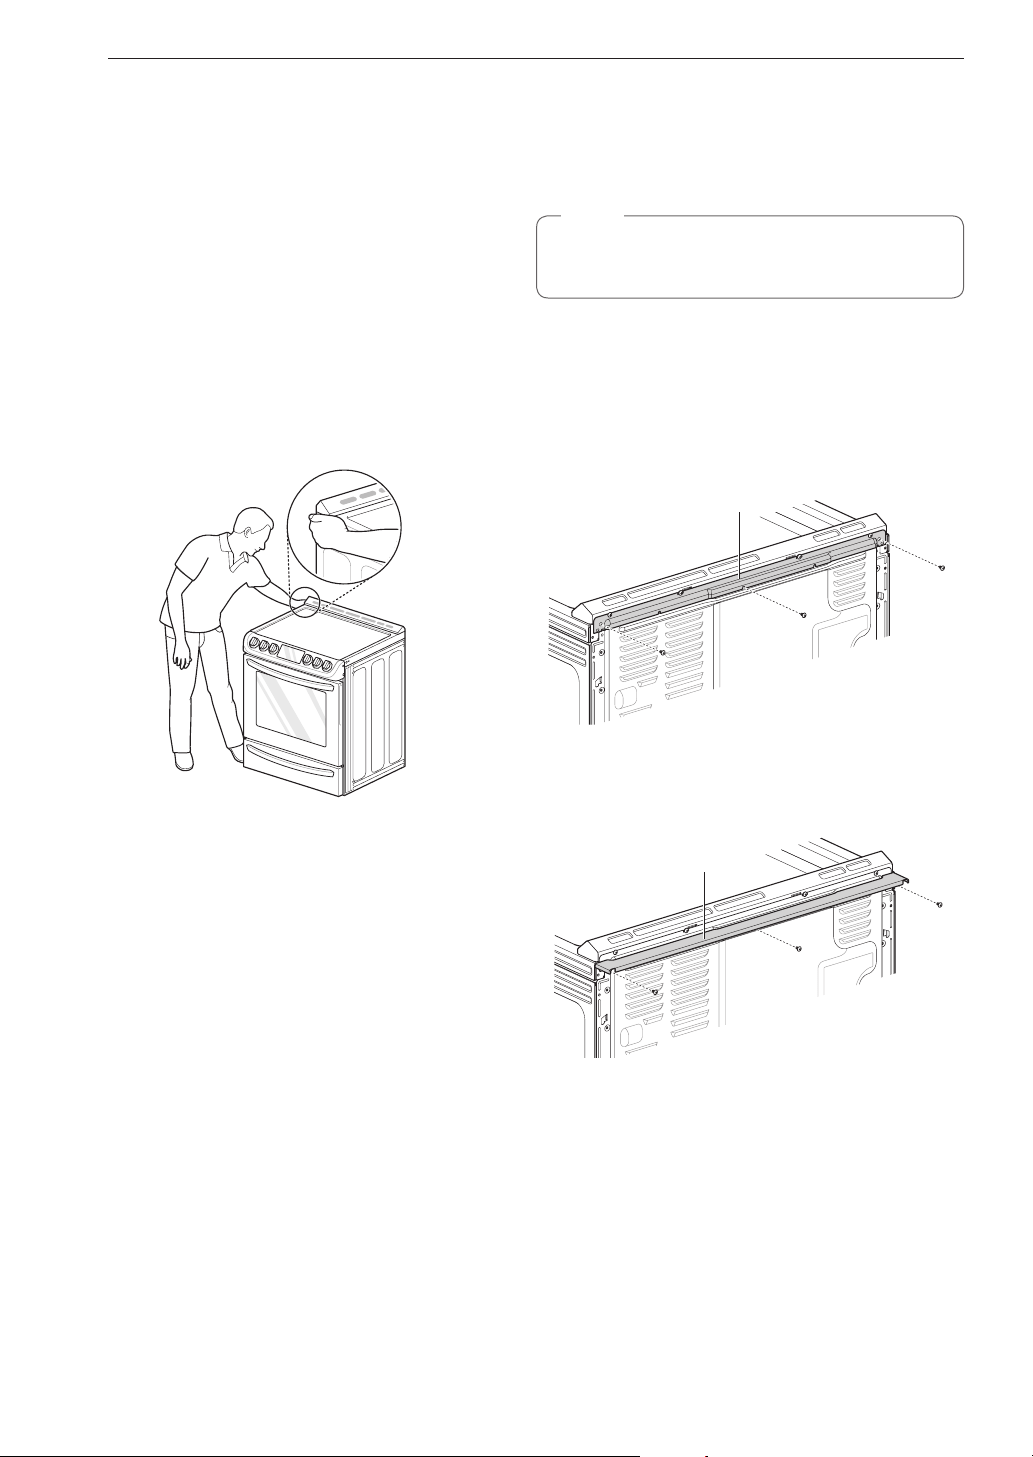
Carefully attempt to tip the range forward to ensure
that the anti-tip bracket is engaged properly. If
properly installed, the anti-tip bracket will prevent
the range from being tipped. If the range can be
tipped, reinstall the range until the anti-tip bracket is
properly installed and the range will not tip forward.
•
Turn on electrical power. Check the range for
proper operation.
Optional Rear Filler
If the counter does not bridge the opening at the rear
wall the rear filler kit, that is provided with the slide in
range, will be needed.
NOTE
If the countertop depth is greater than 25" there will
be a gap between the filler kit and the back wall.
If the countertop depth is less than 24", the control
panel will not sit flush with the countertop.
Installing the Rear Filler
1
Using a screwdriver, remove the three screws
holding the rear bracket in place.
Rear bracket
2
Attach the rear bracket and filler assembly as
shown, using the three screws removed in
step 1.
Rear ller
Loading ...
Loading ...
Loading ...