
Exterior features
P
ersona
li
sat
i
on
ki
ts
These sel
f
-adhesive decals
f
orm
p
art o
f
a
ran
g
e o
f
kits, ver
y
di
ff
erent one
f
rom another,
whi
c
h
a
ll
ow
y
ou to create a un
i
que an
d
a
ttractive exterior
f
or your vehicle.
Guide-me-home lighting
After switching off the ignition, under low
lighting conditions the headlamps remain on for
a
few seconds to help
y
ou leave the vehicle.
R
ear par
ki
n
g
sensors
Thi
s s
y
stem prov
id
es a warn
i
n
g
w
h
en revers
i
n
g
by
d
etect
i
n
g
o
b
stac
l
es
l
ocate
d
b
e
hi
n
d
t
h
e
v
e
hi
c
l
e.
1
9
99
puncture repair kit
plete system consisting of a
compressor and integral sealant product, to
a
llow the temporar
y
repair of a t
y
re.
172
Familiarisation
8
0
Open
A.
Unfoldin
g
/Foldin
g
the ke
y
.
B.
Unlocking the vehicle.
Remote control key
Ot
h
e
r f
u
n
ct
i
o
n
s
..
.
C
.
Normal locking o
f
the vehicle
Vehicle location.
1.
Openin
g
the fuel filler flap.
2.
Openin
g
and hookin
g
the fuel filler cap.
Fuel tank
92
161
T
an
k
capac
i
t
y
:
- approximatel
y
50 litres
(
petrol
)
,
- approximatel
y
48 litres
(
Diesel
)
.
A. Int
e
ri
o
r r
e
l
ease
l
e
v
e
r.
B.
Exterior safet
y
catch.
C
. Bonnet sta
y
.
B
o
nn
et
Interior features
Interior mood lighting
Thi
s su
bd
ue
d
passenger compartment
lighting improves visibilty inside the vehicle in
low lighting conditions. It comprises several
lamps, located in the footwells and in the lower
dashboard stora
g
e compartment.
Gear chan
g
e indicator
Associated with the manual gearbox, this
system suggests when to change up to obtain
o
p
timum
f
uel consum
p
tion.
Sce
n
ted
a
ir
f
r
es
h
e
n
e
r
The scented air
f
reshener di
ff
uses the
selected fragrance throughout the passenger
c
ompartment from its location in the ventilation
sys
t
em.
Digi
ta
l
a
i
r con
di
t
i
on
i
n
g
Af
ter settin
g
the desired level o
f
com
f
ort, the
sy
stem t
h
en automat
i
ca
lly
contro
l
s t
hi
s
l
eve
l
a
ccor
di
n
g
to t
h
e exter
i
or c
li
mat
i
c con
di
t
i
ons.
10
7
14
6
69
66
2
4
5
Aud
i
o
a
n
d
co
mm
u
ni
cat
i
o
n
sy
stems
These s
y
stems bene
f
it
f
rom the latest
technolo
gy
: MP3 compatible Audio s
y
stem,
B
luetooth s
y
stem and U
S
B Box, M
y
Wa
y
with
1
6
/
9 colour screen, auxiliary inputs, Hi-Fi audio
s
ystem.
MyWay
21
7
A
udio system

11
Familiarisation
Instruments and controls
1
.
Cruise control/speed limiter controls.
2.
Headlamp height adjustment.
3.
Steerin
g
wheel ad
j
ustment.
4.
Ligh
t
i
n
g
an
d
di
rect
i
on
i
n
di
cator sta
lk
5.
Instrument panel.
6
.
D
r
i
ver
'
s a
i
r
b
a
g
.
Horn.
7
.
Gear lever.
8
.
12 V accessory socket
USB port/auxiliary socket.
9
. H
ea
t
ed
sea
t
co
ntr
o
l.
1
0
.
B
o
nn
e
t r
e
l
ease
l
e
v
e
r.
11.
Doo
r m
i
rr
o
r
co
ntr
ols
.
Electric window controls.
12.
Fusebox.
13
.
Electronic stability programme button
(ESP/ASR).
1
4.
Front door window demisting/defrosting
vent.
1
5
.
Speaker (tweeter).
1
6
.
Windscreen demistin
g
/defrostin
g
vent.

Instruments and controls
1
. Steering lock and ignition.
2.
Audio equipment steering wheel controls.
3.
Wipers/wash-wipe/trip computer stalk.
4.
S
cented air
f
reshener.
5.
Central locking button.
6.
Multi
f
unction screen.
7.
Hazard warning lamp switch.
8.
C
entral adjustable air vents.
9.
Sunshine sensor
Hi-Fi audio system central speaker.
10.
Passenger's airbag.
11.
Side ad
j
ustable air vent.
12.
G
love box
/
Passen
g
er airba
g
deactivation.
13.
P
ar
ki
n
g
b
ra
k
e.
14.
C
entral armrest with stora
g
e.
15.
Upper and lower storage.
16.
M
y
W
ay or
A
u
di
o system.
1
7
.
Heating/air conditioning controls.

13
Familiarisation
Sitting comfortably
3
. Seat back angle adjustment.
7
1
Front seats
1
. Forwards-backwards adjustment.
2
. Height adjustment.

Sitting comfortably
4.
Head restraint hei
g
ht ad
j
ustment.
Other adjustments
Other functions...
Access to rear seats.
H
eate
d
seats.
7
2
1.
Unlock the ad
j
ustment mechanism.
2.
Ad
j
ust for hei
g
ht and reach.
3.
L
oc
k
t
h
e a
dj
ustment mec
h
an
i
sm.
Steerin
g
wheel ad
j
ustment
75
For reasons o
f
sa
f
et
y
, these operations
m
ust on
ly
b
e carr
i
e
d
out w
i
t
h
t
h
e
v
e
hi
c
l
e stat
i
onar
y
.

15
Familiarisation
Sitting comfortably
D
oo
r mirr
o
r
s
Adjustment
A. Selecting the door mirror.
B.
Ad
j
ustin
g
the position of the door mirror.
C
. De-selectin
g
the door mirror.
76
Ot
h
e
r f
u
n
ct
i
o
n
s
..
.
Folding/Unfolding.
R
ea
r vi
e
w mirr
or
Manual day/night type
1
.
Selecting the "day" position of the rear view mirror.
2.
R
ea
r vi
e
w mirr
o
r
o
ri
e
nt
a
ti
o
n.
77
A
utomatic day/night type
77
1
. Automatic detection of day/night mode.
2
. R
ea
r vi
e
w mirr
o
r
o
ri
e
nt
a
ti
o
n.
A. Fitting the belt.
B.
Fastenin
g
.
C
. Check that the belt is correctl
y
fastened b
y
p
u
lli
n
g
on t
h
e
b
e
l
t we
bbi
n
g
.
Fr
o
n
t
seat
be
l
ts
133

Seeing clearly
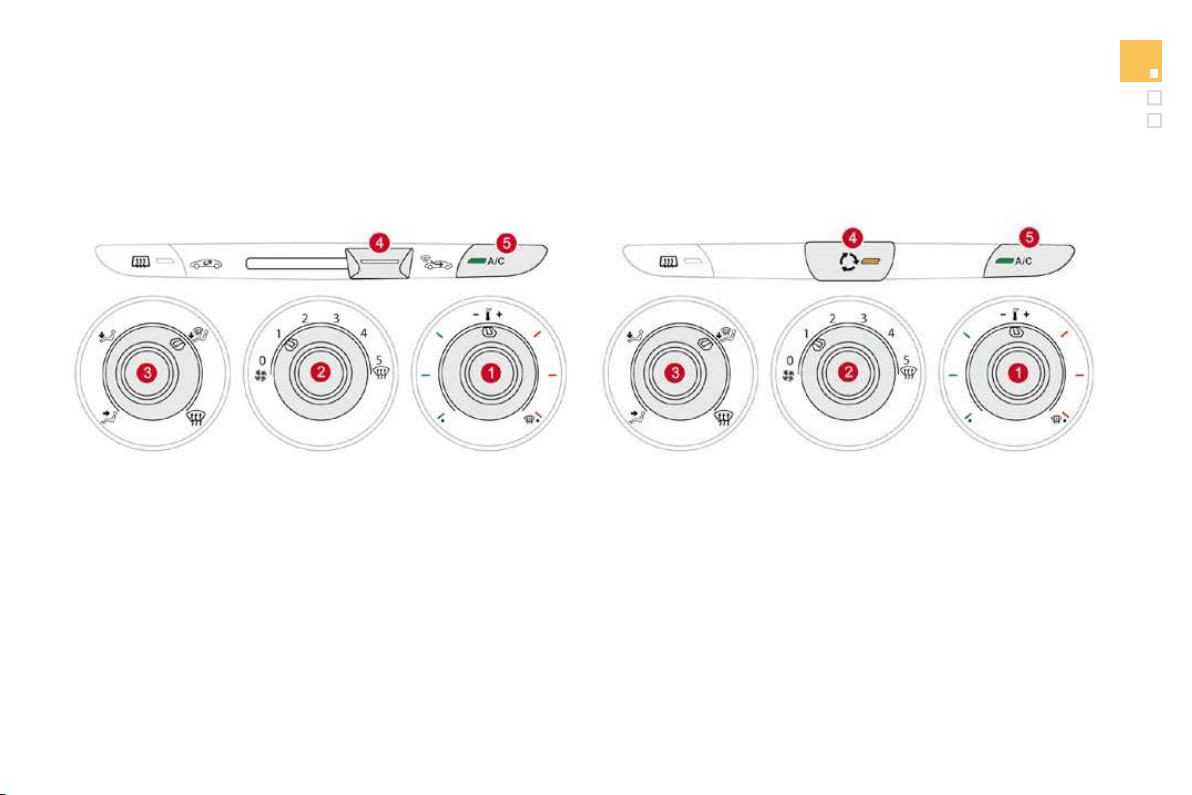
Lighting
Ring A
Ring B
Wipers
96
Control stalk A: windscreen
wipers
2.
Fast wipe.
1.
N
orma
l
w
ip
e.
In
t.
Intermittent wipe.
0
. Park.
AUTO È
A
utomatic wiping or single wipe.
Wash-wipe: pull the stalk towards
y
ou.
102
Switching on "AUTO" mode
)
Push
t
he
s
t
alk
do
wnw
a
r
ds
a
n
d
r
elease
i
t.
S
witchin
g
o
ff
"AUT
O
" mode
)
Push the stalk upwards and return it to
p
osition "0
"
.
Ring B: rear wiper
1
04
1
03
Lighting off.
A
utomatic illumination of headlamps.
Sidelamps.
Dipped/main beam headlamps.
Front and rear
f
o
g
lamps.
P
ar
k
.
I
nterm
i
ttent w
ip
e.
Wash-wipe.
1
7
Familiarisation
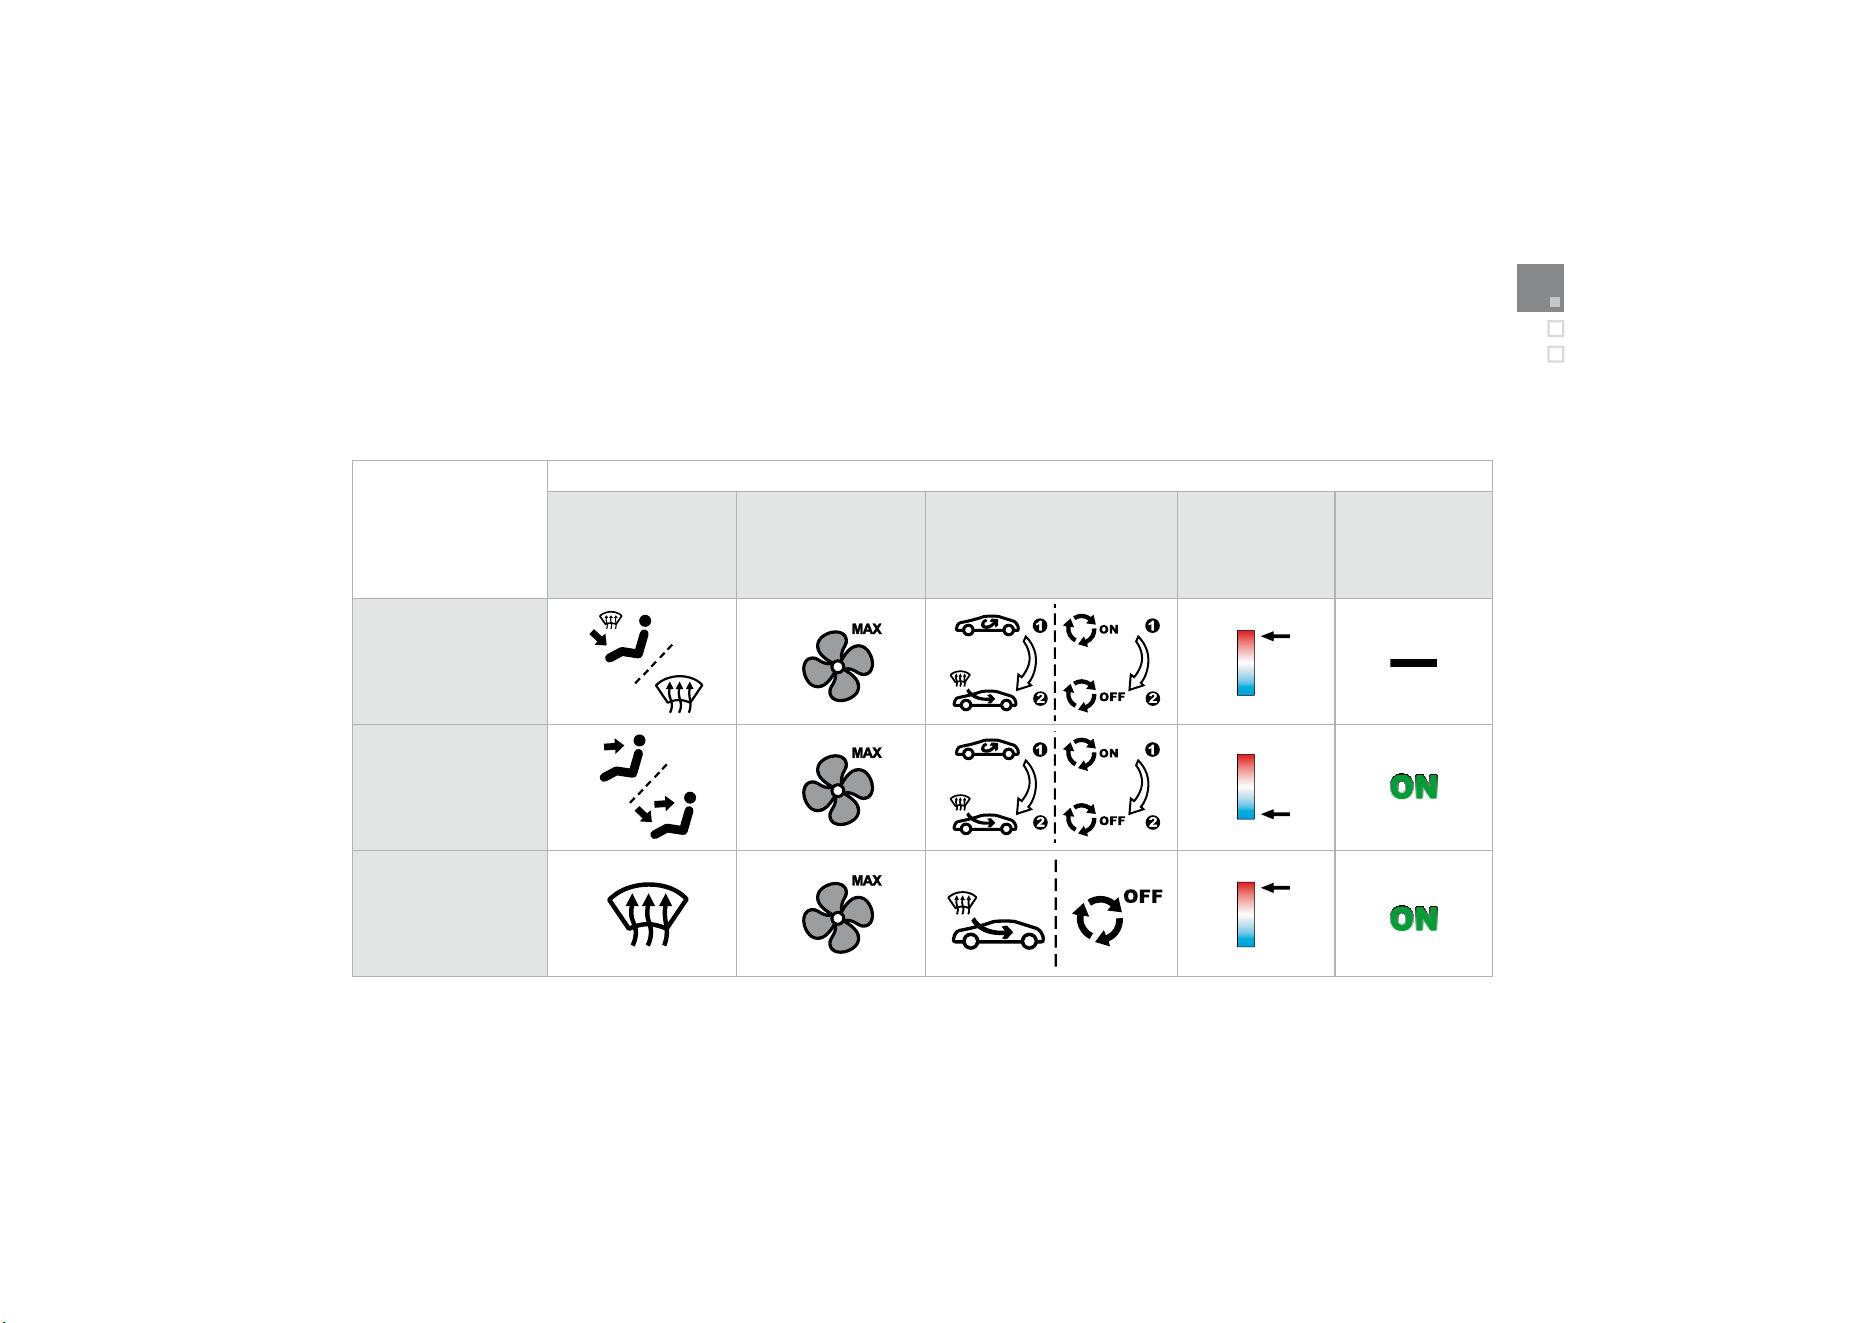
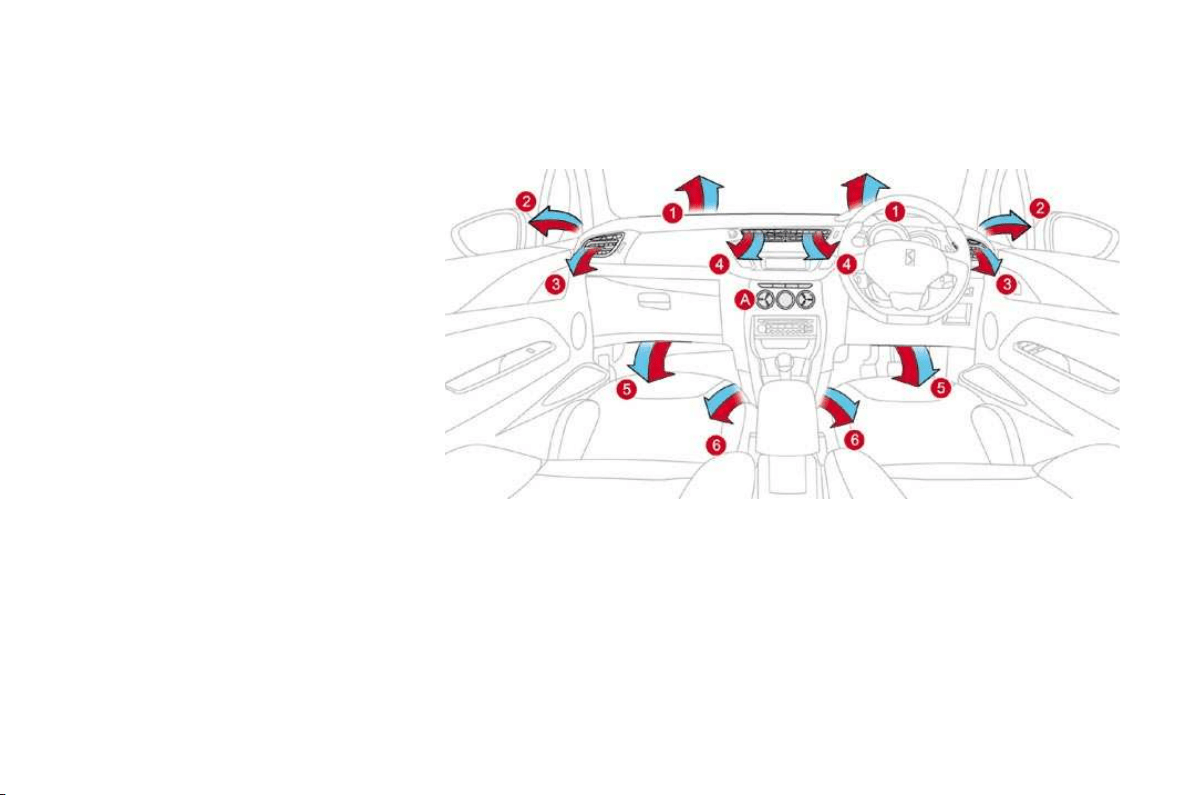
Ventilation
Advice on interior settin
g
s
I require...
H
eat
i
ng or
M
anua
l
a
i
r con
di
t
i
on
i
ng
Air distribution
A
ir
f
low
Ai
r r
eci
r
culatio
n
/
Ex
te
ri
o
r
a
ir in
ta
k
e
T
em
p
eratur
e
M
anual A/
C
HEAT
COO
L
D
EMISTING
D
EFROSTING
Digital
air conditioning: use of the fully automatic mode by pressing the
"
AUTO" button is preferable.

Monitoring
On switchin
g
on, the dial needles
g
o to the
extent of their travel then return to 0.
A.
With the i
g
nition on, the
f
uel
g
au
g
e bars
f
or
t
he
f
uel remainin
g
should li
g
ht up.
B.
Wi
t
h
t
h
e en
gi
ne runn
i
n
g
, t
h
e assoc
i
ate
d
l
ow level warning lamp should switch o
ff
.
C. With the ignition on, the oil level indicator
should display
"
OIL OK
"
for a few
seco
n
ds
.
If the levels are not correct, top up the level
w
hi
c
h i
s
l
o
w.
Instrument panel
2
4
1.
With the i
g
nition on, the oran
g
e and red
w
arnin
g
lamps come on.
2.
Wi
t
h
t
h
e en
gi
ne runn
i
n
g
, t
h
ese warn
i
n
g
l
am
p
s should switch o
ff
.
I
f
a warnin
g
lamp remains on, re
f
er to the pa
g
e
c
oncerne
d
.
Warnin
g
lamps
26
Li
g
htin
g
of the indicator lamp indicates
deactivation of the ESP/ASR s
y
stem.
Switch panel
1
3
1
Familiarisation
Passenger safety
1.
Open the glove box.
2.
Insert the ke
y
.
3.
Select position:
"ON"
(
activation
)
, with
f
ront passen
g
er o
r
"
f
orwards
f
acin
g
" child seat,
"OFF"
(deactivation), with "rear facing"
c
hild
seat.
4.
Remove the key keeping the switch in the
n
ew
p
os
i
t
i
on.
Front passen
g
er's airba
g
1
3
7
A.
Fr
o
nt
sea
t
be
lt
s
n
o
t f
as
t
e
n
ed
o
r
u
nf
as
t
e
n
ed
warnin
g
lamp
.
Fr
o
n
t
seat
be
l
ts
a
n
d
passen
g
er's front airba
g
138
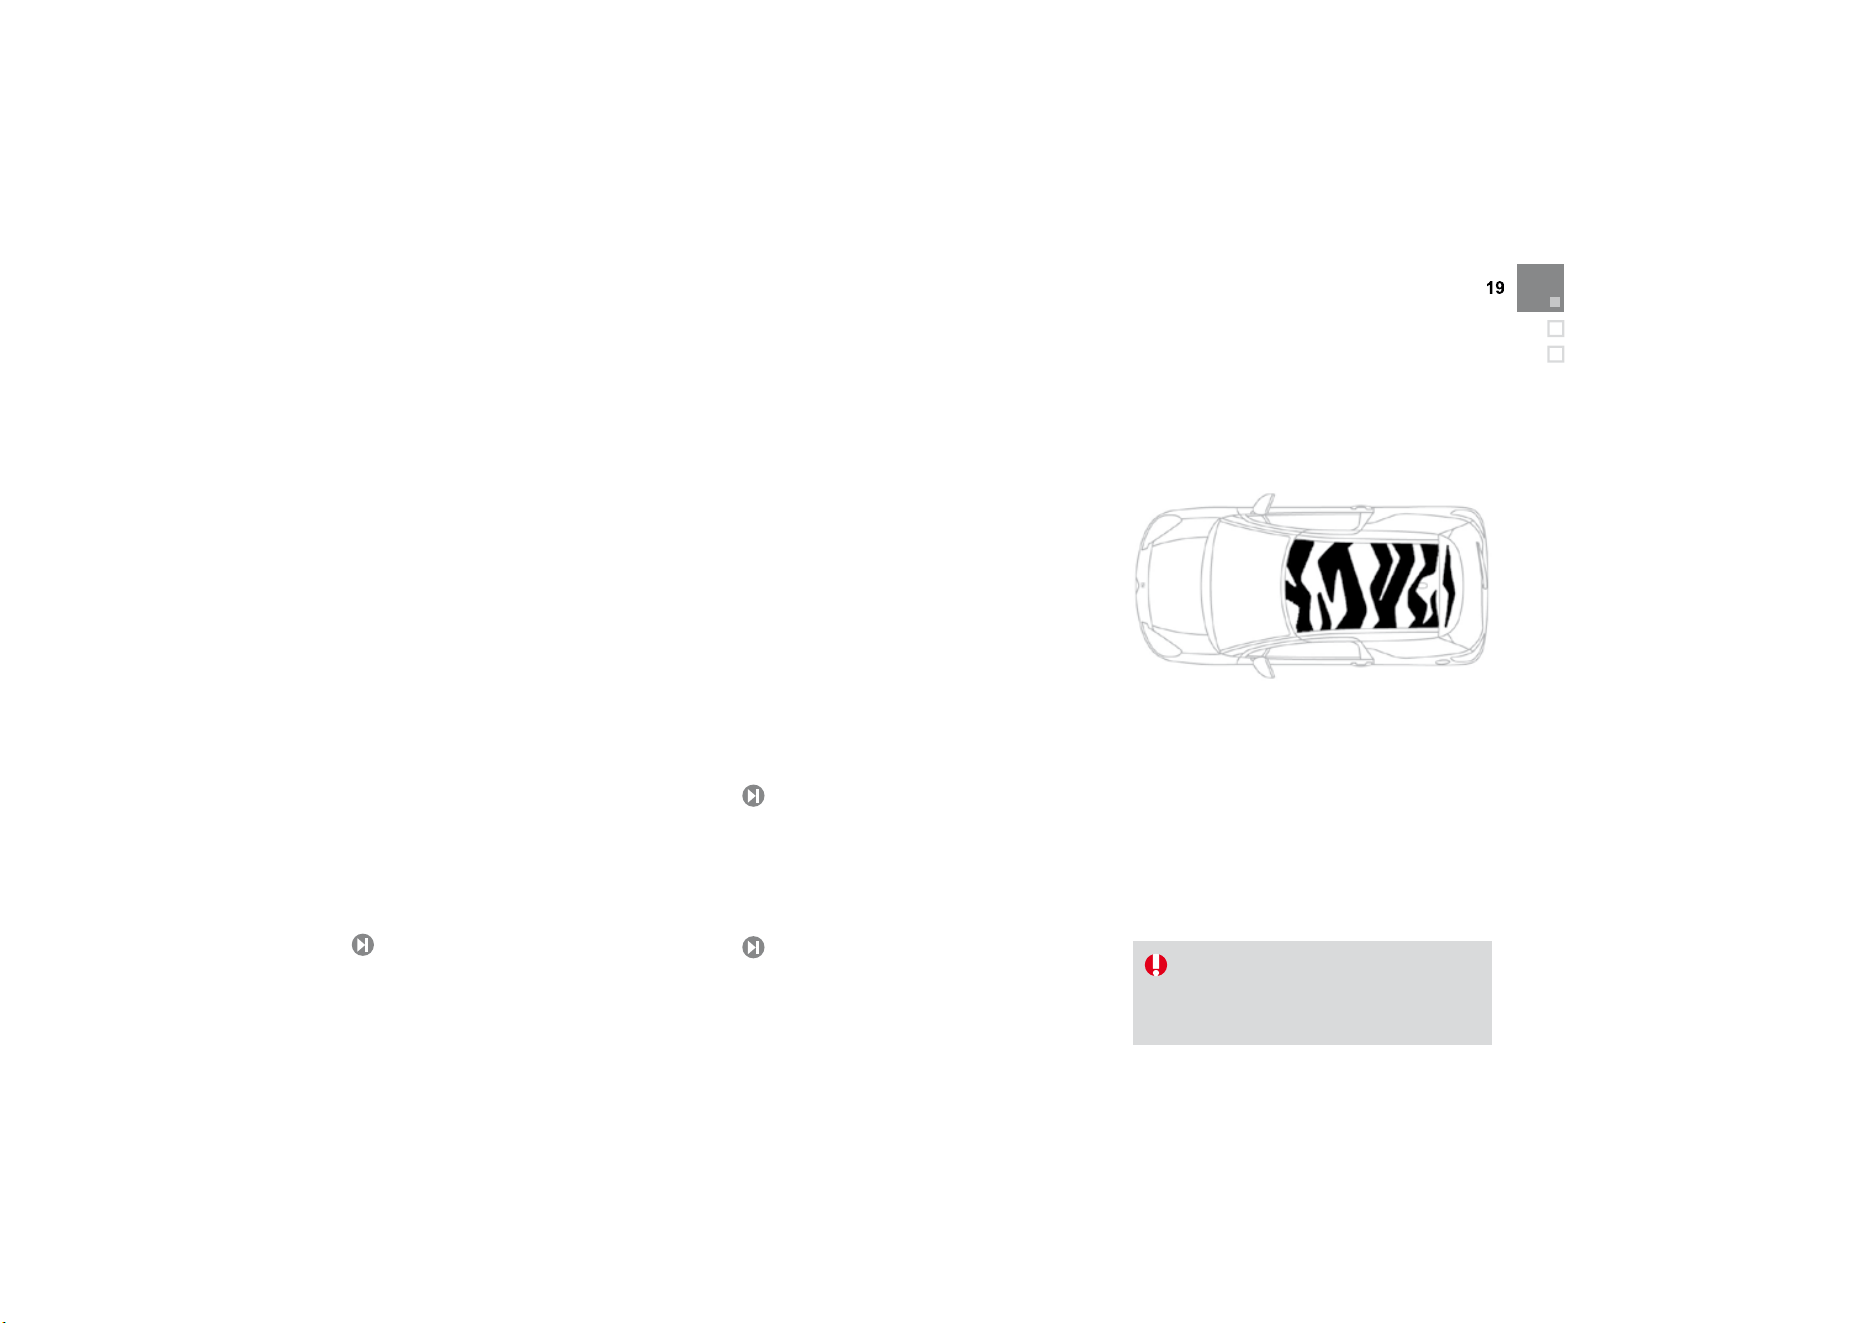
Personalise your vehicle
These st
y
lin
g
stickers are treated to
g
ive
g
ood
resistance to a
g
ein
g
and tearin
g
.
Th
e
y
h
ave
b
een
d
es
ig
ne
d
to a
ll
ow
y
ou to
persona
li
se
y
our ve
hi
c
l
e
'
s
b
o
dy
wor
k
.
A
va
il
a
bl
e a
l
so as accessor
i
es, we recommen
d
that you have them fitted by a CITRO
Ë
N dealer.
Usin
g
expressive stickers
When usin
g
a hi
g
h pressure
j
et wash,
k
ee
p
the end o
f
the lance at least
30
centimetres
f
rom the stickers
B.
F
ront passen
g
er
'
s a
i
r
b
a
g
d
eact
i
vat
i
on
i
n
di
cator
l
am
p
.
C.
F
ront passenger
'
s a
i
r
b
ag act
i
vat
i
on
indicator lamp.
133

Driving safely
1
. Selecting/Switching off speed limiter mode.
2.
Decrease the pro
g
rammed value.
3.
I
ncrease t
h
e pro
g
ramme
d
va
l
ue.
4.
Speed limiter on/off.
The values must be set with the engine running.
Speed limiter "LIMIT"
1
5
1
1.
Selecting/Switching off cruise control mode.
2.
Decrease the pro
g
rammed value.
3.
I
ncrease t
h
e pro
g
ramme
d
va
l
ue.
4.
C
ruise control
Off/
Resume.
I
n or
d
er to
b
e pro
g
ramme
d
or act
i
vate
d
, t
h
e
vehicle speed must be higher than 25 mph
(
40 km
/
h
)
, with at least
f
ourth gear engaged
o
n a manual gearbox (second gear on an
automatic gearbox).
Cr
u
i
se
co
n
t
r
o
l "CR
U
I
S
E"
1
53
The cruise control or speed limiter mode
a
ppears on the instrument panel when it is
selec
t
ed
.
Displa
y
in the instrument panel
Cruise control
S
p
eed limiter

Petrol - Diesel instrument panels, manual or automatic gearbox
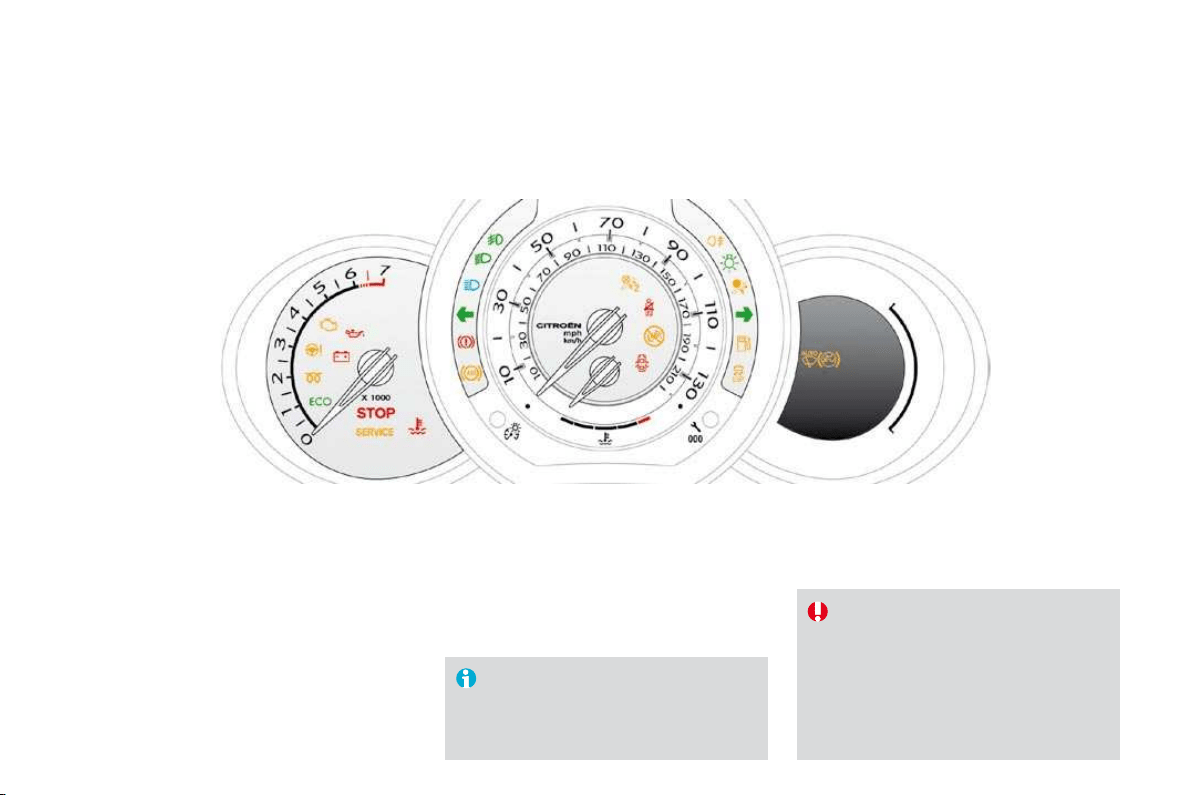
Provided with permanent back-lighting, the instrument panel groups together the vehicle's dials and indicator and warning lamps.
1
.
Rev counter.
Indicates the speed of rotation of the
en
g
ine
(
x 1 000 rpm
)
.
2.
V
e
hi
c
l
e s
p
ee
d
.
Indicates the current speed o
f
the movin
g
v
ehicle
(
km
/
h or mph
)
.
3.
Engine coolant
temperature
.
Indicates the temperature of the engine
coolant liquid (° Celsius).
Dials
7.
L
ighting rheostat button.
A
d
j
usts the level of the instrument and controls
ill
um
i
nat
i
on an
d
t
h
e
i
nter
i
or moo
d
ligh
t
i
n
g
.
4.
Display screen
.
5
. Fuel level
.
Indicates the quantit
y
o
f
f
uel remainin
g
in
the
t
a
n
k
.
6.
Di
sp
l
a
y
mana
g
ement
b
utton
Al
ternates
di
sp
l
ay
b
etween range an
d
tr
i
p
mileage recorder.
Servicing information.
Resets the selected function to zero (trip
d
istance recorder or service indicator).
For more information
,
refer to the
para
g
rap
h
re
l
at
i
n
g
to t
h
e
b
utton or
f
unction and its associated displa
y
.

25
Instruments and controls
Screen
E.
Service indicator
(miles or km), then
Total mileage recorder
These two functions are displa
y
ed
success
i
ve
ly
w
h
en sw
i
tc
hi
n
g
on t
h
e
ig
n
i
t
i
on
F.
Engine oil level indicator
r
Appears a
f
ew seconds a
f
ter switchin
g
on
th
e
i
gn
i
t
i
on, t
h
en
di
sappears.
A
.
Speed limiter
(mph or km/h) or
C
ruise control.
B.
Gear change indicator.
C
.
A
utomatic
g
earbox in
f
ormation.
D.
R
an
ge
(miles or km) or
T
r
i
p m
il
eage recor
d
er.

Visual indicators informing the driver
that a system is in operation
(
operation
or deactivation indicator lamps) or of the
occurrence of a fault (warning lamp).
I
ndicator and warnin
g
lamps
Wh
en t
h
e
i
gn
i
t
i
on
i
s sw
i
tc
h
e
d
on
C
ertain warnin
g
lamps come on
f
or a
f
ew seconds
w
h
en t
h
e ve
hi
c
l
e
'
s
ig
n
i
t
i
on
i
s sw
i
tc
h
e
d
on.
Wh
en t
h
e eng
i
ne
i
s starte
d
, t
h
ese same warn
i
ng
l
am
p
s should switch o
ff
.
If they remain on, before moving off, refer to the
information on the warning lamp concerned.
A
ssoc
i
ate
d
warn
i
ngs
The switchin
g
on o
f
certain warnin
g
lamps ma
y
b
e accompan
i
e
d
by
an au
dibl
e s
ig
na
l
an
d
a
m
essage on the multi
f
unction screen.
The warning lamps may come on
continuously (fixed) or flash.
Certain warnin
g
lamps ma
y
come
o
n in two different modes. Onl
y
b
y
relatin
g
the t
y
pe o
f
li
g
htin
g
to the
o
peratin
g
status o
f
the vehicle can it
b
e ascerta
i
ne
d
w
h
et
h
er t
h
e s
i
tuat
i
on
i
s
normal or whether a
f
ault has occurred.
Th
e passenger a
i
r
b
ag system operat
i
on
l
amp stays on for about a minute after
switching on the ignition, even after the
engine has started.

2
7
Instruments and controls
Operation indicator lamps
I
f
one o
f
the
f
ollowing indicator lamps comes on, this con
f
irms that the corresponding system has come into operation.
Warning lamp
i
s o
n
C
ause
A
ction/Observations
Le
f
t
-h
a
n
d
di
r
ectio
n
i
n
dicato
r
flashing with buzzer.
Th
e
ligh
t
i
n
g
sta
lk
i
s pus
h
e
d
d
own.
Ri
g
ht-hand
d
irection indicator
flashing with buzzer.
The li
g
htin
g
stalk is pushed up.
S
idelamps
fixed.
The lighting stalk is in the "
S
idelamps"
position.
T
urn t
h
e contro
l
to t
h
e
d
es
i
re
d
p
os
i
t
i
on.
Di
pp
ed beam
h
ea
dl
am
p
s
fixed.
The li
g
htin
g
stalk is in the "Dipped
b
eam
h
ea
dl
am
p
s
"
p
os
i
t
i
on.
Turn the control to the desired position.
Main beam
h
eadlamps
fixed.
Th
e
li
g
h
t
i
ng sta
lk
i
s pu
ll
e
d
towar
d
s
you.
P
u
ll
t
h
e sta
lk
to return to
dipp
e
d
b
eam
h
ea
dl
am
p
s.
Front foglamps
fixed.
The front foglamps are switched on. Turn the ring on the stalk rearwards twice to switch of
f
t
he front fo
g
lamps.
Rear
f
o
g
lamps
fixed.
The rear
f
o
g
lamps are switched on. Turn the rin
g
on the stalk rearwards to switch o
ff
the
r
ear
f
o
g
lamps.
Warning lamp
is on
Cause
A
ct
i
o
n/
Obse
rv
at
i
o
n
s
Diesel engine
pre-heatin
g
fix
ed
. The ignition switch is at the
2
nd
position
(
i
g
nition on
)
.
Wait until the warning lamp has switched off before starting.
The duration for which the warnin
g
lamp is on is determined
by
t
h
e c
li
mat
i
c con
di
t
i
ons.
P
ar
ki
n
g
b
ra
k
e
f
ixed.
Th
e par
ki
n
g
b
ra
k
e
i
s app
li
e
d
or not
properly released.
Release the parkin
g
brake to switch o
ff
the warnin
g
l
amp, keepin
g
y
our
f
oot on the brake pedal.
O
bserve the sa
f
et
y
recommendations.
For
f
urther in
f
ormation on the parkin
g
brake, re
f
er to
th
e
"D
r
i
v
i
n
g"
sect
i
on.
Engine coolant
t
empera
t
ure
f
ixed blue.
O
n starting the engine, it indicates
t
hat the engine is cold.
Af
ter a
f
ew minutes driving, it swiches o
ff
to indicate
th
at t
h
e eng
i
ne temperature
i
s norma
l
.
I
n or
d
er to protect your eng
i
ne, avo
id
d
r
i
v
i
ng too
h
ar
d
u
ntil the warning lamp has switched o
ff
.
Foot on the brake
p
eda
l
fix
ed
. With an automatic gearbox, you have
f
or
g
otten to press the brake pedal to
come out of the
P
p
ost
i
on.
With the engine running, before releasing the parking
b
rake you must press the brake pedal to unlock the
t
he automatic gear selector lever and come out of the
P position.
A
utomat
i
c w
i
p
i
n
g
f
ix
ed
.
Th
e w
ip
er contro
l
i
s
p
us
h
e
d
downwards.
A
utomatic
f
ront wipin
g
is activated.
Passenger's
airbag system
fix
ed
. The control switch, located in the glove
box, is in the "
ON
" position.
The passen
g
er's front airba
g
is activated.
In this case, do not install a rear-
f
acin
g
child
seat.
T
u
rn th
e
co
ntr
o
l
s
wit
c
h t
o
th
e
" OF
F
" position to
d
eactivate the front passen
g
er's airba
g
.
I
n this case
y
ou can install a rear-facin
g
child seat.
Th
e passen
g
er
'
s a
i
r
b
a
g
s
y
stem
i
s automat
i
ca
lly
put
into service on startin
g
the vehicle
(
"
ON
" position
)
.
29
Instruments and controls
Deactivation indicator lamps
I
f
one o
f
the
f
ollowing indicator lamps comes on, this con
f
irms that the corresponding system has been switched o
ff
intentionally.
This is accompanied by an audible signal and a message on the multifunction screen.
Warning lamp
i
s o
n
C
ause
A
ction/Observations
P
assen
g
er
'
s
ai
r
b
ag system
fixed.
Th
e contro
l
,
l
ocate
d
i
n t
h
e
gl
ove
b
ox,
is set to the
O
F
F
p
os
i
t
i
on.
The passenger's front airbag is
deactivated.
I
n this case you can install a "rear
f
acing" child seat.
S
et the control to the
O
N
p
os
i
t
i
on to act
i
vate t
h
e
p
assenger's
f
ront airbag. In this case, do not
f
it a child
seat in the rear-facing position.
The passenger's airbag system is put into service
a
utomatically when the vehicle is started (
O
N position).
E
S
P/A
SR
fixed.
Th
e
b
utton,
l
ocate
d
at t
h
e
b
ottom
l
e
f
t o
f
the dashboard, is
p
ressed. Its
i
n
di
cator
l
am
p
i
s on.
The E
S
P
/
A
S
R is deactivated.
ESP: electronic stability programme.
A
SR: anti-skid regulation.
P
ress t
h
e
b
utton a
g
a
i
n to manua
lly
react
i
vate t
h
e
E
S
P
/
A
S
R. Its indicator lam
p
switches o
ff
.
From approximately 30 mph
(
50 km
/
h
)
,
th
e system
i
s react
i
vate
d
automat
i
ca
ll
y
(except for the 1.6 litre THP 150 engine).
The ESP/ASR system is activated automatically when
t
h
e
v
e
hi
c
l
e
i
s
s
t
a
rt
ed
.
Warning lamps
When the engine is running or the vehicle is
being driven, the switching on of one of the
following warning lamps indicates a fault which
requires action on the part of the driver.
A
n
y
f
ault resultin
g
in the switchin
g
on o
f
a warnin
g
lamp must be investi
g
ated
f
urther b
y
r
eadin
g
the associated messa
g
e on the multi
f
unction screen.
If
y
ou encounter an
y
problems, do not hesitate to contact a CITRO
Ë
N dealer.
Warning lamp
is on
C
ause
A
ct
i
o
n/
Obse
rv
at
i
o
n
s
S
T
O
P
f
ixed
,
associated with
anot
h
er warn
i
n
g
l
amp
and accompanied by
an au
dibl
e s
ig
na
l
.
I
t
i
s assoc
i
ate
d
w
i
t
h
t
h
e
b
ra
ki
n
g
s
y
stem or t
h
e en
gi
ne coo
l
ant
temperature.
S
to
p
as soon as it is sa
f
e to do so.
Park, switch off the i
g
nition and call a CITRO
Ë
N
d
ea
l
er.
S
ervice
temporarily.
A
minor
f
ault has occurred
f
or which
t
here is no speci
f
ic warning lamp.
Identi
fy
the
f
ault b
y
readin
g
the messa
g
e shown on the
screen, such as,
f
or exam
p
le:
- t
h
e eng
i
ne o
il
l
eve
l
,
- the screenwash level
,
- the remote control battery,
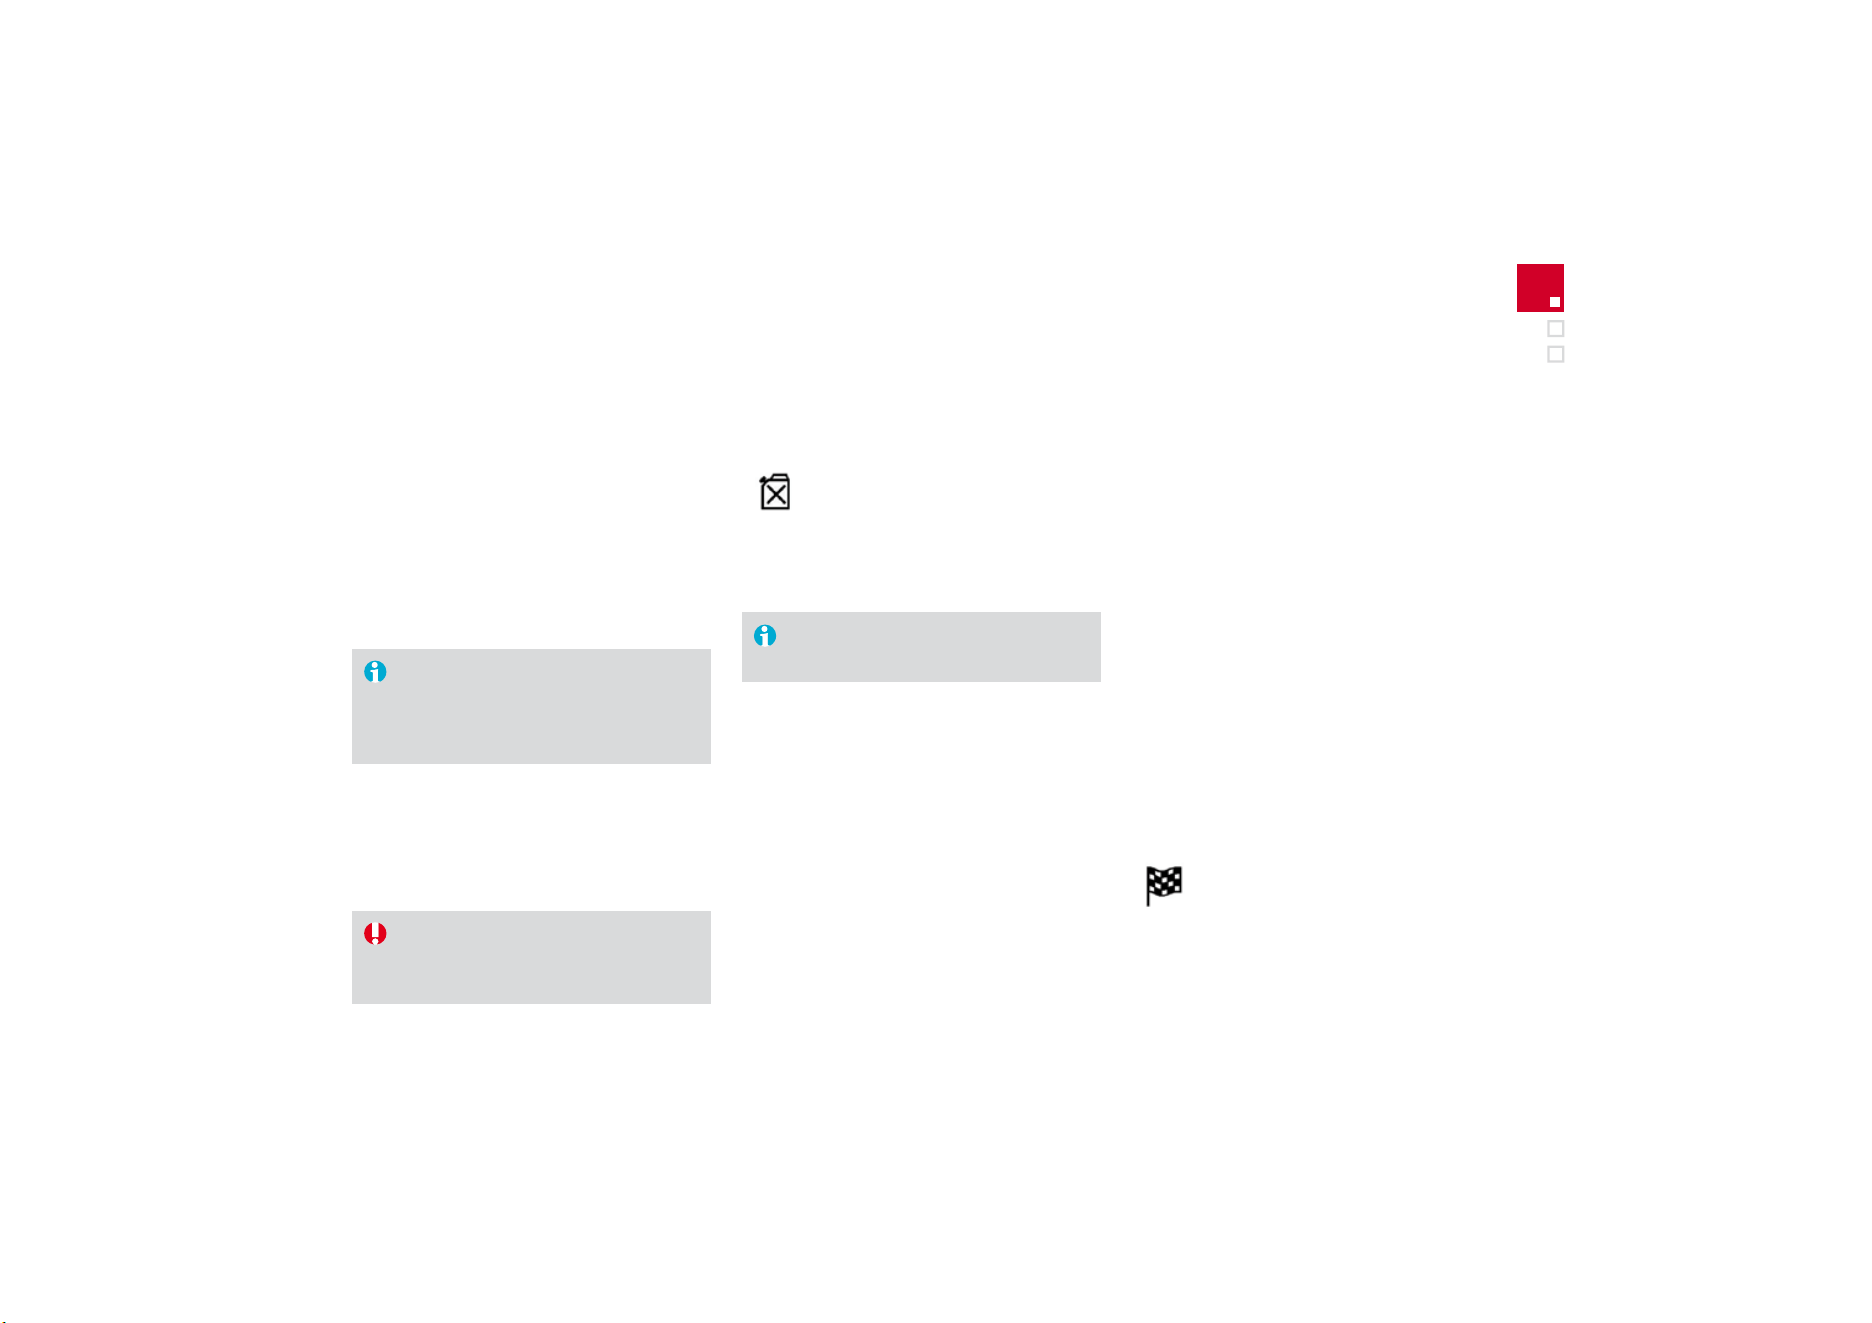
- saturation of the particle emission filter (Diesel).
For an
y
other faults, contact a CITROËN dealer.
f
ix
ed
.
A
ma
j
or
f
ault has occurred
f
or which
t
here is no speci
f
ic warnin
g
lamp.
Identi
fy
the
f
ault b
y
readin
g
the messa
g
e shown on the
screen and contact a
C
ITR
OË
N dealer.

31
Instruments and controls
B
ra
ki
n
g
fixed.
The brakin
g
s
y
stem
f
luid level has
d
ropped signi
f
icantly.
Top up with brake fluid recommended b
y
CITRO
Ë
N.
I
f
the problem persists, have the system checked by a
CITROËN dealer.
+
fixed, associated with
t
he ABS warning lamp.
Th
e
e
l
ec
tr
o
ni
c
b
r
a
k
e
f
o
r
ce
d
i
s
tri
bu
ti
o
n
(EBFD) system has a fault.
Have it checked by a CITROËN dealer.
Warning lamp
i
s o
n
C
ause
A
ction/Observations
Anti-lock Braking
S
ystem (ABS)
fixed.
Th
e ant
i
-
l
oc
k
b
ra
ki
n
g
s
y
stem
h
as a
f
ault.
Th
e ve
hi
c
l
e reta
i
ns convent
i
ona
l
b
ra
ki
n
g
.
Drive care
f
ully at reduced speed and contact a
CITRO
Ë
N dealer without delay.
D
ynam
i
c sta
bili
ty
c
ontrol
(
ESP/ASR
)
flashing.
The ESP/ASR regulation is active. The system optimises traction and improves the
directional stability of the vehicle.
fixed.
U
n
l
ess
i
t
h
as
b
een
d
eact
i
vate
d
w
i
t
h
th
e
i
n
di
cator
l
am
p
on t
h
e
b
utton on,
t
he E
S
P
/
A
S
R system is
f
aulty.
Have it checked b
y
a CITRO
Ë
N dealer.

Warning lamp
is on
Cause Action/Observation
s
Engine
auto
di
a
g
nos
i
s
s
ys
t
em
f
ixed.
Th
e em
i
ss
i
on contro
l
s
y
stem
h
as a
f
ault.
This lamp should switch o
ff
when the en
g
ine is started.
If it does not switch off, contact a CITRO
Ë
N deale
r
u
rgently.
flashing. The engine management system has
a
f
au
lt.
Risk of destruction of the catalytic convertor.
Have it checked by a CITROËN dealer.
Lo
w
fue
l l
e
v
e
l
f
ixed. When it
f
irst comes on there remains
approximatel
y
5 litres o
f
fue
l
in
th
e tan
k
.
You must re
f
uel as soon as possible to avoid runnin
g
o
ut o
f
f
uel.
Thi
s warn
i
ng
l
amp w
ill
come on every t
i
me t
h
e
i
gn
i
t
i
on
i
s
switched on
,
until a sufficient addition of fuel is made.
Fuel tank capacity: approximately 50 litres (petrol) or
48 litres (Diesel).
Never continue to drive until
y
ou run out of fuel as
t
his could dama
g
e the emission control and in
j
ection
s
y
s
t
ems.
M
aximum coolant
t
em
p
erature
fix
ed
r
ed
. The temperature of the cooling system
is too high.
Stop as soon as it is safe to do so.
Wait until the en
g
ine has cooled down before toppin
g
u
p the level, if necessar
y
.
If the
p
roblem
p
ersists, contact a CITRO
Ë
N dealer.
33
Instruments and controls
Warning lamp
i
s o
n
C
ause
A
ction/Observations
E
n
gi
ne o
il
press
u
re
fixed.
There is a
f
ault with the en
g
ine
l
u
b
r
i
cat
i
on system.
S
to
p
as soon it is sa
f
e to do so.
Park, switch off the ignition and contact a CITRO
Ë
N
dealer.
Battery charge
fixed.
The battery charging circuit has a fault
(dirty or loose terminals, slack or cut
alternator belt, ...).
This lamp should switch off when the engine is started.
If it does not switch off
,
contact a CITROËN dealer.
Door(s) open
fixed if the speed is
b
elow 6 mph
(
10 km/h
)
.
A
door or the boot is still open. Close the door or boot.
f
ixed and accom
p
anied
b
y an au
dibl
e s
i
gna
l
if the speed is above
6 mph (10 km/h).
Airbag
s
temporarily.
This lam
p
comes on
f
or a
f
ew seconds
wh
en you turn on t
h
e
i
gn
i
t
i
on, t
h
en
switches off.
This lamp should switch o
ff
when the en
g
ine is started.
If it does not switch off, contact a CITRO
Ë
N dealer.
fixed. One of the airbag or seat belt
pretensioner systems has a fault.
Have it checked by a CITROËN dealer.
Warning lamp
is on
Cause Action/Observation
s
Seat
be
l
t
n
ot
faste
n
ed
/
u
n
faste
n
ed
fixed then flashing
accompanied by an
i
ncreas
i
n
g
au
dibl
e
s
i
gna
l
.
The driver and
/
or the
f
ront passen
g
e
r
has not
f
astened or has un
f
astened
their seat belt.
P
u
ll
t
h
e strap t
h
en
i
nsert t
h
e ton
g
ue
i
n t
h
e
b
uc
kl
e.
P
ower steer
i
n
g
f
ixed. The power steerin
g
has a
f
ault. Drive care
f
ull
y
at reducd speed.
Have it checked by a CITRO
Ë
N dealer.
35
Instruments and controls
With the engine running, when the needle is:
- in zone
A
, the temperature is correct,
- in zone
B
, the temperature is too high;
th
e
ce
ntr
a
l
S
T
O
P warnin
g
lamp and the
m
ax
i
mum temperature warn
i
n
g
l
amp
1
ligh
t up
i
n re
d
, accompan
i
e
d
by
an au
dibl
e
s
i
g
nal and a messa
g
e on the multi
f
unction
screen.
You
must
stop as soon as it is safe to do so.
Wait a few minutes before switching off the
engine.
Consult a CITROËN dealer.
Coolant temperature
indicator
A
fter driving for a few minutes, the temperature
a
nd pressure in the cooling system increase.
To top up the level:
)
wait for the en
g
ine to cool down,
)
unscrew t
h
e cap
by
two turns to a
ll
ow t
h
e
p
ressure to
d
ro
p
,
)
w
h
en t
h
e
p
ressure
h
as
d
ro
pp
e
d
, remove
th
e ca
p
,
) to
p
u
p
t
h
e
l
eve
l
to t
h
e
"MAX"
mar
k
.
System which informs the driver when the
next service is due, in accordance with the
manufacturer's servicing schedule.
Th
e
p
o
i
nt at w
hi
c
h
t
h
e serv
i
ce
i
s
d
ue
i
s
calculated from the last indicator zero reset.
It is determined by two parameters:
- the distance travelled,
- the time elapsed since the last service.
Service indicator
More than 600 miles
(
1 000 km
)
re
m
a
in
be
f
o
r
e
t
h
e
n
e
x
t
se
rvi
ce
i
s
due
For 5 seconds after the i
g
nition is switched on,
th
e spanner s
y
m
b
o
li
s
i
n
g
t
h
e serv
i
ce operat
i
ons
c
omes on.
Th
e
di
stance recor
d
er
di
sp
l
a
y
li
ne
indicates the distance remainin
g
be
f
ore the
next serv
i
ce
i
s
d
ue.
Example:
4 800 km remain be
f
ore the next
service is due.
For 5 seconds after the ignition is switched on,
t
he displa
y
indicates:
Less than 600 miles
(
1 000 km
)
r
e
m
a
in
be
f
o
r
e
t
h
e
n
e
x
t
se
rvi
ce
i
s
due
E
xam
p
le: 400 miles
(
900 km
)
remain before
t
he
n
e
xt
se
rv
ice
is
due
.
For 5 seconds a
f
ter the i
g
nition is switched on,
t
h
e
di
sp
l
a
y
i
n
di
cates:
5 seconds after the ignition is switched on,
th
e
d
i
s
t
a
n
ce
r
eco
r
de
r r
esu
m
es
it
s
n
o
rm
a
l
o
p
erat
i
on.
Th
e s
p
anner rema
i
ns on
to
i
n
dica
t
e
t
ha
t
a
se
rv
ice
m
us
t
be
ca
rr
ied
ou
t
soon
.
5 seconds after the ignition is switched on, the
spanner is switched off
;
the distance recorder
f
r
esumes its normal operation. The displa
y
then
indicates the total and trip distances.

3
7
Instruments and controls
5 seconds a
f
ter the i
g
nition is switched on,
t
he
dis
t
a
n
ce
r
eco
r
de
r r
esu
m
es
i
t
s
n
o
rm
al
operation.
Th
e spanner rema
i
ns
li
t
.
The distance remaining may be
w
ei
g
hted b
y
the time factor, dependin
g
o
n t
h
e
d
r
i
ver
'
s
d
r
i
v
i
n
g
h
a
bi
ts.
There
f
ore, the spanner ma
y
also come
o
n i
f
y
ou have exceeded the two
y
ear
serv
i
ce
i
nterva
l
.
Service indicator zero reset
Af
ter each service, the service indicator must
be reset to zero.
The procedure
f
or resetting to zero is as
f
ollows:
) switch off the ignition,
)
press and hold the trip distance recorder
zero reset button
,
)
switch on the i
g
nition; the distance recorder
di
sp
l
a
y
b
e
gi
ns a count
d
own,
)
w
h
en t
h
e
di
sp
l
a
y
i
n
di
cates
"
=
0"
, re
l
ease
th
e
b
utton; t
h
e s
p
anner
di
sa
pp
ears.
Followin
g
this operation, i
f
y
ou wish to
di
sconnect t
h
e
b
attery,
l
oc
k
t
h
e ve
hi
c
l
e
and wait at least
f
ive minutes
f
or the
zero reset to be taken into account.
Retrieving the service information
You can access the service in
f
ormation at an
y
t
i
me.
)
P
ress t
h
e tr
ip
di
stance recor
d
er zero reset
b
utton.
The service information is displayed for a
few seconds, then disappears.
S
ervice overdue
For 5 seconds after the ignition is switched
on
,
the spanner flashes
to indicate that
the service must be carried out as soon as
possible.
Example:
the service is overdue b
y
300
km.
For 5 seconds a
f
ter the i
g
nition is switched on,
t
h
e
di
sp
l
a
y
i
n
di
cates:

System which informs the driver whether the
engine oil level is correct or not.
Thi
s
in
fo
rm
a
ti
o
n i
s
in
d
i
ca
t
ed
fo
r
a
fe
w
seco
n
ds
when the ignition is switched on, after the
s
ervice in
f
ormation.
En
g
ine oil level indicator
The level read will onl
y
be correct i
f
t
h
e ve
hi
c
l
e
i
s on
l
eve
l
groun
d
an
d
t
h
e
e
ngine has been o
ff
f
or more than
1
5 minutes.
Oil level correct
Lack of oil
This is indicated by the
f
lashing o
f
"O
IL" ,
li
n
k
e
d
with the service warning lamp, accompanied
b
y an audible signal and a message on the
m
u
ltif
u
n
c
ti
o
n
sc
r
ee
n.
If the lack of oil is confirmed b
y
a check usin
g
th
e
di
pst
i
c
k
,
i
t
i
s essent
i
a
l
t
h
at t
h
e
l
eve
l
i
s
t
oppe
d
up to prevent
d
ama
g
e to t
h
e en
gi
ne.
Oil level indicator fault
This is indicated b
y
the
f
lashin
g
o
f
"
O
IL--
"
.
C
onsult a
C
ITR
OË
N dealer.
Th
e
r
e
a
r
e
2
m
a
rk
s
o
n th
e
d
ipstick:
-
A
= max; never excee
d
t
hi
s
level
(
risk o
f
dama
g
e to the
e
n
g
ine
)
,
-
B
= m
i
n; to
p
u
p
t
h
e
l
eve
l
v
i
a
the oil filler cap, using the
g
rade of oil suited to your
e
ngine.
Dip
st
i
c
k
Re
f
er to the "
C
hecks" section to locate the
dipstick and the oil
f
iller cap on your engine.
Instruments and controls
System which measures the total distance
travelled by the vehicle during its life.
The total and trip distances are displayed for
thirt
y
seconds when the i
g
nition is switched o
ff
,
when the driver's door is opened and when the
vehicle is locked or unlocked.
T
ota
l
d
i
sta
n
ce
r
eco
r
de
r
System which measures a distance travelled
durin
g
a da
y
or other period until it is reset to
zero by the driver.
)
Wi
t
h
t
h
e
ig
n
i
t
i
on on, press t
h
e
b
utton unt
il
zeros appear.
T
r
ip
di
stance recor
d
er
System for manual adjustment of the brightness
o
f th
e
in
s
tr
u
m
e
nt
s
a
n
d
co
ntr
o
l
s
in r
e
l
a
ti
o
n t
o
th
e
e
xter
i
or
b
r
igh
tness.
Li
g
h
t
i
ng r
h
eostat
A
ct
i
vat
i
on
Wh
en t
h
e
ligh
t
i
n
g
i
s on:
)
press t
h
e
b
utton to c
h
an
g
e t
h
e
b
r
igh
tness
o
f
the instruments and controls,
)
when the level o
f
brightness required is
reached
,
release the button.
D
eact
iv
at
i
o
n
When the lighting is o
ff
, or in day mode on
vehicles fitted with LED lamps, pressing the
button does not have any effect.

Black panel
System allowing certain displays to be switched
off for ni
g
ht drivin
g
.
Th
e
i
nstrument pane
l
rema
i
ns
li
t w
i
t
h
on
ly
t
h
e
vehicle speed and cruise control or speed
limiter in
f
ormation, i
f
in use.
If there is an alert or a change in a function
or to a sett
i
ng, t
h
e
bl
ac
k
pane
l
mo
d
e
i
s
interrupted.
Activation
)
With the li
g
htin
g
on, press the le
f
t hand
button o
f
the instrument
p
anel several
ti
mes to pro
g
ress
i
ve
ly
re
d
uce t
h
e
d
as
hb
oar
d
li
g
h
t
i
ng
l
eve
l
.
)
Press the button again to reduce the
l
ighting to the minimum level and switch of
f
t
he ambience lighting.
)
Press the button a
g
ain to activate the black
panel.
41
Instruments and controls
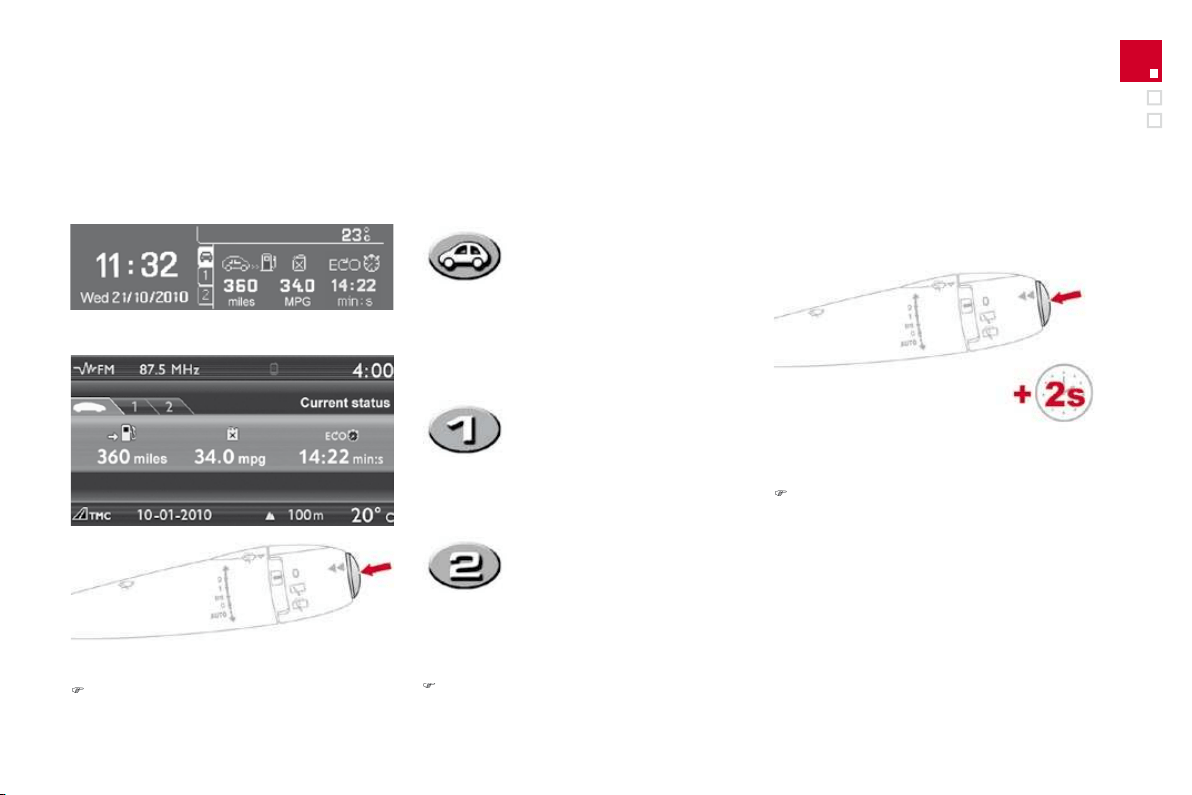
Trip computer
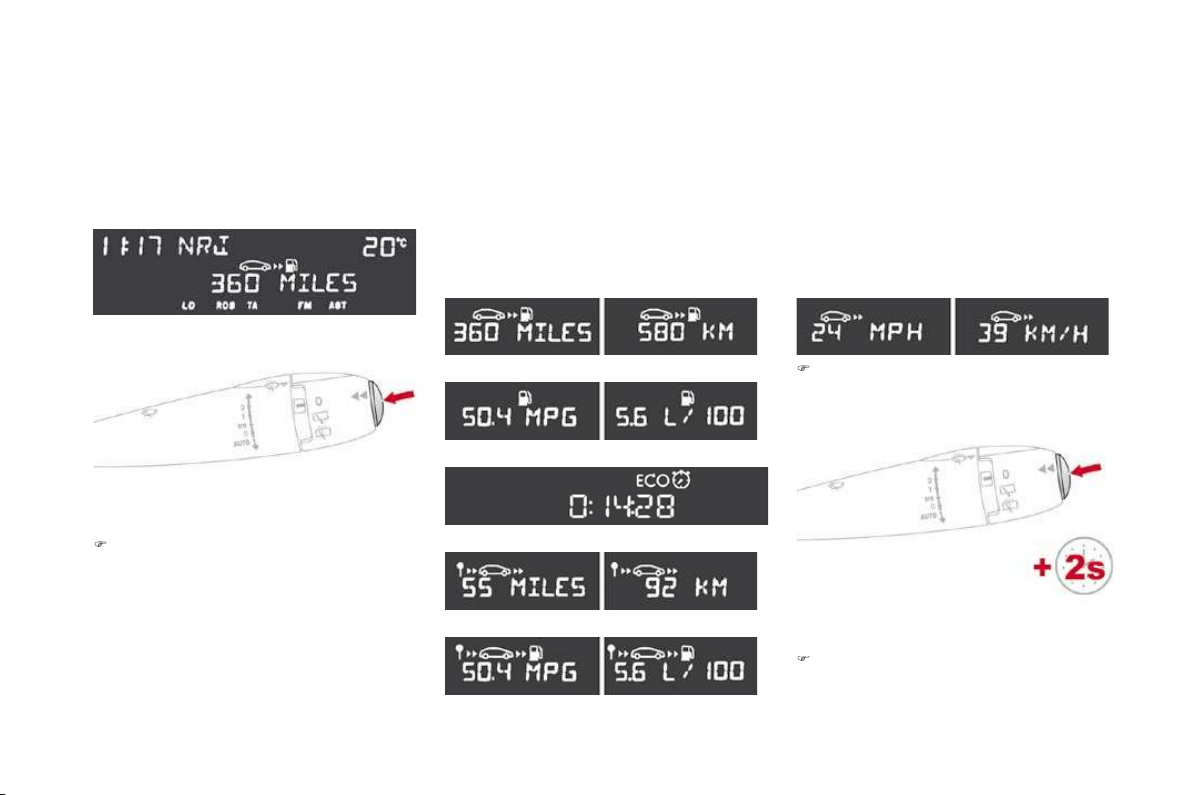
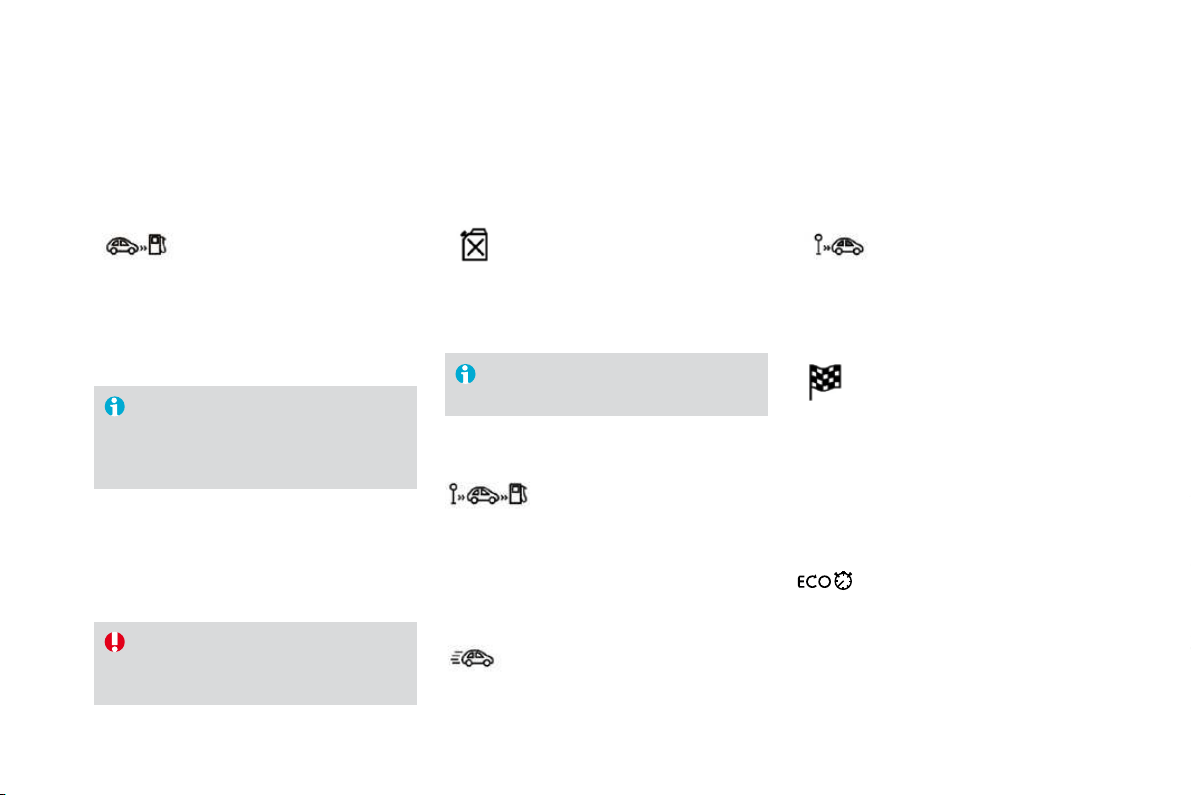
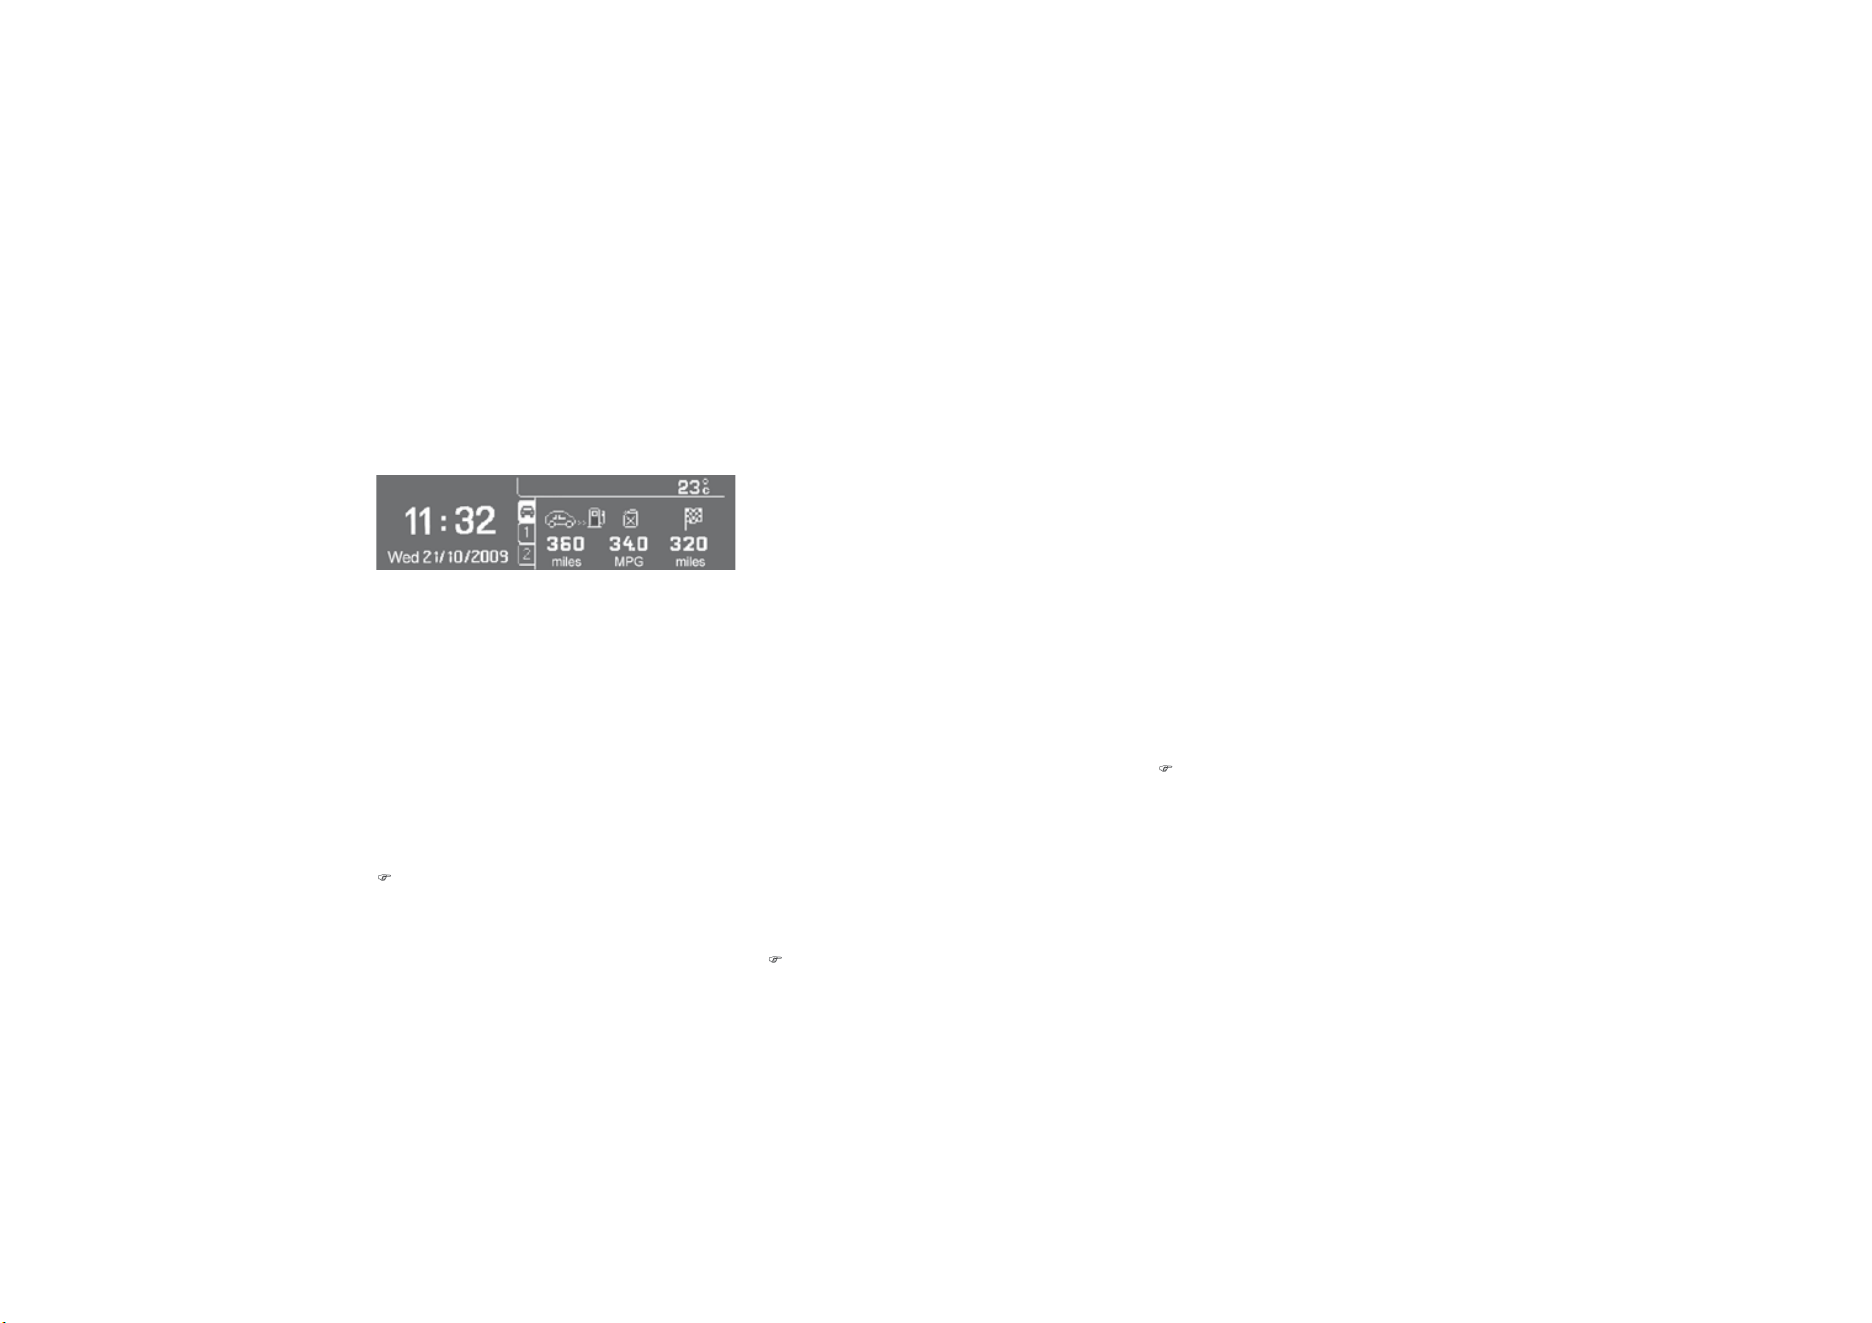
System which provides current information concerning the trip travelled (range, fuel consumption...).
Monochrome screen A
Data displays
)
Press the button, located at the end o
f
the
w
i
per sta
lk
, to display the various items of
trip computer data in succession.
Z
ero reset
)
Pr
ess
th
e
co
ntr
o
l
fo
r m
o
r
e
th
a
n
two secon
d
s to reset to zero t
h
e
di
stance
travelled, the avera
g
e
f
uel consumption
a
n
d
t
h
e average spee
d
.
T
he trip computer provides the
f
ollowing
i
nformation:
-
range
,
- current fuel consumption,
- distance travelled
,
- average
f
uel consumption,
- avera
g
e speed.
)
The next press then returns
y
ou to the
normal display.
Trip computer
System which provides current information concerning the route travelled (range, consumption…).
M
o
n
oc
hr
o
m
e
sc
r
ee
n
C
Data displays
)
Press the button, located at the end o
f
t
he
wiper stalk
, to display the various trip
computer tabs in succession:
T
r
ip
zero reset
)
Wh
en t
h
e route requ
i
re
d
i
s
di
sp
l
a
y
e
d
, press
the control
f
or more than two seconds.
T
r
ip
s "
1
" an
d
"
2
" are
i
n
d
e
p
en
d
ent
b
ut t
h
e
i
r use
i
s
id
ent
i
ca
l
.
Trip "
1
" permits, for example, daily calculations,
a
nd trip "
2"
monthly calculations.
- the current in
f
ormation tab
with:
Ɣ WKHUDQJH
ƔWK
H
FX
UU
H
QWI
XH
O
c
onsumption,
ƔW
K
H
GL
VWDQFHUHPD
L
Q
L
Q
J
WR
be
tr
a
v
elled
.
- t
h
e tr
ip
"
1
" ta
b
w
i
t
h
:
ƔW
K
H
GL
VWDQFHWUDYH
OO
H
G
Ɣ WKHDYHUDJHIXHO
c
onsumption,
Ɣ WKHDYHUDJHVSHHGIRUWKH
f
ir
s
t r
ou
t
e
.
- the trip "
2"
t
ab
with:
Ɣ WKHGLVWDQFHWUDYHOOHG
Ɣ WKHDYHUD
J
HIXHO
c
onsum
p
t
i
on,
Ɣ WKHDYHUD
J
HVSHHG
I
RUWKH
secon
d
route.
)
P
ress
i
n
g
t
h
e
b
utton a
g
a
i
n returns
y
ou to
th
e norma
l
di
sp
l
ay.
43
Instruments and controls
A few definitions…
Ran
g
e
(
miles or km
)
Thi
s
in
d
i
ca
t
es
th
e
d
i
s
t
a
n
ce
w
hi
c
h
ca
n
s
till
be
tr
a
v
e
ll
ed
with th
e
fue
l
remaining in the tank in relation to the average
f
uel consum
p
tion over the last
f
ew miles
(
kilometres
)
travelled.
C
urrent
f
uel consumption
(
mp
g
or l/100 km or km/l
)
This is the avera
g
e fuel consumption
d
urin
g
the last
f
ew seconds.
A
verage fuel
c
onsum
p
t
i
on
(
mp
g
or l
/
100 km or km
/
l
)
This is the average
f
uel consumption since the
l
ast trip computer zero reset.
Di
sta
n
ce
t
r
a
v
e
ll
ed
(
miles or km
)
Thi
s
in
d
i
ca
t
es
th
e
d
i
s
t
a
n
ce
tr
a
v
e
ll
ed
s
i
nce t
h
e
l
ast tr
ip
com
p
uter zero reset.
A
verage spee
d
(
mph or km
/
h
)
Thi
s
i
s t
h
e avera
g
e spee
d
ca
l
cu
l
ate
d
s
i
nce t
h
e
l
ast tr
ip
com
p
uter zero
reset
(
ignition on
)
.
Distance remainin
g
to
dest
in
at
i
o
n
(miles or km)
This is the distance remaining to be travelled
to the final destination. It can be entered b
y
t
he
use
r.
I
f
the distance is not entered, dashes are
d
ispla
y
ed in place o
f
the di
g
its.
This value may vary following a change
in the st
y
le of drivin
g
or the relief,
resultin
g
in a si
g
nificant chan
g
e in the
c
urrent
f
uel consum
p
tion.
If dashes are displa
y
ed continuousl
y
w
hile drivin
g
in place of the di
g
its,
c
ontact a
C
ITR
OË
N dealer.
This function is only displayed from
2
0 mph
(
30 km/h
)
.
When the ran
g
e falls below 20 miles
(
30 km
)
,
dashes are displayed. After filling with at least
5 litres of fuel, the range is recalculated and is
displayed when it exceeds 60 miles (100 km).
Monochrome screen A
This displays the following information:
- time
,
- date,
- ambient temperature (this flashes if there is
a
risk o
f
ice
)
,
- status o
f
the doors and boot,
- audio sources (radio, CD...),
- trip computer (refer to the "Instruments and
Controls" section).
Warnin
g
messa
g
es
(
e.
g
.: "Emission control
sy
stem fault
y
"
)
or information messa
g
es
(
e.
g
.:
"Boot open"
)
ma
y
appear temporaril
y
. These
can
b
e c
l
eare
d
by
press
i
n
g
t
h
e "E
SC
"
bu
tt
o
n.
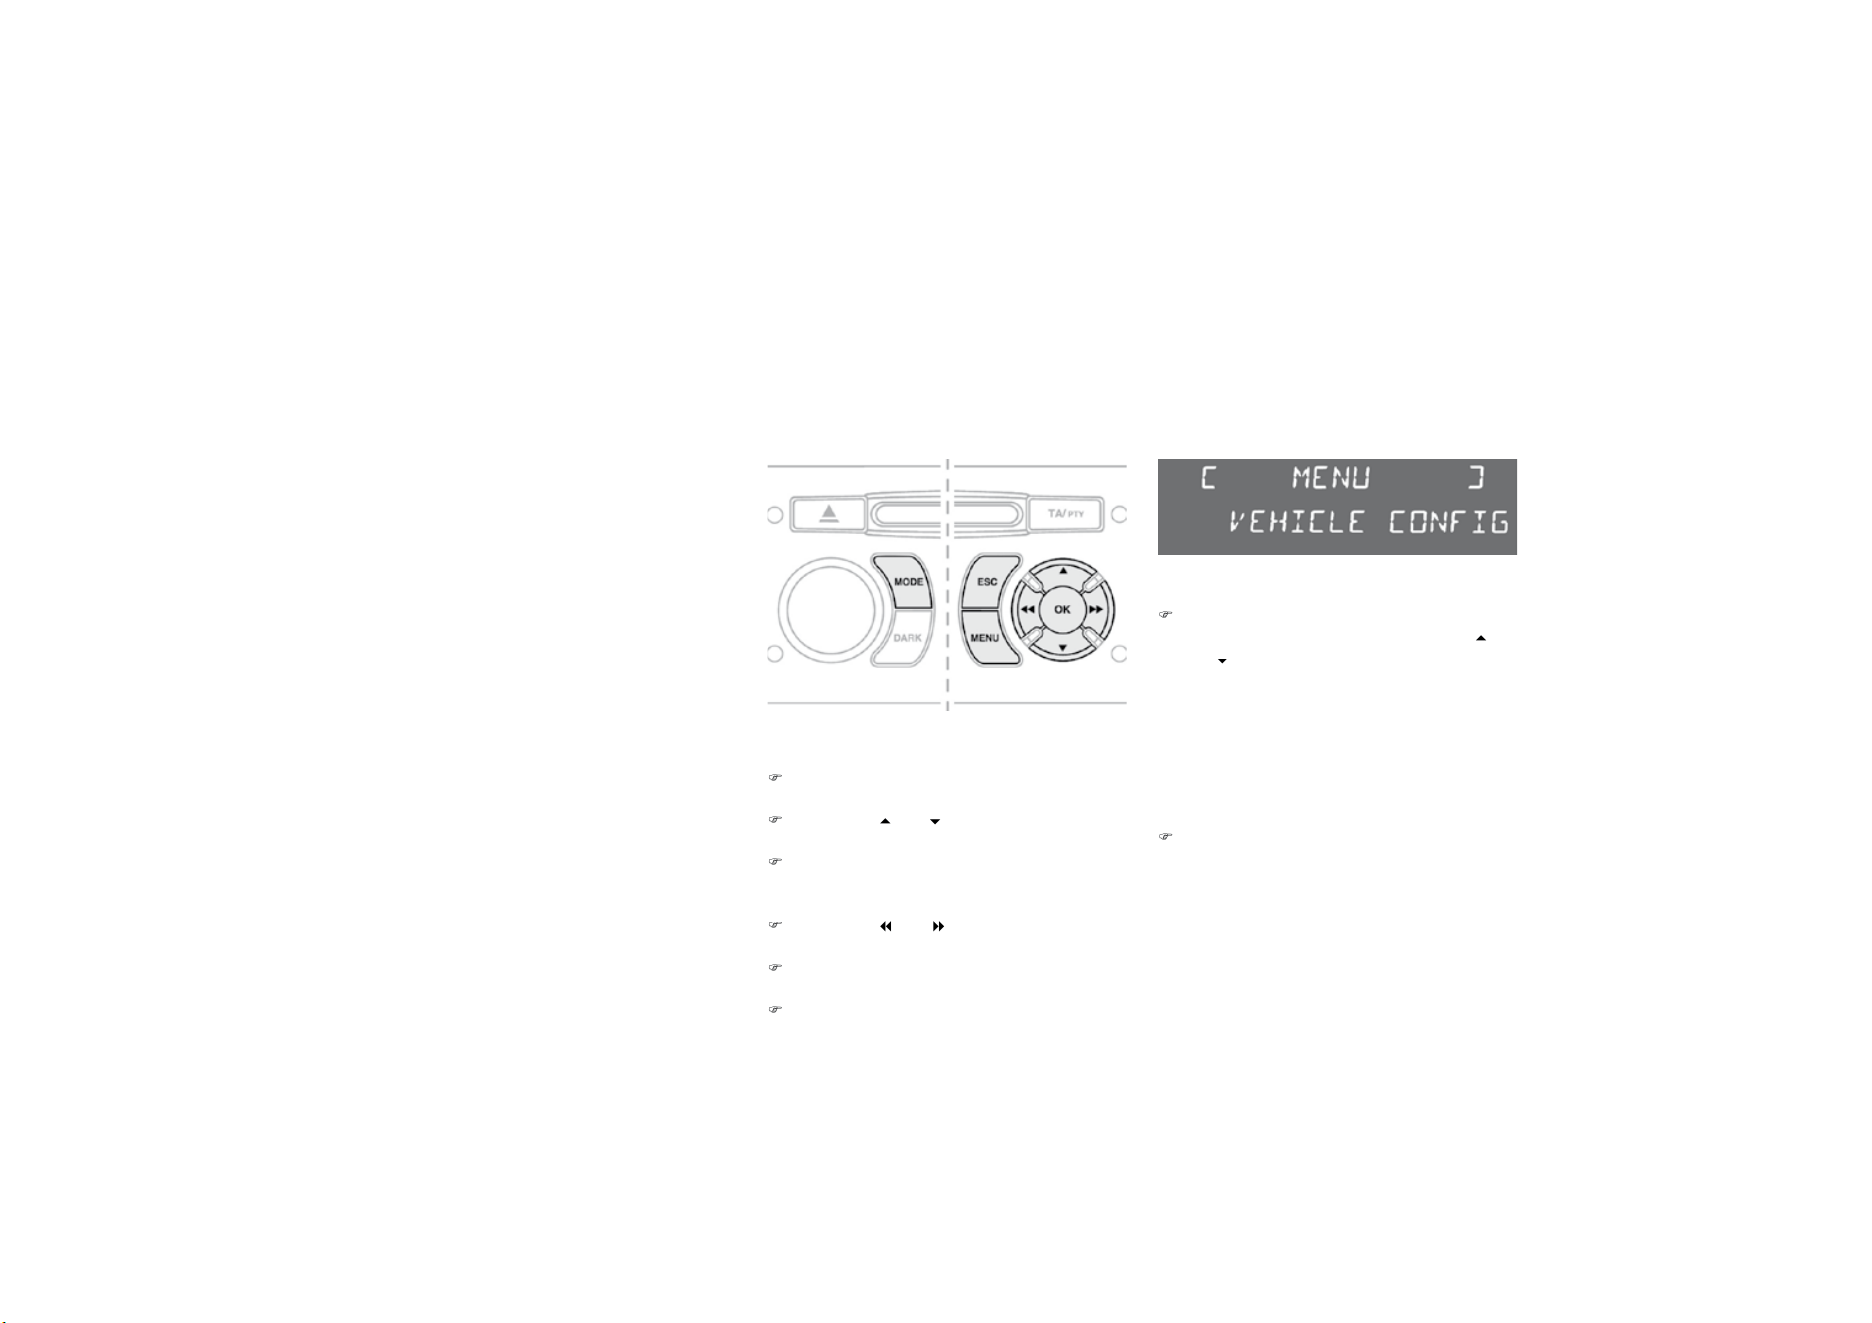
Displays on the screen
From the control panel of
y
our Audio s
y
stem,
y
ou can:
)
p
ress t
h
e
"MENU"
b
utton to
g
a
i
n access to
t
h
e
g
eneral menu
,
)
p
ress t
h
e
"
"
or
"
"
b
uttons to scro
ll
t
hrough the items on the screen,
)
p
ress t
h
e "M
O
DE"
b
utton to c
h
an
g
e
t
he permanent application
(
date, audio
source...
)
,
)
press t
h
e
"
"
o
r
"
"
b
uttons to c
h
an
g
e a
setting value,
)
p
ress t
h
e "
O
K" button to con
f
irm,
o
r
)
p
ress t
h
e "E
SC
"
b
utton to a
b
an
d
on t
h
e
o
peration in progress.
Co
n
t
r
o
l
s
)
P
ress t
h
e
"MENU"
b
utton to ga
i
n access
to the general menu, then press the
"
"
or "
" buttons to scroll through the various
me
n
us
:
- radio-CD
,
- vehicle confi
g
uration,
- o
p
t
i
ons,
-
di
sp
l
a
y
sett
i
n
g
s,
-
l
an
g
ua
g
es,
- un
i
ts.
)
Press the
"
OK
"
button to select the menu
r
equired.
Ge
n
e
r
a
l m
e
n
u

4
7
Multifuntion screens
R
ad
i
o
-
C
D
With the Audio system switched on, once the
"Radio-CD" menu has been selected you can
activate or deactivate the functions linked
w
ith use of the radio
(
RDS, REG
)
, or the CD
(
introscan, shu
ff
le,
C
D repeat
)
.
For
f
urther details concernin
g
the "Radio-
C
D"
application, refer to the Audio system part of
t
h
e
"A
u
di
o an
d
T
e
l
emat
i
cs
"
sect
i
on.
9
HKLFOHFRQ
¿
JXUDWLRQ
Once the "Vehicle Configuration" menu has
b
een selected, you can activate or deactivate
t
he following equipment:
- wiper linked with reverse
g
ear
(
refer to the
"
Visibilit
y
" section
)
,
- "
g
uide-me-home" li
g
htin
g
(
re
f
er to the
"
Visibilit
y
" section
)
,
- parkin
g
assistance
(
re
f
er to the "Drivin
g
"
section).
O
ptions
Once the "Options" menu has been selected,
you can start diagnostics of the status of the
e
quipment (active, not active, faulty).
Languages
Once the "Lan
g
ua
g
es" menu has been
s
elected, you can change the language used
by the display (Français, Italiano, Nederlands,
Portugues, Portugues-Brasil, Deutsch, English,
E
spanol
)
.
U
n
i
ts
O
nce the "Units" menu has been selected,
you can change the units o
f
the
f
ollowing
p
arameters:
- temperature (°C or °F),
- fuel consumption (l/100 km, mpg or km/l).
Once the fuel consumption units have
been set to mp
g
, the information in the
i
nstrument
p
ane
l
screen on s
p
ee
d
an
d
di
stance w
ill
a
l
so
b
e
i
n m
ph
an
d
m
il
es.
For sa
f
ety reasons, con
f
iguration by the
d
river of the multifunction screen must
o
nly be done when stationary.
Display settings
Once the "Display settings" menu has been
selected, you can gain access to the following
s
ett
i
ngs:
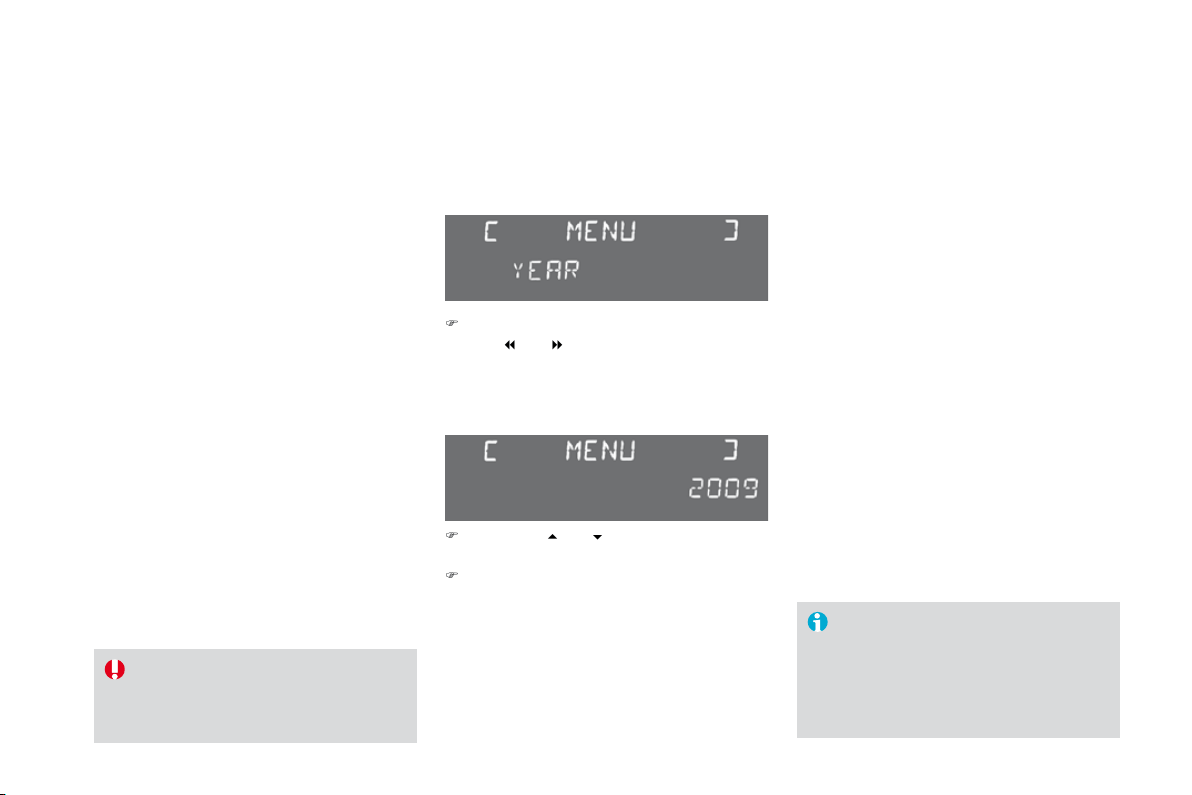
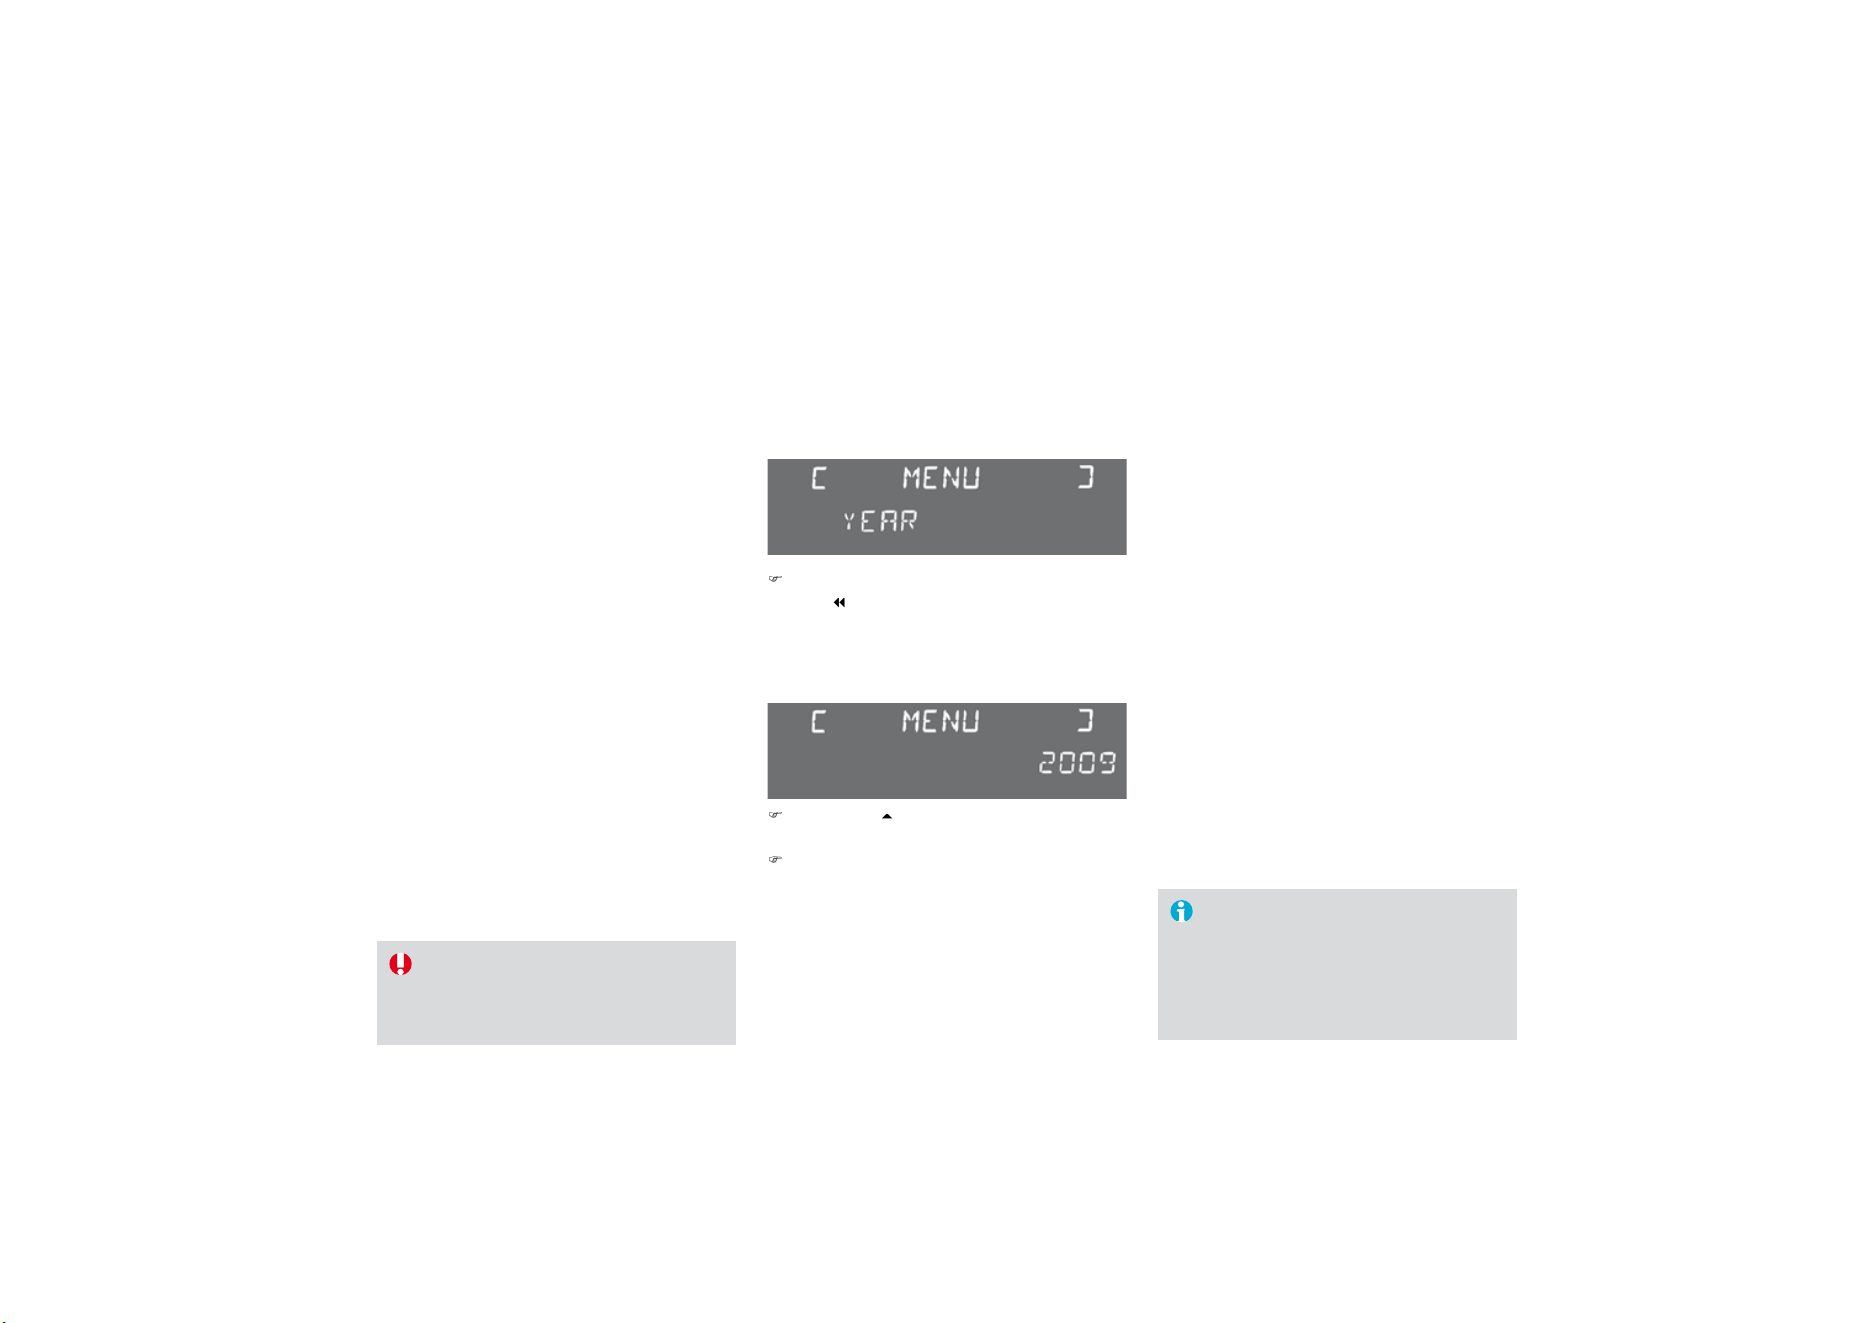
- year,
- month
,
- day,
- hour
,
- minutes,
- 12
o
r 24 h
ou
r m
ode
.
)
Once you have selected a setting, press
t
h
e
"
"
o
r " " buttons to change its value.
)
Press the "
"
o
r
"
"
bu
tt
o
n
s
t
o
s
w
i
t
ch
respect
i
ve
ly
to t
h
e prev
i
ous or next sett
i
n
g
.
)
Press the
"
O
K
"
b
utton to save t
h
e c
h
ange
and return to the normal display or press
t
he
"
ESC" button to cancel.
49
Multifuntion screens
Monochrome screen C
This displa
y
s the followin
g
information:
- t
i
me,
- date
,
- ambient temperature (this flashes if there is
a
risk o
f
ice
)
,
- status of doors and boot,
- audio sources (radio, CD, USB port, jack
socket etc.),
- trip computer (refer to the "Instruments and
controls" section
)
.
Warning messages
(
E.g. "Emisions control
system faulty") or information messages (E.g.:
A
utomatic headlamps active") may appear
temporar
ily
.
Th
ese can
b
e c
l
eare
d
by
press
i
n
g
the "ESC" button.
Displa
y
s on the screen
From
y
our Audio s
y
stem control panel,
y
ou can:
)
press the
"
MENU" button to
g
ain access to
the
g
enera
l
menu
,
)
p
ress t
h
e
"
" or "
"
b
uttons to scro
ll
th
rou
gh
t
h
e
i
tems on t
h
e screen,
)
p
ress t
h
e
"MODE"
b
utton to c
h
ange t
h
e
permanent application (trip computer, audio
source...),
)
press the
"
"
o
r " " buttons to change a
setting value,
)
press the
"O
K
"
button to confirm
,
or
)
p
ress t
h
e
"
E
SC
"
b
utton to a
b
an
d
on t
h
e
o
perat
i
on
i
n pro
g
ress.
C
o
n
t
r
o
l
s
)
P
ress t
h
e
"MENU"
b
utton to ga
i
n access to
t
h
e
g
enera
l
menu :
- audio functions
,
- the trip computer,
- personalisation-configuration,
- telephone
(
hands-free kit
)
.
)
P
r
ess
t
he
"
"
o
r
"
"
bu
tt
o
n
s
t
o
selec
t t
he
m
enu required, then con
f
irm b
y
pressin
g
t
h
e "
O
K
"
b
utton.
Ge
n
e
r
a
l m
e
n
u
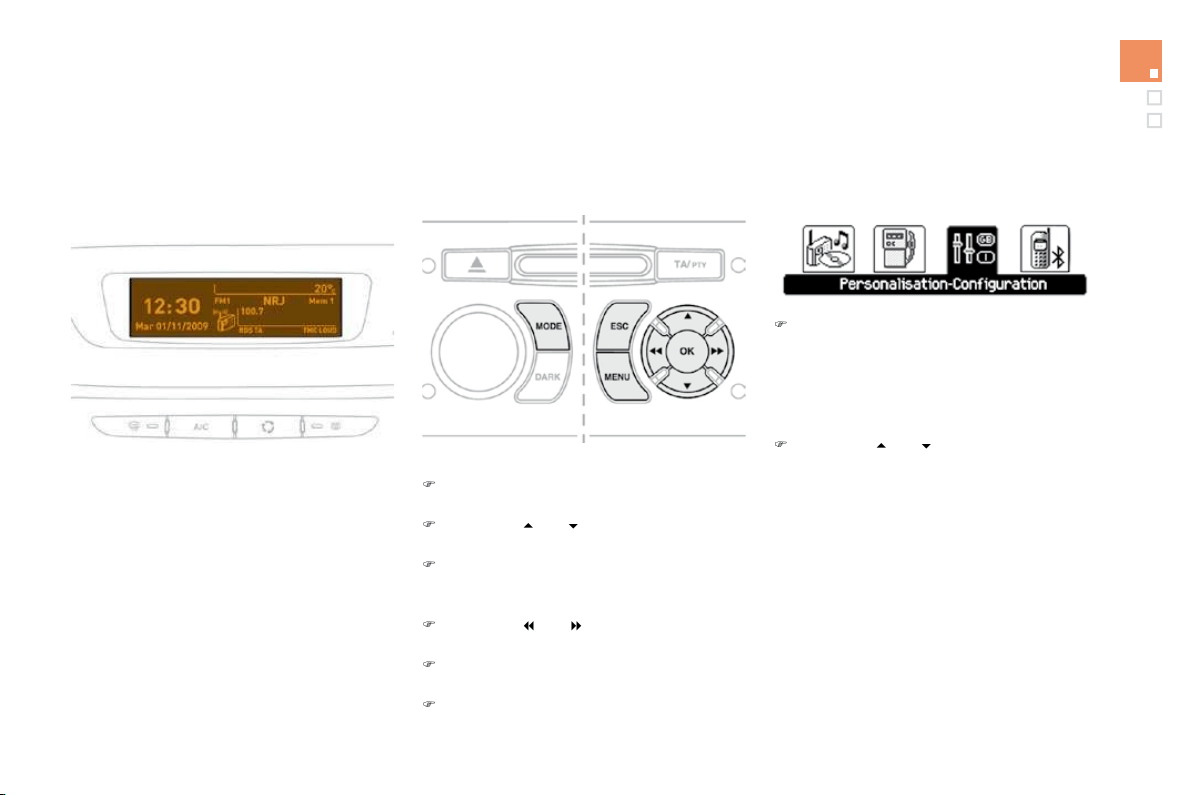
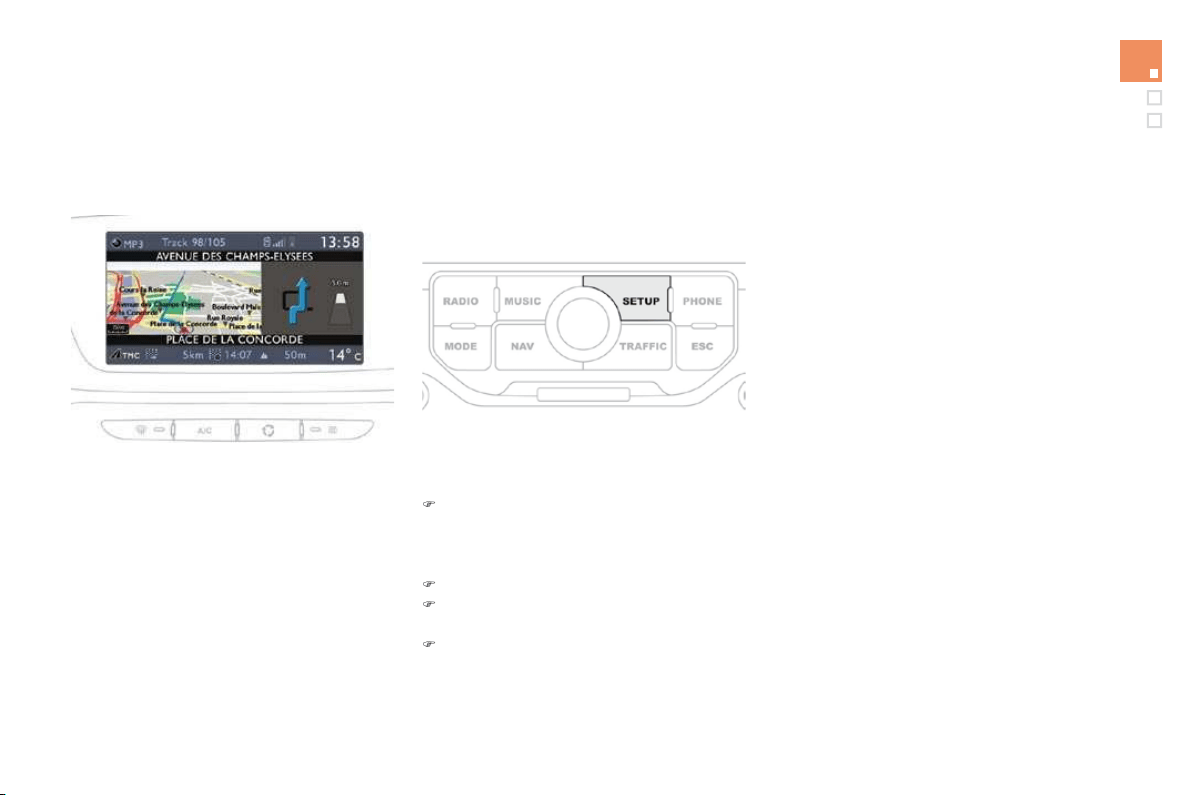
With the Audio system switched on, once this
menu has been selected you can activate
or deactivate the functions linked with use
of the radio (RDS, REG, RadioText), the CD
(
introscan, shuffle, CD repeat) or the MP3
player (USB port/jack socket).
F
o
r
fu
rth
e
r
de
t
a
il
s
o
n th
e
"A
ud
i
o
fu
n
c
ti
o
n
s
"
a
pplication , re
f
er to the Audio s
y
stem part o
f
t
h
e
"A
u
di
o an
d
T
e
l
emat
i
cs
"
sect
i
on.
"Audio functions"
men
u
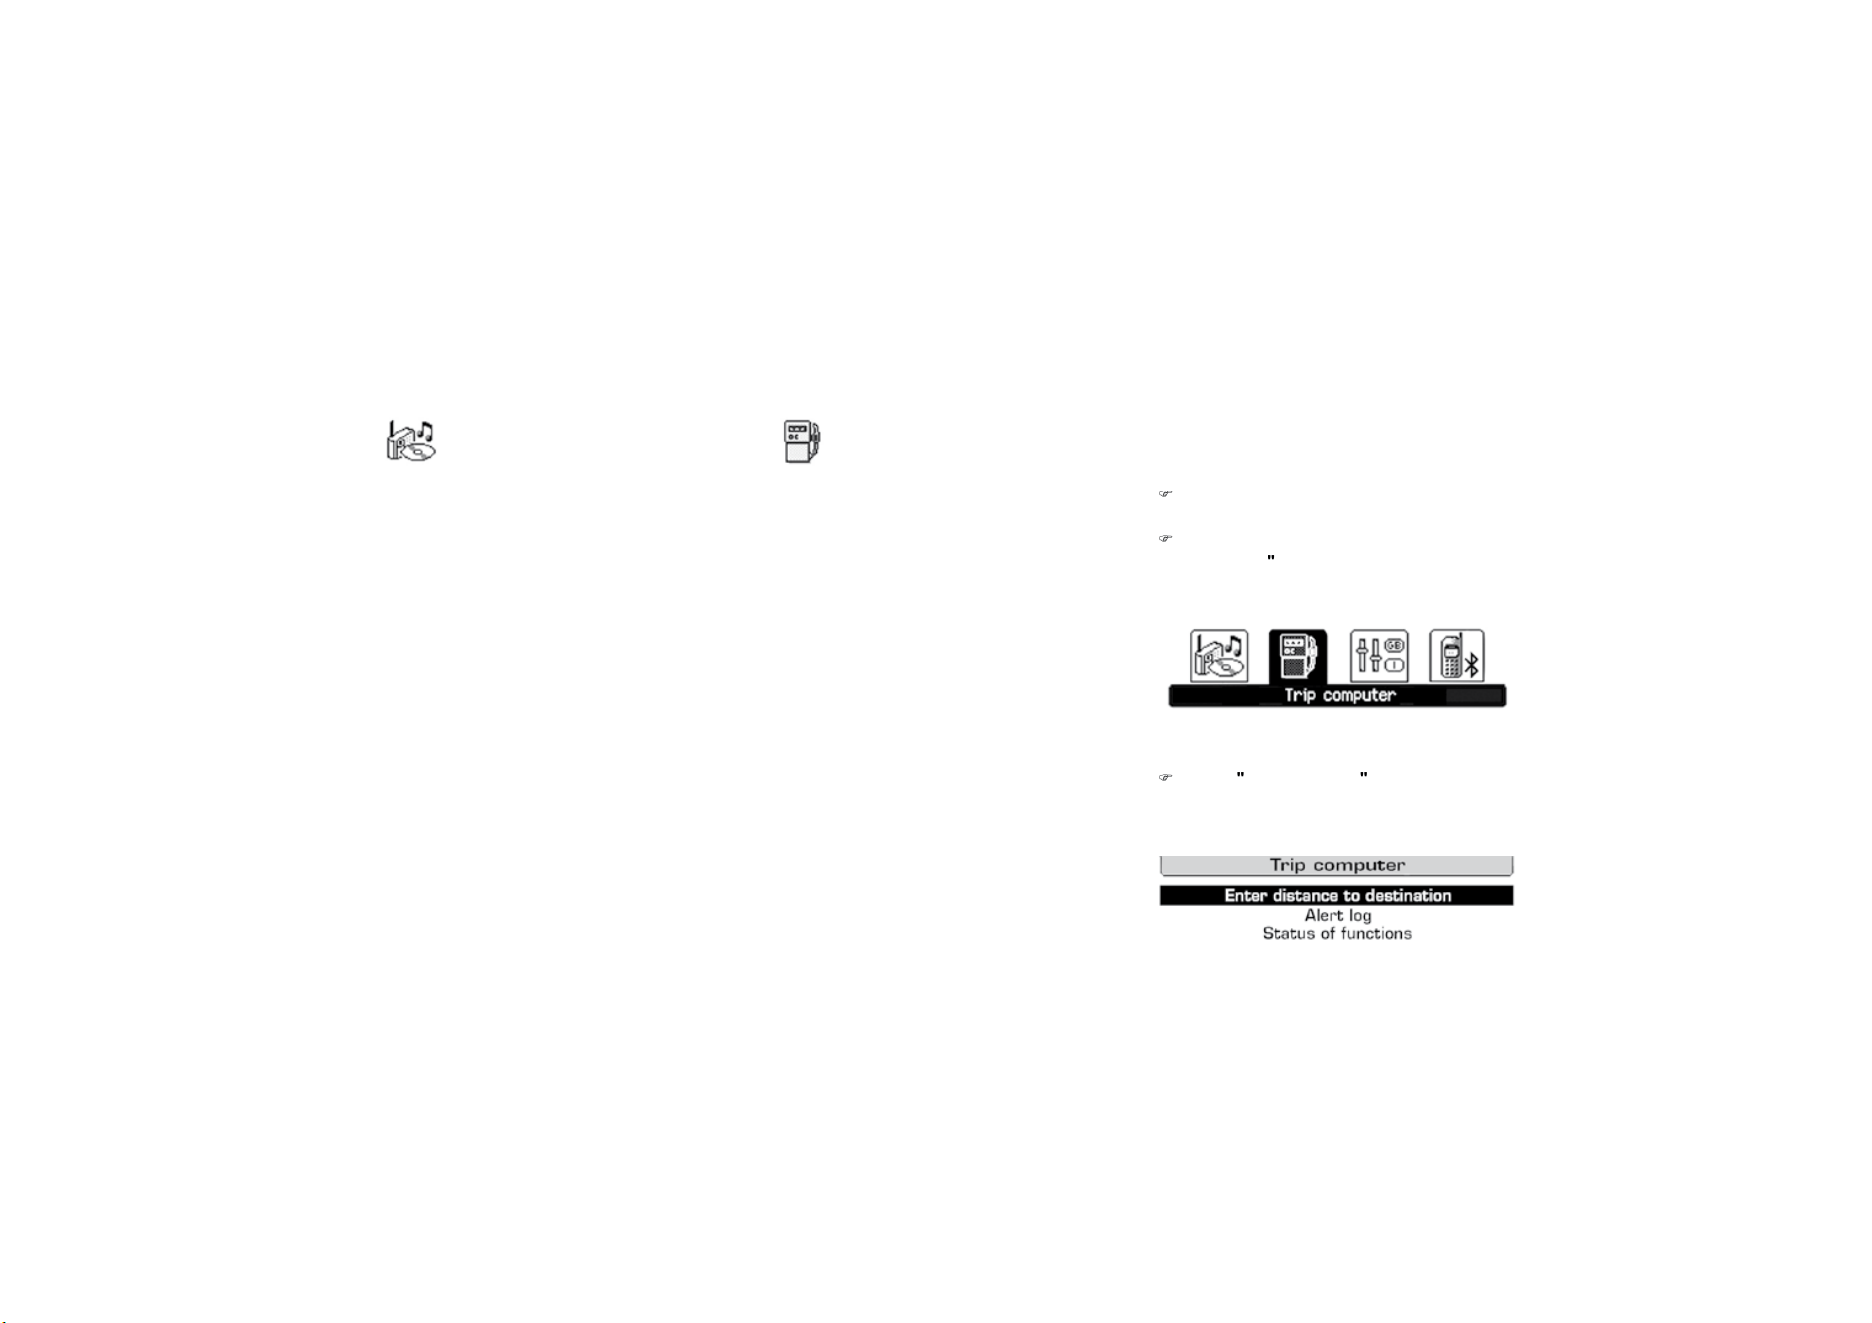
"Trip computer" menu
O
nce this menu has been selected, you can
c
onsult in
f
ormation concerning the status o
f
the
vehicle (warnings log, status of functions, etc.).
Alert log
This summarises the active warnin
g
messa
g
es,
d
ispla
y
in
g
them in succession on the
m
u
lti
fu
n
c
ti
o
n
sc
r
ee
n.
Status
o
f f
u
n
ct
i
o
n
s
This summarises the status
(
active or inactive
)
of
th
e
v
e
hi
c
l
e
'
s
fu
n
c
ti
o
n
s
.
E
nter
di
stance to
d
est
i
nat
i
on
Thi
s a
ll
ows
y
ou to enter an approx
i
mate
d
istance until
y
our
f
inal destination.
)
P
r
ess
t
he
"MENU"
b
utton to
g
a
i
n access to
t
h
e
g
enera
l
menu.
)
P
ress t
h
e arrows, t
h
en t
h
e
"O
K
"
b
utton to
s
e
l
ect t
h
e
"
Trip computer
"
men
u.
)
I
n t
h
e
"
T
r
i
p computer
"
menu, se
l
ect one
o
f
the
f
ollowing applications:
51
Multifuntion screens
"P
e
r
so
n
a
li
sat
i
o
n
-
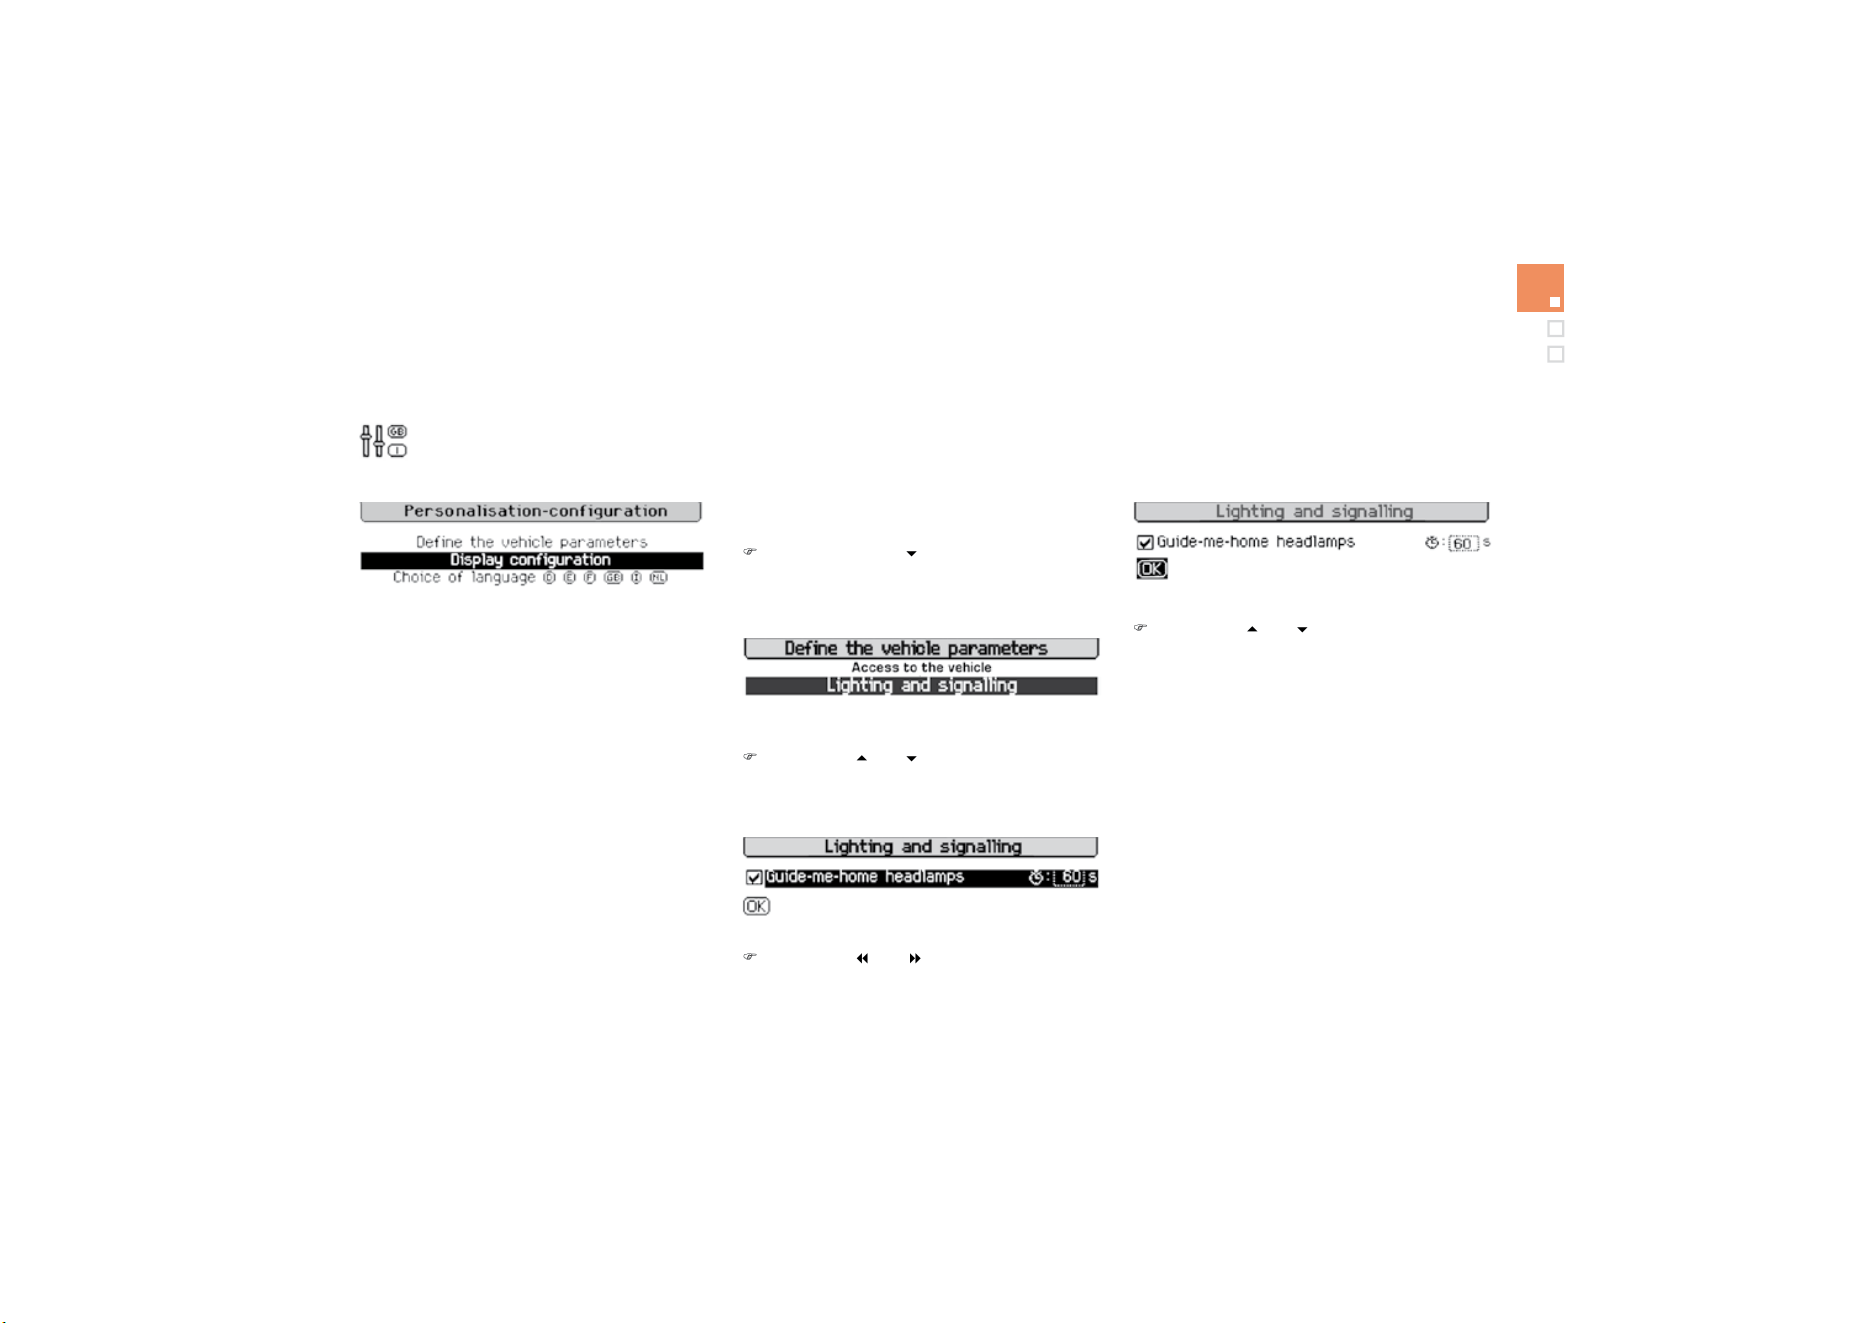
Configuration" menu
Once this menu has been selected, you can
g
ain access to the following functions:
- define the vehicle parameters,
- display configuration,
- choice of language.
'H
¿
QHWKHYHKLFOHSDUDPHWHUV
Once this menu has been selected, you can
activate or deactivate the following equipment:
- wiper linked to reverse gear (refer to the
"Visibilit
y
" section
)
,
- "guide-me-home" lighting
- parking assistance
(
re
f
er to the "Driving"
section).
Example: setting of the duration of the "guide-
me-home" lighting
)
Press the "
"
o
r "
" buttons
,
then the
"
O
K
"
button to select the menu required.
)
Press the "
"
o
r
"
"
b
uttons, t
h
en t
h
e
"
O
K
"
button to select the "
G
uide-me-home
headlamps" line.
)
Press the "
"
or
"
"
b
uttons to set t
h
e
value required
(
15, 30 or 60 seconds
)
, then
press the
"O
K
"
button to con
f
irm.
)
P
ress t
h
e
"
"
or
"
"
b
uttons, t
h
en t
h
e
"O
K
"
b
utton to se
l
ect t
h
e "
O
K"
b
ox an
d
confirm or press the
"
ESC" button to
ca
n
ce
l.

'LVSOD\FRQ¿JXUDWLRQ
Once this menu has been selected,
y
ou can
gain access to the following settings:
-
b
r
igh
tness-v
id
eo sett
i
n
g
,
- date and time setting,
- selection o
f
units.
Once the fuel consumption units have
been chan
g
ed to mp
g
, the information
i
n t
h
e screen re
l
at
i
n
g
to spee
d
an
d
di
stance a
l
so c
h
an
g
es to mp
h
an
d
miles respectively.
For sa
f
et
y
reasons, con
f
i
g
uration b
y
the
driver o
f
the multi
f
unction screen must
only be done when stationary.
C
hoice o
f
lan
g
ua
g
e
Once this menu has been selected,
y
ou can
ch
an
g
e t
h
e
l
an
g
ua
g
e use
d
by
t
h
e
di
sp
l
a
y
(
Deutsch, English, Espanol, Fran
ç
ais, Italiano,
N
e
d
er
l
an
d
s,
P
ortu
g
ues,
P
ortu
g
ues-
B
ras
il
,
T
ürk
ç
e
*
)
.
*
Accordin
g
to countr
y
o
f
destination.
Wi
t
h
A
u
di
o system on, once t
hi
s menu
i
s
s
elected you can configure your Bluetooth
h
ands-free kit (pairing), view the various
telephone directories (list of calls, services...)
a
nd mana
g
e
y
our calls
(
call, han
g
up, second
call, secret mode...
)
.
For more details on the "Tele
p
hone"
f
unction,
re
f
er to the Audio s
y
stem part o
f
the "Audio and
te
l
emat
i
cs
"
sect
i
on.
"Telephone" Menu

53
Multifuntion screens
16/9 colour screen (MyWay)
It displays the following information
automatically and directly:
- t
i
me,
-
d
ate,
- altitude,
- ambient temperature (the value displayed
flashes if there is a risk of ice),
- check of the doors
,
- warning and vehicle function status
messages, displayed temporarily,
- audio functions
,
- satellite navigation system information.
Displa
y
s on the screen
M
y
Wa
y
To select one of the applications, at the
control panel:
)
p
ress t
h
e
d
e
di
cate
d
"RADI
O
"
,
"M
US
I
C"
,
"NAV"
, "TRAFFI
C"
,
"S
ET
U
P"
or
"PHONE"
button
f
or access to the
c
orrespon
di
ng menu,
) turn the dial to change the selection,
) press the dial to confirm the selection,
o
r
)
press the
"
E
SC
"
bu
tt
o
n t
o
aba
n
do
n th
e
c
urrent operation and return to the previous
di
sp
l
a
y
.
C
o
n
t
r
o
l
s
For further information on these applications,
r
e
f
e
r t
o
th
e
"A
ud
i
o
a
n
d
T
e
l
e
m
a
ti
cs
"
sec
ti
o
n
o
r
to the speci
f
ic user
g
uide
g
iven to
y
ou with the
o
t
h
er owner
'
s
d
ocuments.
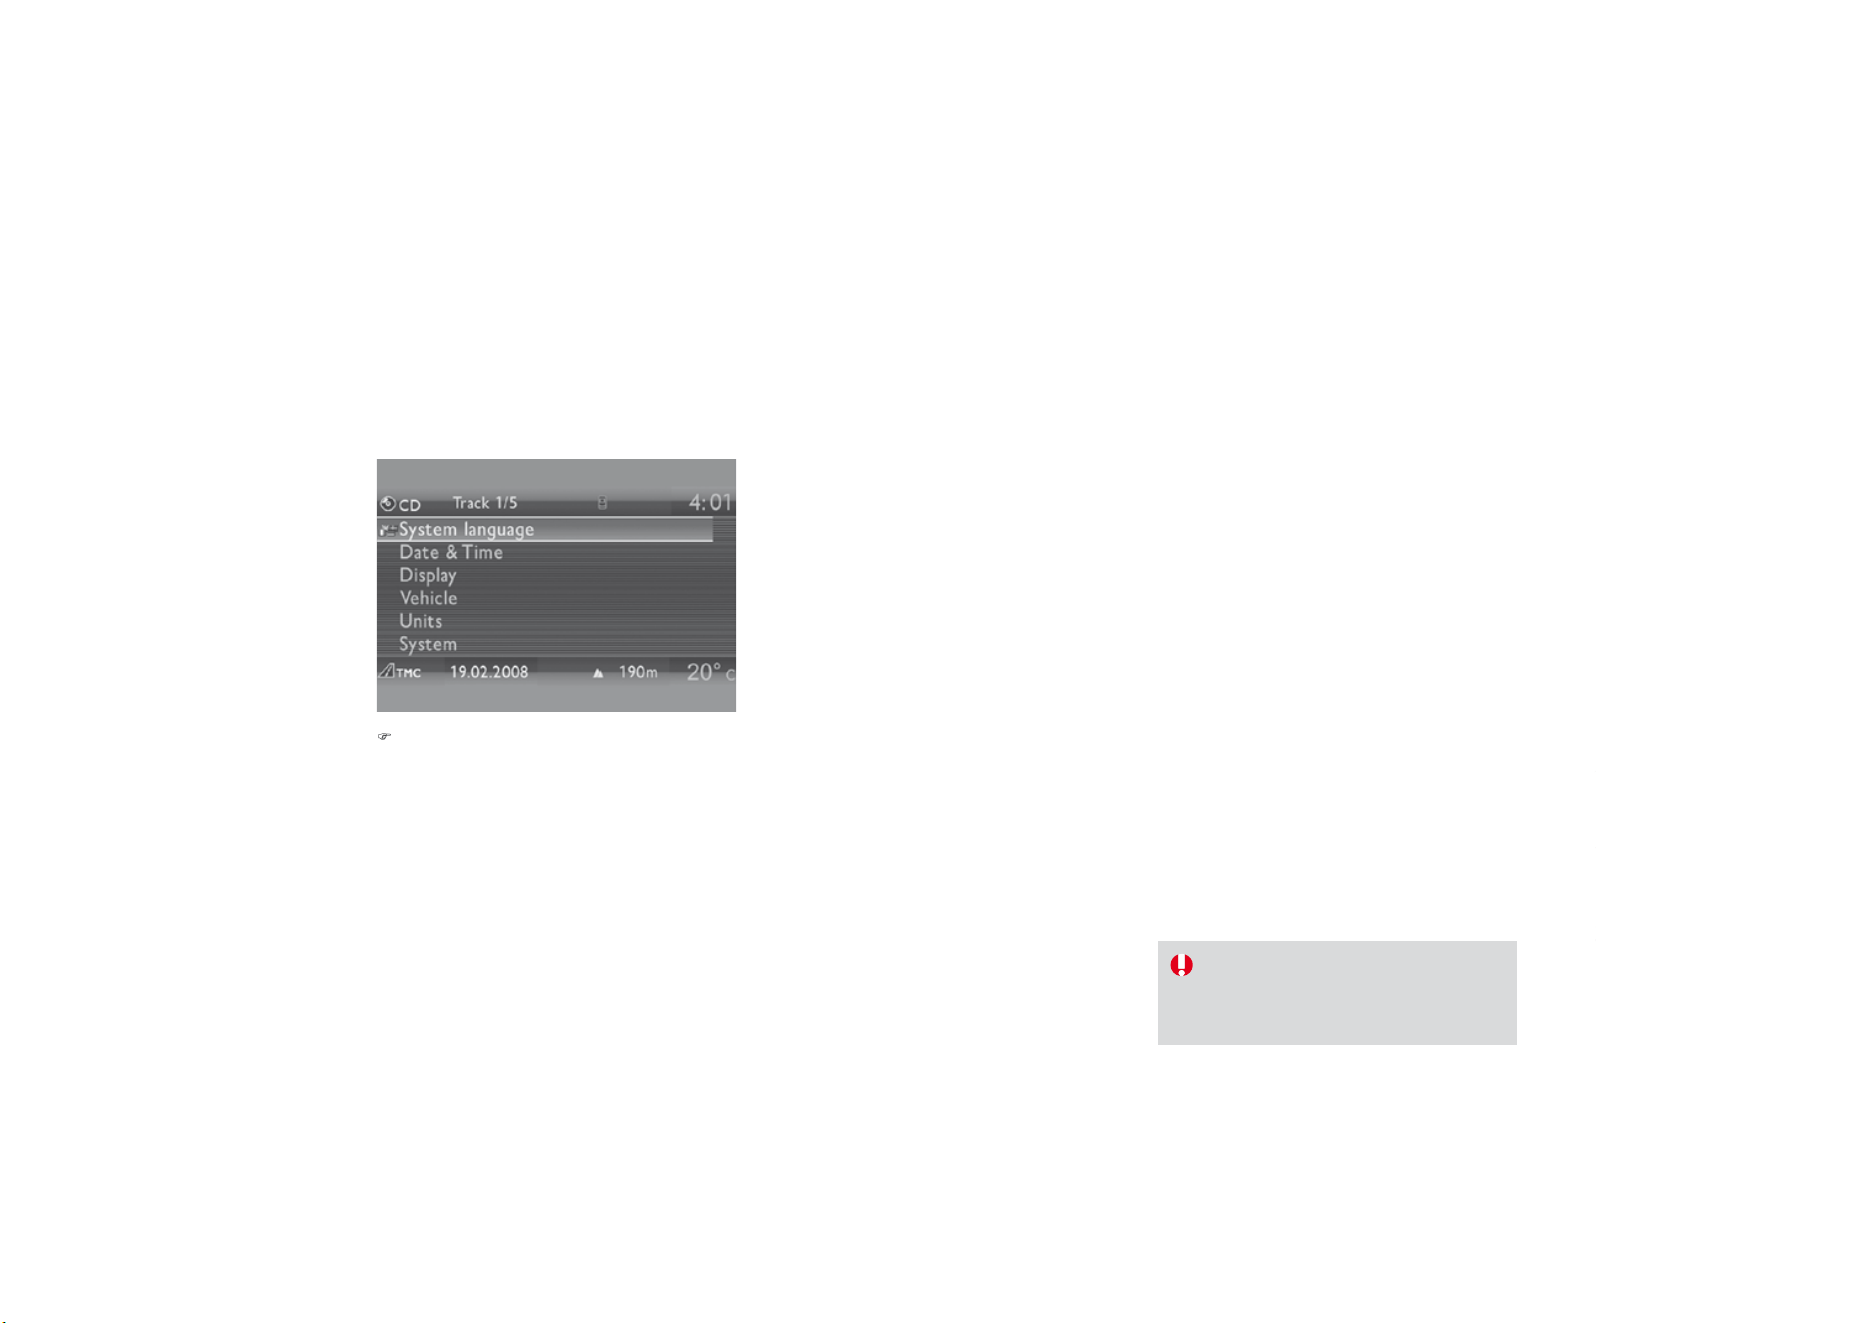
"
S
ET
U
P" m
e
n
u
)
Pr
ess
th
e
"
SETUP" button to gain access
to
th
e
"SETUP
"
menu. This allows you to
select from the followin
g
functions:
- "
Sy
stem lan
g
ua
g
e",
-
"D
ate an
d
t
i
me
"
,
-
"Di
sp
l
a
y"
,
- "Vehicle",
-
"U
n
i
ts
"
,
- "System".
Sy
stem lan
g
ua
g
e
This menu allows
y
ou to select the lan
g
ua
g
e
u
sed b
y
the displa
y
: Deutsch, En
g
lish,
E
spano
l
,
F
ran
ç
a
i
s,
I
ta
li
ano,
N
e
d
er
l
an
d
s,
P
o
l
s
ki
,
P
ortugues, Türk
ç
e
*
.
D
ate
a
n
d
t
im
e
This menu allows you to set the date and time,
t
h
e
f
o
rm
a
t
o
f th
e
da
t
e
a
n
d
th
e
f
o
rm
a
t
o
f th
e
tim
e
(
refer to the "Audio and Telematics" section or
t
o the speci
f
ic user
g
uide
g
iven to
y
ou with the
o
ther owner's documents
)
.
Displa
y
This menu allows you to set the brightness o
f
t
he screen
,
the screen colour scheme and the
c
olour o
f
the map
(
da
y/
ni
g
ht or auto mode
)
.
*
Accordin
g
to countr
y
.
Ve
hi
c
l
e
This menu allows
y
ou to activate or deactivate
certain drivin
g
and comfort equipment:
- wiper linked with reverse
g
ear
(
re
f
er to the
"Visibilit
y
" section
)
,
-
g
uide-me-home li
g
htin
g
and duration
(
re
f
er
to the "Visibility" section
)
,
- parking assistance (refer to the "Driving"
s
ection).
U
ni
ts
This menu allows you to select the units:
temperature (°C or °F) and fuel consumption
(
km/l, l/100 or mpg).
S
y
stem
This menu allows
y
ou to restore the
f
actor
y
con
f
i
g
uration, displa
y
the so
f
tware version and
a
ct
i
vate scro
lli
n
g
text.
For sa
f
ety reasons, con
f
iguration o
f
the
multifunction screen by the driver must
o
nly be done when stationary.

Ventilation
Air intake
The air circulating in the passenger compartment
is filtered and originates either from the outside
via the grille located at the base of the windscreen
or
f
rom the inside in air recirculation mode.
Air treatment
The incoming air follows various routes
depending on the controls selected by the
d
riv
e
r:
- direct arrival in the passenger compartment
(
air intake
)
,
- passa
g
e throu
g
h a heatin
g
circuit
(
heatin
g)
,
- passage through a cooling circuit (air
c
onditioning).
The temperature control enables you to obtain
the level of comfort required by mixing the air of
the various circuits.
The air distribution control enables
y
ou to
diffuse the air in the passenger compartment
com
bi
n
i
n
g
severa
l
a
i
r vents.
The air
f
low control enables
y
ou to increase o
r
reduce the s
p
eed o
f
the ventilation blower.
Control
p
anel
The controls o
f
this s
y
stem are
g
rouped
t
oget
h
er on contro
l
pane
l
A
on t
h
e centre
c
onsole. Depending on the model, the
f
unctions
offered are:
- the level of comfort required,
- air flow
,
- air distribution
,
- demistin
g
-de
f
rostin
g
,
- manua
l
or
digi
ta
l
a
i
r con
di
t
i
on
i
n
g
contro
l
s.
Ai
r
di
str
ib
ut
i
on
1.
Windscreen demistin
g
-de
f
rostin
g
vents.
2.
Front side window demisting-de
f
rosting
v
ents.
3.
Side adjustable air vents.
4.
Central adjustable air vents.
5.
Air
ou
tl
e
t
s
t
o
th
e
fr
o
nt f
oo
tw
e
ll
s
.
6
. Air
ou
tl
e
t
s
t
o
th
e
r
ea
r f
oo
tw
e
ll
s
.

59
Comfort
Recommendations for ventilation and air conditioning
I
f
a
f
ter an extended sto
p
in sunshine,
th
e
i
nter
i
or temperature
i
s ver
y
high
,
f
irst ventilate the cabin
f
or a
f
ew
moments.
Put the air flow control at a setting high
enough to quickly change the air in the
passen
g
er compar
t
men
t
.
The air conditionin
g
s
y
stem does not
c
onta
i
n c
hl
or
i
ne an
d
d
oes not
p
resent
an
y
d
an
g
er to t
h
e ozone
l
a
y
er.
In order
f
or these s
y
stems to be
f
ull
y
e
ff
ective,
f
ollow the operation and maintenance
guidelines below:
)
T
o o
b
ta
i
n an even a
i
r
di
str
ib
ut
i
on, ta
k
e care not to o
b
struct t
h
e exter
i
or a
i
r
i
nta
k
e gr
ill
es
located at the base of the windscreen
,
the nozzles
,
the vents and the air outlets
,
as well
as the air extractor located in the boot.
)
Do not cover the sunshine sensor, located on the dashboard; this is used for regulation
o
f the air conditionin
g
s
y
stem.
)
Operate the air conditionin
g
s
y
stem for at least 5 to 10 minutes, once or twice a month
to keep it in per
f
ect workin
g
order.
)
Ensure that the passen
g
er compartment
f
ilter is in
g
ood condition and have the
f
ilter
e
lements replaced re
g
ularl
y
(
re
f
er to the "
C
hecks" section
)
.
We recommend the use o
f
a combined passenger compartment
f
ilter. Thanks to its
s
pecial active additive, it contributes to the purification of the air breathed by the
o
ccupants and the cleanliness of the passenger compartment (reduction of allergic
s
ymptoms, bad odours and greasy deposits).
)
To
g
uarantee correct operation of the air conditionin
g
s
y
stem,
y
ou are also advised to
have it checked re
g
ularl
y
as recommended in the Maintenance and Warrant
y
Guide.
)
If the s
y
stem does not produce cold air, deactivate it and contact a CITRO
Ë
N dealer.
When towin
g
the maximum load on a steep
g
radient in hi
g
h temperatures, switchin
g
o
ff
the
a
i
r con
di
t
i
on
i
n
g
i
ncreases t
h
e ava
il
a
bl
e en
gi
ne power an
d
so
i
mproves t
h
e tow
i
n
g
a
bili
t
y
.
The condensation created by the air
c
onditionin
g
results in a dischar
g
e
o
f w
a
t
e
r
u
n
de
r th
e
v
e
hi
c
l
e
whi
c
h i
s
per
f
ectl
y
normal.

Heating/Ventilation
Manual control panel
Electric control panel

1
. Temperature ad
j
ustment
)
T
u
rn th
e
d
i
a
l
f
r
o
m
b
l
ue
(cold) to red (hot) to adjust
t
h
e temperature to
y
our
re
q
u
i
rements.
$LUÀRZDGMXVWPHQW
)
Turn the dial from position
1
to pos
i
t
i
on
5
to obtain a
comfortable air flow.
)
If you place the air flow control
i
n position
0
(deactivation of the
s
ystem), the temperature is no
longer maintained at a comfortable
level. However, a sli
g
ht flow of air,
due to the movement of the vehicle,
can still be
f
elt.
3
. Air distribution ad
j
ustment
Wi
n
d
screen an
d
s
id
e w
i
n
d
ows.
Windscreen
,
side windows and
f
oo
tw
e
ll
s
.
Foo
tw
ells
.
Central and side vents.
The
ai
r
dis
tr
ibu
t
io
n
ca
n
be
ad
apte
d
by
p
l
ac
i
n
g
t
h
e
di
a
l
i
n an
i
nterme
di
ate
p
os
i
t
i
on.
4. Air in
ta
k
e
/Air r
ec
ir
cu
l
at
i
o
n
The intake o
f
exterior air avoids the
f
ormation o
f
mi
st on t
h
e w
i
n
d
screen an
d
s
id
e w
i
n
d
ows.
The recirculation o
f
interior air insulates the
p
assenger compartment from exterior odours
a
n
d
s
m
o
k
e
.
Return to exterior air intake as soon as possible
to prevent deterioration of the air qualit
y
and
th
e
fo
rm
a
ti
o
n
of
mi
s
t.
Manual control
p
anel
)
Pr
ess
th
e
bu
tt
o
n t
o
r
ec
ir
cu
l
a
t
e
the
i
nt
e
r
io
r
ai
r.
The
i
n
dica
t
or
l
am
p
comes on to con
f
irm this.
)
Press the button again to
permit the intake of exterior air.
The indicator lamp switches of
f
to
co
nfirm thi
s
.

Comfort
5. Air conditionin
g
O
n/
Off
Th
e a
i
r con
di
t
i
on
i
n
g
i
s
d
es
ig
ne
d
to
o
perate e
ff
ectivel
y
in all seasons,
wi
t
h
t
h
e w
i
n
d
ows c
l
ose
d
.
El
ectr
i
c contro
l
pane
l
)
P
ress t
h
e
b
utton to rec
i
rcu
l
ate
th
e
i
nter
i
or a
i
r.
Thi
s
i
s
c
onfirmed by lighting of the
indicator lamp.
)
Press the button again to allow fresh air
into the passenger compartment. This is
confirmed by the indicator lamp switching off.
It enables you to:
- lower the temperature, in summer,
- increase the effectiveness of the demisting
in winter
,
above 3 °C.
6
ZLWFKLQJRQ
)
Press the
"
A/C" button
,
the associated
green indicator lamp comes on.
7KHDLUFRQGLWLRQLQJGRHVQRWRSHUDWH
ZKHQWKHDLU
I
ORZDG
M
XVWPHQWFRQWURO
is in
p
osition "0"
.
6ZLWFKLQJRII
)
P
ress t
h
e
"
A
/C
"
b
utton a
g
a
i
n, t
h
e
a
ssociated green indicator lamp switches o
ff
.
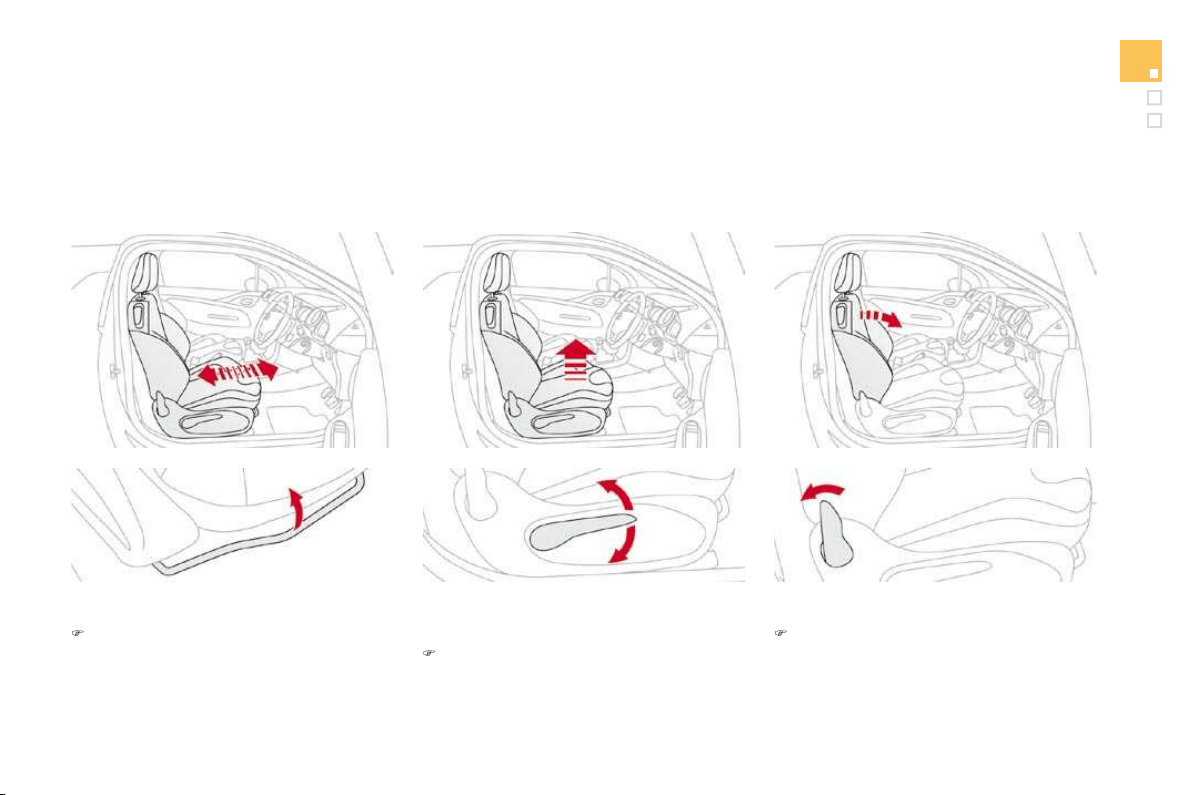
Front demist - defrost
:LWKWKHKHDWLQ
J
YHQWLODWLRQ
system
)
Put the temperature and air flow controls to
t
he dedicated marked position.
)
P
u
t th
e
a
ir int
a
k
e
co
ntr
o
l t
o
th
e
"Ext
e
ri
o
r
a
ir
i
ntake" position
(manual control to the right or electric
c
ontrol with indicator lamp o
ff)
.
)
P
ut t
h
e a
i
r
di
str
ib
ut
i
on contro
l
to t
h
e
"Wi
n
d
screen
"
p
os
i
t
i
on.
These markin
g
s on the control panel indicate the control positions for rapid demistin
g
or
defrostin
g
of the windscreen and side windows.
:L
W
K
W
K
HPDQXD
O
D
L
U
con
di
t
i
on
i
ng system
)
Put the temperature and air flow controls to
t
he dedicated marked position.
)
P
u
t th
e
a
ir int
a
k
e
co
ntr
o
l t
o
th
e
"Ext
e
ri
o
r
a
ir
intake" position
(
manual control to the ri
g
ht or electric
c
ontrol with indicator lamp o
ff)
.
)
P
ut t
h
e a
i
r
di
str
ib
ut
i
on contro
l
to t
h
e
"Wi
n
d
screen
"
p
os
i
t
i
on.
)
S
witch on the air conditioning by pressing
t
he
"A/C"
button; the associated green
w
arning lamp comes on.
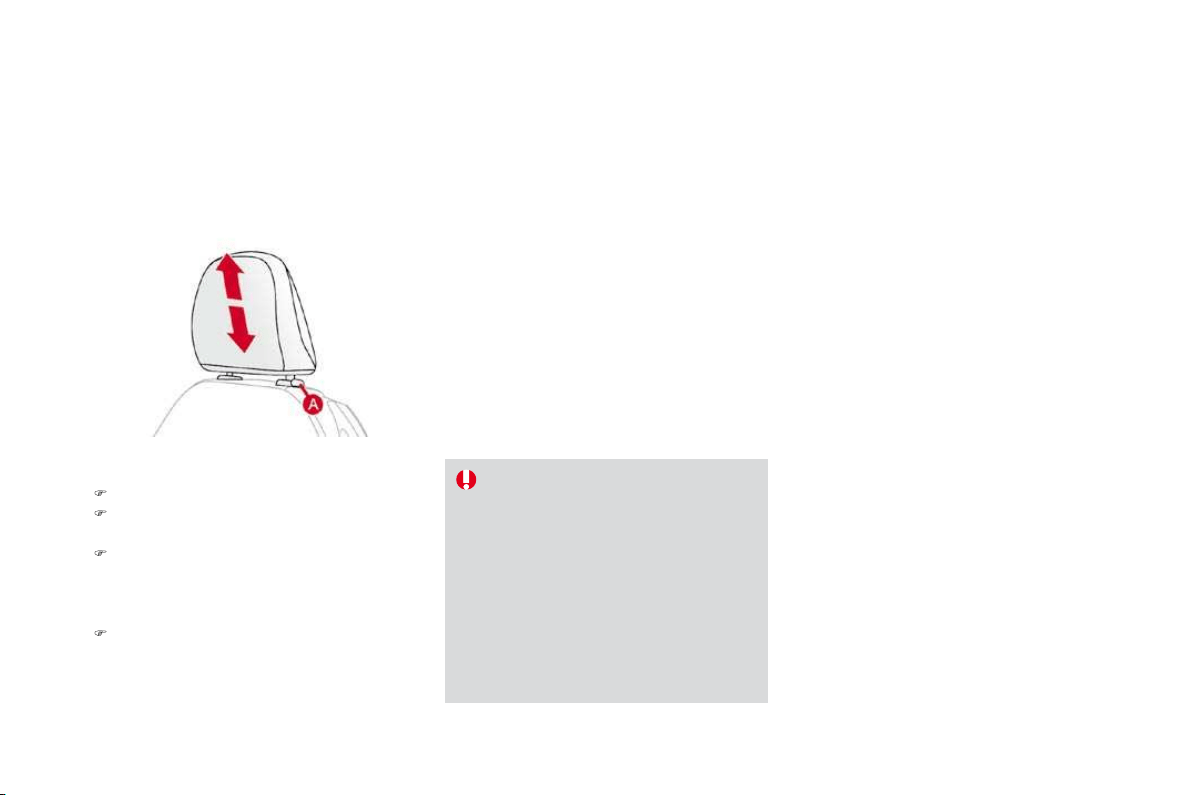
65
Comfort
Rear screen demist - defrost
The control button is located on the heatin
g
or air conditionin
g
s
y
stem control panel.
6ZLWFKLQJRQ
The rear screen demistin
g/
de
f
rostin
g
can onl
y
operate w
h
en t
h
e eng
i
ne
i
s runn
i
ng.
)
Press this button to demist
/
de
f
rost the rea
r
s
creen and (depending on version) the doo
r
m
irrors. The indicator lamp associated with
the button comes on.
6ZLWFKLQ
J
RII
The demistin
g/
de
f
rostin
g
switches o
ff
a
utomat
i
ca
ll
y to prevent an excess
i
ve
c
onsum
p
tion o
f
current.
) It is possible to stop the demisting
/
d
efrosting operation before it is switched
o
ff automatically by pressing the button
a
g
ain. The indicator lamp associated with
t
h
e
bu
tt
o
n
s
wit
c
h
es
off
.
)
S
witch o
ff
the demistin
g/
de
f
rostin
g
of
the rear screen and door mirrors
as soon as a
pp
ro
p
r
i
ate as
l
owe
r
current consum
p
t
i
on resu
l
ts
i
n
reduced fuel consumption.
I
f
the engine is switched o
ff
be
f
ore the
demisting
/
de
f
rosting is switched o
ff
automatically, demisting/defrosting will
r
esume next time the engine is switched on.

61
Comfort
Manual air conditioning
Manual control panel
Electric control panel
1
. Temperature ad
j
ustment
)
T
u
rn th
e
d
i
a
l
f
r
o
m
b
l
ue
(cold) to red (hot) to adjust
t
h
e temperature to
y
our
re
q
u
i
rements.
$LUÀRZDGMXVWPHQW
)
Turn the dial from position
1
to pos
i
t
i
on
5
to obtain a
comfortable air flow.
)
If you place the air flow control
i
n position
0
(deactivation of the
s
ystem), the temperature is no
longer maintained at a comfortable
level. However, a sli
g
ht flow of air,
due to the movement of the vehicle,
can still be
f
elt.
3
. Air distribution ad
j
ustment
Wi
n
d
screen an
d
s
id
e w
i
n
d
ows.
Windscreen
,
side windows and
f
oo
tw
e
ll
s
.
Foo
tw
ells
.
Central and side vents.
The
ai
r
dis
tr
ibu
t
io
n
ca
n
be
ad
apte
d
by
p
l
ac
i
n
g
t
h
e
di
a
l
i
n an
i
nterme
di
ate
p
os
i
t
i
on.
4. Air in
ta
k
e
/Air r
ec
ir
cu
l
at
i
o
n
The intake o
f
exterior air avoids the
f
ormation o
f
mi
st on t
h
e w
i
n
d
screen an
d
s
id
e w
i
n
d
ows.
The recirculation o
f
interior air insulates the
p
assenger compartment from exterior odours
a
n
d
s
m
o
k
e
.
Return to exterior air intake as soon as possible
to prevent deterioration of the air qualit
y
and
th
e
fo
rm
a
ti
o
n
of
mi
s
t.
Manual control
p
anel
)
Pr
ess
th
e
bu
tt
o
n t
o
r
ec
ir
cu
l
a
t
e
the
i
nt
e
r
io
r
ai
r.
The
i
n
dica
t
or
l
am
p
comes on to con
f
irm this.
)
Press the button again to
permit the intake of exterior air.
The indicator lamp switches of
f
to
co
nfirm thi
s
.

Comfort
5. Air conditionin
g
O
n/
Off
Th
e a
i
r con
di
t
i
on
i
n
g
i
s
d
es
ig
ne
d
to
o
perate e
ff
ectivel
y
in all seasons,
wi
t
h
t
h
e w
i
n
d
ows c
l
ose
d
.
El
ectr
i
c contro
l
pane
l
)
P
ress t
h
e
b
utton to rec
i
rcu
l
ate
th
e
i
nter
i
or a
i
r.
Thi
s
i
s
c
onfirmed by lighting of the
indicator lamp.
)
Press the button again to allow fresh air
into the passenger compartment. This is
confirmed by the indicator lamp switching off.
It enables you to:
- lower the temperature, in summer,
- increase the effectiveness of the demisting
in winter
,
above 3 °C.
6
ZLWFKLQJRQ
)
Press the
"
A/C" button
,
the associated
green indicator lamp comes on.
7KHDLUFRQGLWLRQLQJGRHVQRWRSHUDWH
ZKHQWKHDLU
I
ORZDG
M
XVWPHQWFRQWURO
is in
p
osition "0"
.
6ZLWFKLQJRII
)
P
ress t
h
e
"
A
/C
"
b
utton a
g
a
i
n, t
h
e
a
ssociated green indicator lamp switches o
ff
.

Front demist - defrost
:LWKWKHKHDWLQ
J
YHQWLODWLRQ
system
)
Put the temperature and air flow controls to
t
he dedicated marked position.
)
P
u
t th
e
a
ir int
a
k
e
co
ntr
o
l t
o
th
e
"Ext
e
ri
o
r
a
ir
i
ntake" position
(manual control to the right or electric
c
ontrol with indicator lamp o
ff)
.
)
P
ut t
h
e a
i
r
di
str
ib
ut
i
on contro
l
to t
h
e
"Wi
n
d
screen
"
p
os
i
t
i
on.
These markin
g
s on the control panel indicate the control positions for rapid demistin
g
or
defrostin
g
of the windscreen and side windows.
:L
W
K
W
K
HPDQXD
O
D
L
U
con
di
t
i
on
i
ng system
)
Put the temperature and air flow controls to
t
he dedicated marked position.
)
P
u
t th
e
a
ir int
a
k
e
co
ntr
o
l t
o
th
e
"Ext
e
ri
o
r
a
ir
intake" position
(
manual control to the ri
g
ht or electric
c
ontrol with indicator lamp o
ff)
.
)
P
ut t
h
e a
i
r
di
str
ib
ut
i
on contro
l
to t
h
e
"Wi
n
d
screen
"
p
os
i
t
i
on.
)
S
witch on the air conditioning by pressing
t
he
"A/C"
button; the associated green
w
arning lamp comes on.

65
Comfort
Rear screen demist - defrost
The control button is located on the heatin
g
or air conditionin
g
s
y
stem control panel.
6ZLWFKLQJRQ
The rear screen demistin
g/
de
f
rostin
g
can onl
y
operate w
h
en t
h
e eng
i
ne
i
s runn
i
ng.
)
Press this button to demist
/
de
f
rost the rea
r
s
creen and (depending on version) the doo
r
m
irrors. The indicator lamp associated with
the button comes on.
6ZLWFKLQ
J
RII
The demistin
g/
de
f
rostin
g
switches o
ff
a
utomat
i
ca
ll
y to prevent an excess
i
ve
c
onsum
p
tion o
f
current.
) It is possible to stop the demisting
/
d
efrosting operation before it is switched
o
ff automatically by pressing the button
a
g
ain. The indicator lamp associated with
t
h
e
bu
tt
o
n
s
wit
c
h
es
off
.
)
S
witch o
ff
the demistin
g/
de
f
rostin
g
of
the rear screen and door mirrors
as soon as a
pp
ro
p
r
i
ate as
l
owe
r
current consum
p
t
i
on resu
l
ts
i
n
reduced fuel consumption.
I
f
the engine is switched o
ff
be
f
ore the
demisting
/
de
f
rosting is switched o
ff
automatically, demisting/defrosting will
r
esume next time the engine is switched on.

Digital air conditioning
The air conditioning can only operate when the engine is running.
Automatic operation
1. Automatic "comfort"
programme
P
ress t
h
e "A
U
T
O
"
b
utton.
Th
e
"AUTO"
symbol is displayed.
We recommend that you use
this mode. It provides optimised
a
utomatic control of all of the followin
g
f
unctions: passen
g
er compartment
tem
p
erature, air
f
low, air distribution and air
intake, in accordance with the comfort value
t
h
at
y
ou
h
ave c
h
osen.
This system is designed to operate e
ff
ectively
i
n all seasons
,
with the windows closed.
For
y
our comfort, when the en
g
ine is
switched o
ff
, the settin
g
s are retained
u
nt
il
t
h
e en
gi
ne
i
s sw
i
tc
h
e
d
on a
g
a
i
n.
To prevent too
g
reat a distribution o
f
c
o
ld
a
i
r w
h
en t
h
e en
gi
ne
i
s co
ld
, t
h
e a
i
r
f
low will only reach its optimum level
gradually.
2. Temperature adjustment
Th
e va
l
ue
i
n
di
cate
d
on t
h
e
di
sp
l
a
y
correspon
d
s
t
o a level o
f
com
f
ort and not to a tem
p
erature in
d
e
g
rees
C
elsius or Fahrenheit.
On enterin
g
the vehicle, if the interio
r
i
s ver
y
co
ld
or
h
ot, t
h
ere
i
s no nee
d
to
c
h
an
g
e t
h
e va
l
ue
di
sp
l
a
y
e
d
i
n or
d
er
to reach the re
q
uired level o
f
com
f
ort.
Th
e s
y
stem corrects t
h
e temperature
d
i
ff
erence automatically and as quickly
as possible.
Pr
ess
th
e
"
"
a
n
d
"
"
bu
tt
o
n
s
t
o
chan
g
e this value. A settin
g
around
t
he
v
alue
21
ena
bl
es o
p
t
i
mum
com
f
ort to be obtained. However,
d
epen
di
n
g
on
y
our requ
i
rements, a
s
etting between 18 and 24 is usual.
$XWRPDWLFYLVLELOLW
\
p
ro
g
ramme
The automatic com
f
ort pro
g
ramme
m
a
y
not be su
ff
icient
f
or rapid
demistin
g
or de
f
rostin
g
o
f
the
wi
n
d
screen an
d
s
id
e w
i
n
d
ows
(
humidity, several passengers, ice, etc.
)
.
In this case, select the automatic visibility
p
rogramme. The button
3
indicator lamp comes on.
The system automatically controls the air
conditionin
g
and the flow of air and provides
o
p
t
i
mum a
i
r
di
str
ib
ut
i
on to t
h
e w
i
n
d
screen an
d
side
w
i
n
do
w
s
.
I
t
deac
t
i
v
a
t
es
ai
r r
eci
r
cula
t
io
n
5
.
T
o ex
i
t t
hi
s pro
g
ramme, press
b
utton
3
a
g
a
i
n
or
"AUTO"
, the indicator lamp on the button is
"
s
witched o
ff
and
"
A
U
T
O
"
i
s
di
sp
l
aye
d
.
6
7
Comfort
It is possible to adjust one or more functions
manually while leaving the other functions in
automatic mode.
Th
e
"AUTO"
symbol switches off.
To return to automatic mode, press the
"AUTO"
bu
tt
o
n.
0
D
Q
XD
O
R
Y
H
UUL
GH
4. Air conditionin
g
on/o
ff
For maximum cooling or heating o
f
the
cabin, it is possible to go beyond the
minimum
1
4 or maximum
28
values.
)
Press the blue button
2
u
ntil "LO"
is displayed or the red button
2
u
ntil
"HI"
is displa
y
ed.
Pr
ess
thi
s
bu
tt
o
n t
o
s
wit
c
h
off
th
e
a
i
r
c
on
di
t
i
on
i
n
g
.
S
topping the air conditioning may cause
some problems
(
humidity, misting
)
.
A
utomatic operation of the air conditioning is
r
esumed when the button is pressed again. The
symbol "A/C
"
is displayed.
5
. Air in
ta
k
e/
Air r
ec
ir
cu
l
at
i
o
n
Pr
ess
thi
s
bu
tt
o
n
fo
r r
ec
ir
cu
l
a
ti
o
n
of
t
h
e
i
nter
i
or a
i
r.
Th
e a
i
r rec
i
rcu
l
at
i
on
s
ym
b
o
l
5
i
s
di
sp
l
aye
d
.
Ai
r rec
i
rcu
l
at
i
on ena
bl
es t
h
e
passenger compartment to be isolated from
e
xt
e
ri
o
r
odou
r
s
a
n
d
s
m
o
k
e
.
Press this button again or press the
"
AUTO"
button to resume automatic mana
g
ement of the
intake o
f
air. The air recirculation s
y
mbol
5
is
s
wit
c
h
ed
off
.
A
void prolonged recirculation o
f
interior
air
(
risk o
f
condensation or deterioration
o
f the air quality).
S
witching to manual mode may not be
suitable
(
temperature, humidity, odour,
c
ondensation) and does not provide
o
ptimum comfort.

Pressing this button several times in
succession enables the air
f
low to be
di
recte
d
i
n turn towar
d
s:
- the windscreen and the side windows
(demisting or defrosting),
- the windscreen
,
side windows and air
v
ents
,
- the windscreen
,
the side windows
,
the air
v
ents and the footwells
,
- t
h
e w
i
n
d
screen, t
h
e s
id
e w
i
n
d
ows an
d
t
h
e
f
ootwells,
- the footwells,
- the air vents and the footwells,
- the air vents.
A
void drivin
g
for lon
g
periods with the
air conditionin
g
switched o
ff
(
risk o
f
mistin
g
and reduction o
f
the air qualit
y
in the cabin
)
.
P
r
ess
t
he
"
fu
ll
fa
n"
bu
tt
o
n t
o
increase the air
f
low.
$LU
À
RZDG
M
XVWPHQW
The air flow s
y
mbol, the fan, fills pro
g
ressivel
y
accor
di
n
g
to t
h
e va
l
ue requeste
d
.
P
r
ess
t
he
"empt
y
f
an
"
bu
tt
o
n t
o
d
ecrease the air
f
low.
6
ZLWFKLQ
J
WKHV
\
VWHPR
II
Pr
ess
th
e
a
ir
f
l
o
w "empt
y
f
an
"
7
u
nt
il
the
f
an s
y
mbol disappears.
Thi
s
ac
ti
o
n
s
wit
c
h
es
off
a
ll
of
th
e
fu
n
c
ti
o
n
s
of
t
h
e a
i
r con
di
t
i
on
i
n
g
s
y
stem.
Thermal com
f
ort is no longer controlled.
A
slight
f
low o
f
air resulting
f
rom the movement
of the vehicle, remains perceptible however.
Pressing the air flow
"
full fan
"
bu
tt
o
n
7
o
r
o
n
"
AUTO" reactivates the system with the values
se
t
be
f
o
r
e
it w
as
s
wit
c
h
ed
o
ff.

69
Comfort
Scented air freshener
System permitting the diffusion of a fragrance in the passenger compartment in accordance with your requirements, by means of the adjustment dial
and the various fragrance cartridges available.
Thi
s
d
i
a
l i
s
l
oca
t
ed
o
n th
e
das
h
boa
r
d
.
It allows you to adjust the intensity of diffusion
of the fragrance.
)
Turn the dial to the ri
g
ht to permit di
ff
usion
of the fragrance.
)
Turn the dial to the left to stop diffusion of
the
f
ragrance.
Adjustment dial
Thi
s cartr
id
ge can
b
e remove
d
eas
il
y.
Th
e
f
irst time it is used, replace the plug with a real
cartridge.
You can change it at any time and store it in the
sealed case which keeps it closed once it has
b
een opened.
You can obtain di
ff
erent
f
ra
g
rance cartrid
g
es
from
C
ITR
OË
N dealers.
Leave the central vents open.
The intensity of diffusion of the
f
ra
g
rance ma
y
depend on the
vent
il
at
i
on or a
i
r con
di
t
i
on
i
ng sett
i
ngs.
Fragrance cartridge
Do not discard the original cartridge
as this serves as a plu
g
when no
f
ra
g
rance cartrid
g
e is in use.
In order to
p
reserve the service li
f
e
of
the cartrid
g
e, turn the dial
f
ull
y
to
t
he le
f
t when you no longer wish to
d
i
ff
use the
f
ragrance in the passenger
c
ompartment.
A
s a safety precaution, do not carry
o
ut an
y
action on the cartrid
g
e while
d
rivin
g
.
D
o not
di
smant
l
e t
h
e cartr
idg
es.
Do not attempt to re
f
ill the
f
ra
g
rance
d
i
ff
user or the cartrid
g
es.
A
vo
id
a
ll
contact w
i
t
h
t
h
e s
ki
n an
d
eyes.
Keep out of reach of children and
animals.

5
HPRY
L
QJW
K
HFDUWU
LG
JH
)
Press the dial and turn it a
q
uarter o
f
a turn
a
nt
i
-c
l
oc
k
w
i
se.
)
Remove the cartridge.
)
Refit its sealing case.
)L
WW
L
QJW
K
HFDUWU
LG
JH
)
Remove the cartrid
g
e
f
rom the sealin
g
case
.
)
Install the cartrid
g
e
(f
lower at top le
f
t
)
.
)
Press the dial and turn it a
q
uarter o
f
a turn
c
lockwise.

7
1
Comfort
Front seats
Seat consisting of a seat cushion, a seat back and a head restraint which can all be adjusted to adapt your position for ease of driving and comfort.
Manual adjustments
)RUZDUGVEDFNZDUGVDGMXVWPHQW
)
Raise the control and slide the seat
forwards or backwards.
'
U
L
YHU
VRUSDVVHQJHU
VVHDW
KHLJKWDGMXVWPHQW
)
P
u
ll
t
h
e contro
l
u
p
war
d
s to ra
i
se or
p
us
h
it downwards to lower, as many times as
necessary, to obtain the position required.
S
eat back angle adjustment
)
P
us
h
t
h
e contro
l
rearwar
d
s.
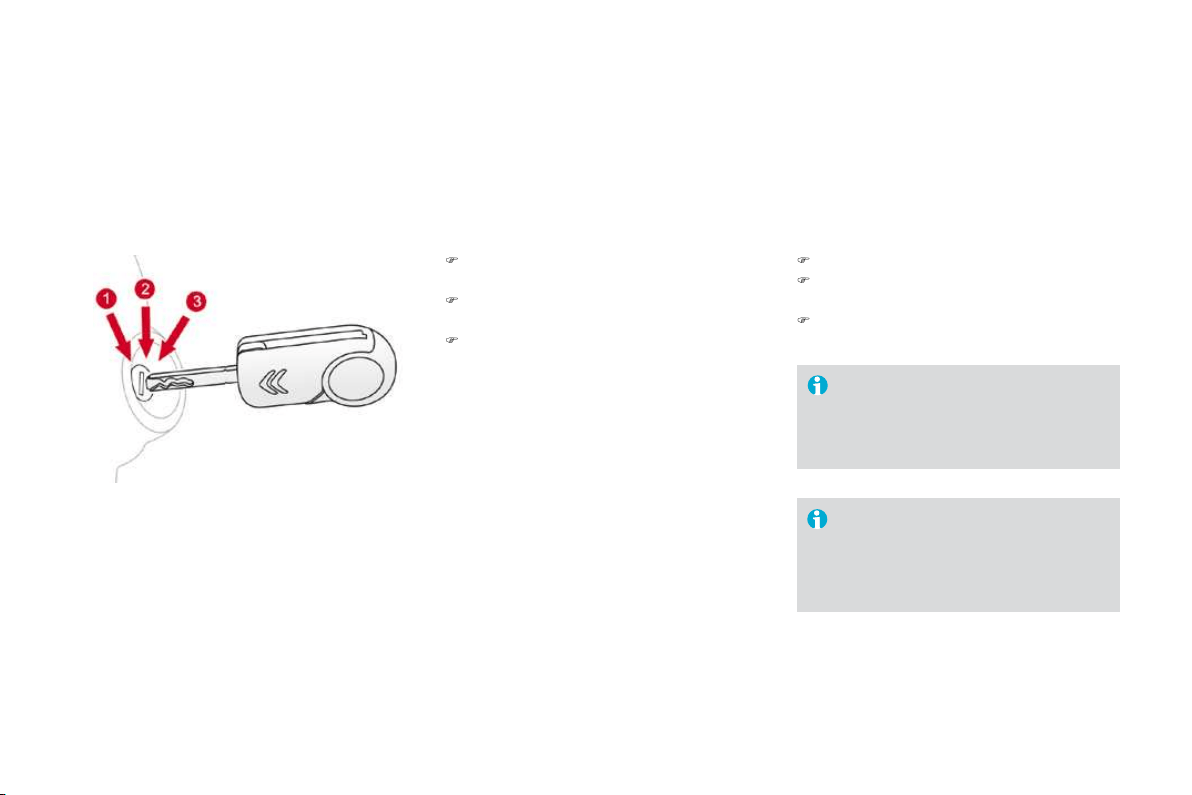
Additional adjustments
+HDGUHVWUDLQWKHLJKWDGMXVWPHQW
)
T
o ra
i
se t
h
e
h
ea
d
restra
i
nt,
p
u
ll
i
t u
p
war
d
s.
)
T
o remove t
h
e
h
ea
d
restra
i
nt,
p
ress t
h
e
l
ug
A
an
d
p
u
ll
t
h
e
h
ea
d
restra
i
nt u
p
war
d
s.
)
T
o
p
ut t
h
e
h
ea
d
restra
i
nt
b
ac
k
i
n
pl
ace,
engage the head restraint stems in the
openings keeping them in line with the seat
bac
k.
)
To lower the head restraint, press the lu
g
A
a
n
d
t
he
head
r
es
tr
ai
nt
a
t t
he
sa
m
e
t
i
m
e
.
Th
e
h
ead
r
es
tr
a
int i
s
fitt
ed
with
a
fr
a
m
e
w
ith notches which prevents it from
l
owerin
g
; this is a safet
y
device in case
o
f
im
p
act.
7K
HD
GM
XVWPHQW
L
VFRUUHFWZ
K
HQW
K
H
X
SSHUHG
J
HR
I
WKHKHDGUHVWUDLQWLV
O
HYHOZLWKWKHWRSRIWKHKHDG
Never drive with the head restraints
r
emoved; they must be in place and
a
djusted correctly.

7
3
Comfort
$FFHVVWRWKHUHDUVHDWV
)
Pull the control upwards to fold the seat
back and move the seat forward.
Wh
en
p
ut
b
ac
k
i
n
pl
ace, t
h
e seat returns to
its initial position.
N
o person or o
bj
ect s
h
ou
ld
prevent t
h
e
seat slide from returning to its initial
position; the return to this position is
necessary for longitudinal locking.
C
heck that the seat belt has reeled in
c
orrect
ly
so as to not
i
mpe
d
e access to
t
he rear seats
f
or passen
g
ers.
H
eate
d
seats contro
l
With the en
g
ine runnin
g
, the
f
ront seats can be
h
eate
d
separate
ly
.
)
U
se t
h
e a
dj
ustment
di
a
l
, p
l
ace
d
on t
h
e s
id
e
o
f
each
f
ront seat, to switch on and select
the level of heating required:
0
: Off.
1
: L
o
w.
2
: M
ed
i
u
m.
3
:
High
.
*UDEKDQGOH
This eas
y
to use handle, located at the top o
f
th
e s
id
e tr
i
m:
-
p
rovides a means o
f
su
pp
ort
f
or the outer
r
ear passengers w
h
en mov
i
ng,
- provides a hand hold to ease access to the
r
ear seats
,
- f
ac
ilit
a
t
es
e
xit fr
o
m th
e
r
ea
r
sea
t
s
.
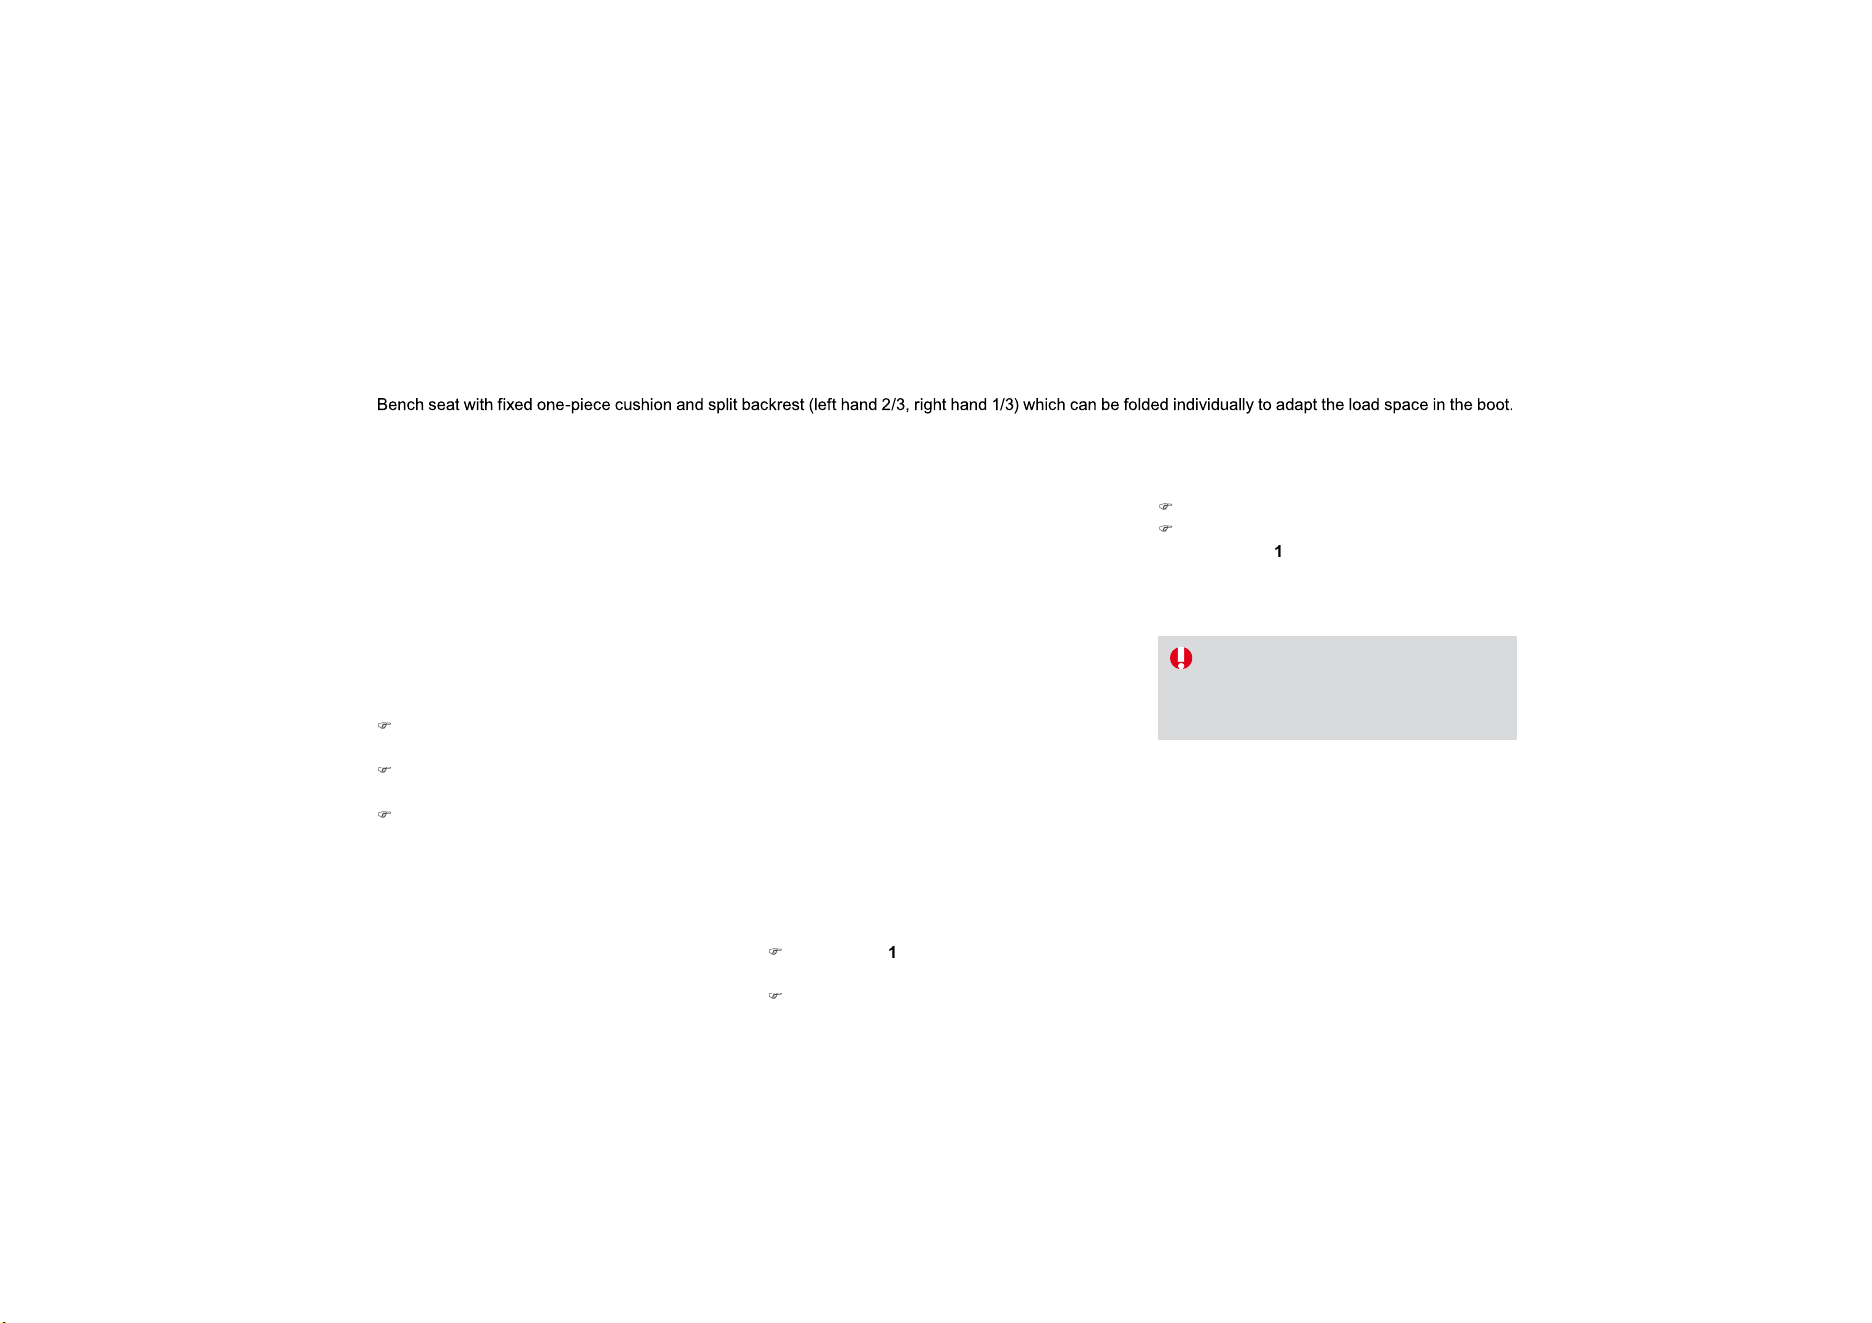
Rear seats
)
Move the corresponding front seat forward if
n
ecessary.
)
Check that the seat belt is positioned correctly
o
n th
e
s
i
de
o
f th
e
sea
t
bac
k.
)
Place the head restraints in the low position.
)ROGLQJWKHEDFNUHVW
)
P
u
ll
co
ntr
o
l
1
f
o
rw
a
r
ds
t
o
r
e
l
ease
th
e
sea
t
bac
k
2
.
)
F
o
l
d
th
e
sea
t
bac
k
2
o
n t
o
th
e
cus
hi
o
n.
Wh
en repos
i
t
i
on
i
n
g
t
h
e rear seat
b
ac
k
rest:
)
S
trai
g
hten the seat back
2
an
d
secure
i
t.
)
C
heck that the red indicator, located next to
t
h
e contro
l
1
,
i
s no
l
onger v
i
s
ibl
e.
5HSRVLWLRQLQJWKHVHDWEDFNUHVW
Wh
en repos
i
t
i
on
i
n
g
t
h
e seat
b
ac
k
rest,
ta
k
e care not to tra
p
t
h
e seat
b
e
l
ts.

7
5
Comfort
These have one position
f
or use
(
up
)
and a
s
towed position
(
down
)
.
They can also be removed.
To remove a head restraint:
)
release the backrest using control
1
,
)
tilt the backrest
2
slightly forwards,
)
pull the head restraint upwards to the stop,
)
then, press the lug
A
.
5HDUKHDGUHVWUDLQWV
N
ever
d
r
i
ve w
i
t
h
t
h
e
h
ea
d
restra
i
nts
removed; they must be in place and
c
orrectly adjusted.
Steering wheel adjustment
)
:KHQVWDWLRQDU\
, pull the control lever to
\
r
elease the steerin
g
wheel.
)
Ad
j
ust the hei
g
ht and reach to suit
y
ou
r
d
r
i
v
i
n
g
pos
i
t
i
on.
)
P
us
h
t
h
e contro
l
l
ever to
l
oc
k
t
h
e steer
i
n
g
w
h
ee
l
.
A
s a sa
f
et
y
precaution, these
operat
i
ons s
h
ou
ld
on
l
y
b
e carr
i
e
d
out
w
hile the vehicle is stationary.
Mirrors
Each fitted with an ad
j
ustable mirror
g
lass
p
ermittin
g
the lateral rearward vision necessar
y
f
or overtakin
g
or parkin
g
. The
y
can also be
folded for parking in confined spaces.
'HPLVWLQJ'HIURVWLQJ
I
f
y
our vehicle is
f
itted with heated mirrors, the
demisting - defrosting operates with the engine
running, by switching on the heated rear screen
(
refer to the "Rear screen demist - defrost"
page).
Adjustment
)
Mo
v
e
co
ntr
ol
A
to the ri
g
ht or to the le
f
t to
se
l
ect t
h
e correspon
di
n
g
m
i
rror.
)
M
ove contro
l
B
in all
f
our directions to
a
dj
ust.
)
Return control
A
to the central position.
Door mirrors
Th
e o
bj
ects o
b
serve
d
are,
i
n rea
li
t
y
,
cl
oser t
h
an t
h
e
y
appear.
T
a
k
e t
hi
s
i
nto account
i
n or
d
er to
c
orrectly judge the distance o
f
vehicles
a
pproaching from behind.
Foldin
g
)
From outside: lock the vehicle using the
r
emote control or the ke
y
.
)
F
rom
i
ns
id
e: w
i
t
h
t
h
e
ig
n
i
t
i
on on, pu
ll
co
ntr
ol
A
r
ea
rw
a
r
ds
.
Unfolding
)
F
rom outs
id
e: un
l
oc
k
t
h
e ve
hi
c
l
e us
i
n
g
t
h
e
r
emote contro
l
or t
h
e
k
e
y
.
)
F
rom
i
ns
id
e: w
i
t
h
t
h
e
i
gn
i
t
i
on on, pu
ll
contro
l
A
rearwar
d
s.
If the mirrors are folded using control
A
,
they will not unfold when the vehicle is
u
nlocked. Pull a
g
ain on control
A
.
The
f
oldin
g
and un
f
oldin
g
o
f
the door
m
i
rrors us
i
n
g
t
h
e remote contro
l
can
b
e
d
eactivated by a CITRO
Ë
N dealer.
Never fold or unfold the electric folding
mirrors manually.
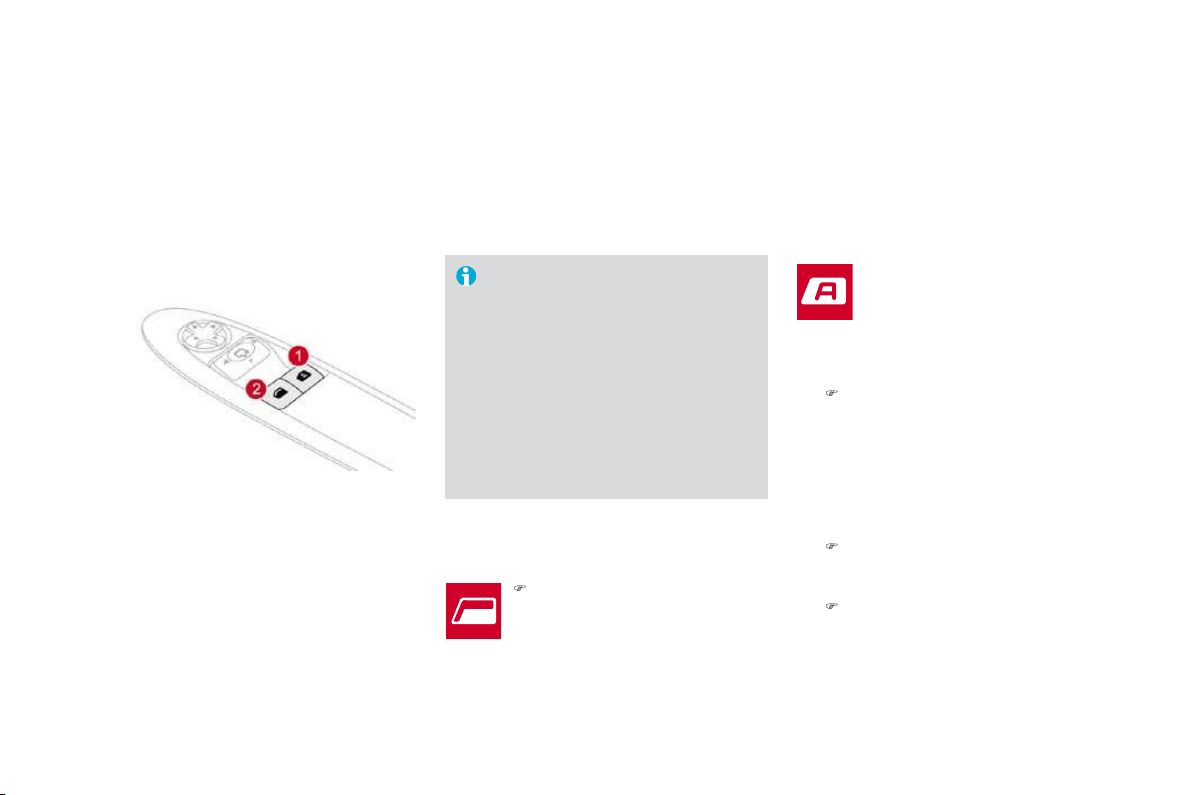
77
Comfort
5
HDUY
L
HZP
L
UUR
U
Adj
usta
bl
e m
i
rror prov
idi
n
g
a centra
l
rearwar
d
v
i
ew.
Equipped with an anti-dazzle s
y
stem, use
f
ul in poor li
g
ht.
0DQXDOGD\
QLJKWPRGHO
Adjustment
)
Adjust the mirror so that the glass is
di
recte
d
correct
l
y
i
n t
h
e
"d
ay
"
pos
i
t
i
on.
'D
\
QL
J
KWSRVLWLRQ
)
Pull the lever to change to the "night" anti-
dazzle position.
)
Push the lever to change to the normal
"da
y
" position.
B
y
means o
f
a sensor, which measures the
l
i
g
ht
f
rom the rear o
f
the vehicle, this s
y
stem
a
utomat
i
ca
lly
an
d
pro
g
ress
i
ve
ly
c
h
an
g
es
b
etween t
h
e
d
ay an
d
n
i
g
h
t uses.
$
XWRPDWLFGD\
QLJKWPRGHO
I
n or
d
er to guarantee opt
i
mum v
i
s
ibili
ty
d
uring your manoeuvres, the mirror
l
ightens automatically when reverse
gear is engaged.
A
s a safety precaution, the mirrors
must be adjusted to reduce the "blind
spot".
It has an anti-dazzle system which darkens the
mirror glass: this reduces any driver discomfort
c
aused b
y
the li
g
ht beam of followin
g
vehicles,
the sun...
Remote control key
System which permits central unlocking or locking of the vehicle using the lock or from a distance. It is also used to locate and start the vehicle, as well
as providing protection against theft.
Unlocking the vehicle
Un
f
oldin
g
the ke
y
)
First press button
A
to unfold the ke
y
.
Unlocking using the remote
control
Unlockin
g
usin
g
the ke
y
)
Press the open padlock to unlock
th
e
v
e
hi
c
l
e
.
)
Turn the ke
y
to the le
f
t in the driver's doo
r
l
oc
k
to un
l
oc
k
t
h
e ve
hi
c
l
e.
Unlocking is confirmed by rapid flashing of
t
he direction indicators for approximatel
y
two seconds.
A
ccordin
g
to version, the door mirrors un
f
old at
th
e same t
i
me.

81
Access
L
ocking the vehicle
Locking using the remote control Locking using the key
) Turn the key to the right in the driver's doo
r
l
ock to lock the vehicle completely.
Locking is confirmed by fixed lighting o
f
t
he direction indicators for approximatel
y
two seconds.
A
ccordin
g
to version, the door mirrors
f
old at
th
e same t
i
me.
)
Press the closed padlock to lock
t
h
e
v
e
hi
c
l
e
.
I
f
one o
f
the doors or the boot is still
open, t
h
e centra
l
l
oc
ki
ng
d
oes not ta
k
e
pl
ace.
When the vehicle is locked
,
if it is
unlocked inadvertently, it will relock
a
utomatically after thirty seconds
unless a door or the boot is open.
The foldin
g
and unfoldin
g
of the door
mi
rrors us
i
n
g
t
h
e remote contro
l
can
b
e
deactivated b
y
a CITRO
Ë
N dealer.
Foldin
g
the ke
y
)
First press button
A
to fold the ke
y
.

lamps and flashing of the direction indicators
f
o
r
a
f
e
w
seco
n
ds
.
L
ocating your vehicle
)
Press the closed padlock to
locate your locked vehicle in a
c
ar
p
ar
k
.
Anti-the
f
t
p
rotection
Electronic en
g
ine immobilise
r
The key contains an electronic chip which has
a special code. When the ignition is switched
o
n, this code must be recognised in order for
startin
g
to be possible.
Thi
s e
l
ectron
i
c en
gi
ne
i
mmo
bili
ser
l
oc
k
s t
h
e
en
g
ine mana
g
ement s
y
stem a
f
ew minutes
a
f
ter the i
g
nition is switched o
ff
and prevents
starting o
f
the engine by anyone who does not
h
ave t
h
e
k
ey.
In the event of a malfunction
,
y
ou are informed by
l
i
g
htin
g
of this warnin
g
l
amp, an audible si
g
nal and a messa
g
e on the
m
u
lti
fu
n
c
ti
o
n
sc
r
ee
n.
I
n t
hi
s case,
y
our ve
hi
c
l
e
d
oes not start; contact
a CITRO
Ë
N dealer as soon as
p
ossible.
- Position
1
:
S
top
- P
os
iti
o
n
2
:
I
gnition
- Position
3
: Starting
I
gnition switch

85
Access
Do
n
o
t t
h
r
o
w t
he
r
e
m
o
t
e
co
ntr
ol
b
atter
i
es awa
y
, t
h
e
y
conta
i
n meta
l
s
which are harm
f
ul to the environment.
T
a
k
e t
h
em to an a
pp
rove
d
co
ll
ect
i
on
point.
L
ost
k
e
y
s
Visit a CITRO
Ë
N dealer with the vehicle's V5 re
g
istration document and
y
our personal
identi
f
ication documents.
The CITRO
Ë
N dealer will be able to retrieve the key code and the transponder code
required to order a replacement key.
R
emote contro
l
The hi
g
h
f
requenc
y
remote control is a sensitive s
y
stem; do not operate it while it is in
y
our
pocket as there is a possibility that it may unlock the vehicle, without you being aware o
f
it.
Do not repeatedly press the buttons of your remote control out of range and out of sight of
y
our vehicle. You run the risk of stopping it from working and the remote control would have
to
be
r
e
initi
a
li
sed
.
The remote control does not operate when the ke
y
is in the i
g
nition, even when the i
g
nition
is switched off, except for reinitialisation.
Locking the vehicle
Driving with the doors locked may make access to the passenger compartment by the
emer
g
enc
y
services more difficult in an emer
g
enc
y
.
A
s a safet
y
precaution
(
with children on board
)
, remove the ke
y
from the i
g
nition when
y
ou
l
eave the vehicle, even
f
or a short time.
Anti-theft protection
Do not make an
y
modi
f
ications to the electronic en
g
ine immobiliser s
y
stem; this could
c
ause mal
f
unctions.
When purchasin
g
a second-hand vehicle
Have the ke
y
codes memorised b
y
a CITRO
Ë
N dealer, to ensure that the ke
y
s in
y
our
possess
i
on are t
h
e on
ly
ones w
hi
c
h
can start t
h
e ve
hi
c
l
e.

83
Access
S
tarting the vehicle
)
I
nsert t
h
e
k
e
y
i
n t
h
e
ig
n
i
t
i
on sw
i
tc
h
.
The system recognises the starting code.
)
Turn the key fully towards the fascia to
position
3 (Starting).
)
When the engine starts, release the key.
)
I
mm
obilise
t
he
v
ehicle
.
)
Turn the ke
y
f
ull
y
towards
y
ou to position
1
(S
top
)
.
) Remove the key
f
rom the ignition switch.
S
witching the vehicle o
ff
Do not attach an
y
heav
y
ob
j
ects to
t
h
e
k
e
y
as t
hi
s cou
ld
we
igh
d
own on
i
t
wh
en
i
n t
h
e
ig
n
i
t
i
on sw
i
tc
h
an
d
cause
a
f
ault.
K
e
y
rem
i
n
d
e
r
If the ke
y
is left in the i
g
nition switch, an
au
dibl
e s
ig
na
l
soun
d
s w
h
en t
h
e
d
r
i
ver
'
s
d
oor
i
s o
p
ene
d
.
Followin
g
disconnection o
f
the vehicle batter
y
,
replacement o
f
the remote control battery or
in the event of a remote control malfunction,
you can no longer unlock, lock or locate your
ve
hi
c
l
e
.
)
First of all, use the key in the lock to unlock
or lock your vehicle.
)
Th
en, re
i
n
i
t
i
a
li
se t
h
e remote contro
l
.
If the
p
roblem
p
ersists, contact a CITRO
Ë
N
dealer as soon as possible.
Remote control problem
Reinitialisation
)
Switch off the ignition.
)
Turn the ke
y
to position
2 (Ignition)
.
)
Press the closed padlock immediatel
y
for a
fe
w
seco
n
ds
.
)
S
witch o
ff
the i
g
nition and remove the ke
y
from the ignition switch.
The remote control is
f
ully operational again.
C
hanging the battery
Battery ref.: CR1620/3 volts.
This replacement battery is available from
C
ITR
O
ËN dealers.
)
Maintain pressure on lug
A
and remove the
chrome finisher by sliding it off at 45°.
)
Unclip the casing by inserting a coin at the
n
otch and rotatin
g
.
)
Slide the flat batter
y
out of its location.
)
S
lide the new batter
y
into its location
o
b
serv
i
n
g
t
h
e or
igi
na
l
di
rect
i
on.
)
C
lip the casin
g
in place, then the chrome
f
inisher.
)
Reinitialise the remote control.
If the battery is flat, you
a
re informed by lighting of
thi
s warn
i
ng
l
amp
i
n t
h
e
i
nstrument
p
ane
l
, an au
dibl
e
s
ig
na
l
an
d
a messa
g
e on t
h
e
m
u
lti
fu
n
c
ti
o
n
sc
r
ee
n.
)
Unfold the key.
)
Release the chrome finisher b
y
pressin
g
on
l
u
g
A
.

85
Access
Do
n
o
t t
h
r
o
w t
he
r
e
m
o
t
e
co
ntr
ol
b
atter
i
es awa
y
, t
h
e
y
conta
i
n meta
l
s
which are harm
f
ul to the environment.
T
a
k
e t
h
em to an a
pp
rove
d
co
ll
ect
i
on
point.
L
ost
k
e
y
s
Visit a CITRO
Ë
N dealer with the vehicle's V5 re
g
istration document and
y
our personal
identi
f
ication documents.
The CITRO
Ë
N dealer will be able to retrieve the key code and the transponder code
required to order a replacement key.
R
emote contro
l
The hi
g
h
f
requenc
y
remote control is a sensitive s
y
stem; do not operate it while it is in
y
our
pocket as there is a possibility that it may unlock the vehicle, without you being aware o
f
it.
Do not repeatedly press the buttons of your remote control out of range and out of sight of
y
our vehicle. You run the risk of stopping it from working and the remote control would have
to
be
r
e
initi
a
li
sed
.
The remote control does not operate when the ke
y
is in the i
g
nition, even when the i
g
nition
is switched off, except for reinitialisation.
Locking the vehicle
Driving with the doors locked may make access to the passenger compartment by the
emer
g
enc
y
services more difficult in an emer
g
enc
y
.
A
s a safet
y
precaution
(
with children on board
)
, remove the ke
y
from the i
g
nition when
y
ou
l
eave the vehicle, even
f
or a short time.
Anti-theft protection
Do not make an
y
modi
f
ications to the electronic en
g
ine immobiliser s
y
stem; this could
c
ause mal
f
unctions.
When purchasin
g
a second-hand vehicle
Have the ke
y
codes memorised b
y
a CITRO
Ë
N dealer, to ensure that the ke
y
s in
y
our
possess
i
on are t
h
e on
ly
ones w
hi
c
h
can start t
h
e ve
hi
c
l
e.
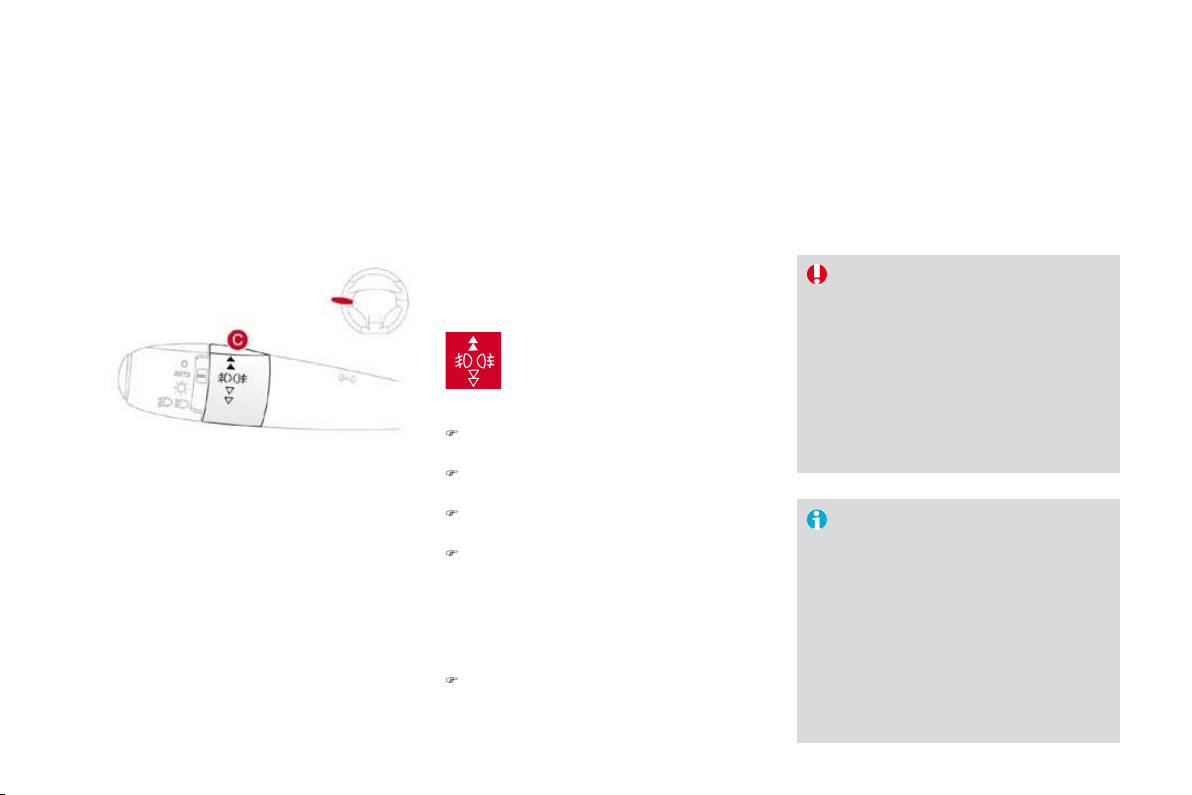
1
.
Driver's electric window switch.
2.
Passenger's electric window switch.
Window controls
System which opens or closes a window manually or automatically. It is fitted with anti-pinch protection on the driver's side.
Th
e
e
l
ec
tri
c
win
do
w
s
wit
c
h
es
r
emain operational for approximately
4
5 seconds after the i
g
nition is
switched o
ff
or until a door is o
p
ened.
I
f
, durin
g
this period o
f
45 seconds,
y
ou
open a
d
oor w
hil
e operat
i
n
g
a w
i
n
d
ow,
th
e w
i
n
d
ow stops.
A
ny new operat
i
on
o
f
the window switch will only be taken
i
nto account after the door has closed.
)
P
ress or
p
u
ll
t
h
e sw
i
tc
h
.
Th
e
wi
n
d
ow sto
p
s as soon as t
h
e
s
w
i
tc
h
i
s re
l
ease
d
.
P
assenger
'
s e
l
ectr
i
c
window
There are two methods of operation:
Driv
e
r'
s
e
l
ect
ri
c
win
do
w
- m
a
n
ual
m
ode
)
Press or pull the switch without passing
t
he point of resistance. The window
stops as soon as the switch is released.
-
auto
m
atic
m
ode
)
Press or pull the switch fully. The window
opens or closes completely when the
s
wit
c
h i
s
r
e
l
eased
.
)
Pressin
g
or pullin
g
the switch a
g
ain
stops the movement of the window.
8
7
Access
In the event of unwanted opening of the
w
indow on closing (for example in the
presence of frost):
)
press the switch until it opens
comp
l
ete
ly
,
)
t
h
en pu
ll
i
t
i
mme
di
ate
ly
unt
il
i
t
c
l
oses,
)
continue to hold the switch for
approximately one second after the
window has closed.
T
he safety anti-pinch function is not
active during these operations.
S
a
f
ety anti-pinch
On the driver's side, the one-touch front electric
w
indow has a safety anti-pinch function.
When the window rises and meets an obstacle
,
it stops and partiall
y
lowers a
g
ain.
R
e
ini
t
i
a
li
sat
i
o
n
A
lwa
y
s remove the ke
y
f
rom the i
g
nition
w
hen leavin
g
the vehicle, even
f
or a
s
h
ort t
i
me.
In the event of contact during operation
o
f the windows
,
reverse the movement
o
f the window. To do this, press the
c
orrespondin
g
switch.
When the driver operates the
passen
g
er e
l
ectr
i
c w
i
n
d
ow sw
i
tc
h
, t
h
e
y
s
h
ou
ld
ensure t
h
at no one
i
s prevent
i
n
g
c
orrect closin
g
o
f
the window.
Th
e
d
r
i
ver s
h
ou
ld
ensure t
h
at t
h
e
passenger uses the electric window
c
orrectly.
Be aware of children when operating
t
h
e
win
do
w
s
.
In the event o
f
a mal
f
unction
y
ou have to
r
einitialise the o
p
eration o
f
the electric
w
indows:
) release the switch and pull it again until the
window closes completely,
)
hold the switch for approximately one
second after closin
g
,
)
p
ress t
h
e sw
i
tc
h
to
l
ower t
h
e w
i
n
d
ow
automat
i
ca
lly
.
T
he sa
f
et
y
anti-pinch
f
unction is not active
d
ur
i
ng t
h
ese operat
i
ons.

Doors
From outside
)
A
f
ter unlockin
g
the vehicle usin
g
the
r
emote contro
l
or t
h
e
k
e
y
, pu
ll
t
h
e
d
oor
h
an
dl
e.
From inside
)
P
u
ll
t
h
e
d
oor
l
ever to o
p
en t
h
e
d
oor; t
hi
s
u
n
l
oc
k
s t
hi
s ve
hi
c
l
e comp
l
ete
ly
.
Closin
g
When a door is not closed correctl
y
:
-
w
h
en t
h
e en
gi
ne
i
s runn
i
n
g
, t
hi
s
w
arn
i
n
g
l
amp comes on, accompan
i
e
d
by a message on the multi
f
unction
screen for a few seconds
,
-
when the vehicle is moving (speed
h
igher than 6 mph (10 km/h)), this warning
lamp comes on, accompanied by an
a
udible si
g
nal and a messa
g
e on the
mu
lti
fu
n
c
ti
o
n
sc
r
ee
n
fo
r
a
fe
w
seco
n
ds
.
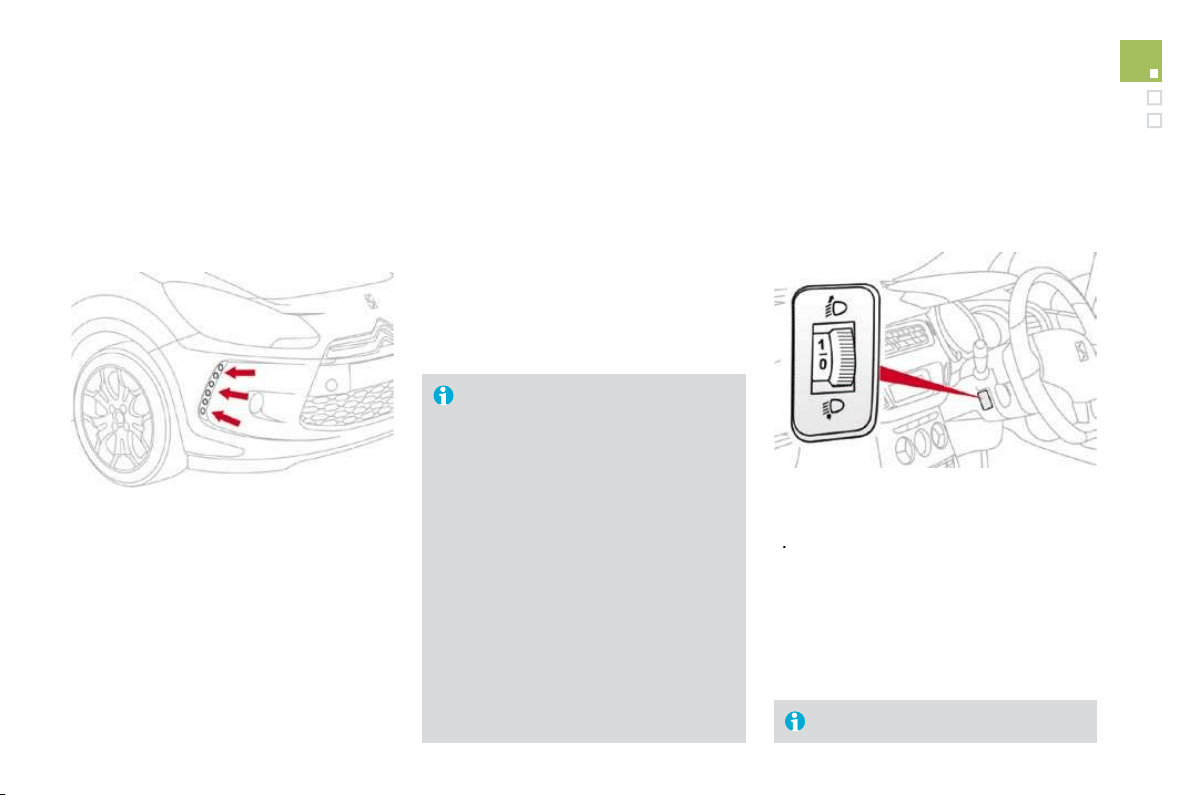
89
Access
System which provides full manual locking or
unlocking of the doors from the inside.
Ma
n
ua
l
ce
n
t
r
a
li
sed
co
n
t
r
o
l
Locking
)
Press button
A
to lock the vehicle.
The red indicator lamp on the button comes on.
Unlocking
)
P
r
ess
bu
tt
o
n
A
a
g
a
i
n to un
l
oc
k
t
h
e ve
hi
c
l
e.
Th
e re
d
i
n
di
cator
l
am
p
on t
h
e
b
utton sw
i
tc
h
es
o
ff
.
If one of the doors is open, central
l
ockin
g
f
rom the inside does not take
pl
ace.
I
f
the vehicle is locked
f
rom the outside,
the red indicator lam
p
f
lashes and
b
utton
A
is inactive.
)
In this case
,
use the remote control
or the key to unlock the vehicle.
A
uto
m
at
i
c
ce
n
t
r
a
li
sed
contro
l
Sy
stem which provides
f
ull automatic lockin
g
o
r unlocking o
f
the doors and the boot while
d
riving.
You can activate or deactivate this function.
Loc
ki
ng
When the speed exceeds 6 mph
(
10 km
/
h
)
, the
d
oors and the boot lock automatically.
Unlocking
)
Above 6 mph (10 km/h), press button
A
to
unlock the doors and the boot temporarily.
If one of the doors is open, the
automatic central lockin
g
does not take
pl
ace.
I
f
the boot is o
p
en, the automatic
c
entral lockin
g
o
f
the doors is active.
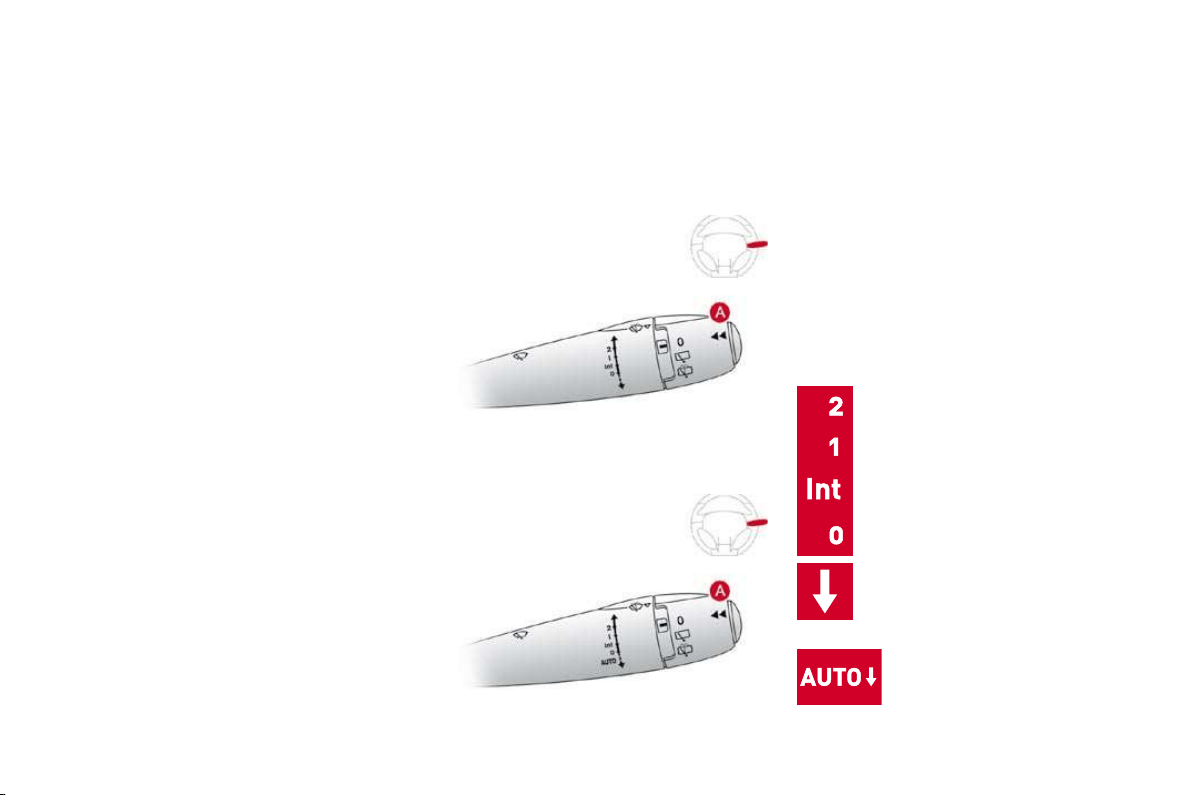
Activation
)
P
r
ess
bu
tt
o
n
A
for more than two seconds.
A confirmation message appears on the
multifunction screen, accompanied by an
a
u
dibl
e s
i
gna
l
.
Deactivation
)
P
r
ess
bu
tt
o
n
A
again for more than
t
wo secon
d
s.
A confirmation message appears on the
multifunction screen, accompanied by an
a
udible signal.
Sy
stem which locks or unlocks the doors
mechanicall
y
in the event o
f
a mal
f
unction o
f
th
e centra
l
l
oc
ki
ng.
E
mer
g
enc
y
control
Loc
ki
ng t
h
e
d
r
i
ver
'
s
d
oor
)
I
nsert t
h
e
k
e
y
i
n t
h
e
l
oc
k
, t
h
en turn
i
t to t
h
e
r
igh
t.
U
n
l
oc
ki
ng t
h
e
d
r
i
ver
'
s
d
oor
)
I
nsert t
h
e
k
e
y
i
n t
h
e
l
oc
k
, t
h
en turn
i
t to t
h
e
l
e
f
t.
Loc
ki
ng t
h
e passenger
d
oor
)
I
nsert t
h
e
k
e
y
i
n t
h
e
l
oc
k
,
l
ocate
d
on t
h
e
e
d
g
e o
f
the door, then turn it one ei
g
hth o
f
a
tu
rn.
U
n
l
oc
ki
ng t
h
e passenger
d
oor
)
P
u
ll
t
h
e
i
nter
i
or
d
oor open
i
n
g
contro
l
.

91
Access
Boot
Openin
g
)
After unlocking the vehicle using the
r
emote control or the key, pull the handle
and raise the tailgate.
C
losing
)
L
ower t
h
e ta
ilg
ate us
i
n
g
t
h
e
i
nter
i
or
g
ra
b
handle.
I
f
the tail
g
ate is not closed correctl
y
:
- when the engine is running
,
this warning lamp comes on,
a
ccompanied by a message on
th
e
m
u
ltif
u
n
c
ti
o
n
sc
r
ee
n f
o
r
a
f
e
w
s
econds
,
-
w
hen the vehicle is moving (speed above
6 mph
(
10 km/h
))
, this warnin
g
lamp comes
o
n, accompan
i
e
d
by
an au
dibl
e s
ig
na
l
an
d
a messa
g
e on the multi
f
unction screen
f
o
r
a few seconds.
S
y
stem for mechanical unlockin
g
of the boot
in the event of a batter
y
or central lockin
g
m
a
l
fu
n
c
ti
o
n.
Tail
g
ate release
Unlockin
g
)
Fold back the rear benchseat to gain
access
t
o
th
e
l
oc
k fr
o
m in
s
i
de
th
e
boo
t.
)
I
n
se
rt
a
s
m
all
sc
r
e
w
d
r
i
v
e
r
i
nt
o
hole
A
of
th
e
l
oc
k
to un
l
oc
k
t
h
e ta
ilg
ate.
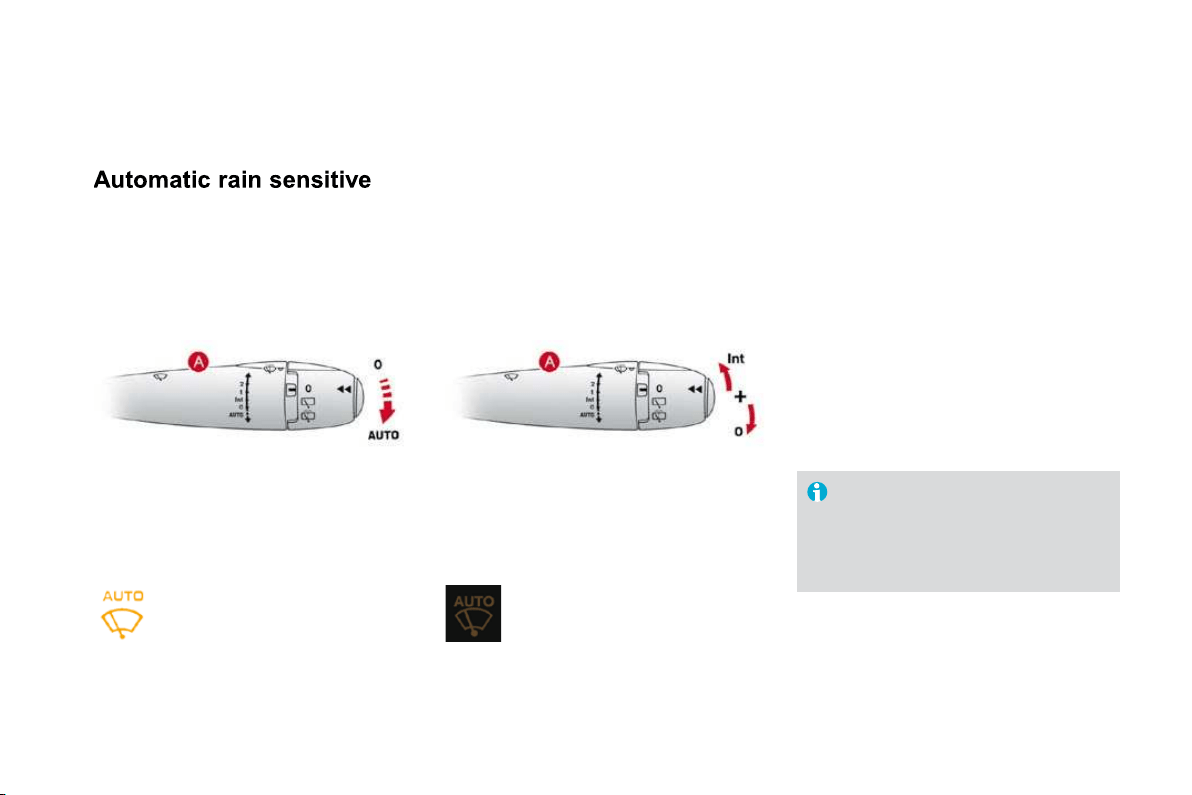
Fuel tank
F
uel tank capacity: approximately 50 litres (petrol) or 48 litres (Diesel).
Low fuel level
Filli
ng
A label affixed to the inside of the flap reminds
you of the type of fuel to be used depending on
your engine.
Additions of fuel must be of at least 5 litres,
in order to be taken into account by the fuel
gauge.
The key cannot be removed
f
rom the
lock until the cap is refitted.
Opening the filler cap may create a
noise a caused by an inrush of air. This
vacuum is entirely normal, resulting
f
rom the sealin
g
o
f
the
f
uel s
y
stem.
To fill the tank in complete safety:
)
t
he en
g
ine must be switched o
ff,
)
o
p
en the
f
uel
f
iller
f
la
p
,
)
i
nsert t
h
e
k
e
y
i
n t
h
e cap, t
h
en turn
i
t to t
h
e
l
e
f
t,
)
remove the cap and hook it onto the clip
located on the inside of the flap,
)
fill the tank
,
but do not continue a
f
ter the
3rd cut-o
ff
o
f
the
p
um
p
;
this could cause
ma
l
fu
n
c
ti
o
n
s
.
When you have filled the tank:
)
put the cap back in place,
)
turn the key to the right, then remove it
from the cap,
)
close the
f
la
p
.
When the fuel tank minimum level
is reached this warning lamp comes
on on the instrument panel. When it
fir
s
t
co
m
es
o
n th
e
r
e
r
e
m
a
in
s
a
pproximately
5 litres
o
f f
ue
l in th
e
t
a
nk.
You must refuel as soon as possible to avoid
runnin
g
out o
f
f
uel.
I
f
y
ou run out o
f
f
uel
(
Diesel
)
, re
f
er also to the
"Checks" section.

93
Access
Quality of the fuel used for
petrol engines
The petrol en
g
ines are per
f
ectl
y
compatible
w
ith E10 type petrol bio
f
uels
(
containing 10
%
e
thanol), conforming to European standards
E
N
228
and EN
1
5
3
7
6
.
E85 type fuels (containing up to 85 % ethanol)
are reserved exclusivel
y
for vehicles marketed
f
or the use o
f
this t
y
pe o
f
f
uel
(
BioFlex
vehicles). The quality of the ethanol must
compl
y
with European standard EN 15293.
For Brazil only, special vehicles are marketed
to run on fuels containing up to 100 % ethanol
(E100 type).
Q
ualit
y
of the fuel used for
Di
ese
l
en
gi
nes
The Diesel engines are per
f
ectly compatible
w
ith biofuels which conform to current and
future European standards (Diesel fuel which
c
omplies with standard EN 5
90
mixed with a
b
iofuel which complies with standard EN 14214)
a
vailable at the pumps
(
containin
g
up to 7 %
F
att
y
Acid Meth
y
l Ester
)
.
The B
30
bio
f
uel can be used in certain Diesel
en
gi
nes;
h
owever, t
hi
s use
i
s su
bj
ect to str
i
ct
a
pplication o
f
the special servicing conditions.
Consult a CITROËN dealer.
The use of any other type of (bio)fuel
(vegetable or animal oils, pure or diluted,
domestic fuel...
)
is strictl
y
prohibited
(
risk of
dama
g
e to the en
g
ine and fuel s
y
stem
)
.

Lighting controls
System for selection and control of the various front and rear lamps providing the vehicle's lighting.
The various
f
ront and rear lam
p
s o
f
the vehicle
are designed to adapt the driver's visibility
progressively according to climatic conditions:
- sidelamps, to be seen,
- dipped beam headlamps to see without
dazzling other drivers,
- main beam headlamps to see clearl
y
when
the
r
oad
is
clea
r.
Main lighting
O
ther lam
p
s are installed to
f
ul
f
il the
re
q
uirements o
f
p
articular conditions o
f
visibility:
- a rear foglamp to be seen from afar,
- front foglamps for improved vision.
- LED lamps to be seen during the daytime.
Additional lighting
V
ar
i
ous automat
i
c
ligh
t
i
n
g
contro
l
mo
d
es
are also available according to the
f
ollowing
op
t
i
ons:
- guide-me-home lighting,
- automatic illumination of headlamps.
Programming
In some climatic conditions (e.g. low
temperature or humidity), the presence
o
f mistin
g
on the internal surface of the
g
lass o
f
the headlamps and rear lamps
is normal; it disa
pp
ears a
f
ter the lam
p
s
have been on
f
or a
f
ew minutes.
9
7
Visibility
Model without AUTO lighting
Model with AUTO lighting
M
a
n
ua
l
co
n
t
r
o
l
s
Th
e
ligh
t
i
n
g
comman
d
s are
i
ssue
d
di
rect
ly
by
t
he driver by means o
f
the ring
A
and the stalk
A
B
.
A
utomat
i
c
li
g
h
t
i
ng.
B.
Stalk for switchin
g
the headlamp beam:
p
u
ll
t
h
e sta
lk
to sw
i
tc
h
b
etween
dipp
e
d
an
d
ma
i
n
b
eam
h
ea
dl
am
p
s.
In the lam
p
s o
ff
and sidelam
p
s modes, the
d
r
i
ver can sw
i
tc
h
on t
h
e ma
i
n
b
eam
h
ea
dl
am
p
s
t
emporarily ("headlamp flash") by maintaining a
p
ull on the stalk.
A
. Main lighting mode selection ring: turn it
t
o position the s
y
mbol required facin
g
the
mark.
Lam
p
s o
ff
.
S
idelamps only.
Dipped headlamps or main beam
headlamps.
Displays
Li
g
htin
g
o
f
the correspondin
g
indicator lamp on
the instrument panel con
f
irms the switching on
of
the lighting selected.
The instrument panel has permanent back-
lighting. Illumination of the instrument panel is
therefore not linked to the exterior lighting.

C
.
F
o
gl
amp se
l
ect
i
on r
i
n
g
.
The
f
oglamps operate with the dipped and main
beam headlamps.
R
otate an
d
re
l
ease t
h
e r
i
n
g
C
:
)
f
orwards a
f
irst time to switch on the
f
ront
f
oglamps.
)
forwards a second time to switch on the
rear foglamp,
)
r
ea
rw
a
r
ds
a
fir
s
t tim
e
t
o
s
wit
c
h
o
ff th
e
r
ear
f
o
g
lamp
)
r
ea
rw
a
r
ds
a
seco
n
d
tim
e
t
o
s
wit
c
h
o
f th
e
f
ront
f
o
g
lamps.
Model with front foglamps and
a
rear fo
g
lamp
L
i
g
h
t
i
ng on
b
uzzer
When the i
g
nition is switched o
ff
, all
of
the lamps switch o
ff
automatically,
u
nless "guide-me-home lighting" is
activated.
If the lighting is switched on manually
after switchin
g
off the i
g
nition, there
is an audible si
g
nal when a front door
i
s o
p
ene
d
to warn t
h
e
d
r
i
ver t
h
at
the
y
have
f
or
g
otten to switch o
ff
the
vehicle's li
g
htin
g
, with the i
g
nition o
ff
.
I
n
g
oo
d
or ra
i
n
y
weat
h
er,
by
b
ot
h
d
a
y
and ni
g
ht, the
f
ront
f
o
g
lamps and the
rear
f
oglamp are prohibited. In these
s
ituations, the power of their beams
may dazzle other drivers.
Do not forget to switch off the front
f
o
g
lamps and the rear fo
g
lamp when
the
y
are no lon
g
er necessar
y
.
Front and rear foglamps
When the lighting is switched off automatically
(
with AUTO model
)
or when the dipped
headlamps are switched o
ff
manuall
y
, the
f
o
g
lamps and sidelamps will remain on.
)
Turn the rin
g
rearwards to switch o
ff
the
f
oglamps, the sidelamps will then switch o
ff
.
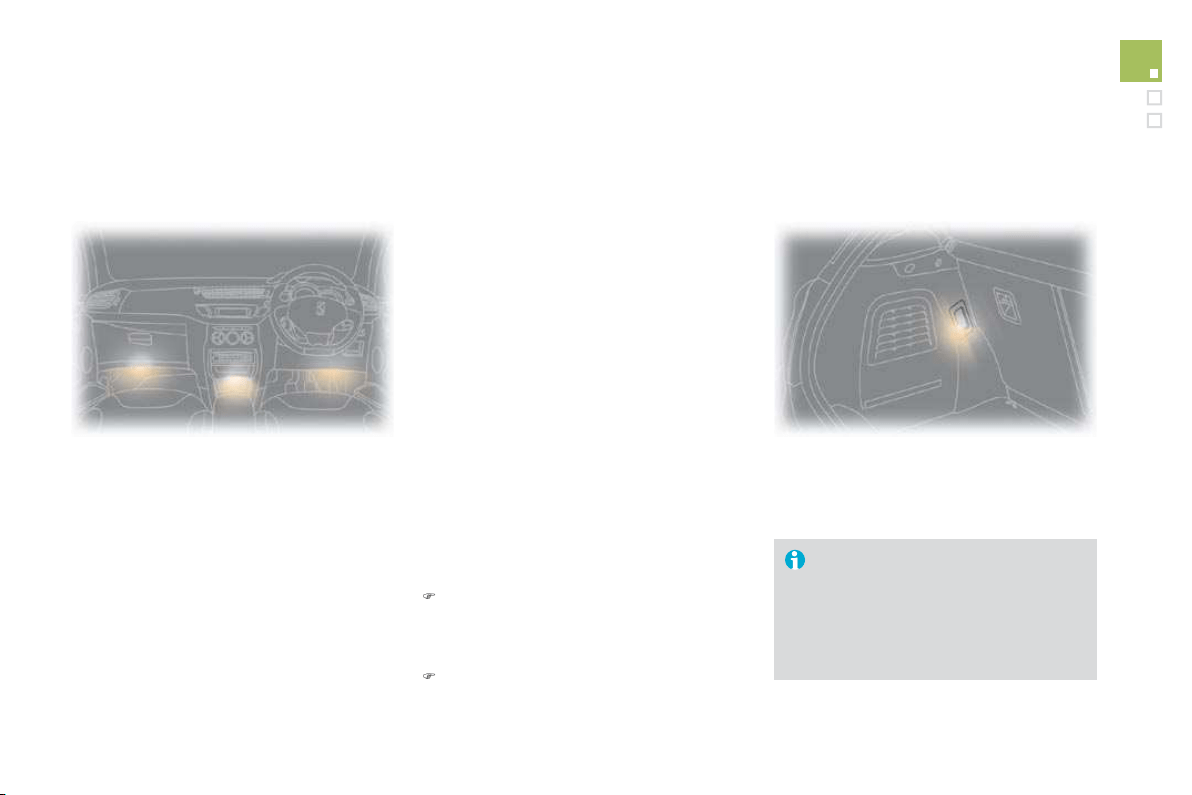
99
Visibility
Temporarily keeping the dipped beam
headlamps on after the vehicle's ignition has
been switched off makes the driver's exit easier
w
hen the li
g
ht is poor.
Switching on
)
With the ignition off, "flash" the headlamps
us
i
n
g
t
h
e
ligh
t
i
n
g
sta
lk
.
)
A
f
urther "headlam
p
f
lash" switches the
function off.
Switching off
Th
e manua
l
g
u
id
e-me-
h
ome
ligh
t
i
n
g
sw
i
tc
h
es
o
ff
automaticall
y
a
f
ter a set time.
Manual guide-me-home
ligh
t
i
n
g
switched on automatically, without any action
on the part of the driver, when a low level of
e
xternal li
g
ht is detected or in certain cases of
a
ctivation o
f
the windscreen wi
p
ers.
As soon as the brightness returns to a
sufficient level or after the windscreen wipers
are switched off, the lamps are switched off
automatically.
A
utomatic illumination o
f
headlam
p
s
Activation
)
Turn ring
A
to the
A
"
AUTO" position. The automatic
illumination of headlamps is accompanied by a
message on the multifunction screen.
D
eact
iv
at
i
o
n
)
Turn ring
A
to a position other than
"AUTO". Deactivation is accompanied by a
message on the multifunction screen.
C
ouplin
g
with the automatic
"G
uide-me-home" li
g
htin
g
Assoc
i
a
ti
o
n with th
e
au
t
o
m
a
ti
c
ill
u
min
a
ti
o
n
o
f
headlamps provides "
g
uide-me-home" li
g
htin
g
with the followin
g
additional options:
- selection o
f
the li
g
htin
g
duration to
15, 30 or 60 seconds in the vehicle
p
arameters on the multi
f
unction screen
c
on
f
iguration menu
(
except in the case o
f
t
he monochrome screen A
,
for which the
d
uration is set: 60 seconds),
- automatic activation of "guide-me-home"
l
i
g
htin
g
when automatic li
g
htin
g
is in
o
peration.
O
perating
f
ault
In th
e
e
v
e
nt
of
a
fau
lt with th
e
b
r
igh
tness sensor, t
h
e
ligh
t
i
n
g
come on, t
hi
s warn
i
n
g
l
amp
i
s displayed on the instrument panel and
/
or a
m
essage appears on the multifunction screen,
a
ccompanied by an audible signal.
Consult a CITROËN dealer.
In fog or snow, the brightness
s
ensor ma
y
detect sufficient li
g
ht.
Therefore, the li
g
htin
g
will not come on
automat
i
ca
lly
.
D
o not cover t
h
e
b
r
igh
tness sensor,
cou
pl
e
d
w
i
t
h
t
h
e ra
i
n sensor an
d
l
ocated in the centre o
f
the windscreen
behind the rear view mirror
;
the
associated functions would no longe
r
be
co
ntr
o
ll
ed
.
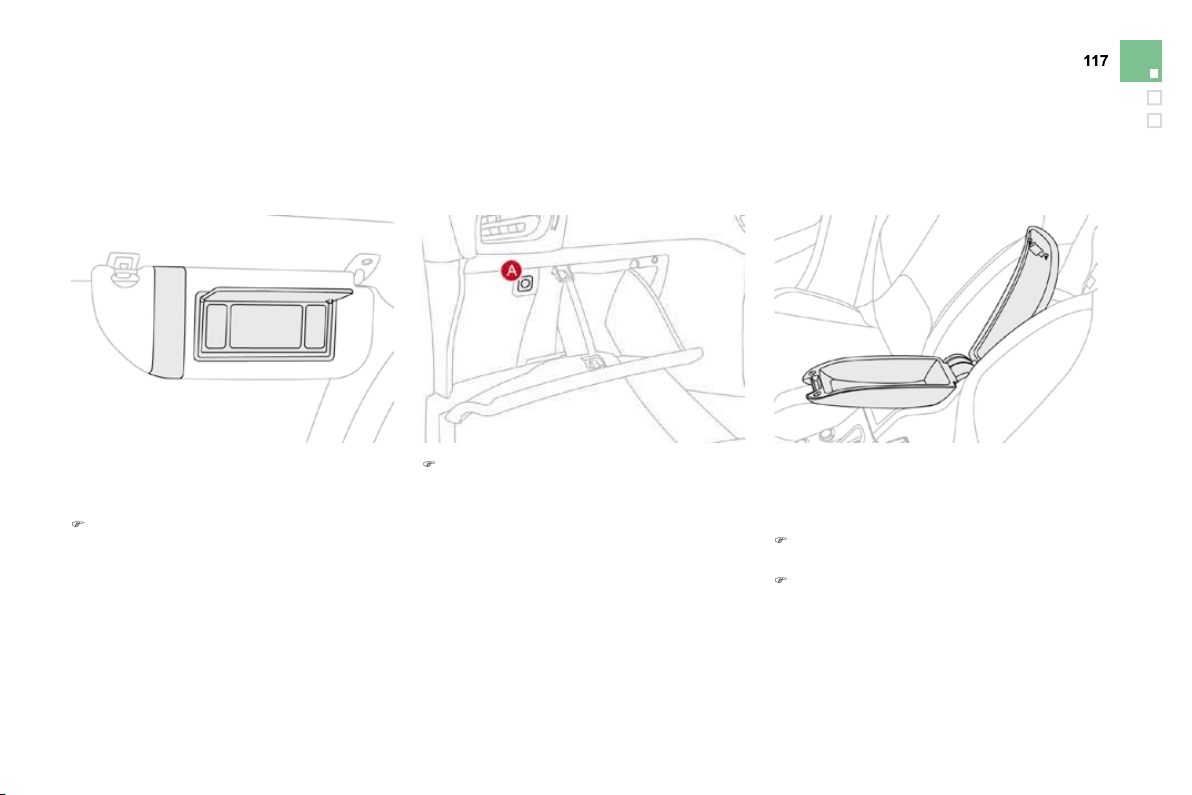
101
Visibility
LED lamps
Daytime external lighting using specific front lamps providing a signature of the vehicle. Comprising
two sets of six diodes, they are located in the vertical scoops below each headlamp.
On starting the vehicle, in daylight the LED
lamps come on automatically, if the lighting
stalk is in position
"
0"
o
r
"
AUT
O
"
.
If the dipped beam headlamps are switched
on manually or automatically, the LED lamps
s
witch o
ff
.
For countries where exterior lighting by day
i
s not a le
g
al requirement,
y
ou can activate
o
r
dea
tiv
a
t
e
th
e
fu
n
c
ti
o
n vi
a
th
e
m
u
lti
fu
n
c
ti
o
n
screen con
f
i
g
uration menu.
Headlamp
adjustment
T
o avoid causing a nuisance to other road
T
T
users, the hei
g
ht o
f
the headlamps should be
adjusted in relation to the load in the vehicle.
0
.
Driver only or driver + front passenger.
-
.
Intermediate setting
1.
5 people.
-
. 5 people + load in the boot.
2
.
D
r
i
ver on
l
y + max
i
mum aut
h
or
i
se
d
l
oa
d
i
n
th
e
boo
t.
This position is su
ff
icient to avoid causin
g
dazzle.
Higher settings may limit the spread of light
f
rom the headlam
p
s.
p
Th
e
i
n
i
t
i
a
l
sett
i
ng
i
s pos
i
t
i
on
"0
".
Programming
I
n countr
i
es w
h
ere
i
t
i
s a
l
e
g
a
l
requirement:
- this function is activated by default
a
nd cannot be deactivated
,
- in daylight, the sidelamps and
n
umber plate lamps also come on,
- If the dipped beam headlamps
a
re sw
i
tc
h
e
d
on manua
lly
o
r
a
utomat
i
ca
lly
, t
h
e
LED
l
amps
switch o
ff
.
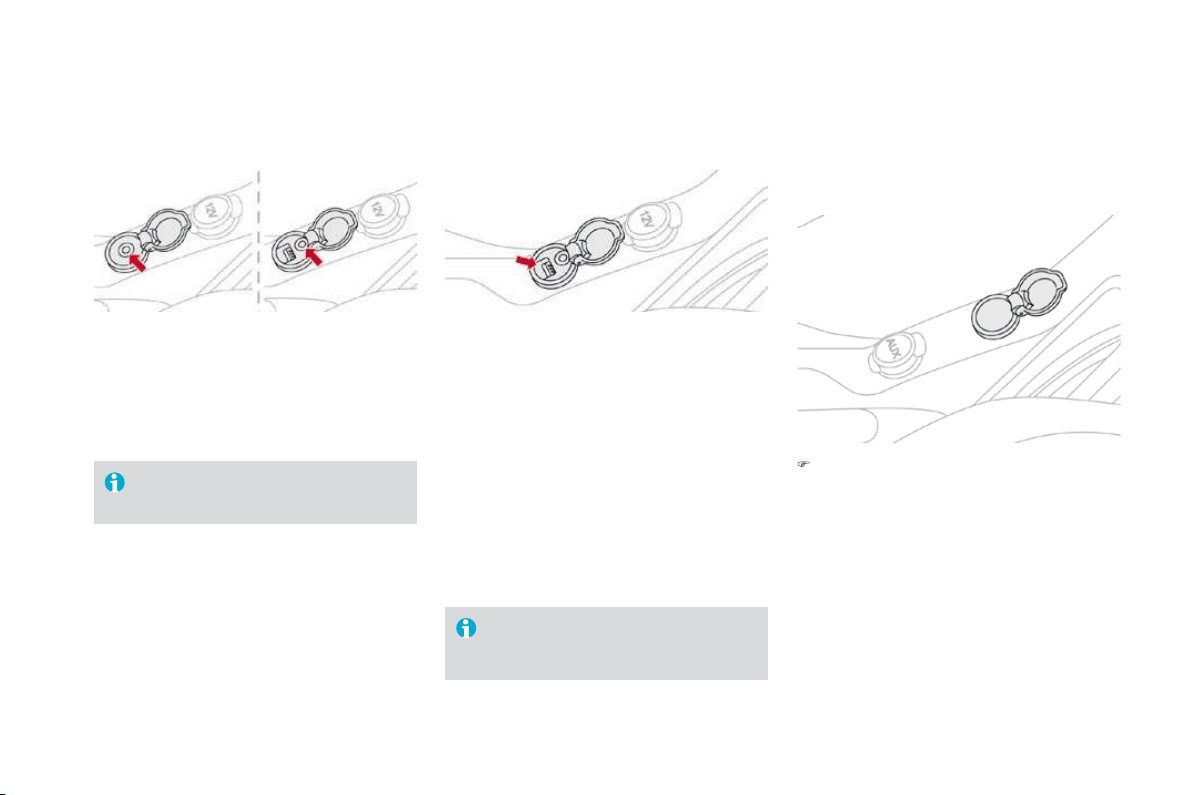
System for selection and control of the various
front and rear wiping modes for the elimination
of rain and cleaning.
The vehicle's front and rear wipers are
d
es
ig
ne
d
to
i
mprove t
h
e
d
r
i
ver
'
s v
i
s
ibili
t
y
p
ro
g
ress
i
ve
ly
accor
di
n
g
to t
h
e c
li
mat
i
c
con
di
t
i
ons.
Wiper controls
P
ro
g
ramm
i
n
g
M
o
d
e
l
w
i
t
h
i
nterm
i
ttent w
i
p
i
ng
Various automatic wiper control modes are also
available according to the following options:
- automatic rain sensitive windscreen wipers,
- rear w
i
p
i
n
g
on en
g
a
gi
n
g
reverse
g
ear.
Model with AUTO wiping
The wiper commands are issued directly by the
driver by means of the stalk
A
and the ring
B
.
M
a
n
ua
l
co
n
t
r
o
l
s
Wi
n
d
screen w
ip
ers
A.
w
i
p
i
n
g
spee
d
se
l
ect
i
on sta
lk
:
sin
g
le wipe
(
press downwards
)
,
automatic, then sin
g
le wipe
(
see
f
ollowin
g
pa
g
e
)
.
fast (heavy rain),
normal
(
moderate rain
)
,
intermittent (proportional to the
speed of the vehicle),
park,
or

103
Visibility
B. rear wiper selection ring:
R
ear w
ip
er
If a significant accumulation of snow or
ice is present, or when using a tailgate
bic
y
cle carrier, deactivate the automatic
rear wiper via the multifunction screen
configuration menu.
p
ar
k
,
intermittent wipe,
wash-wipe
(
set duration
)
.
R
everse gear
Wh
en reverse
g
ear
i
s en
g
a
g
e
d
, t
h
e rear w
i
per
w
ill come into o
p
eration i
f
the windscreen
wi
pers are operat
i
ng.
P
rogramm
i
ng
Th
e
fu
n
c
ti
o
n i
s
ac
tiv
a
t
ed
o
r
deac
tiv
a
t
ed
vi
a
th
e
multi
f
unction screen con
f
i
g
uration menu.
This
f
unction is activated b
y
de
f
ault.
Wi
n
d
screen was
h
P
u
ll
t
h
e w
i
per sta
lk
towar
d
s
y
ou.
Th
e
wi
n
d
screen was
h
, t
h
en t
h
e w
i
n
d
screen w
ip
ers,
op
erate
f
or a s
p
eci
f
ied time.

windscreen wipers
The windscreen wipers operate automatically,
without any action on the part of the driver, if
rain is detected (sensor behind the rear view
mirror), adapting their speed to the intensity of
th
e
r
a
inf
a
ll.
Activation
Thi
s
i
s contro
ll
e
d
manua
lly
by
t
h
e
d
r
i
ver
by
pushing stalk
A
to t
h
e "A
U
T
O
"
p
os
i
t
i
on.
It is accompanied b
y
the li
g
htin
g
o
f
this indicator lamp in the instrument
panel and a message on the
m
ultifunction screen.
Switchin
g
of
f
Thi
s
i
s contro
ll
e
d
manua
lly
by
t
h
e
d
r
i
ve
r
by moving stalk
A
upwar
d
s, return
i
n
g
i
t to
p
os
i
t
i
on
"0
"
.
I
t
i
s accompan
i
e
d
by
t
h
e
i
n
di
cato
r
l
am
p
i
n t
h
e
i
nstrument
p
ane
l
s
witching o
ff
and a message on the
multifunction screen.
Th
e automat
i
c w
i
p
i
n
g
must
b
e
reactivated i
f
the i
g
nition has been o
ff
f
or more than one minute, by pushing
s
talk
A
downwards.

105
Visibility
O
peratin
g
f
ault
If an automatic wiping malfunction occurs, the
w
ipers will operate in intermittent mode.
Have it checked by a CITROËN dealer.
To retain the e
ff
ectiveness o
f
the "
f
lat
-
bl
a
d
e
"
w
ip
er
bl
a
d
es,
i
t
i
s a
d
v
i
sa
bl
e to:
- handle them with care
,
- clean them regularly using soapy
w
a
t
er
,
- n
o
t
use
th
e
m t
o
h
o
l
d
a
s
h
ee
t
of
car
db
oar
d
a
g
a
i
nst t
h
e w
i
n
d
screen,
- replace them at the
f
irst si
g
ns o
f
wear
.
Do not cover the rain sensor, linked
w
ith the brightness sensor and located
in th
e
ce
ntr
e
o
f th
e
win
dsc
r
ee
n
be
hin
d
t
h
e
r
ea
r vi
e
w mirr
o
r.
Switch off the automatic wipin
g
when
u
s
i
n
g
an automat
i
c car was
h
.
I
n w
i
nter,
i
t
i
s a
d
v
i
sa
bl
e to wa
i
t unt
il
t
h
e
w
indscreen is completel
y
clear o
f
ice
be
f
ore activating the automatic wiping.
This position allows the wiper blades to be lifted
f
or winter parkin
g
, cleanin
g
or replacement
wi
t
h
out
d
ama
gi
n
g
t
h
e
b
onnet.
In the minute
f
ollowin
g
switchin
g
o
ff
o
f
the
i
gn
i
t
i
on, any act
i
on on t
h
e w
i
per sta
lk
pos
i
t
i
ons
t
he wipers vertically.
To park the wipers after this has been done,
switch on the ignition and operate the wiper stalk.
V
ertical windscreen wiper
p
os
i
t
i
on

A.
C
ourtes
y
lamp
B.
Map reading lamps
Courtesy lamp
In this position, the courtesy lamp
comes on gradually:
Courtes
y
lamp
- when the vehicle is unlocked
,
- when the key is removed from the ignition,
- when a door is opened,
- w
h
en t
h
e remote contro
l
l
oc
ki
n
g
b
utton
i
s
act
i
vate
d
,
i
n or
d
er to
l
ocate
y
our ve
hi
c
l
e.
It switches o
ff
g
raduall
y
:
- w
h
en t
h
e ve
hi
c
l
e
i
s
l
oc
k
e
d
,
- when the ignition is switched on,
- 30 seconds after the last door is closed.
Permanently off.
Permanent lighting.
W
i
t
h
t
h
e
"
permanent
ligh
t
i
n
g"
mo
d
e, t
h
e
duration o
f
li
g
htin
g
varies, dependin
g
o
n th
e
c
ir
cu
m
s
t
a
n
ces
:
- with the ignition off, approximately
t
en minutes
,
- in energy economy mode,
approx
i
mate
ly
t
hi
rt
y
secon
d
s
,
- w
i
t
h
t
h
e eng
i
ne runn
i
ng, un
li
m
i
te
d
.
Map readin
g
lamps
)
Wi
t
h
t
h
e
ig
n
i
t
i
on on, press t
h
e
correspon
di
ng sw
i
tc
h
.

10
7
Visibility
Interior mood lighting
The dimmed passenger compartment lighting improves visibility in the vehicle when the light is
poor.
Switching on
At night, the illumination of footwells and the
centra
l
d
as
hb
oar
d
stora
g
e compartment comes
on automat
i
ca
lly
w
h
en t
h
e s
id
e
l
amps are
s
w
i
tc
h
e
d
on.
Switchin
g
off
The interior mood li
g
htin
g
switches of
f
a
utomat
i
ca
lly
w
h
en t
h
e s
id
e
l
amps are sw
i
tc
h
e
d
off
.
It can be switched o
ff
manuall
y
usin
g
the
i
nstrument pane
l
li
g
h
t
i
ng r
h
eostat
b
utton.
)
Wi
t
h
t
h
e
li
g
h
t
i
ng on, press severa
l
t
i
mes on
t
he left hand button of the instrument panel
t
o progressively reduce the dashboard
l
ighting level.
)
Press a
g
ain to reduce the li
g
htin
g
level
to
th
e
minim
u
m
a
n
d
s
wit
c
h
off
th
e
int
e
ri
or
mood lighting.
This comes on automatically when the boot is
o
pened and switches off automaticall
y
when
t
he
boo
t
is
closed
.
Boot lamp
Di
ff
erent li
g
htin
g
times are provided:
- when the i
g
nition is o
ff
,
approx
i
mate
l
y ten m
i
nutes,
- in energy economy mode,
approximately thirty seconds,
- when the engine is running, no limit.
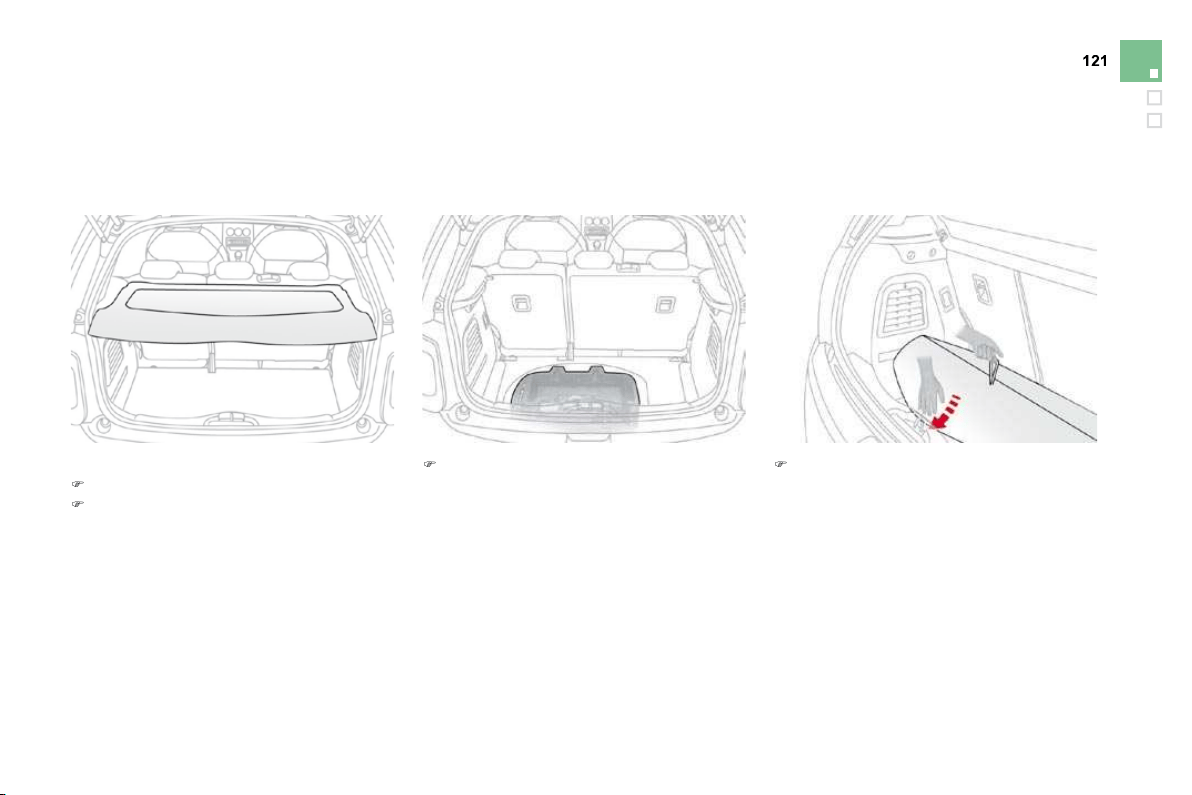
,QWHULRU¿WWLQJV
1
.
Sun visor
(see details on the following page)
2.
Illuminated
g
love bo
x
(see details on the following page)
3.
D
oor tra
y
4.
U
pper stora
g
e compartmen
t
5.
Lower storage compartment with
n
on-s
li
p ma
t
6.
USB por
t
/
auxiliary socke
t
(see details on the following pages)
7.
12
V accessories socket
(see details on following pages)
8
.
Centre armrest with storage
(see details on the following page)
or
Cup/bottle holder

Fittings
Component which protects against sunlight
from the front or the side, also equipped with an
ill
um
i
nate
d
courtes
y
m
i
rror.
)
With the ignition on, raise the concealing
f
lap; the mirror is lit automaticall
y
.
Thi
s sun v
i
sor
i
s a
l
so e
q
u
ipp
e
d
w
i
t
h
a t
i
c
k
et
holder.
Sun visor Illuminated glove
box
Thi
s
ca
n
be
used
t
o
h
o
l
d
a
w
a
t
e
r
bo
ttl
e
.
Its lid has a location for storin
g
the vehicle's
handbook pack.
)
T
o open t
h
e
gl
ove
b
ox, ra
i
se t
h
e
h
an
dl
e.
I
t
i
s
li
t w
h
en t
h
e
lid
i
s o
p
ene
d
.
It houses the
f
ront passenger airbag
deactivation switch A .
If the vehicle is fitted with air conditioning, it
p
rovides access to the ventilation nozzle
B
,
distributin
g
the same conditioned air as the
v
ents in the passen
g
er compartment.
Centre armrest
S
torage
)
For access to the closed stora
g
e box, lift
the lever to open the lid.
)
F
or access to t
h
e open stora
g
e
b
ox
b
e
l
ow
the armrest, li
f
t the com
p
lete armrest
towar
d
s t
h
e rear.
These can be used
f
or portable devices
(
mobile
phone, MP3 player ...) which can be connected
to the USB port/Jack socket or charged from
th
e
12
V
soc
k
e
t in th
e
ce
ntr
e
co
n
so
l
e
.
Comfort and stora
g
e s
y
stem for the driver and
f
ront passen
g
er.
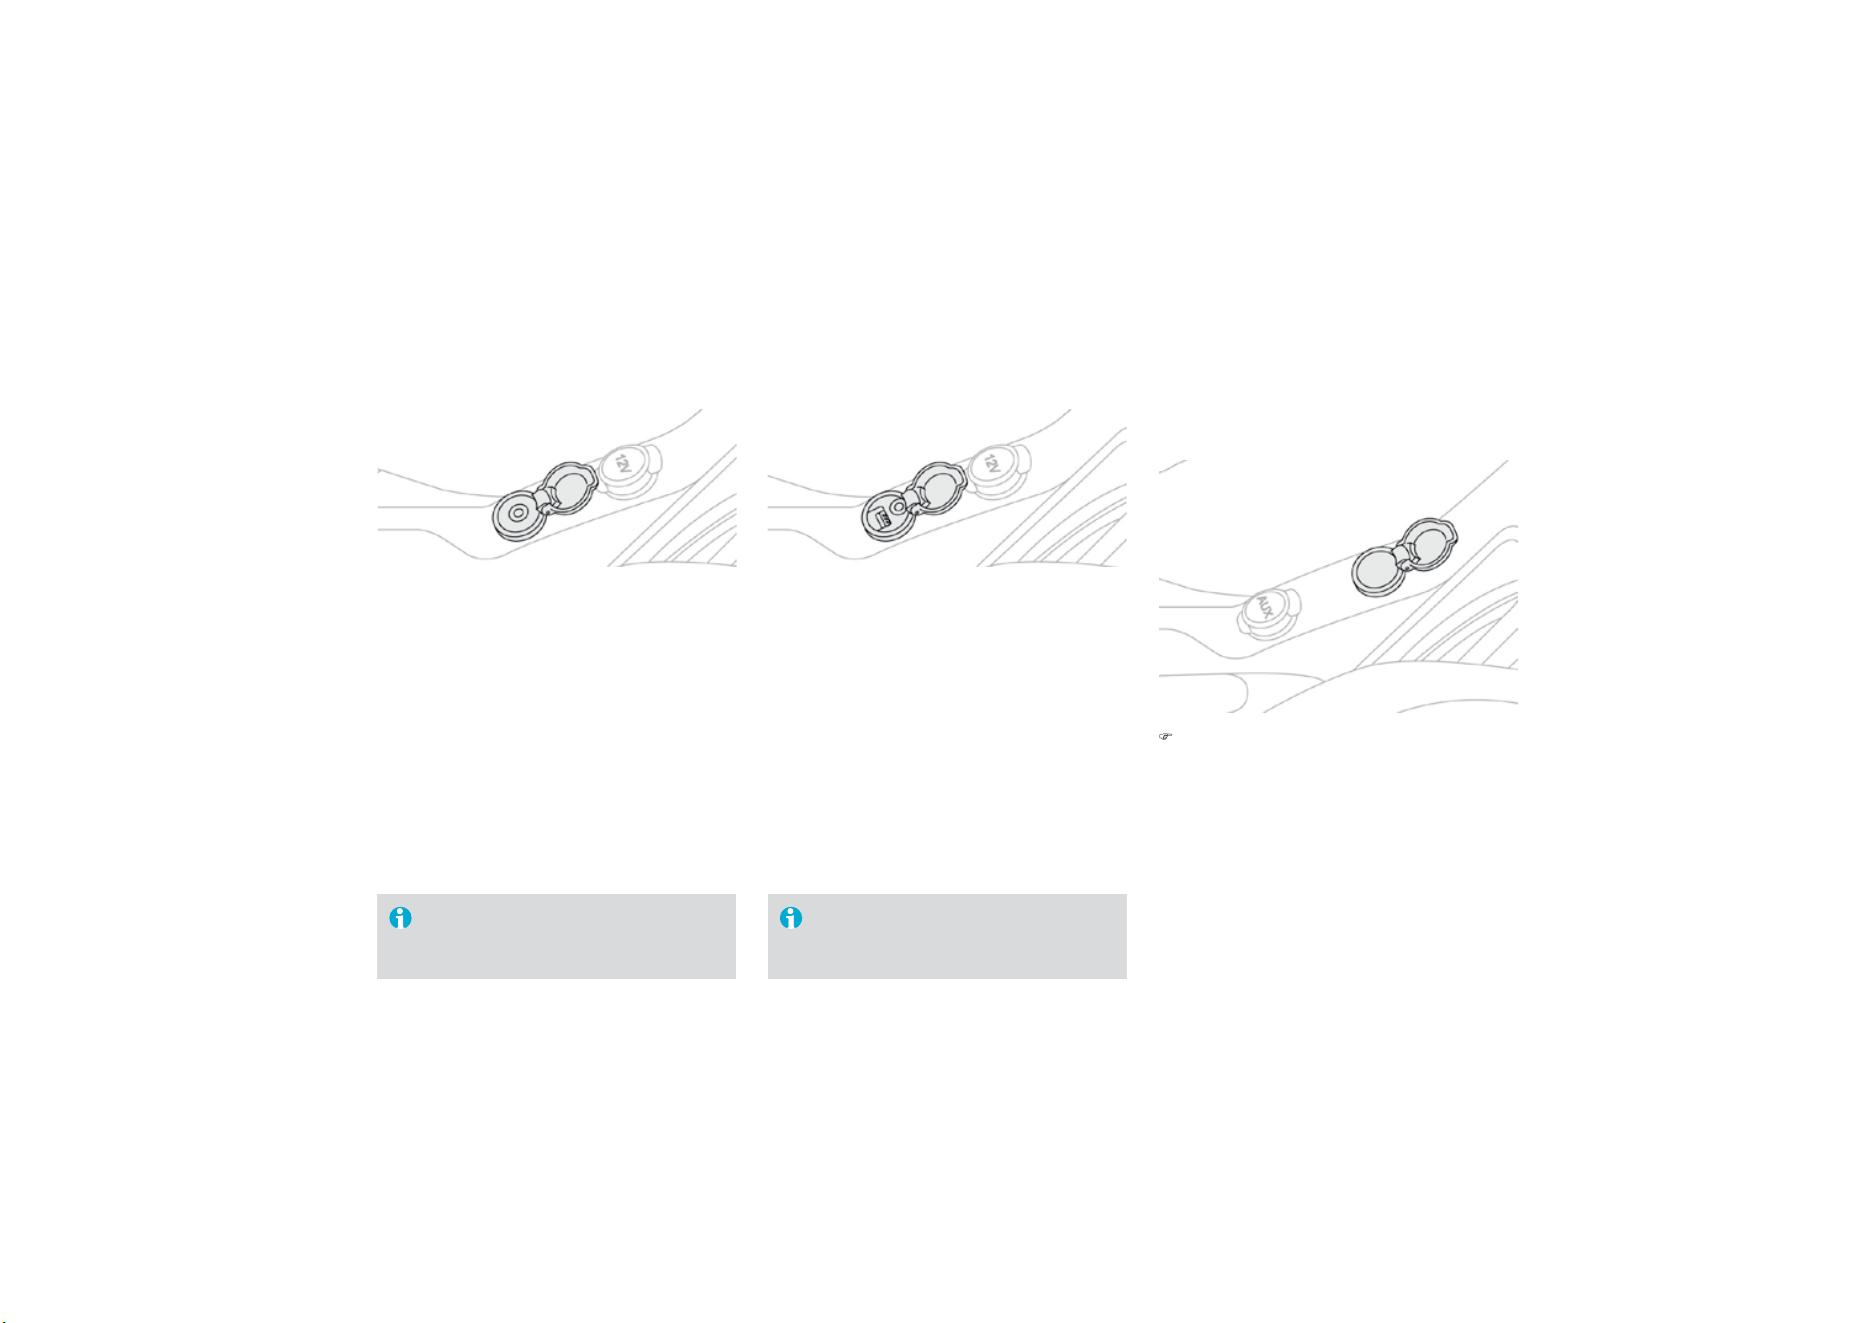
Auxiliary socket
This connection box, consisting of a JACK
soc
k
e
t i
s
l
oca
t
ed
o
n th
e
ce
ntr
e
co
n
so
l
e
.
It permits the connection of portable
equipment, such as a digital audio player of the
iPod
®
t
y
pe.
It reads the audio
f
ile
f
ormats
(
mp3, ogg,
w
ma, wav, ...
)
which are transmitted to your
audio equipment and played via the vehicle's
s
peakers.
You can manage these files using the steering
w
heel controls or the audio equipment control
panel and display them on the multifunction
screen
.
USB Player
Wh
en
i
t
i
s
i
n use, t
h
e
p
orta
bl
e
equipment charges automatically.
Wh
en
i
t
i
s
i
n use, t
h
e
p
orta
bl
e
equ
i
pment c
h
arges automat
i
ca
ll
y.
For more information on the use of this
e
quipment, refer to the MyWay or Audio system
part of the "Audio and Telematics" section.
This connection box, consisting of a JACK
socket and a USB port, is located on the centre
console.
It
p
ermits the connection o
f
p
ortable
equipment, such as a di
g
ital audio pla
y
er o
f
the
iPod
®
or USB stick type.
®
It reads the audio
f
ile
f
ormats
(
mp3, ogg,
wma, wav...) which are transmitted to your
audio equipment and played via the vehicle's
speakers.
You can mana
g
e these files usin
g
the steerin
g
w
h
ee
l
contro
l
s or t
h
e au
di
o e
q
u
ip
ment contro
l
panel and displa
y
them on the multi
f
unction
screen
.
For more information on the use of this
equipment, refer to the Audio system part of the
"
A
ud
i
o
a
n
d
T
e
l
e
m
a
ti
cs
"
sec
ti
o
n.
12 V accessories
socket
)
To connect a 12 V accessory (max power:
1
20 Watts), remove the cover and connect
a
suitable adaptor.
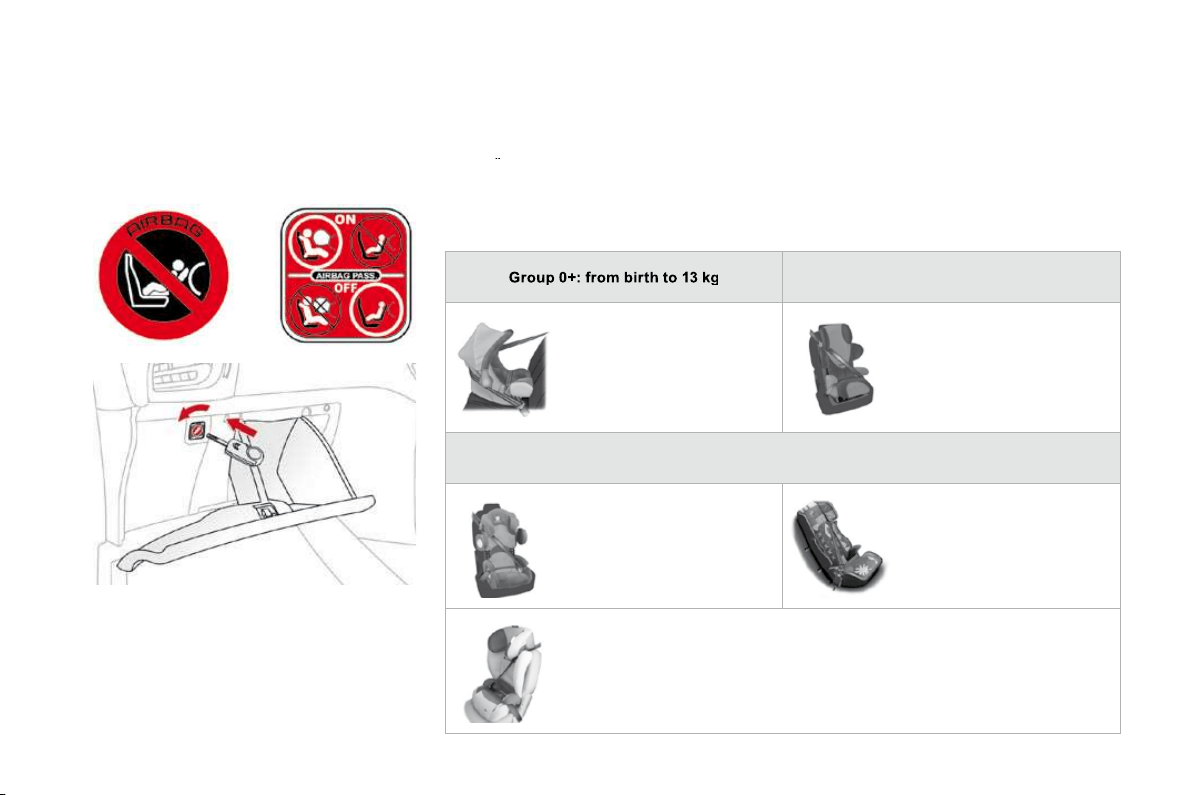
Fittings
Mats
Removable carpet protection component.
When fitting the mat for the first time, on the
driver's side, use only the fixings provided in
th
e
w
a
ll
e
t
a
tt
ac
h
ed
.
The other mats are simply placed on the
car
p
e
t
.
Fitting
Removal
T
o
r
e
m
o
v
e
th
e
m
a
t
o
n th
e
d
riv
e
r'
s
s
i
de
:
)
move the seat as far back as possible,
)
unclip the fixin
g
s,
)
r
e
m
o
v
e
t
he
m
a
t.
Refitting
To re
f
it the mat on the driver's side:
) pos
i
t
i
on t
h
e mat correct
l
y,
) re
f
it the
f
ixings by pressing,
) check that the mat is secured correctly.
To avoid an
y
risk o
f
j
ammin
g
o
f
the
p
e
d
a
l
s:
- on
ly
use mats w
hi
c
h
are su
i
te
d
to
the
f
ixings already present in the
vehicle
;
their use is essential
,
- never fit one mat on top of another.

1
. Rear
p
arcel
shelf
(see the following page for details)
2.
Retainin
g
strap
3.
L
ocation
f
or Hi-Fi am
p
li
f
ier
4.
S
towin
g
rin
g
s
5.
S
tora
g
e box
(
version equipped with a
temporary puncture repair kit)
(
see the
f
ollowing page
f
or details
)
o
r
T
ool box (version equipped with a spare
w
heel
)
(
refer to section "Practical Information -
§
Chan
g
in
g
a wheel"
)
%RRW¿WWLQJV
Fittings
T
o
r
e
m
o
v
e
th
e
s
h
e
lf:
)
unhook the two cords,
)
raise the shelf slightly, then unclip it on
each side.
Rear parcel shelf
)
Raise the boot carpet by pulling the strap
upwards to gain access to the storage box.
This has areas for storin
g
a temporar
y
puncture
re
p
air kit, a box o
f
s
p
are bulbs, a
f
irst aid kit,
t
wo warn
i
n
g
tr
i
an
gl
es, ...
Storage box
)
refit the boot floor carpet by folding it
s
lightly in the middle.

General points relating to child seats
A
lthough one of CITROËN's main criteria when designing your vehicle, the safety of your children
a
lso depends on you.
C
ITRO
Ë
N recommends that children
s
h
ou
l
d
tr
a
v
e
l in th
e
r
ear seats of you
r
vehicle:
-
"rearwards-
f
acin
g
" up to the a
g
e
of 2,
-
"
f
orwards-
f
acin
g
" over the a
g
e o
f
2.
For maximum sa
f
et
y
, please observe the
f
ollowin
g
recommendations:
- in accordance with European regulations,
a
ll children under the age of 12 or less
than one and a half metres tall must
travel in a
pp
roved child seats suited to
their wei
g
h
t
, on seats fitted with a seat
belt or ISOFIX mountings * ,
-
s
tatisticall
y
, the sa
f
est seats in
y
our
ve
hi
c
l
e
fo
r carr
yi
n
g
child
r
e
n
a
r
e
the
r
ear sea
t
s
,
-
a
child weighing less than
9
kg must
travel in the "rearwards-facing" position
b
oth in the front and in the rear
.
* The rules for carr
y
in
g
children are specific to
e
ach countr
y
. Re
f
er to the current le
g
islation
i
n
y
our countr
y
.

Child safety
Child seat in the front
"Rearwards-facing"
When a "rearwards-facing" child seat is
installed on the
f
ront passen
g
er sea
t
,
i
t
is essential that the passenger airbag is
deactivated.
O
therwise,
the
child
w
ould
risk being seriously injured or killed if the
airbag were to inflate.
"Forwards-facing"
When a "
f
orwards-
f
acin
g
" child seat is installed
on t
h
e
f
ront passen
g
er seat, a
dj
ust t
h
e
v
e
hi
c
l
e
'
s seat to t
h
e
i
nterme
di
ate
l
ong
i
tu
di
na
l
p
os
i
t
i
on w
i
t
h
t
h
e seat
b
ac
k
upr
i
g
h
t an
d
l
eave
t
he passenger airbag activated.
I
nterme
di
ate
l
ong
i
tu
di
na
l
p
os
i
t
i
on

Passenger air bag OFF
Child seats recommended by CITROËN
CITRO
Ë
N offers a complete range of recommended child seats which are secured using a
y
t
hree
p
oint seat belt :
Group 0: from birth to 10 kg
G
roup 0+: from birth to 13 k
g
G
roups 1, 2 and 3:
f
rom 9 to 36 k
g
L1
"
RÖMER Bab
y
-Safe Plus"
In
s
t
a
ll
ed
in th
e
r
ea
rw
a
r
ds
-
f
acin
g
position.
L
2
"
KIDDY Lif
e
"
T
he use of the restrainin
g
c
ushion is compulsor
y
for
c
arr
yi
n
g
y
oun
g
c
hild
ren
(f
rom 9 to 18 k
g)
.
Groups 2 and 3: from 15 to 36 kg
L3
"
RE
C
AR
O
S
tart''
L4
"
KLIPPAN Optima"
F
rom the age of 6 years
(
approximately 22 kg), the
boos
t
e
r i
s
used
o
n it
s
o
wn.
L5
"
R
Ö
MER KIDFIX"
C
an be
f
itted to the vehicle's I
SO
FIX anchorages.
Th
e c
hild
i
s restra
i
ne
d
b
y t
h
e seat
b
e
l
t.
Advice on child seats
Th
e
in
co
rr
ec
t in
s
t
a
ll
a
ti
o
n
o
f
a
c
hil
d
sea
t in
a
vehicle compromises the child's protection
in the event of an accident.
R
e
m
e
m
be
r t
o
fas
t
e
n th
e
sea
t
be
lt
s
o
r th
e
child
sea
t
ha
rn
ess
keeping the slack
in
relation to the child's body
to
a
m
i
n
i
m
u
m ,
e
ven
f
or short journeys.
T
o
i
nsta
ll
a c
hild
seat us
i
ng t
h
e ve
hi
c
l
e
'
s
seat belt, ensure that the belt is well
tightened on the child seat and that it holds
the child seat firmly against the vehicle's
seat
.
For o
p
timum installation o
f
the "
f
orward
f
acin
g
" child seat, ensure that the back o
f
t
h
e c
hild
seat
i
s
i
n contact w
i
t
h
t
h
e
b
ac
k
of
the vehicle's seat and that the head
restraint does not cause any discom
f
ort.
If the head restraint has to be removed
,
e
nsure that it is stored or attached securely
to prevent it from being thrown around the
vehicle in the event of sharp brakin
g
.
Children under the age of 10 must not travel
in the "forward facing" position on the front
passen
g
er seat, unless the rear seats are
a
l
rea
dy
occup
i
e
d
by
ot
h
er c
hild
ren, cannot
be
used
o
r
a
r
e
abse
nt.
Deactivate the passen
g
er airba
g
*
when a
"
rear
f
acing" child seat is installed on the
f
ront seat.
Otherwise, the child would risk being
seriously injured or killed if the airbag were
to
infl
a
t
e
.
I
nsta
lli
n
g
a
b
ooster seat
The chest
p
art o
f
the seat belt must be
p
os
i
t
i
one
d
on t
h
e c
hild'
s s
h
ou
ld
er w
i
t
h
out
t
ouc
hi
n
g
t
h
e nec
k
.
Ensure that the la
p
p
art o
f
the seat belt
passes correct
l
y over t
h
e c
hild'
s t
hi
g
h
s.
CITROËN recommends the use of a
b
ooster seat which has a back
,
fitted with a
seat belt guide at shoulder level.
*
Accordin
g
to countr
y
.
A
s a safet
y
precaution, do not leave:
-
o
n
e
o
r m
o
r
e
child
r
e
n
alo
n
e
a
n
d
u
nsu
p
erv
i
se
d
i
n a ve
hi
c
l
e,
- a c
hild
or an an
i
ma
l
i
n a ve
hi
c
l
e w
hi
c
h
i
s ex
p
ose
d
to t
h
e sun, w
i
t
h
t
h
e w
i
n
d
ows
c
l
ose
d
,
- the keys within reach of children inside
the vehicle.
To protect young children from the rays of
t
he sun
,
fit side blinds on the rear windows.

123
Child safety
Y
our ve
hi
c
l
e
h
as
b
een a
pp
rove
d
i
n accor
d
ance
w
ith the ne
w
ISOFIX
r
egulation .
The seats, represented below, are fitted with
regulation ISOFIX mountings:
"ISOFIX" mountings
There are three rings
f
or each seat:
- two rings A
,
located between the vehicle
seat back and cushion, indicated by a label,
- a ring
B
, behind the seat, re
f
erred to as the
TOP TETHER
for fixing the upper strap.
This ISOFIX mounting system guarantees you
f
ast, reliable and safe fittin
g
of the child seat in
y
our ve
hi
c
l
e.
The
I
SO
FIX
c
hil
d
seats
a
r
e
f
itt
ed
with tw
o
l
oc
k
s
whi
c
h
are secure
d
eas
ily
on t
h
e two r
i
n
g
s
A
.
S
ome also have an
u
pper s
t
rap w
hi
c
h
i
s
attac
h
e
d
to r
i
ng
B
.
To attach this strap, raise the vehicle seat's
head restraint then pass the hook between its
rods. Then fix the hook on ring
B
and tighten
the upper strap.
The incorrect installation of a child seat
in a vehicle compromises the child's
protection in the event of an accident.
For information re
g
ardin
g
the ISOFIX child
s
eats w
hi
c
h
can
b
e
i
nsta
ll
e
d
i
n
y
our ve
hi
c
l
e,
consult the summar
y
table
f
or the location o
f
the I
SO
FIX child seats.
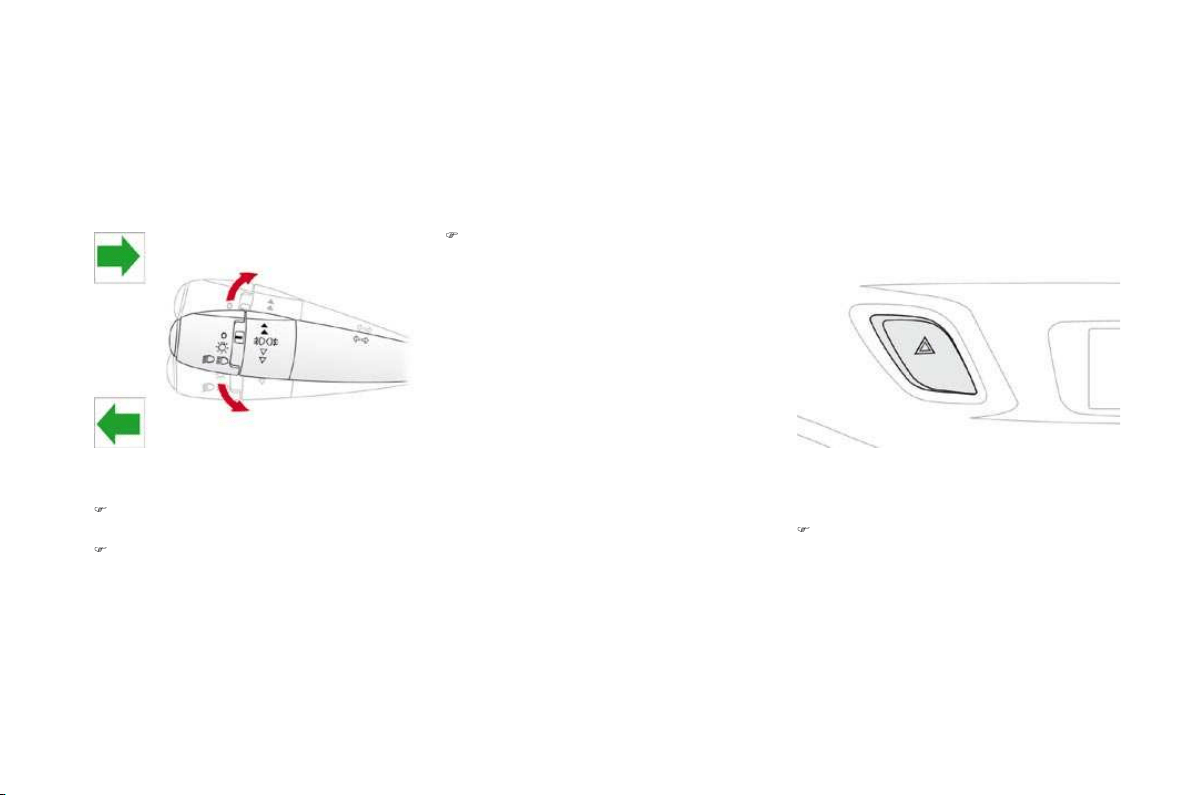
ISOFIX child seat recommended by CITROËN and approved for
your vehicle
This child seat can also be used on seats which are not
f
itted with I
SO
FIX mountings. In this case, it must be attached to the vehicle seat using
the three point seat belt.
F
ollow the instructions for fitting the child seat given in the seat manufacturer's installation guide.
RÖ
MER Duo Plus ISOFIX
(
size cate
g
or
y
B1
)
G
roup 1: from 9 to 18 kg
Installed in the
f
orwards-
f
acing position.
Fi
tte
d
w
i
t
h
an upper strap to
b
e secure
d
on t
h
e upper r
i
ng
B
, re
f
erred to as the T
O
P TETHER.
Three seat body angles: sitting, reclining, lying.
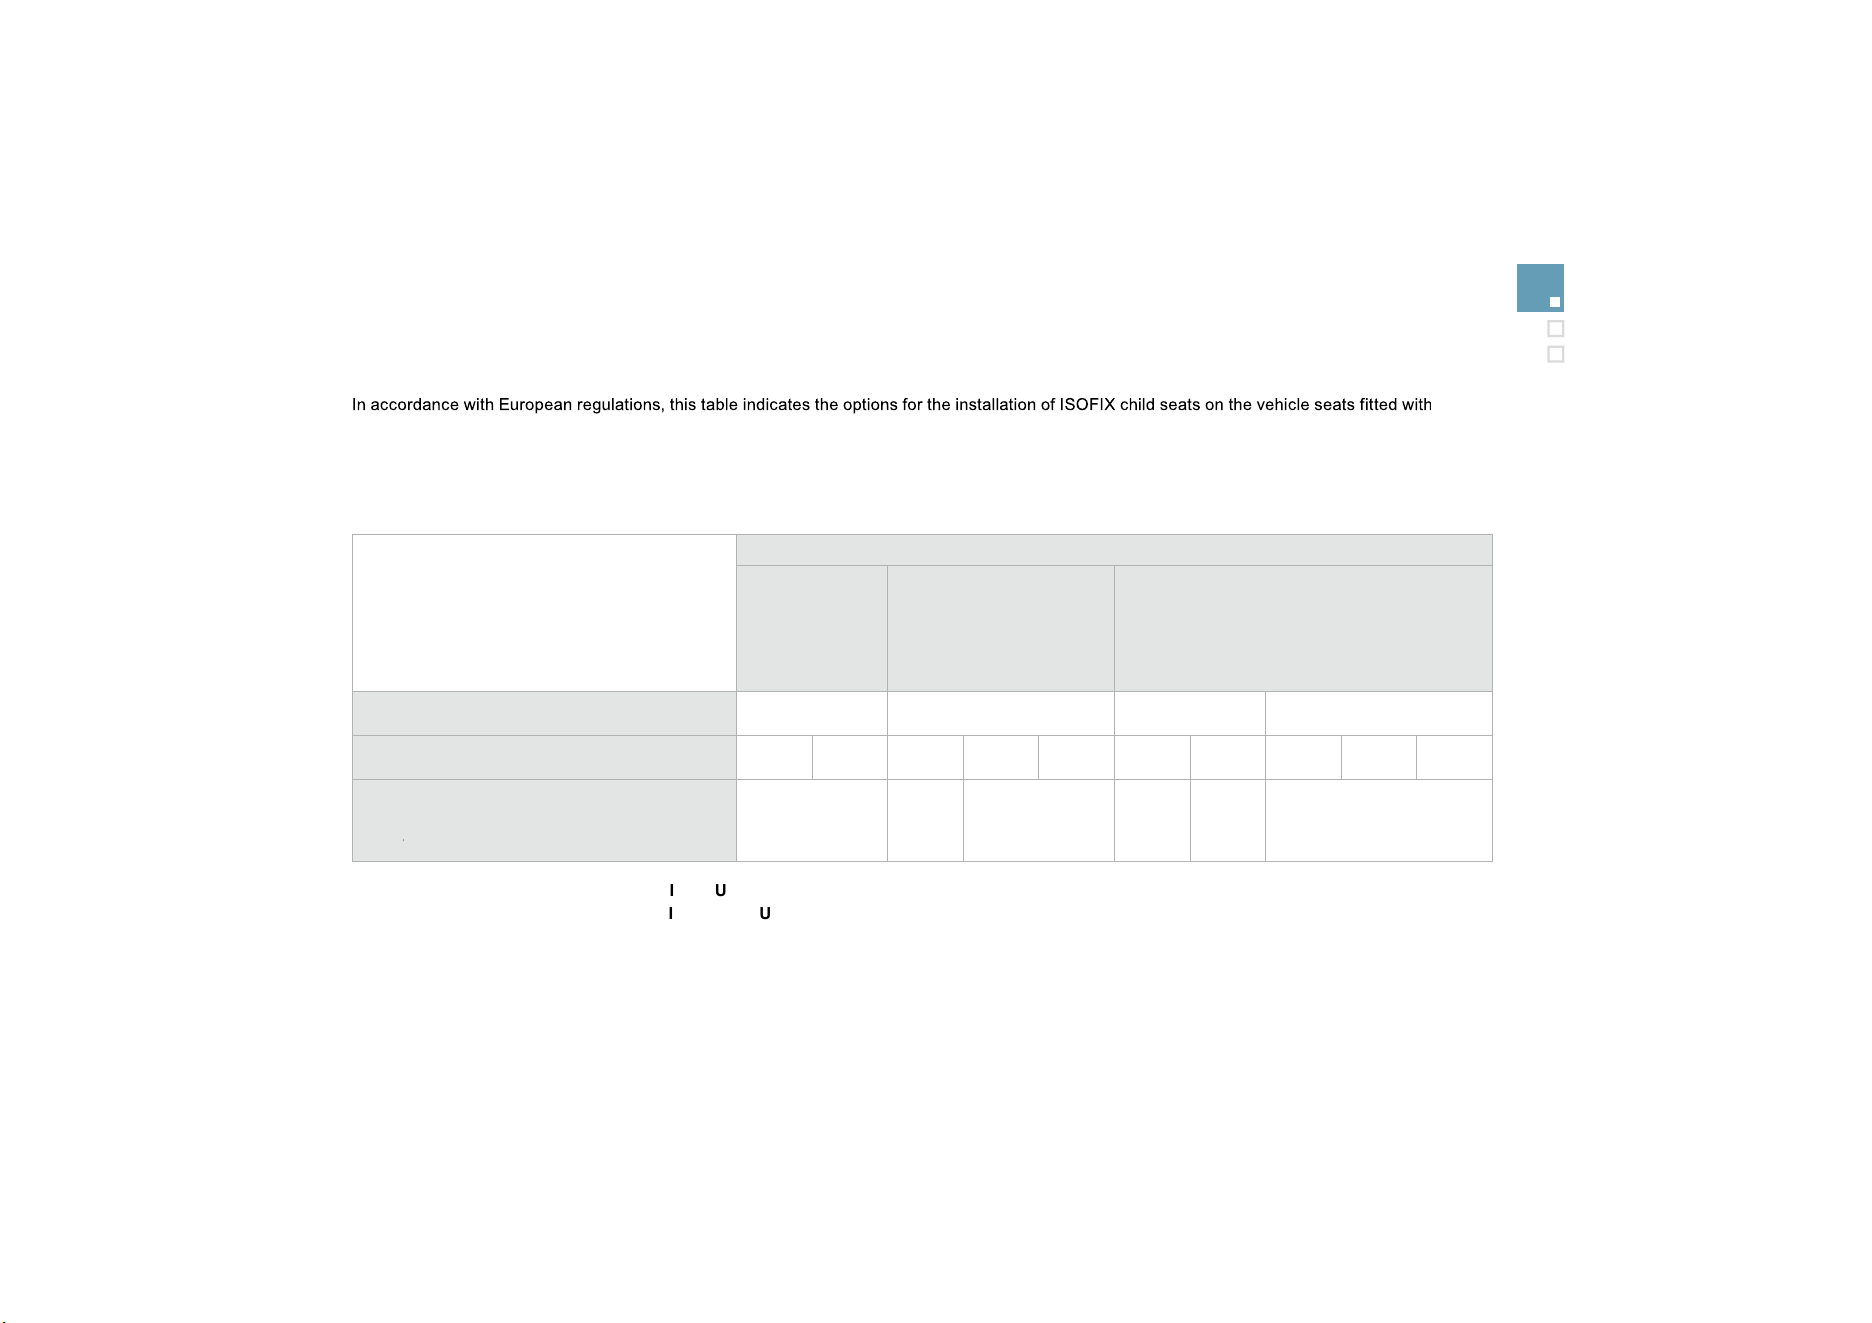
125
Child safety
Installing ISOFIX child seats
ISOFIX mountings.
In the case of the universal and semi-universal ISOFIX child seats, the child seat's ISOFIX size cate
g
or
y
, determined b
y
a letter between
A
a
n
d
G
,
is
indicated on the child seat next to the ISOFIX lo
g
o.
IUF
:
seat suitable for the installation of an
I
so
f
ix
U
n
i
versa
l
seat,
"
F
orward
f
acing" and secured using the "Top Tether" upper strap.
I
L-
SU:
seat suitable for the installation an
I
sofix
S
emi-
U
niversal seat which is:
- "rear facing" fitted with a "Top Tether" upper strap or a stay,
- "forward facing" fitted with a stay,
For the securing of the "Top Tether" upper strap, refer to the "Isofix Mountings" section.
X:
seat which is not suitable for the installation of an ISOFIX seat of the size cate
g
or
y
indicated.
*
In
f
ant car seats and "car cots" cannot be installed on the
f
ront passen
g
er seat.
W
eight of the child
/
/
indicative age
L
ess than
10
kg
(group 0)
Up to
6
months
appro
x
L
ess than 10 k
g
(g
roup 0
)
L
ess than
13
kg
(
group 0+)
U
p to
1
year approx
F
rom 9 to 18 k
g
(g
roup 1
)
From
1
to
3
y
ears approx
T
ype of ISOFIX child seat Inf
a
n
t
ca
r
seat
*
"rear facing
"
"rear facing
"
"forward facing"
I
SO
FIX size cate
g
or
y
F
G
C
D
E
C
D
A
B
B1
Universal and semi-universal ISOFIX child
s
eats which can be installed on the rea
r
outer
seats
r
X
X
I
L-S
U
X
I
L-S
U
IUF
I
L-
SU

Direction indicators
Selection of the left or right direction indicators
to si
g
nal a chan
g
e of direction of the vehicle.
)
Le
f
t: lower the li
g
htin
g
stalk be
y
ond the
point of resistance.
)
Righ
t: ra
i
se t
h
e
ligh
t
i
n
g
sta
lk
b
e
y
on
d
t
h
e
point of resistance.
"
Motorway"
f
unction
)
Press briefly upwards or downwards,
w
ithout
g
oin
g
be
y
ond the point o
f
resistance
;
the direction indicators will flash
3
times.
Hazard warning
lamps
A
visual warning by means of the direction
i
n
d
i
ca
t
o
r
s
t
o
a
l
e
rt
o
th
e
r r
oad
use
r
s
t
o
a
v
e
hi
c
l
e
b
rea
kd
own, tow
i
n
g
or acc
id
ent.
)
P
ress t
hi
s
b
utton, t
h
e
di
rect
i
on
i
n
di
cators
f
lash.
They can operate with the ignition o
ff
.

Safety
Automatic o
p
eration o
f
h
azar
d
warn
i
n
g
l
amps
Wh
en
b
ra
ki
n
g
i
n an emer
g
enc
y
,
d
epen
di
n
g
on
t
h
e
d
ece
l
erat
i
on, t
h
e
h
azar
d
warn
i
n
g
l
amps
come on automatically.
They switch off automatically the first time you
a
ccelerate.
)
You can also switch them off by pressing
th
e
bu
tt
o
n.
Horn
A
udible warning to alert other road users to an
imminent dan
g
er.
)
Press one o
f
the spokes o
f
the steerin
g
wheel
.
U
se t
h
e
h
orn mo
d
erate
ly
an
d
on
ly
i
n
t
he
f
ollowin
g
cases:
-
i
mme
di
ate
d
an
g
er,
- overta
ki
ng a cyc
li
st or pe
d
estr
i
an,
- w
h
en approac
hi
ng an area w
h
ere
there is no visibility.

Braking assistance systems
Group of supplementary systems which help
you to obtain optimum braking in complete
s
afet
y
in emer
g
enc
y
situations:
- anti-lock braking system (ABS),
- electronic brake
f
orce distribution
(
EBFD
)
,
- emer
g
enc
y
brakin
g
assistance
(
EBA
)
.
Anti-lock braking system
and electronic brake force
di
str
ib
ut
i
on
Li
n
k
e
d
systems w
hi
c
h
i
mprove t
h
e sta
bili
ty an
d
manoeuvrability of your vehicle when braking,
in particular on poor or slippery surfaces.
Activation
The anti-lock braking system comes into
o
peration automatically when there is a risk of
wh
ee
l l
oc
k.
Normal operation of the ABS ma
y
make itself
f
elt b
y
sli
g
ht vibration o
f
the brake pedal.
When brakin
g
in an emer
g
enc
y
, press
v
er
y
f
irml
y
without releasin
g
the
press
u
re
.
O
peratin
g
f
ault
If this warnin
g
lamp comes on,
to
g
ether with the
S
T
O
P
a
n
d
AB
S
w
arn
i
n
g
l
amps, accompan
i
e
d
by
a
n au
dibl
e s
ig
na
l
an
d
a messa
g
e on t
h
e
m
ulti
f
unction screen, it indicates a mal
f
unction
o
f
the electronic brake
f
orce distribution which
could result in loss of control of the vehicle
w
hen braking.
Y
ou must sto
p
as soon as it is safe to do so.
When replacing wheels (tyres and
rims), ensure that they conform to the
m
a
n
u
f
ac
t
u
r
e
r'
s
r
eco
mm
e
n
da
ti
o
n
s
.
I
f
this warnin
g
lamp comes on,
a
ccompan
i
e
d
b
y an au
dibl
e s
i
gna
l
a
nd a message on the multifunction
s
creen
,
it indicates a malfunction of the anti-
lock braking system which could result in loss
of control of the vehicle when brakin
g
.
In either case, contact a CITRO
Ë
N dealer.

131
Safety
Emergency braking
ass
i
stance
System which, in an emergency, enables you
to o
b
ta
i
n t
h
e opt
i
mum
b
ra
ki
n
g
pressure more
quickly, thus reducing the stopping distance.
Activation
It is triggered by the speed at which the brake
p
e
d
a
l
i
s
p
resse
d
.
The effect of this is a reduction in the
resistance of the pedal and an increase in
braking efficiency.
When braking in an emergency, press
f
irmly without releasing the pressure.
Trajectory control systems
A
nti-skid regulation (A
S
R)
a
n
d
e
l
ectron
i
c sta
bili
t
y
programme (E
S
P)
The anti-skid re
g
ulation
(
also known as
T
raction Control
)
optimises traction to prevent
skiddin
g
o
f
the wheels, b
y
actin
g
on the brakes
o
f
the drivin
g
wheels and on the en
g
ine.
Th
e e
l
ectron
i
c sta
bili
t
y
pro
g
ramme acts on t
h
e
b
rake o
f
one or more wheels and on the engine
t
o keep the vehicle on the trajectory required
b
y the driver, within the limits of the laws o
f
p
hysics.
A
ct
i
vat
i
on
Th
ese s
y
stems are act
i
vate
d
automat
i
ca
lly
e
ac
h
t
i
me t
h
e ve
hi
c
l
e
i
s starte
d
.
They come into operation in the event o
f
a grip
o
r trajectory problem.
This is indicated by flashing of this
w
arnin
g
lamp on the instrument panel.
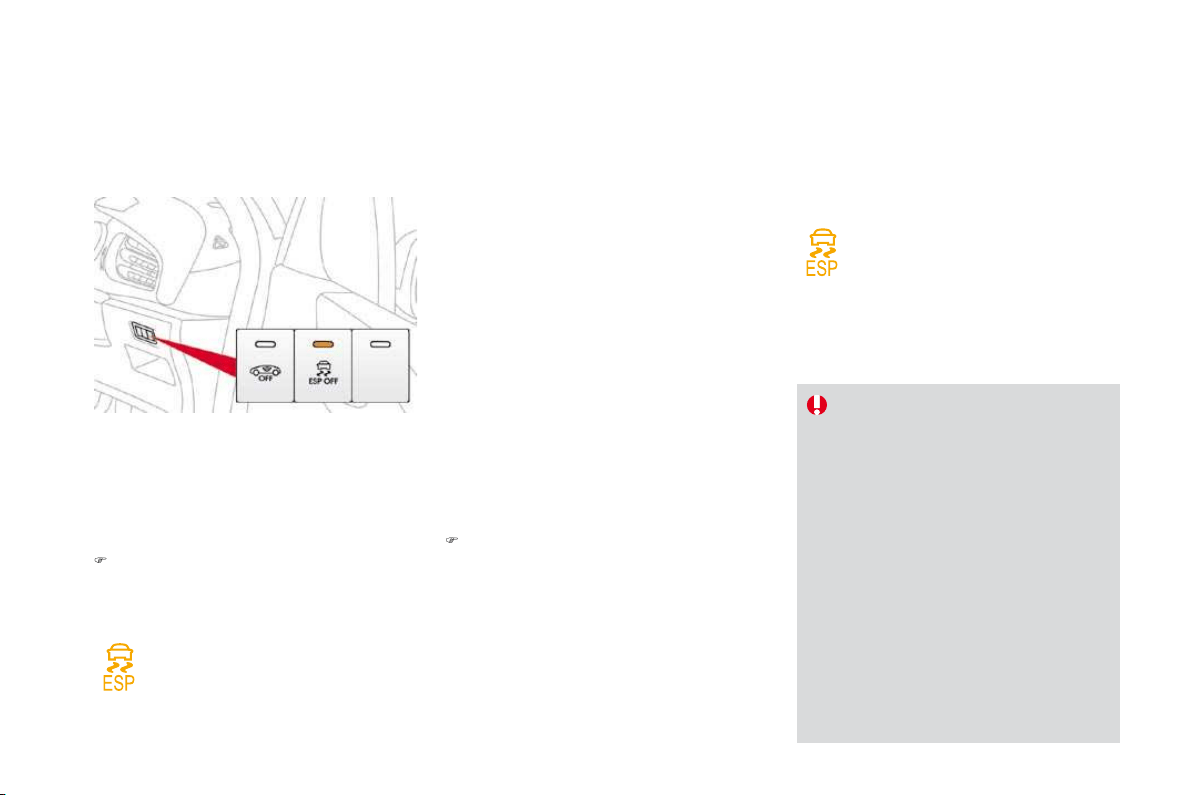
Safety
Seat belts
F
ront seat
b
e
l
ts
The front seat belts are fitted with a
pretensionin
g
and
f
orce limitin
g
s
y
stem.
This s
y
stem improves sa
f
et
y
in the
f
ront seats
in the event o
f
a
f
ront impact. Depending on the
severity of the impact, the pretensioning system
instantly tightens the seat belts against the
body of the occupants.
The pretensionin
g
seat belts are active when
t
h
e
ig
n
i
t
i
on
i
s on.
The force limiter reduces the pressure of the
s
eat belt on the chest o
f
the occu
p
ant,
so improving their protection.
F
astenin
g
) Pull the strap, then insert the tongue in the
buc
kl
e
.
)
C
heck that the seat belt is fastened
c
orrectl
y
b
y
pullin
g
the strap.
Unfastening
) Press the red button on the buckle.
)
Guide the seat belt as it is reeled in.
Seat
be
l
t
n
ot
faste
n
ed
/
u
n
f
astened warnin
g
lamp
When the ignition is switched on,
this warning lamp comes on in the
i
nstrument panel, if the driver and/o
r
the
f
ront passen
g
er has not
f
astened
t
hei
r
sea
t
bel
t.
From approximatel
y
12 mph
(
20 km
/
h
)
this warning lamp
f
lashes
f
or two minutes
accompanied by an audible signal o
f
increasing
volume. Once these two minutes have elapsed,
this warning lamp remains on until the drive
r
and/or the front passenger fastens thei
r
sea
t
be
lt.

Rear seat belts
F
asten
i
ng
)
P
u
ll
t
h
e strap, t
h
en
i
nsert t
h
e tongue
i
n t
h
e
b
uc
kl
e.
)
Check that the seat belt is fastened
c
orrectly by pulling the strap.
Unfastening
)
P
ress t
h
e re
d
b
utton on t
h
e
b
uc
kl
e.
)
G
uide the seat belt as it is reeled in.
The rear seats are each fitted with a three-point
inertia reel seat belt with force limiter.

135
Safety
Th
e
d
r
i
ver must ensure t
h
at passen
g
ers use
th
e seat
b
e
l
ts correct
ly
an
d
t
h
at t
h
e
y
are a
ll
restrained securel
y
be
f
ore settin
g
o
ff
.
Wh
erever you are seate
d
i
n t
h
e ve
hi
c
l
e,
always fasten your seat belt, even for short
j
ourneys.
Do not invert the seat belt buckles as they will
not fulfil their role full
y
.
Th
e
sea
t
be
lt
s
a
r
e
f
itt
ed
with
a
n in
e
rti
a
r
ee
l
permittin
g
automatic ad
j
ustment o
f
the len
g
th
of
the strap to
y
our size. The seat belt is
store
d
automat
i
ca
lly
w
h
en not
i
n use.
Be
f
ore and a
f
ter use, ensure that the seat
belt is reeled in correctly.
The lower part of the strap must be
positioned as low as possible on the pelvis.
The upper part must be positioned in the
h
o
ll
o
w
of
th
e
s
h
ou
l
de
r.
Th
e
in
e
rti
a
r
ee
l
s
a
r
e
f
itt
ed
with
a
n
au
t
o
m
a
ti
c
l
oc
ki
n
g
d
ev
i
ce w
hi
c
h
comes
i
nto operat
i
on
i
n
t
he event o
f
a collision, emer
g
enc
y
brakin
g
o
r i
f
the vehicle rolls over. You can release
t
he device by pulling firmly on the strap and
releasing it so that it re-winds slightly.
In order to be e
ff
ective, a seat belt must:
-
b
e t
igh
tene
d
as c
l
ose to t
h
e
b
o
dy
as
possible,
- be pulled in
f
ront o
f
you with a smooth
movement, checking that it does not
twist
,
- be used to restrain only one person,
- not bear an
y
trace of cuts or fra
y
in
g
,
- n
o
t
be
co
nv
e
rt
ed
o
r m
od
ifi
ed
t
o
a
v
o
i
d
a
ff
ectin
g
its per
f
ormance.
In accordance with current sa
f
et
y
re
g
ulations,
a
ll
repa
i
rs an
d
c
h
ec
k
s must
b
e carr
i
e
d
out
by
a CITRO
Ë
N dealer who guarantees that the
work is carried out correctly.
Have your seat belts checked regularly by a
CITROËN dealer and particularly if the straps
show si
g
ns of dama
g
e.
Clean the seat belt straps with soap
y
water or
a textile cleanin
g
product, sold b
y
CITRO
Ë
N
dealers.
Af
ter
f
oldin
g
or movin
g
a seat or rear bench
seat, ensure t
h
at t
h
e seat
b
e
l
t
i
s
p
os
i
t
i
one
d
and reeled in correctly.
Recommendations
f
or children
Use a suitable child seat if the passenger is
l
ess than
12
y
ears old or shorter than one
a
n
d
a
h
a
lf m
e
tr
es
.
Ne
v
e
r
use
t
he
sa
m
e
sea
t
bel
t t
o
secu
r
e
more t
h
an one
p
erson.
N
ever a
ll
ow a c
hild
to trave
l
on
y
our
l
ap.
In the event o
f
an impact
D
epen
di
n
g
on t
h
e nature an
d
ser
i
ousness
o
f the impacts, t
h
e pre-tens
i
on
i
ng
d
ev
i
ce
may be triggered be
f
ore and independently
of the airbags. Triggering of the pre
-
t
ensioners is accompanied by a slight
discharge of harmless smoke and a noise,
due to the activation of the p
y
rotechnic
c
artr
idg
e
i
ncorporate
d
i
n t
h
e s
y
stem.
I
n a
ll
cases, t
h
e a
i
r
b
a
g
warn
i
n
g
l
amp comes on.
F
o
ll
ow
i
n
g
an
i
mpact,
h
ave t
h
e seat
b
e
l
ts
system checked, and i
f
necessary replaced,
b
y a CITRO
Ë
N dealer.

Airbags
Sy
stem desi
g
ned to maximise the sa
f
et
y
o
f
the
occupants
(
with the exception o
f
the rear centre
p
assen
g
er
)
in the event o
f
violent collisions.
It supplements the action o
f
the
f
orce-limiting
seat belts (with the exception of the rear centre
passenger).
If a collision occurs, the electronic detectors
record and anal
y
se the front and side impacts
sustained in the impact detection zones:
- in the case of a serious impact, the airbags
a
re tr
igg
ere
d
i
nstant
ly
an
d
protect t
h
e
occupants o
f
the vehicle
(
with the exception
o
f
the rear centre passenger
)
; immediately
a
fter the impact, the airbags deflate rapidly
so that they do not hinder visibility or the
exit of the occupants,
- in the case of a minor or rear impact or in
c
erta
i
n ro
ll
-over con
di
t
i
ons, t
h
e a
i
r
b
a
g
s
will
not
b
e tr
igg
ere
d
; t
h
e seat
b
e
l
t a
l
one
i
s
su
ff
icient to
p
rovide o
p
timum
p
rotection in
th
ese s
i
tuat
i
ons.
T
he airbags do not operate when the
i
gnition is switched off
.
This equipment will onl
y
deplo
y
once.
I
f
a second impact occurs
(
durin
g
the
same or a subsequent accident
)
, the
ai
r
b
a
g
w
ill
not
b
e tr
igg
ere
d
a
g
a
i
n.
I
m
p
act
d
etect
i
on zones
A.
F
ront
i
m
p
act zone.
B
.
S
ide im
p
act zone.
Tri
gg
erin
g
o
f
the airba
g(
s
)
is
accompan
i
e
d
by
a s
ligh
t em
i
ss
i
on
of
harmless smoke and a noise, due
to the activation of the pyrotechnic
cartridge incorporated in the system.
This smoke is not harmful
,
but sensitive
individuals ma
y
experience sli
g
ht
irrit
a
ti
o
n.
The noise o
f
the detonation ma
y
result
i
n a sli
g
ht loss o
f
hearin
g
f
or a short time.
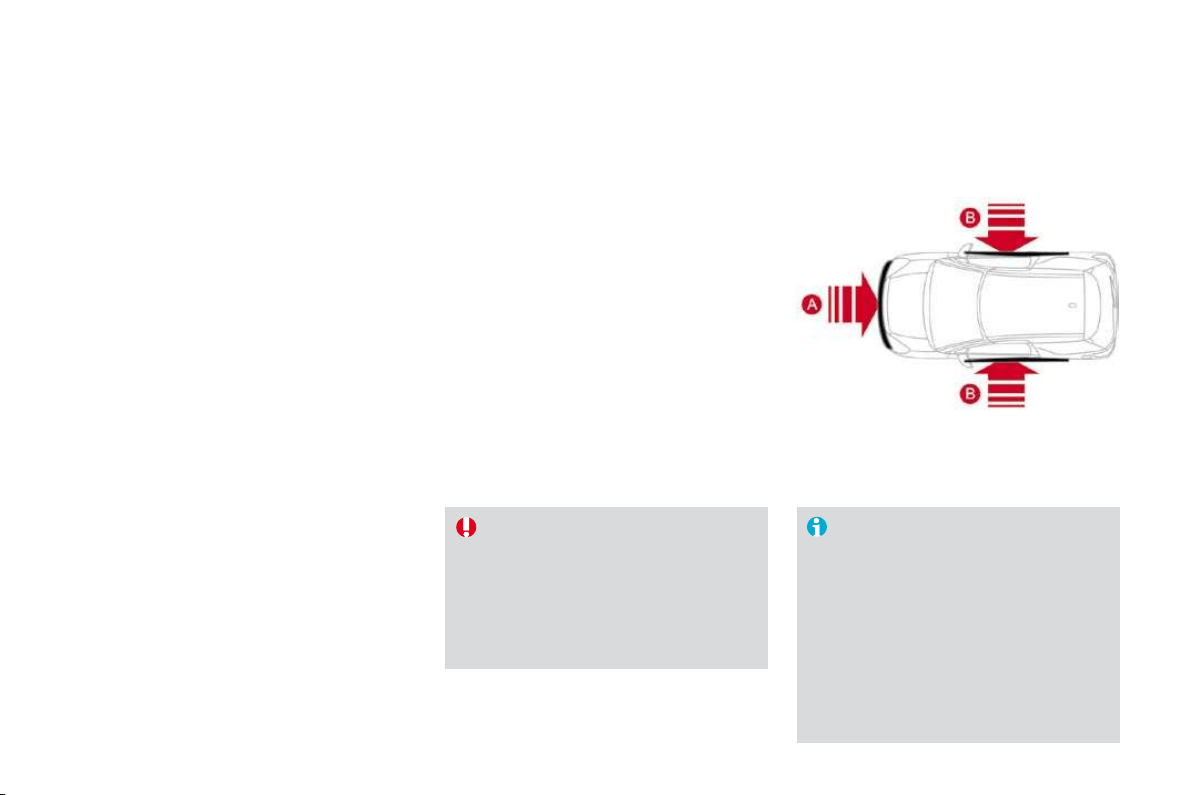
13
7
Safety
Front airba
g
s
S
y
stem which protects the driver and front
passen
g
er in the event o
f
a serious
f
ront impact
in order to limit the risk o
f
in
j
ur
y
to the head
an
d
c
h
est.
Th
e
d
r
i
ver
'
s a
i
r
b
ag
i
s
i
ncorporate
d
i
n t
h
e centre
of the steering wheel; the front passenger's
airbag is incorporated in the dashboard above
the glove box.
A
ct
i
vat
i
on
Th
e a
i
r
b
a
g
s are tr
igg
ere
d
s
i
mu
l
taneous
ly
,
u
nless the passenger's
f
ront airbag is
deactivated, in the event o
f
a serious
f
ront
i
mpact applied to all or part of the front impact
z
o
n
e
A , in the longitudinal centreline of the
v
ehicle on a horizontal plane and directed from
t
h
e
fr
o
nt t
o
th
e
r
ea
r
o
f th
e
v
e
hi
c
l
e
.
The
f
ront airba
g
in
f
lates between the head
-
t
horax o
f
the
f
ront occu
p
ant o
f
the vehicle
a
nd the dashboard to cushion their
f
orward
movement.

Deactivation
Only the passenger's front airbag can be
d
eact
i
vate
d
:
)
with the ignition off
,
i
nsert t
h
e
k
ey
i
n t
h
e
f
p
assenger airbag deactivation switch
1
,
)
t
u
rn it t
o
th
e
"OFF
"
position,
)
then, remove the key keeping the switch in
t
he new position.
This warning lamp comes on in the
i
nstrument panel when the ignition is
on and until the airbag is re-activated.
To assure the safety of your child,
t
he passenger's front airbag must
b
e deactivated when you install a
"
rear facin
g
" child seat on the front
p
assen
g
er sea
t
.
O
therwise, the child would risk bein
g
seriousl
y
in
j
ured or killed i
f
the airba
g
w
ere tr
i
ggere
d
.
R
eact
i
vat
i
on
Wh
en
y
ou remove t
h
e c
hild
seat, turn sw
i
tc
h
1
to
th
e "
O
N
"
pos
i
t
i
on to re-act
i
vate t
h
e a
i
r
b
ag an
d
so assure the sa
f
ety o
f
your
f
ront passenger in
t
he event of an impact.
Wi
t
h
t
h
e
ig
n
i
t
i
on on, t
hi
s warn
i
n
g
l
am
p
comes on
i
n t
h
e
i
nstrument
p
anel for approximately one minute,
i
f the passenger's front airbag is
ac
tiv
a
t
ed
.
O
peratin
g
f
ault
I
f
this warning lamp
f
lashes, contact
a
CITRO
Ë
N dealer. The passenger's
front airbag may no longer be
triggered in the event of a serious
i
mpact.
If at least one of the two airbag
w
arning lamps come on continuously,
do
n
o
t in
s
t
a
ll
a
c
hil
d
sea
t
o
n th
e
fr
o
nt
passenger sea
t
.
Have the s
y
stem checked b
y
a
C
ITR
OË
N dealer.
I
f
this warning lamp comes on on the
i
nstrument panel, accompanied by an
a
udible warning and a message on
the multifunction screen
,
contact a CITROËN
dealer to have the s
y
stem checked. The
a
irba
g
s ma
y
no lon
g
er be tri
gg
ered in the event
o
f
a serious im
p
act.

139
Safety
L
ateral airba
g
s
Sy
stem which protects the driver and
f
ront
passen
g
er in the event o
f
a serious side impact
in order to limit the risk o
f
in
j
ur
y
to the chest.
E
ac
h
l
atera
l
a
i
r
b
ag
i
s
b
u
il
t
i
nto t
h
e seat
backrest frame, door side.
A
ct
i
vat
i
on
I
m
p
act
d
etect
i
on zones
A.
F
ront
i
m
p
act zone.
B
.
S
ide im
p
act zone.
Th
e
l
atera
l
a
i
r
b
a
g
s are tr
igg
ere
d
un
il
atera
lly
i
n
t
he event o
f
a serious side im
p
act a
pp
lied to all
or
p
art o
f
the side im
p
act zone
B
,
p
er
p
en
di
cu
l
a
r
t
o the longitudinal centreline o
f
the vehicle on a
h
orizontal plane and directed from the outside
t
owards the inside of the vehicle.
The lateral airbag inflates between the front
occupant of the vehicle and the correspondin
g
door trim panel.
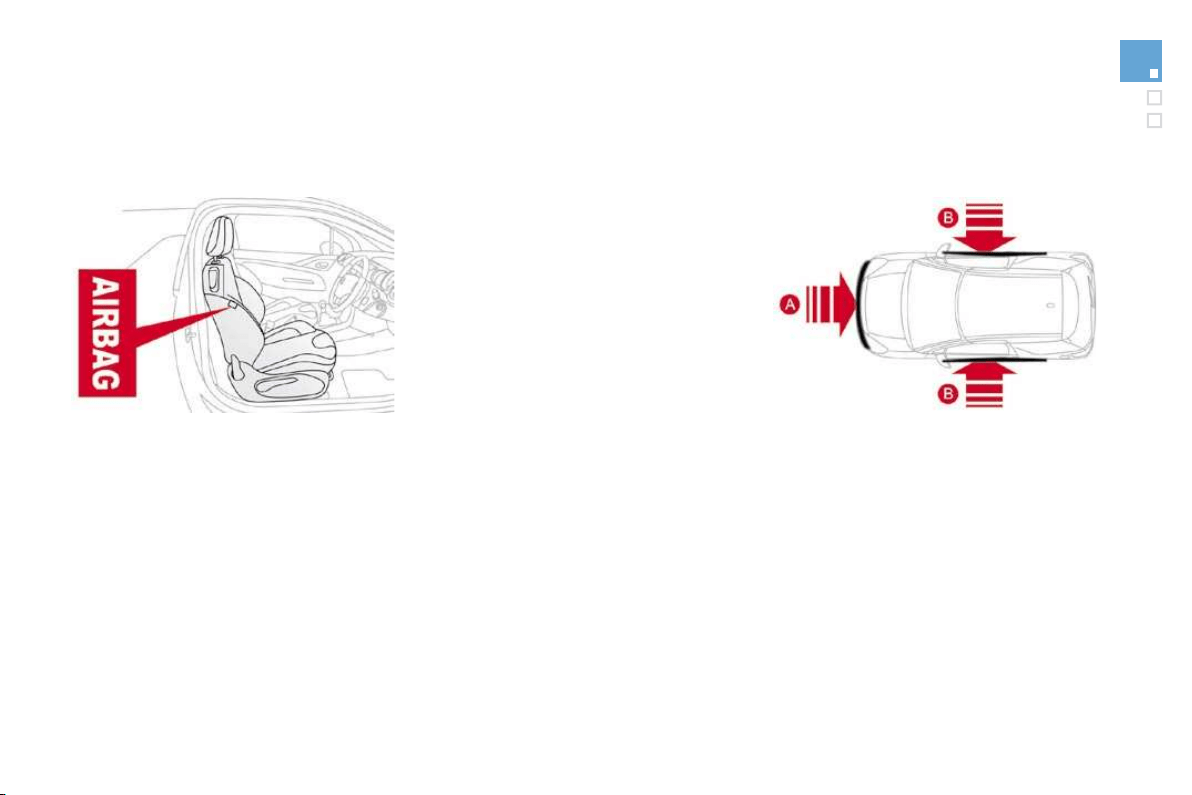
Curtain airbags
System which protects the driver and
passengers (with the exception of the rear
centre passenger) in the event of a serious side
impact in order to limit the risk of injury to the
s
ide o
f
the head.
Each curtain airbag is built into the pillars and
the upper passenger compartment area.
Activation
The curtain airbag is triggered at the same
t
i
me as t
h
e correspon
di
n
g
l
atera
l
a
i
r
b
a
g
i
n t
h
e
event of a serious side impact applied to all or
part of the side impact zone
B
,
p
er
p
en
di
cu
l
a
r
to the longitudinal centreline of the vehicle on a
horizontal plane and directed from the outside
towards the inside of the vehicle.
The curtain airbag inflates between the front or
rear occupant of the vehicle and the windows.
Operatin
g
fault
In the event of a minor impact or bump
o
n th
e
s
i
de
o
f th
e
v
e
hi
c
l
e
o
r if th
e
vehicle rolls over, the airbag may not be
tri
gg
ered.
In the event o
f
a rear or
f
ront collision,
t
h
e a
i
r
b
a
g
i
s not tr
igg
ere
d
.
If this warning lamp comes on on the
instrument panel, accompanied by
an audible si
g
nal and a messa
g
e on
t
he multifunction screen
,
contact a CITROËN
d
ea
l
er to
h
ave t
h
e s
y
stem c
h
ec
k
e
d
.
Th
e
a
i
r
b
a
g
s ma
y
no
l
on
g
er
b
e tr
igg
ere
d
i
n t
h
e event
of
a serious im
p
act.

1
4
1
Safety
For the airbags to be fully effective, observe the following safety rules:
Front airbags
Do not drive holding the steering wheel by its
spokes or resting your hands on the centre
part of the wheel.
Passen
g
ers must not place their feet on the
dashboard.
I
f
possible, do not smoke as deplo
y
ment o
f
t
he airba
g
s can cause burns or the risk o
f
in
j
ur
y
f
rom a ci
g
arette or pipe.
N
ever remove or p
i
erce t
h
e steer
i
ng w
h
ee
l
o
r
hit it violently.
S
ide airba
g
s
Use only approved covers on the seats.
T
h
ese
will n
o
t hin
de
r infl
a
ti
o
n
o
f th
e
s
i
de
airba
g
s. Consult a CITRO
Ë
N dealer.
Do not
f
ix or attach an
y
thin
g
to the seat
b
acks
(
clothin
g
...
)
. This could cause in
j
ur
y
t
o the chest or arms i
f
the side airbag is
t
r
i
ggere
d
.
Do not sit with the upper part of the body any
nearer to the door than necessary.
C
urtain airbags
Do not fix or attach anything to the roof. This
c
ould cause injury to the head if the curtain
a
irbag is triggered.
Do not remove the
g
rab handles installed
on the roo
f
, the
y
pla
y
a part in securin
g
the
c
urta
i
n a
i
r
b
a
g
s.
S
it in a normal upri
g
ht position.
W
ear a correct
l
y a
dj
uste
d
seat
b
e
l
t.
Do not leave anything between the occupants
and the airbags (a child, pet, object...). This
c
ould hamper the operation of the airbags o
r
in
j
ure the occupants.
A
ft
e
r
a
n
acc
i
de
nt
o
r if th
e
v
e
hi
c
l
e
h
as
bee
n
sto
l
en or
b
ro
k
en
i
nto,
h
ave t
h
e a
i
r
b
a
g
s
y
stems c
h
ec
k
e
d
.
All
wor
k
on t
h
e a
i
r
b
a
g
s
y
stem
i
s str
i
ct
ly
f
orbidden unless it is carried out by quali
f
ied
personnel of the CITROËN dealer network.
Even if all of the precautions mentioned are
o
bserved, a risk of injury or of minor burns
t
o the head, chest or arms when an airba
g
is
triggered cannot be ruled out.
The ba
g
in
f
lates almost instantl
y
(
within a
f
ew
milliseconds
)
then de
f
lates within the same
ti
me
di
sc
h
ar
gi
n
g
t
h
e
h
ot
g
as v
i
a open
i
n
g
s
p
rovided
f
or this
p
ur
p
ose.

Parking brake
Applying
)
Pull the parkin
g
brake lever
f
ull
y
up to
i
mmo
bili
se
y
our ve
hi
c
l
e.
R
e
l
eas
i
n
g
)
P
u
ll
t
h
e par
ki
n
g
b
ra
k
e
l
ever
g
ent
ly
, press
t
he release button then lower the lever
f
ull
y
.
When parking on a slope, direct you
r
w
heels against the pavement, apply the
parkin
g
brake and en
g
a
g
e a
g
ear.
When the vehicle is being driven, if this
w
arning lamp and the STOP warning
lamp come on, accompanied b
y
an
audible si
g
nal and a messa
g
e on the multifunction
screen, t
hi
s
i
n
di
cates t
h
at t
h
e par
ki
n
g
b
ra
k
e
i
s st
ill
o
n or
h
as not
b
een proper
ly
re
l
ease
d
.
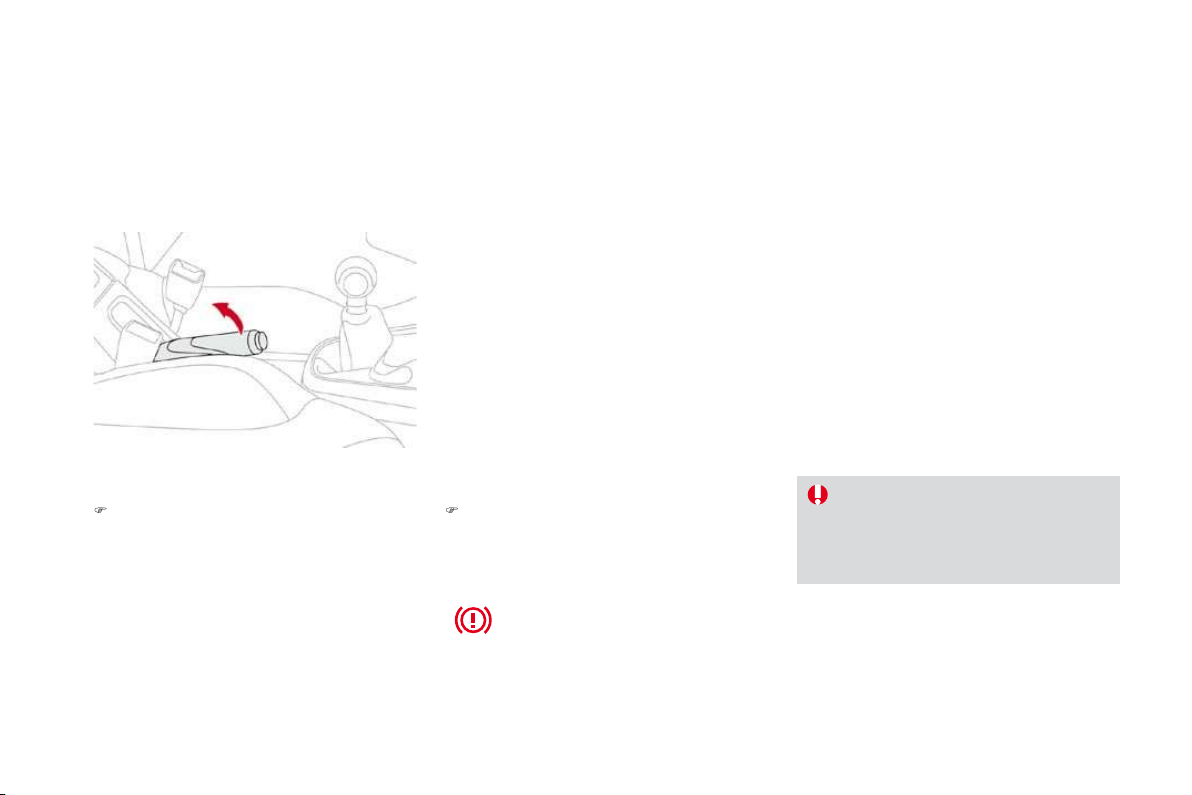
1
4
5
Driving
6-speed manual gearbox
)
Raise the ring under the knob and push the
gear lever to the left then forwards.
Engaging reverse gear
A
s a sa
f
ety precaution and to
f
acilitate
s
tarting of the engine:
- always select neutral,
- press the clutch pedal.
Only engage reverse gear when the
v
ehicle is stationary with the engine at idle.
Gear change indicator *
Operation
The system intervenes only when driving
economically.
Dependin
g
on the drivin
g
situation and
y
ou
r
v
e
hi
c
l
e
'
s equ
i
pment, t
h
e s
y
stem ma
y
a
d
v
i
se
y
ou to s
ki
p one or more
g
ears.
Y
ou can
follow this instruction without engaging the
i
nterme
di
ate gears.
The gear engagement recommendations must
not be considered compulsory. In fact, the
configuration of the road, the amount of traffic
and safety remain determining factors when
choosing the best gear. Therefore, the driver
remains responsible
f
or decidin
g
whether or not
to follow the advice given by the system.
This function cannot be deactivated.
-
Th
e s
y
stem ma
y
su
gg
est t
h
at
y
ou en
g
a
g
e a
hi
g
her
g
ear, i
f
appropriate.
The information appears in the form of an arrow on
the instrument panel display.
Dependin
g
on
y
our vehicle's equipment, this arrow
m
a
y
be accompanied b
y
the recommended
g
ear.
In the case of drivin
g
which makes
p
articular demands on the
p
er
f
ormance
of
the en
g
ine
(f
irm pressure on the
accelerator
p
edal,
f
or exam
p
le, when
o
vertaking...
)
, the system will not
recommen
d
a gear c
h
ange.
The system never suggests:
- engaging first gear,
- engaging reverse gear,
- en
g
a
g
in
g
a lower
g
ear.
* According to engine.
Example:
-
Y
ou are
i
n t
hi
r
d
g
ear.
-
Y
ou
p
ress t
h
e acce
l
erator
p
e
d
a
l
mo
d
erate
ly
.

1
47
Driving
Four-speed automatic gearbox which offers a
choice between the comfort of fully automatic
operation, enhanced by sport and snow
pro
g
rammes, or manua
l
g
ear c
h
an
gi
n
g
.
Therefore, four driving modes are offered:
-
automatic
o
p
eration
f
or electronic
management of the gears by the gearbox,
-
s
por
t
programme for a more dynamic style
of driving,
-
snow
programme to improve driving when
traction is poor,
-
manual
operation for sequential changing
of the gears by the driver.
Automatic gearbox
1.
G
ear lever.
2.
B
u
tt
o
n "
S"
(
sport
)
.
3.
Bu
tt
o
n
"
7
"
(snow).
Gear selection
g
ate
P.
Pa
r
k
.
- Immobilisation o
f
the vehicle, parkin
g
brake
on or o
ff
.
-
S
tarting the engine.
R
. Reverse.
- Reversing manoeuvres, vehicle stationary,
e
ngine at idle.
N.
N
eu
tr
a
l.
- Immobilisation o
f
the vehicle, parkin
g
brake on.
-
S
tartin
g
the en
g
ine.
D.
A
utomat
i
c o
p
erat
i
on.
M. +
/
-
M
anua
l
o
p
erat
i
on w
i
t
h
se
q
uent
i
a
l
c
hanging o
f
the
f
our gears.
)
Push forwards to change up through the gears.
o
r
)
Pull backwards to change down through
the
g
ears.
Gea
r l
e
v
er
When you move the lever in the gate to select
a position, the corresponding indicator is
displayed on the instrument panel.
P.
Pa
r
k
R.
R
everse
N.
N
eutra
l
D.
Drive
(
Automatic driving
)
S. Spor
t
programme
7
.
Sno
w
programme
1, 2, 3, 4
.
Gear engaged during manual operation
-.
Invalid value during manual operation
Displays on the instrument panel
Foot on brake
)
Press the brake pedal when this
i
n
di
cator
l
amp
i
s
di
sp
l
aye
d
on t
h
e
instrument panel (e.g.: starting
the engine).
Movin
g
off
I
f
p
osition
N
i
s en
g
a
g
e
d
i
na
d
vertent
ly
whil
e
d
r
i
v
i
ng, a
ll
ow t
h
e eng
i
ne to
r
eturn to
idl
e t
h
en engage pos
i
t
i
on
D
to
a
ccelerate.
Wh
en t
h
e eng
i
ne
i
s runn
i
ng at
idl
e, w
i
t
h
the brakes released, i
f
p
osition
R
,
D
or
M
is selected
,
the vehicle moves even
w
ithout the accelerator being pressed.
When the engine is running, neve
r
lea
v
e
c
hil
d
r
e
n in th
e
v
e
hi
c
l
e
with
ou
t
s
u
p
erv
i
s
i
on.
Wh
en carr
yi
n
g
out ma
i
ntenance w
i
t
h
t
h
e en
gi
ne runn
i
n
g
, app
ly
t
h
e par
ki
n
g
b
ra
k
e an
d
se
l
ect
p
os
i
t
i
on
P
.
P
)
A
pp
l
y t
h
e par
ki
ng
b
ra
k
e.
)
Select position
P
or
N
.
)
Start the engine.
If this procedure is not followed, an audible
signal is heard, accompanied by a message on
t
h
e
m
u
ltif
u
n
c
ti
o
n
sc
r
ee
n.
)
Wi
t
h
t
h
e en
gi
ne runn
i
n
g
, press t
h
e
b
ra
k
e
p
e
d
a
l
.
)
R
e
l
ease t
h
e par
ki
n
g
b
ra
k
e.
)
Select position
R
,
D
or
M
,
)
G
radually release the brake pedal.
The vehicle moves off immediately.

1
4
9
Driving
Automatic operation
)
Select position
D
f
o
r
a
utomatic chan
g
in
g
o
f
the
f
our
g
ears.
The gearbox then operates in auto-adaptive
mode, without any intervention on the part
o
f
the driver. It continuously selects the most
suitable gear according to the style of driving,
the profile of the road and the load in the
vehicle.
For maximum acceleration without touching
the lever, press the accelerator pedal down
fully (kick down). The gearbox changes down
automat
i
ca
lly
or ma
i
nta
i
ns t
h
e
g
ear se
l
ecte
d
unt
il
t
h
e max
i
mum en
gi
ne spee
d
i
s reac
h
e
d
.
On braking, the gearbox changes down
automatically to provide efficient engine
braking.
If you release the accelerator sharply, the
g
earbox will not change to a higher gear for
safety reasons.
Never select position
N
while the
vehicle is moving.
Never select positions
P
o
r
R
unless
th
e ve
hi
c
l
e
i
s comp
l
ete
ly
stat
i
onar
y
.
Sport and snow
programmes
Th
ese two spec
i
a
l
pro
g
rammes supp
l
ement t
h
e
a
utomatic operation in very speci
f
ic conditions
o
f
use.
S
port programme "
S
"
)
P
ress
b
utton "
S"
, a
f
ter starting the engine.
The gearbox automatically favours a dynamic
style of driving.
S
a
pp
ears on t
h
e
i
nstrument
p
ane
l
.
Snow pro
g
ramme "
7
"
)
Press button "
7
", a
f
ter startin
g
the en
g
ine.
Th
e
g
ear
b
ox a
d
apts to
d
r
i
v
i
n
g
on s
li
pper
y
r
oa
d
s.
Thi
s programme
i
mproves start
i
ng an
d
d
r
i
ve
wh
en tract
i
on
i
s
p
oor.
7
a
pp
ears on t
h
e
i
nstrument
p
ane
l
.
R
etu
rn
to
auto
m
at
i
c
operat
i
on
)
A
t an
y
t
i
me, press t
h
e
b
utton se
l
ecte
d
a
ga
i
n to qu
i
t t
h
e programme engage
d
an
d
return to auto-a
d
a
p
t
i
ve mo
d
e.
Manual operation
D
di
sappears an
d
t
h
e
g
ears en
g
a
g
e
d
app
ear
i
n success
i
on on t
h
e
i
nstrument
p
ane
l
.
In the event of the engine labouring
or over-revving, the gear selected flashes for a
few seconds, then the actual gear engaged is
displayed.
It is possible to change from position
D
(automatic) to position
M
(manual) at any time.
Wh
en t
h
e ve
hi
c
l
e
i
s stat
i
onar
y
or mov
i
n
g
very slowly, the gearbox selects gear
M1
automatically.
The sport and snow programmes do not
operate in manual mode.
Invalid value durin
g
manual
operation
)
S
elect
p
osition
M
f
or sequent
i
a
l
c
h
an
gi
n
g
o
f
the
f
our gears.
)
P
us
h
t
h
e
l
ever towar
d
s t
h
e
+
sign to
c
hange up a gear.
)
P
u
ll th
e
l
e
v
e
r t
o
w
a
r
ds
th
e
-
sign to change
down a gear.
It is onl
y
possible to chan
g
e from one
g
ear to
a
nother i
f
the vehicle speed and en
g
ine speed
permit; otherwise, the gearbox will operate
temporarily in automatic mode.
This s
y
mbol is displa
y
ed i
f
a
g
ear
is not en
g
a
g
ed correctl
y
(
selector
between two positions
)
.
Stoppin
g
the vehicle
Be
f
ore switchin
g
o
ff
the en
g
ine,
y
ou can en
g
a
g
e
p
os
i
t
i
on
P
or
N
to p
l
ace t
h
e
g
ear
b
ox
i
n neutra
l
.
I
n
b
ot
h
cases, app
l
y t
h
e par
ki
ng
b
ra
k
e to
i
mmo
bili
se t
h
e ve
hi
c
l
e.
Wh
en t
h
e
i
gn
i
t
i
on
i
s on, t
h
e
lighting of this warning lamp,
accompanied by an audible
signal and a message on the multifunction screen,
i
ndicates a
g
earbox malfunction.
In this case, the
g
earbox switches to back-up mode
and is locked in 3rd
g
ear. You ma
y
f
eel a substantial
k
nock when chan
g
in
g
f
rom
P
to
R
and from
R
N
to
R
.
R
Thi
s w
ill
not cause an
y
d
ama
g
e to t
h
e
g
ear
b
ox.
Do not exceed 60 mph
(
100 km
/
h
)
, local speed
restrictions permitting.
Contact a CITROËN dealer as soon as possible.
Operatin
g
fault
If the lever is not in position
P
,
P
w
hen the driver's door is opened or
a
pproximatel
y
45 seconds after the
ig
nition is switched o
ff
, a messa
g
e
app
ears in the multi
f
unction screen.
)
R
eturn t
h
e
l
ever to
p
os
i
t
i
on
P
; t
h
e
message
di
sappears.
There is a risk o
f
dama
g
e to the
g
earbox:
- i
f
y
ou press the accelerator and
b
ra
k
e
p
e
d
a
l
s at t
h
e same t
i
me,
- i
f
you
f
orce the movement o
f
the
gear lever from the
P
position to
a
nother position when the battery
is
fl
a
t.
To reduce fuel consumption when at
a prolon
g
ed standstill with the en
g
ine
runnin
g
(
traffic
j
am...
)
, put the
g
ea
r
le
v
e
r in th
e
N
position and appl
y
the
parkin
g
brake.

151
Driving
S
y
stem which prevents the vehicle from
e
xcee
di
n
g
t
h
e spee
d
pro
g
ramme
d
by
t
h
e
d
r
i
ver.
When the programmed speed limit is reached,
pressing the accelerator pedal in the normal
manner no longer has any effect.
The speed limiter is
s
w
itched
on
manua
ll
y:
it requires a programmed speed of at least
20 mph (30 km/h).
The speed limiter is
switched off
by manual
f
operation of the control.
The programmed speed can be exceeded
temporaril
y
b
y
pressin
g
the accelerator
f
irml
y
.
T
o return to t
h
e pro
g
ramme
d
spee
d
, s
i
mp
ly
sl
ow
d
own to a spee
d
b
e
l
ow t
h
e pro
g
ramme
d
speed.
The programmed speed remains in the memory
when the ignition is switched off.
Speed limiter
Th
e spee
d
li
m
i
ter cannot,
i
n an
y
ci
rcumstances, re
pl
ace t
h
e nee
d
to
res
p
ect s
p
ee
d
li
m
i
ts, nor can
i
t re
pl
ace
t
he need
f
or vi
g
ilance and responsibilit
y
o
n the
p
art o
f
the driver.
The controls of this s
y
stem are
g
rouped
t
o
g
ether on stalk
A
.
1.
Sp
eed limiter mode selection thumb wheel
2.
V
a
l
ue
d
ecrease
b
utton
3.
V
a
l
ue
i
ncrease
b
utton
4.
Sp
eed limiter on
/
o
ff
button
Steerin
g
mounted controls
The pro
g
rammed information is
g
rouped
to
g
ether on the instrument panel displa
y
.
5.
Sp
eed limiter on
/
o
ff
indication
6
.
Sp
eed limiter mode selection indication
7.
P
ro
g
ramme
d
spee
d
va
l
ue
Displa
y
s on the instrument panel

)
T
urn t
h
um
b
w
h
ee
l
1
to the
"LIMIT"
position: the speed limiter mode is
selected but is not switched on (PAUSE).
You do not have to switch the speed limiter on
i
n order to set the speed.
)
S
et the speed value b
y
pressin
g
button
2
or
3
(e.g.: 55 mph (90 km/h)).
Pro
g
rammin
g
You can then change the programmed speed using buttons
2
and
3
:
- by + or - 1 mph (km/h) = short press,
- by + or - 5 mph (km/h) = long press,
- in steps of + or - 5 mph
(
km/h
)
= maintained press.
)
S
witch the speed limiter on b
y
pressin
g
button
4
.
)
S
witch the speed limiter o
ff
b
y
pressin
g
button
4
: t
h
e
di
sp
l
a
y
c
on
f
irms that it has been switched o
ff
(
PAU
S
E
)
.
)
S
witch the speed limiter back on by pressing button 4 aga
i
n.
E
xcee
di
ng t
h
e programme
d
spee
d
P
ress
i
ng t
h
e acce
l
erator pe
d
a
l
to excee
d
t
h
e programme
d
spee
d
w
ill
not
h
ave
any effect unless you press the pedal
firmly
past the
y
p
oint of resistance .
The speed limiter is deactivated temporarily and the programmed speed,
which is still displayed, flashes.
Returning to the programmed speed, by means of intentional or
unintentional deceleration of the vehicle, automatically cancels the
f
lashin
g
o
f
the pro
g
rammed speed.
O
n a stee
p
descent or in the event o
f
sh
ar
p
acce
l
erat
i
on, t
h
e s
p
ee
d
li
m
i
te
r
will
not
b
e a
bl
e to
p
revent t
h
e ve
hi
c
l
e
f
rom exceeding the programmed
s
peed.
To avoid any risk of jamming of the
pedals:
- ensure that the mat is positioned
correctl
y
,
- do not
f
it one mat on to
p
o
f
another.
Leavin
g
limiter mode
)
T
u
rn th
u
m
b
wh
ee
l
1
t
o
th
e
"0" position:
t
h
e s
p
ee
d
li
m
i
ter mo
d
e
i
s
d
ese
l
ecte
d
.
Th
e
di
sp
l
a
y
returns to t
h
e
di
stance recor
d
er.
O
perating
f
ault
In the event of a speed limiter malfunction, the
s
peed is cleared resulting in flashing of the
das
h
es
.
Have the s
y
stem checked b
y
a CITROËN
deale
r.

153
Driving
Cruise control
System which automatically maintains the
speed of the vehicle at the value programmed
by
t
h
e
d
r
i
ver, w
i
t
h
out an
y
act
i
on on t
h
e
accelerator pedal.
Th
e cru
i
se contro
l
i
s
s
w
itched
on
manua
lly
:
i
t
re
q
uires a minimum vehicle s
p
eed o
f
25 m
p
h
(40 km/h), as well as the engagement of:
- fourth gear on a manual gearbox,
- second gear on an automatic gearbox, in
sequential mode,
- position
D
on an automatic gearbox.
The
c
r
uise
co
ntr
ol
is
switched off
manually
f
or
by
press
i
n
g
t
h
e
b
ra
k
e or c
l
utc
h
pe
d
a
l
or
on triggering of the ESP system for safety
reasons
.
It is possible to exceed the programmed speed
temporarily by pressing the accelerator pedal.
To return to the programmed speed, simply
release the accelerator pedal.
Switching off the ignition cancels any
programmed speed value.
The controls of this s
y
stem are
g
rouped
t
o
g
ether on stalk
A
.
1.
C
ruise control mode selection thumb whel
2.
V
a
l
ue
d
ecrease
b
utton
3.
V
a
l
ue
i
ncrease
b
utton
4.
C
ruise control o
ff/
resume button
Steerin
g
mounted controls
Th
e cru
i
se contro
l
cannot,
i
n an
y
c
i
rcumstances, re
pl
ace t
h
e nee
d
to
r
es
p
ect s
p
ee
d
li
m
i
ts, nor can
i
t re
pl
ace
the need
f
or vi
g
ilance and responsibilit
y
on the
p
art o
f
the driver.
The pro
g
rammed information is
g
rouped
to
g
ether on the instrument panel displa
y
.
5.
C
ruise control o
ff/
resume indication
6
.
C
ruise control mode selection indication
7.
P
ro
g
ramme
d
spee
d
va
l
ue
Displa
y
s on the instrument panel
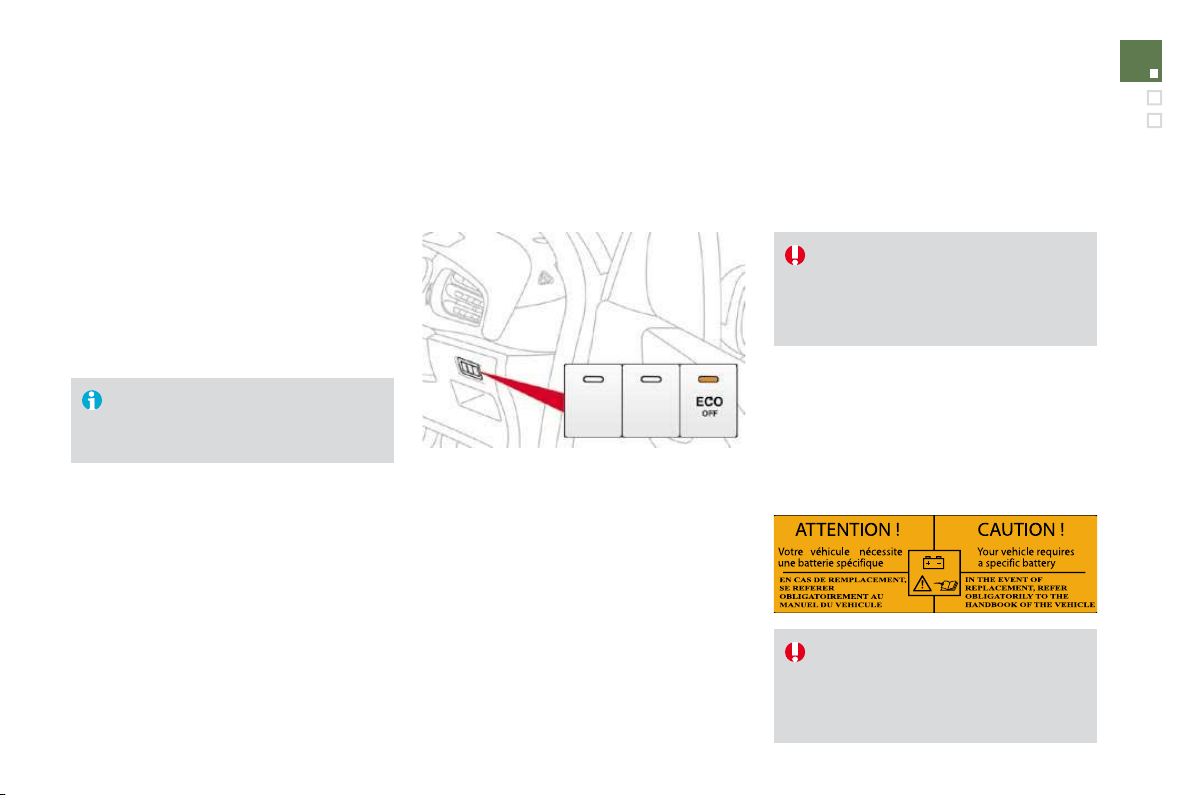
Pro
g
rammin
g
)
Turn thumb wheel
1
to the
"CR
U
I
S
E
"
position: the cruise control mode is
selected but is not switched on (PAUSE).
)
Set the programmed speed by
a
cceleratin
g
to the required speed, then
press button
2
o
r 3
(e.g.: 70 mph
(
110 km
/
h
))
.
You can then change the programmed speed using buttons
2
a
n
d
3
:
- b
y
+ or - 1 mph
(
km/h
)
= short press,
- b
y
+ or - 5 mph
(
km
/
h
)
= lon
g
press,
- in steps o
f
+ or - 5 mph
(
km
/
h
)
= maintained press.
)
S
witch o
ff
the cruise control b
y
pressin
g
button
4
: t
h
e
di
sp
l
a
y
c
on
f
irms that it has been switched o
ff
(
PAU
S
E
)
.
)
Switch the cruise control back on b
y
pressin
g
button
4
a
g
ain.
E
xcee
di
ng t
h
e programme
d
spee
d
Intentional or unintentional exceeding of the programmed speed results
i
n flashing of this speed on the display.
Return to the programmed speed, by means of intentional or unintentional
deceleration of the vehicle, automatically cancels the flashing of the speed.
Leaving cruise control mode
)
T
urn t
h
um
b
w
h
ee
l
1
to t
h
e "
0
"
position: the cruise control mode is
deselected. The display returns to the distance recorder.
Operatin
g
fault
In the event of a cruise control malfunction
,
the speed is cleared resultin
g
in
f
lashin
g
o
f
the
dashes. Have it checked b
y
a CITRO
Ë
N dealer.
Wh
en t
h
e cru
i
se contro
l
i
s sw
i
tc
h
e
d
on,
be care
f
ul i
f
you maintain the pressure
o
n one o
f
the programmed speed
changing buttons: this may result in a
very rapid change in the speed of your
v
e
hi
c
l
e
.
D
o
n
o
t
use
th
e
c
r
u
i
se
co
ntr
o
l
o
n
s
lipper
y
roads or in heav
y
tra
ff
ic.
O
n a stee
p
descent, the cruise control
will
not
b
e a
bl
e to
p
revent t
h
e ve
hi
c
l
e
f
rom exceeding the programmed speed.
To avoid any risk o
f
jamming o
f
the
pedals:
- ensure that the mat is positioned
correctly,
- never fit one mat on top of another.
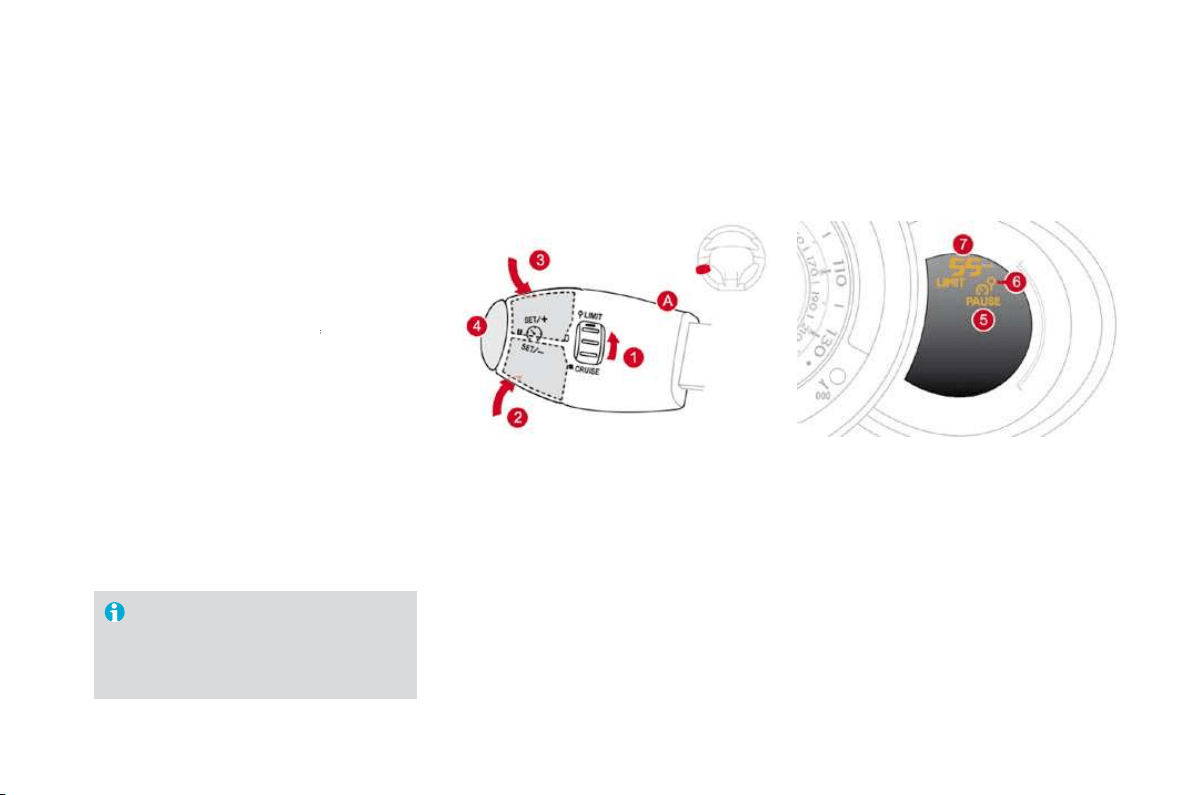
155
Rear parking sensors
System consisting of four proximity sensors,
l
ocate
d
i
n t
h
e rear
b
um
p
er.
This detects any obstacle (person, vehicle,
tree, gate, etc.) behind the vehicle, except
obstacles located just below the bumper.
A
n object, such as a stake, a roadworks
c
one or any other similar object may
b
e detected at the be
g
innin
g
of the
manoeuvre,
b
ut ma
y
no
l
on
g
er
b
e
d
etecte
d
whe
n t
he
v
ehicle
co
m
es
close
t
o
i
t.
Th
e par
ki
n
g
sensor s
y
stem cannot,
i
n
a
n
y
circumstances, take the place o
f
the vigilance and responsibility o
f
the
driver.
The s
y
stem is activated as soon as reverse
g
ear
i
s en
g
a
g
e
d
, accompan
i
e
d
by
an au
dibl
e
si
g
nal. The proximit
y
in
f
ormation is
g
iven b
y
:
- an au
dibl
e s
ig
na
l
, w
hi
c
h
b
ecomes more
r
a
pid
as t
h
e ve
hi
c
l
e a
pp
roac
h
es t
h
e
obstacle.
- a graphic on the multifunction screen, with
b
locks which become increasingly closer to
t
h
e
v
e
hi
c
l
e
.
Activation
Wh
e
n th
e
d
i
s
t
a
n
ce
be
tw
ee
n th
e
r
ea
r
of
th
e
ve
hi
c
l
e an
d
t
h
e o
b
stac
l
e
i
s
l
ess t
h
an t
hi
rt
y
cent
i
metres, t
h
e au
dibl
e s
ig
na
l
b
ecomes
cont
i
nuous an
d
t
h
e
"D
an
g
er
"
s
y
m
b
o
l
appears
o
n th
e
m
u
lti
fu
n
c
ti
o
n
sc
r
ee
n.
O
n completion o
f
the manoeuvre, when
y
ou exit
reverse
g
ear, t
h
e s
y
stem
b
ecomes
i
nact
i
ve.
Driving
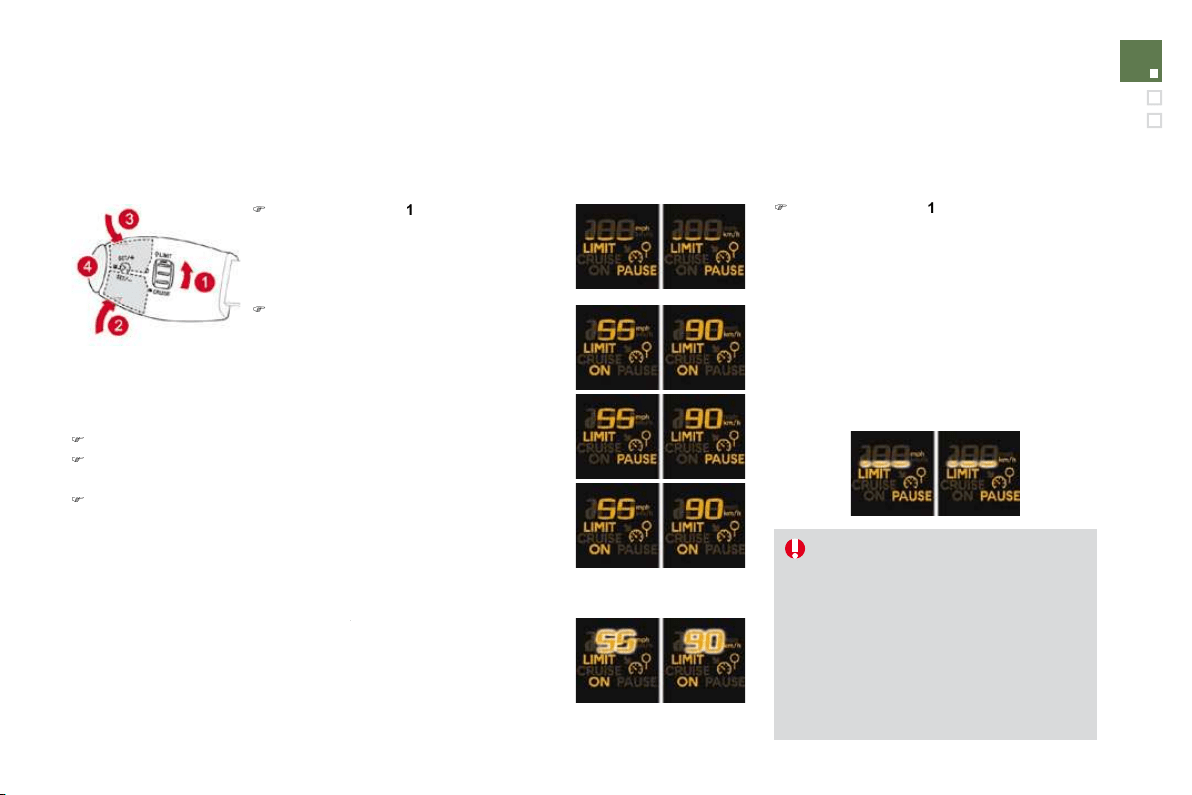
Pro
g
rammin
g
Operatin
g
faults
I
f
there is an operating
f
ault, when reverse gear
is engaged this warning lamp comes on on the
instrument panel, accompanied by an audible
signal (short beep) and a message on the
m
u
ltif
u
n
c
ti
o
n
sc
r
ee
n.
Y
ou can act
i
vate or
d
eact
i
vate t
h
e system
b
y
means of the multifunction screen configuration
menu. The system state is memorised when
s
witching off the ignition.
For more information on access to the parkin
g
a
ssistance menu, re
f
er to vehicle con
f
i
g
uration
in the "Multifunction screens" section
correspon
di
n
g
to
y
our screen.
Th
e system w
ill
b
e
d
eact
i
vate
d
automat
i
ca
ll
y w
h
en tow
i
ng a tra
il
er or
w
hen a bicycle carrier is fitted (vehicle
fitted with a towbar or bicycle carrier
recommended by CITROËN).
I
n
b
a
d
or w
i
ntr
y
weat
h
er, ensure t
h
at
th
e sensors are not covere
d
w
i
t
h
mu
d
,
f
rost or snow.
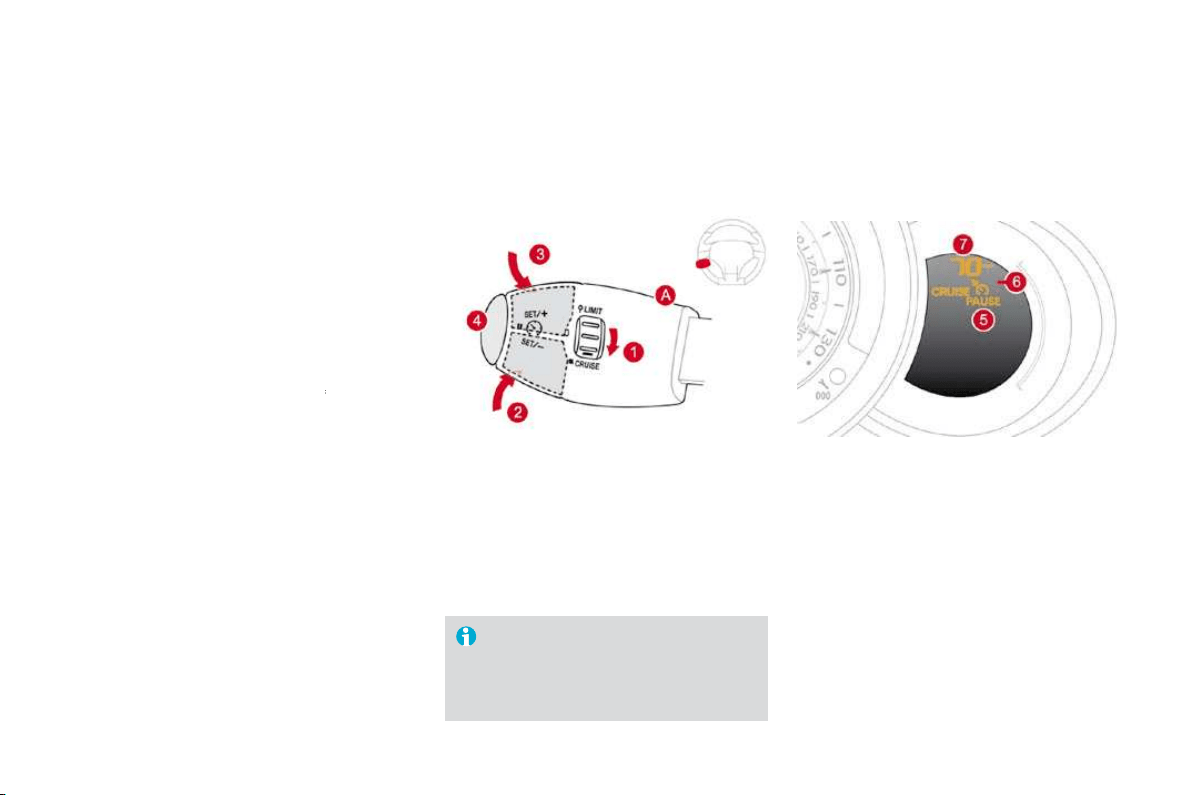
161
Checks
Bonnet
Protects the components of the engine and provides access for checking levels.
O
pening
)
Open the front left door.
)
P
u
ll th
e
int
e
ri
o
r r
e
l
ease
l
e
v
e
r
A
,
located at
the bottom of the door aperture.
) Push the exterior safety catch
B
to the left
a
n
d
r
a
i
se
th
e
bo
nn
e
t.
)
Unclip the bonnet stay
C
from its housing,
h
olding it by its foam protection.
)
Fix the sta
y
in the notch to hold the bonnet
open.
The location of the interior release leve
r
prevents opening of the bonnet while
t
h
e
fr
o
nt l
e
ft
doo
r i
s
c
l
osed
.
Wh
en t
h
e eng
i
ne
i
s
h
ot,
h
an
dl
e t
h
e
exterior sa
f
ety catch and the stay with
c
are.
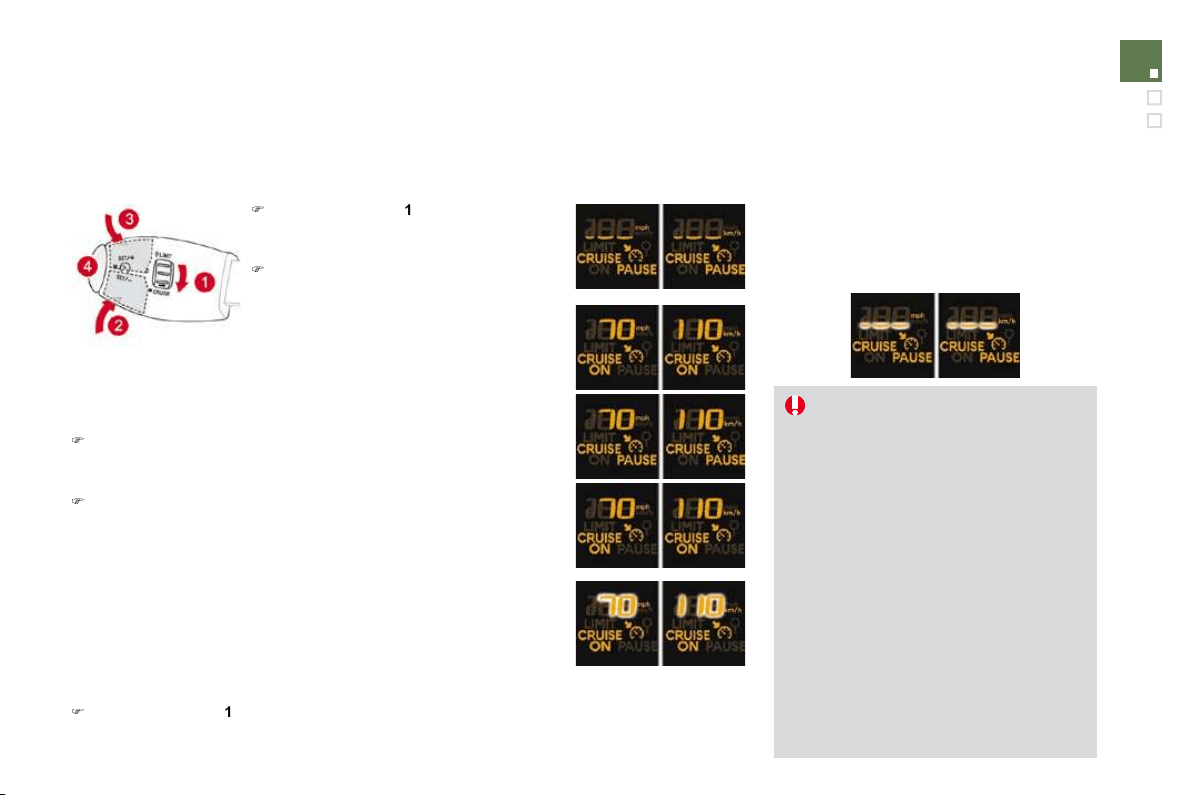
Closing
Running out of fuel
(Diesel)
I
f
your vehicle is
f
itted with an HDI engine, the
f
uel system must be primed if you run out of
fue
l.
This system consists of a priming pump, a
t
ransparent pipe and a bleed screw under the
bo
nn
e
t.
HDi
90
a
n
d
HDi
110
FAP
e
n
g
ines
)
Fill th
e
f
ue
l t
a
nk with
a
t l
eas
t fiv
e
litr
es
o
f
Diesel
.
)
Op
en the bonnet.
)
D
epen
di
n
g
on vers
i
on, unc
li
p t
h
e cover to
ga
i
n access to t
h
e pr
i
m
i
ng pump.
)
S
queeze and release the priming pump
until fuel appears in the transparent pipe
w
ith the green connector.
)
Operate the starter until the engine starts.
)
Dependin
g
on version, put the cover back
i
n
p
os
i
t
i
on an
d
c
lip
i
t
i
n
pl
ace.
)
C
lose the bonnet.
I
f
the engine does not start at the
f
irst
attempt, do not try again.
Operate the priming pump again, then
th
e
s
t
a
rt
e
r.
)
Take the sta
y
out of the support notch.
)
C
lip the sta
y
in its housin
g
.
)
Lo
w
e
r t
he
bo
nn
e
t
a
n
d
r
elease
i
t
a
t t
he
e
n
d
o
f
its travel.
)
Pull on the bonnet to check that it is
f
ully
l
atc
h
e
d
.
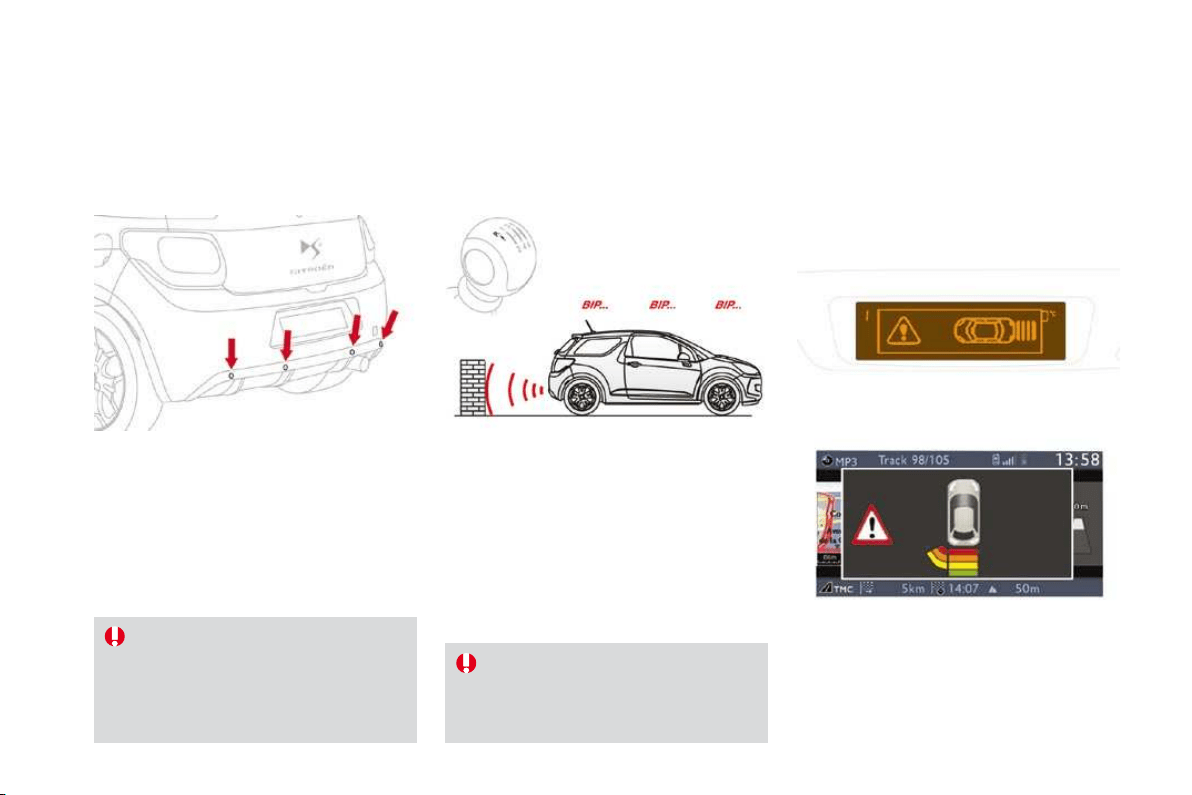
163
Checks
* According to engine.
Petrol engines
1
.
S
creenwash reservoir.
2.
Coolant header tank.
3.
Air filter * .
4.
Br
a
k
e
fl
u
i
d
r
ese
rv
o
ir.
5.
Batter
y
.
6
.
Fusebo
x.
7.
Engine oil dipstick.
8
. En
g
ine oil
f
iller cap.

* According to engine.
Diesel engines
1
.
Screenwash reservoir.
2.
Coolant header tank.
3.
Air filt
e
r * .
4.
Br
a
k
e
fl
u
i
d
r
ese
rv
o
ir.
5.
Batter
y
.
6.
Fusebo
x.
7.
E
n
gi
ne o
il
di
pst
i
c
k
.
8.
En
g
ine oil
f
iller cap.
9.
Priming pump
*
.
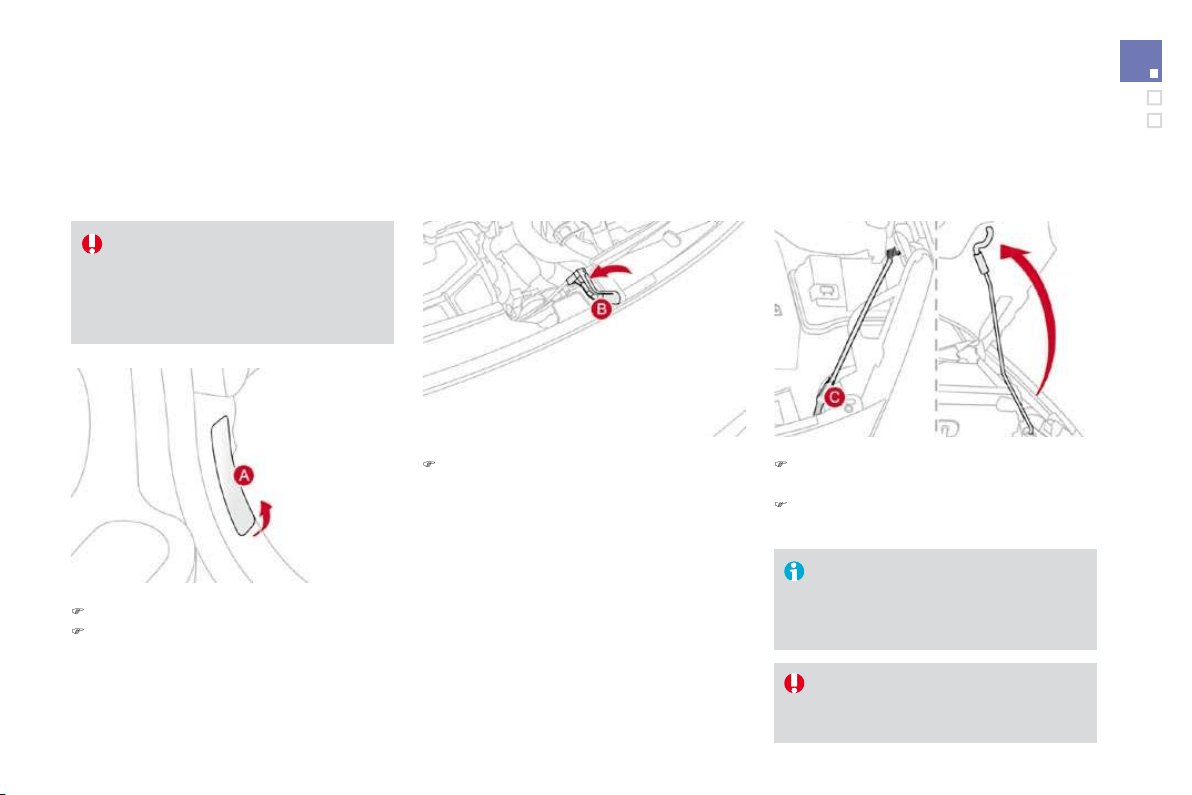
165
Checks
Checking levels
Check all of these levels re
g
ularl
y
and top them up if necessar
y
, unless otherwise indicated.
If a level drops si
g
nificantl
y
, have the correspondin
g
s
y
stem checked b
y
a CITROËN dealer.
Oil level
Engine oil change
Refer to the Maintenance and Warranty Guide
f
or details o
f
the interval
f
or this o
p
eration.
In order to maintain the reliability of the engine
and emission control system, the use of
additives in the engine oil is prohibited.
Oil grade
The oil must be suitable for your engine
and conform to the manufacturer's
recommen
d
at
i
ons.
Brake fluid level
&KDQJLQJWKHÀXLG
Re
f
er to the Maintenance and Warrant
y
G
uide
f
or details o
f
the interval
f
or this o
p
eration.
)OXLGV
S
HFL¿FDWLRQ
The brake
f
luid must con
f
orm to the
manu
f
acturer's recommendations and meet the
DO
T4 standard.
Th
e
b
r
a
k
e
fl
u
i
d
l
e
v
e
l
s
h
ou
l
d
be
c
l
ose
t
o the "MAX" mark. I
f
it is not, check
th
e
b
ra
k
e
p
a
d
wear.
The reading will only be correct if the
v
e
hi
c
l
e
i
s on
l
eve
l
g
roun
d
an
d
t
h
e
engine has been off for more than
15
minutes.
The check is carried out either when the ignition
is switched on using the oil level indicator on the
instrument panel, or using the dipstick.

C
hanging the coolant
Th
e coo
l
ant
d
oes not
h
ave to
b
e c
h
ange
d
.
)OXLGVSHFL
¿
FDWLRQ
The coolant must conform to the
m
a
n
u
f
ac
t
u
r
e
r'
s
r
eco
mm
e
n
da
ti
o
n
s
.
Screenwash fluid level
)OXLGV
S
HFL
¿
FDWLRQ
For optimum cleaning and to avoid
f
reezing,
this fluid must not be topped up or replaced
w
ith water.
T
a
k
e care w
h
en carr
yi
n
g
out c
h
ec
k
s
u
nder the bonnet as some
p
arts o
f
the
e
ngine can be very hot
(
risk o
f
burns
)
.
Coolant level
T
op up t
h
e
l
eve
l
w
h
en necessar
y
.
Th
e coo
l
ant
l
eve
l
s
h
ou
ld
b
e c
l
ose
to the "MAX" mark but should never
exceed it.
When the engine is warm, the
temperature of the coolant is regulated by the
fan. This can operate with the i
g
nition off.
On vehicles which are fitted with a particle
e
mission
f
ilter, the
f
an ma
y
operate a
f
ter
the vehicle has been switched off, even if
t
h
e eng
i
ne
i
s co
ld
.
In addition, as the cooling system is
pressurised, wait at least one hour after
s
witching off the engine before carrying out any
work.
To avoid any risk of scalding, unscrew the cap
by
two turns to a
ll
ow t
h
e pressure to
d
rop.
When the pressure has dropped, remove the
ca
p
an
d
to
p
u
p
t
h
e
l
eve
l
.

16
7
Checks
Diesel additive level
(Diesel engine with particle
e
mission filter
)
A
low additive level is indicated b
y
li
g
htin
g
of
the service warning lamp, accompanied by
an audible warning and a message on the
multi
f
unction screen.
Topping up
This additive must be topped up by a CITROËN
dealer without delay.
U
se
d
p
ro
d
ucts
A
void prolonged contact o
f
used oil or
fluids with the skin.
Most of these fluids are harmful to
h
ealth or indeed very corrosive.
Do not discard used oil or
f
luids into
s
ewers or onto the ground.
Take used oil to a CITROËN dealer
(
France) or an authorised waste
disposal site.
Checks
Battery
A
ir filter and passen
g
er compartment filte
r
Oil filter
P
article emission filter
(
Diesel
)
It is im
p
erative that the maintenance o
f
the
particle emission filter is carried out by a
CITROËN dealer.
Followin
g
prolon
g
ed operation o
f
the
ve
hi
c
l
e at ver
y
l
ow spee
d
or at
idl
e,
y
ou ma
y
,
i
n except
i
ona
l
c
i
rcumstances,
notice the emission o
f
water va
p
our at
t
h
e ex
h
aust on acce
l
erat
i
on.
Thi
s
d
oes
not affect the behaviour of the vehicle
o
r th
e
e
nvir
o
nm
e
nt.
Unless otherwise indicated, check these components in accordance with the Maintenance and Warant
y
G
uide and accordin
g
to
y
our en
g
ine.
Otherwise, have them checked by a CITROËN dealer.
The battery does not require any
m
a
int
e
n
a
n
ce
.
However, check that the terminals
are clean and correctly tightened,
particularly in summer and winter.
When carrying out work on the battery, refer to
the "Practical information" section for details of
the precautions to be taken be
f
ore disconnecting
the batter
y
and
f
ollowin
g
its reconnection.
Refer to the Maintenance and
Warranty Guide for details of the
re
p
lacement intervals
f
or these
com
p
onents.
Depending on the environment
(
e.g. dusty
atmosphere) and the use of the vehicle (e.g.
city driving
)
,
replace them twice as often if
necessar
y
(refer to the "Engines" paragraph).
A
clogged passenger compartment
f
ilter may
h
ave an adverse e
ff
ect on the
p
er
f
ormance
o
f
the air conditioning system and generate
un
d
es
i
ra
bl
e o
d
ours.
Replace the oil filter each time the
en
gi
ne o
il
i
s c
h
an
g
e
d
.
Re
f
er to the Maintenance and Warrant
y
G
uide
f
or details o
f
the re
p
lacement
i
nterval
f
or this com
p
onent.
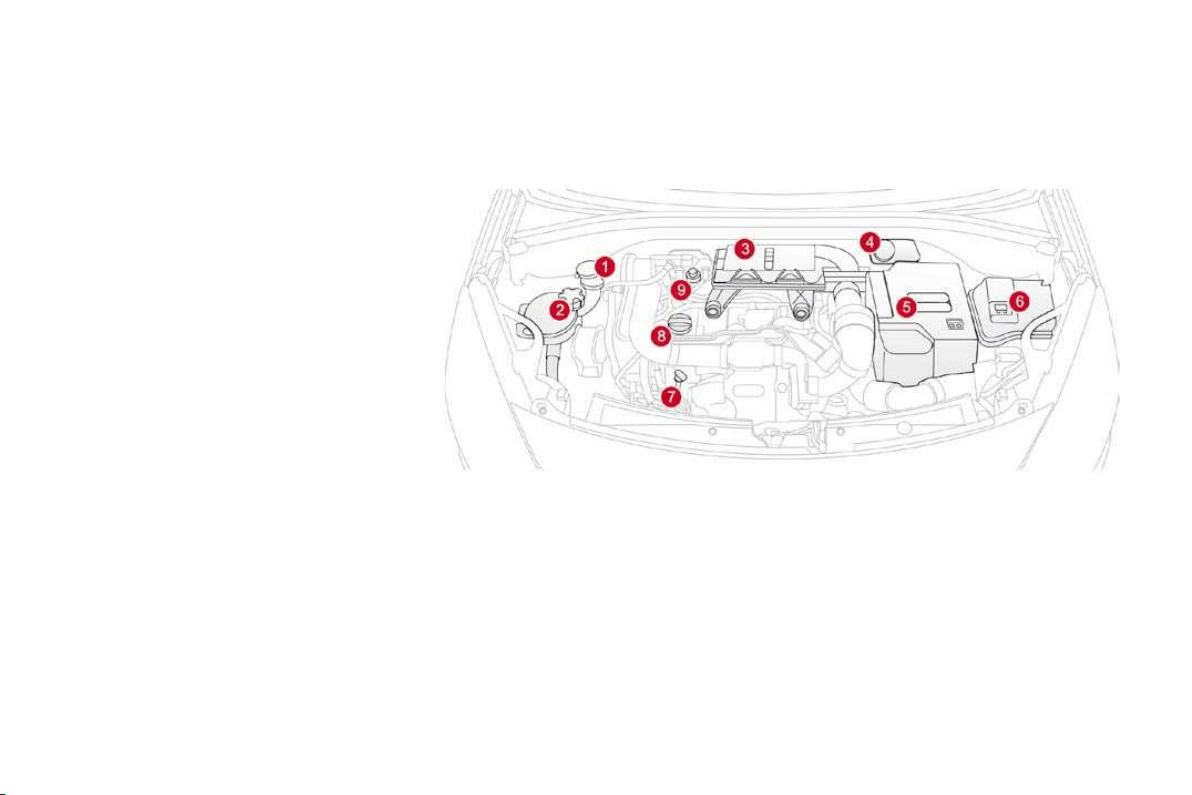
169
Checks
M
anua
l
g
ear
b
ox
Automatic gearbox
B
ra
k
e
p
a
d
s
Brake wear depends on the st
y
le
o
f
drivin
g
, particularl
y
in the case
o
f
vehicles used in town, over short
di
stances.
I
t ma
y
b
e necessar
y
to
h
ave the condition o
f
the brakes checked, even
b
etween ve
hi
c
l
e serv
i
ces.
Unless there is a leak in the circuit, a drop in
t
h
e
b
r
a
k
e
fl
u
i
d
l
e
v
e
l in
d
i
ca
t
es
th
a
t th
e
b
r
a
k
e
pads are worn.
The gearbox does not require any
maintenance
(
no oil chan
g
e
)
.
Refer to the Warranty and
M
aintenance Record
f
or the details o
f
the level checking interval
f
or this component.
Br
a
k
e
d
i
sc
w
ea
r
P
ar
ki
n
g
b
ra
k
e
If
a
l
oss
o
f
e
ff
ec
tiv
e
n
ess
o
f thi
s
s
y
stem
i
s not
i
ce
d
, t
h
e par
ki
n
g
b
ra
k
e
must
b
e c
h
ec
k
e
d
, even
b
etween two
serv
i
ces.
This system must be checked by a CITRO
Ë
N
d
ea
l
er.
Only use products recommended by
C
ITROËN or products of equivalent
q
ualit
y
and specifications.
In order to optimise the operation
of
units as important as the brakin
g
s
y
stem, CITRO
Ë
N selects and offers
ver
y
speci
f
ic products.
T
o avo
id
d
amag
i
ng t
h
e e
l
ectr
i
ca
l
un
i
ts,
t
he use of a high pressure washer
in the engine compartment is strictly
p
rohibite
d
.
The gearbox does not require any
maintenance
(
no oil chan
g
e
)
.
Re
f
er to the Warranty and Maintenance
Record for details of the level checking
interval for this component.
For in
f
ormation relatin
g
to checkin
g
t
h
e
b
ra
k
e
di
sc wear, contact a
CITRO
Ë
N dealer.

Temporary puncture repair kit
Complete system consisting of a compressor
a
nd an incorporated sealant cartrid
g
e which
p
erm
i
ts
temporary repair
of the tyre so that
r
y
ou can
d
r
i
ve to t
h
e nearest
g
ara
g
e.
A
ccess
to
t
h
e
ki
t
This re
p
air kit is available
f
rom
CITROËN dealers.
It is designed to repair most punctures
w
hich could affect the tyre, located
on the t
y
re tread or shoulder. Avoid
r
emovin
g
an
y
f
orei
g
n bodies which
h
ave penetrate
d
t
h
e t
y
re.
Using the kit
This procedure, comprisin
g
several steps, must
be
ca
rri
ed
ou
t in f
u
ll.
)
S
witch o
ff
the i
g
nition.
)
Tu
rn t
he
selec
t
o
r
A
t
o
t
he
"
S
EALANT"
p
osition.
)
C
heck that the switch
B
i
s
i
n
p
os
i
t
i
on
"0"
.

1
7
3
Practical information
)
Connect the white pipe
C
to the valve of the
tyre to be repaired.
) Connect the compressor's electric plug to
t
h
e
v
e
hi
c
l
e
'
s
12
V
soc
k
e
t.
)
Affix the speed limitation sticker to the
vehicle's steerin
g
wheel to remind
y
ou that
a w
h
ee
l
i
s
i
n temporar
y
use.
)
S
tart the vehicle and leave the en
g
ine
r
unn
i
n
g
.
)
Switch on the compressor by moving
th
e
s
wit
c
h
B
to position "
1
" until the tyre
p
ressure reaches
2
.
0
bars.
I
f
a
f
ter around
5
to 7 minutes the
p
ressure
i
s not atta
i
ne
d
, t
hi
s
i
n
di
cates
th
at t
h
e t
y
re
i
s not repa
i
ra
bl
e; contact a
CITRO
Ë
N dealer for assistance.

Remove the kit, taking care to avoid
staining your vehicle with traces of fluid.
Keep the kit to hand.
)
Drive immediatel
y
for approximatel
y
t
hree miles
(f
ive kilometres
)
, at reduced
speed
(
between 15 and 35 mph [20 and
60 km
/
h]
)
, to plu
g
the puncture.
)
S
top to check the repair and the tyre
p
ressure using the kit.
)
Turn the selector
A
to the AIR position.
)
Connect the black pipe
D
t
o
th
e
v
a
lv
e
o
f th
e
w
h
ee
l.
Checkin
g
/Ad
j
ustin
g
t
y
re pressures
You can use this kit to inflate other accessories such as a ball or bic
y
cle t
y
res.
To do this, turn the selector to the "In
f
lation
(
AIR
)
" position, connect the black pipe with the
appropriate adaptor to the accessor
y
to be in
f
lated, then
f
ollow the rest o
f
the procedure
below as
f
ar as removal o
f
the kit.
You can also use this kit
f
or routine checking and adjustment o
f
the tyre pressures on your
vehicle. For this, carry out just the
f
ollowing 6 points.
)
Connect the compressor's electric plug to
th
e
v
e
hi
c
l
e
'
s
12
V
soc
k
e
t.
)
Start the vehicle a
g
ain and leave the
e
n
g
ine runnin
g
.

1
7
5
Practical information
)
Adjust the pressure using the compressor
(to inflate: switch
B
in position
"1"
;
to
deflate: switch
B
in position "0
"
and press
bu
tt
o
n
E
), in accordance with the vehicle's
tyre pressure label (located on the left hand
door aperture
)
.
A loss of pressure indicates that the
puncture has not been fully plugged;
contact a CITROËN dealer for assistance.
)
Remove and stow the kit.
) Drive at reduced speed (50 mph [80 km/h]
max) limiting the distance travelled to
approximatel
y
120 miles
(
200 km
)
.
)
Visit a
C
ITR
OË
N dealer as soon as
p
oss
ibl
e to
h
ave t
h
e t
y
re repa
i
re
d
or rep
l
ace
d
by
a tec
h
n
i
c
i
an.
Take care, this
p
roduct is harm
f
ul
(e.g. ethylene-glycol, colophony,
ethanediol...) if swallowed and causes
irritation to the eyes. Keep it out o
f
r
eac
h
o
f
c
hil
d
r
e
n.
The expir
y
date o
f
the
f
luid is indicated
o
n t
h
e cartr
idg
e.
The sealant cartrid
g
e is desi
g
ned
f
or
single use; even i
f
only partly used, it
must
b
e re
pl
ace
d
.
To remove the cartridge, unscrew it
c
ompletely at its cap and pull off.
A
fter use, do not discard the cartridge
into the environment
,
take it to an
aut
h
or
i
se
d
waste
di
s
p
osa
l
s
i
te or a
C
ITR
OË
N dealer.
Do not
f
or
g
et to obtain a new sealant
c
artridge, available from CITRO
Ë
N
d
ea
l
ers.
Changing a wheel
Procedure for changing a faulty wheel for the spare wheel using the tools provided with the vehicle.
The tools are installed in the boot under
the floor.
To gain access to them:
)
open the boot,
)
li
f
t the boot carpet b
y
pullin
g
the strap
up
war
d
s,
)
remove t
h
e po
l
ystyrene storage
b
ox,
)
unclip and remove the box containing the
t
ools.
Access to the tools
List of tools
A
ll o
f
these tools are speci
f
ic to
y
our vehicle.
D
o not use them
f
or other
p
ur
p
oses.
Wh
ee
l
w
i
t
h
tr
i
m
Wh
en remov
i
n
g
t
h
e w
h
ee
l
,
f
irst
d
etac
h
t
h
e tr
i
m us
i
n
g
t
h
e w
h
ee
lb
race
1
pu
lli
ng at t
h
e va
l
ve passage
h
o
l
e.
W
hen refitting the wheel
,
refit the
t
rim starting by placing its cut-out at the
valve and press around its edge with
t
he palm of
y
our hand.
3.
"Bolt cover" tool.
For removal of the bolt protectors (covers)
on alloy wheels.
4.
Socket for the securit
y
wheel bolts
(
located
i
n the
g
love box
)
.
For ada
p
tation o
f
the wheelbrace to the
s
pec
i
a
l
secur
i
t
y
w
h
ee
l
b
o
l
ts.
1.
Wheelbrace.
For removal of the wheel trim and removal
o
f the wheel fixing bolts.
2.
Jack with inte
g
ral handle.
For raisin
g
the vehicle.
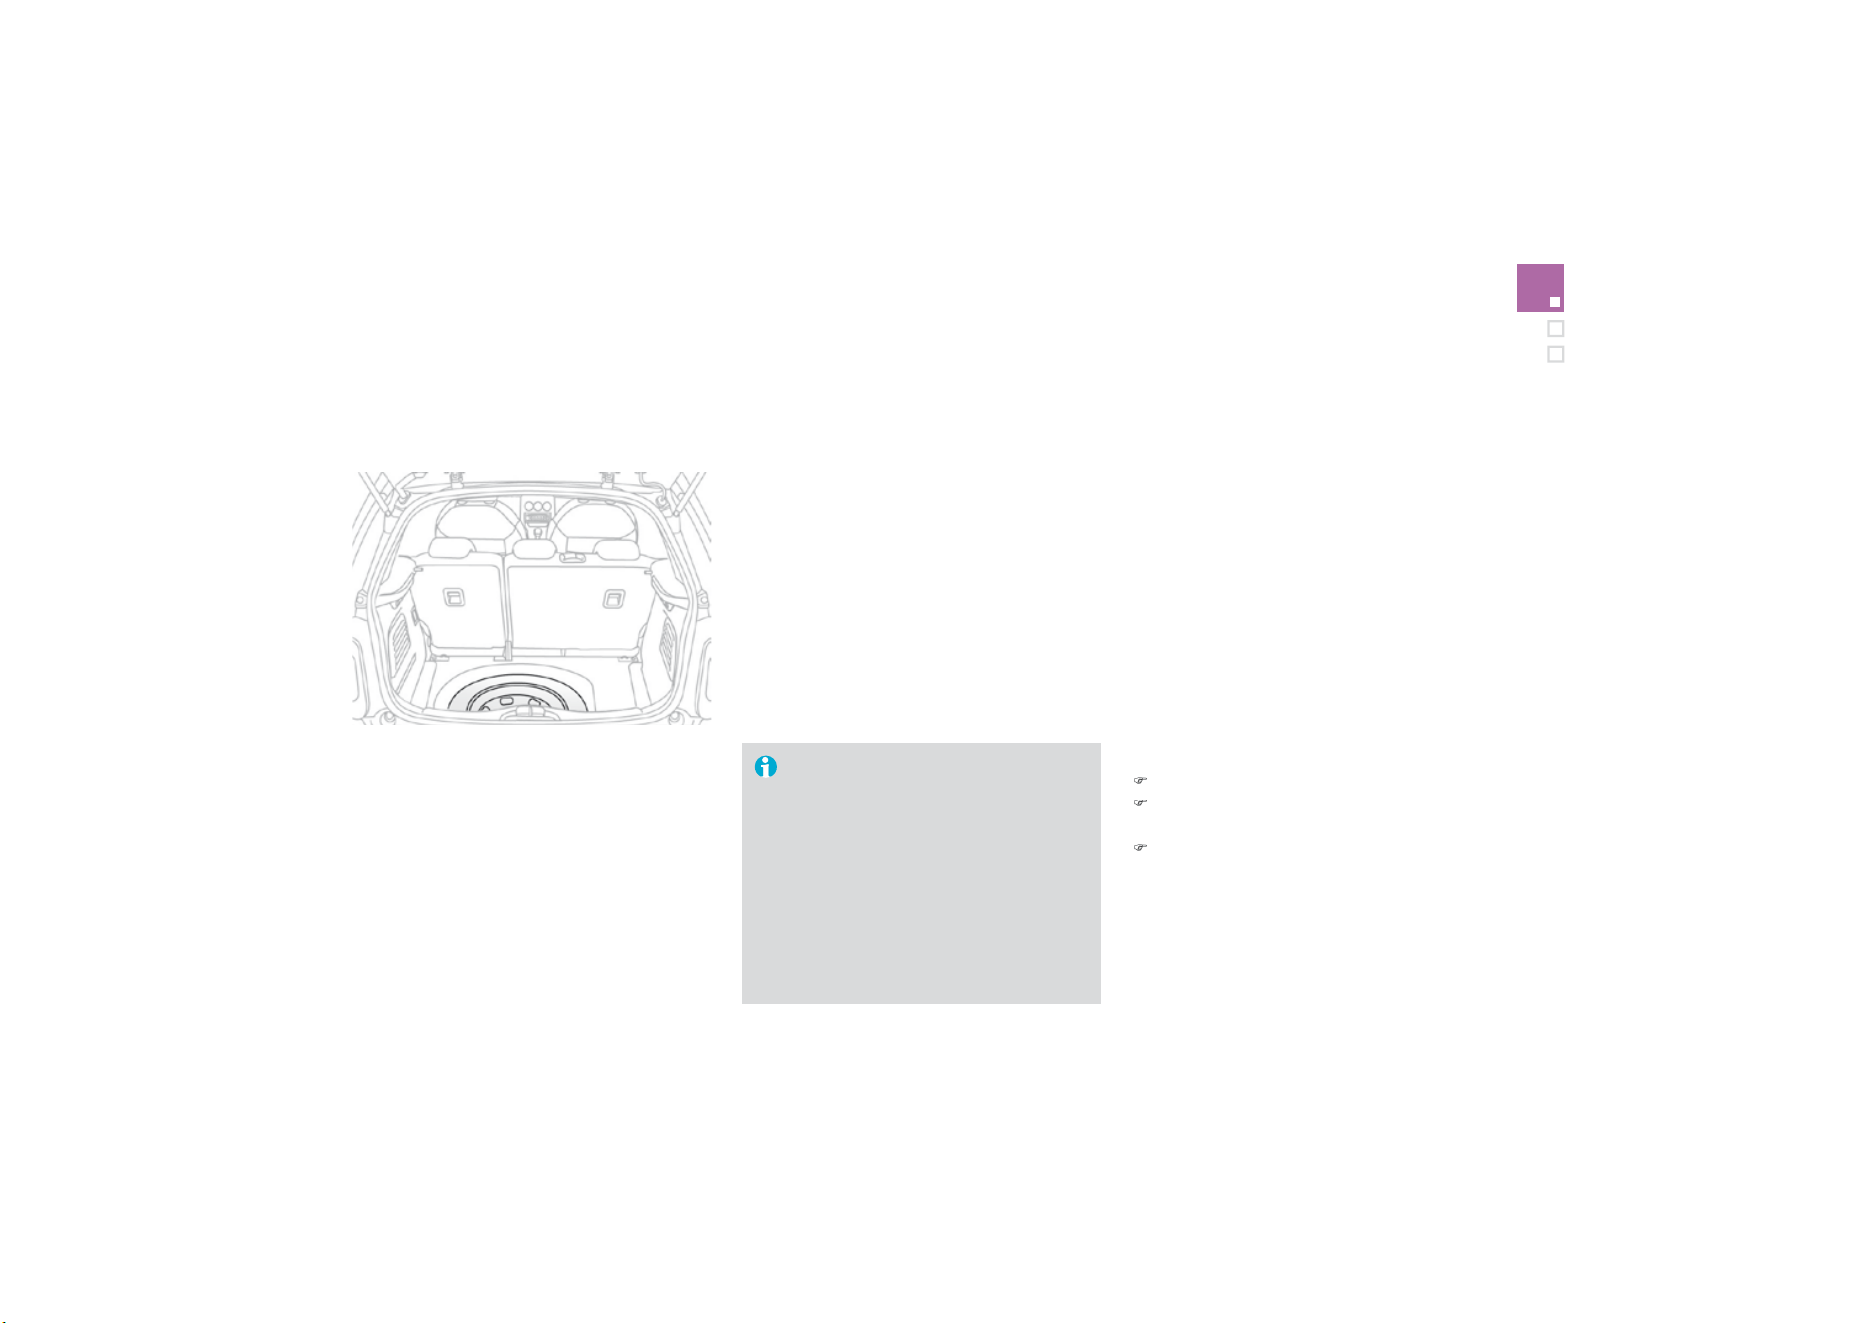
1
77
Practical information
The spare wheel is installed in the boot under
th
e
fl
oo
r.
According to country, you will have either a
"space saver" spare wheel or a temporary
p
uncture re
p
a
i
r
ki
t.
For access to it, refer to the paragraph "Access
to t
h
e too
l
s
"
on t
h
e prev
i
ous page.
Access to the spare wheel
Fitting the "space-saver"
t
y
pe spare wheel
If your vehicle is fitted with alloy
w
heels
,
it is normal to notice
,
when
tightening the bolts on fitting, that the
was
h
e
r
s
do
n
o
t
co
m
e
int
o
co
nt
ac
t with
t
h
e
"
space-saver
"
t
y
pe spare w
h
ee
l
.
Th
e w
h
ee
l
i
s secure
d
by
t
h
e con
i
ca
l
contact o
f
each bolt.
T
a
ki
n
g
out t
h
e w
h
ee
l
)
U
nscrew t
h
e
y
e
ll
ow centra
l
b
o
l
t.
)
Raise the spare wheel towards
y
ou
f
rom
t
h
e rear.
)
Take the wheel out o
f
the boot.
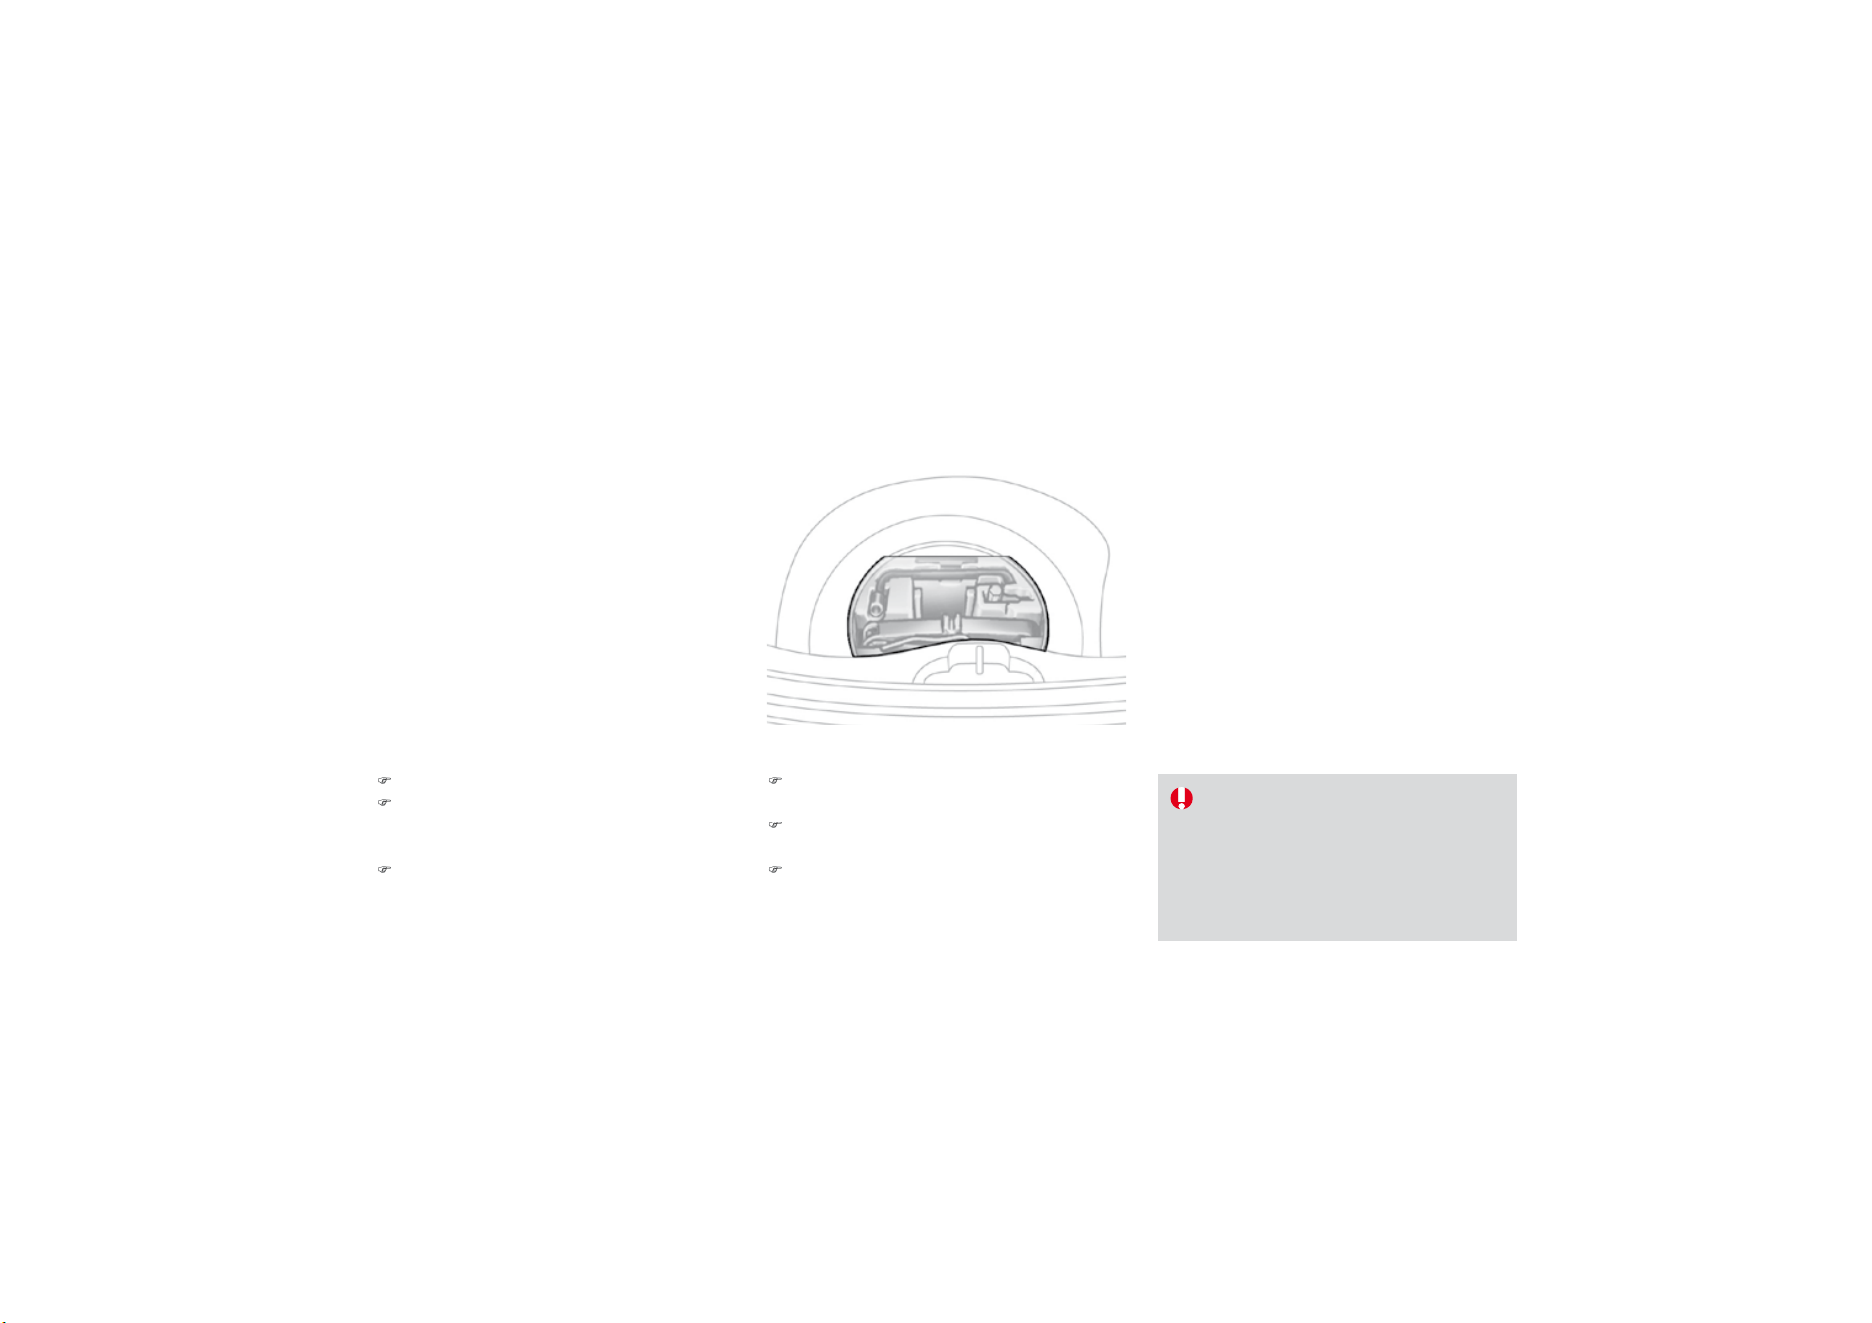
P
utt
i
n
g
t
h
e w
h
ee
l
b
ac
k
i
n p
l
ace
)
Put the box back in
p
lace in the centre o
f
t
he wheel and cli
p
it.
)
Put the polystyrene storage box back in
place.
)
Refit the boot floor carpet by lightly
f
oldin
g
it in the middle
(
refer to the section
"
Fittin
g
s -
§
S
tora
g
e box"
)
.
)
Put the wheel back in its housing.
)
Unscrew the yellow central bolt by a few
t
urns then place it in the centre of the
w
h
ee
l.
)
Tighten fully until the central bolt clicks to
retain the wheel correctly.
On vehicles e
q
ui
pp
ed with a "s
p
ace
-
s
aver" type spare wheel, the punctured
w
heel can be stowed in place of the
"space-saver" wheel; however the boot
f
l
oo
r will n
o
t th
e
n
be
fl
a
t.

Practical information
Removing the wheel
Parking the vehicle
Imm
ob
ili
se
th
e
v
e
hi
c
l
e
wh
e
r
e
it
does
not block traffic: the ground must be
l
evel, stable and not slipper
y
.
A
ppl
y
the parkin
g
brake, switch o
ff
the
i
g
nition and en
g
a
g
e
f
irst
g
ear
*
to lock
th
e w
h
ee
l
s.
I
f
necessary, place a chock under the
wh
ee
l
di
agona
ll
y oppos
i
te t
h
e w
h
ee
l
to
be changed.
It is imperative that you ensure that the
o
ccupants get out of the vehicle and
w
ait where the
y
are safe.
N
ever
g
o un
d
erneat
h
a ve
hi
c
l
e ra
i
se
d
using a jack; use an axle stand.
List of o
p
erations
)
R
e
m
o
v
e
th
e
c
hr
o
m
ed
bo
lt
co
v
e
r
f
r
o
m
eac
h
o
f
the bolts usin
g
the tool
3
(
allo
y
wheels
only).
)
Fit the socket
4 on t
h
e w
h
ee
lb
race
1
to
slacken the security bolt.
)
Slacken the other bolts using the
wheelbrace
1
only.
* position
P
f
or an automatic
g
earbox.
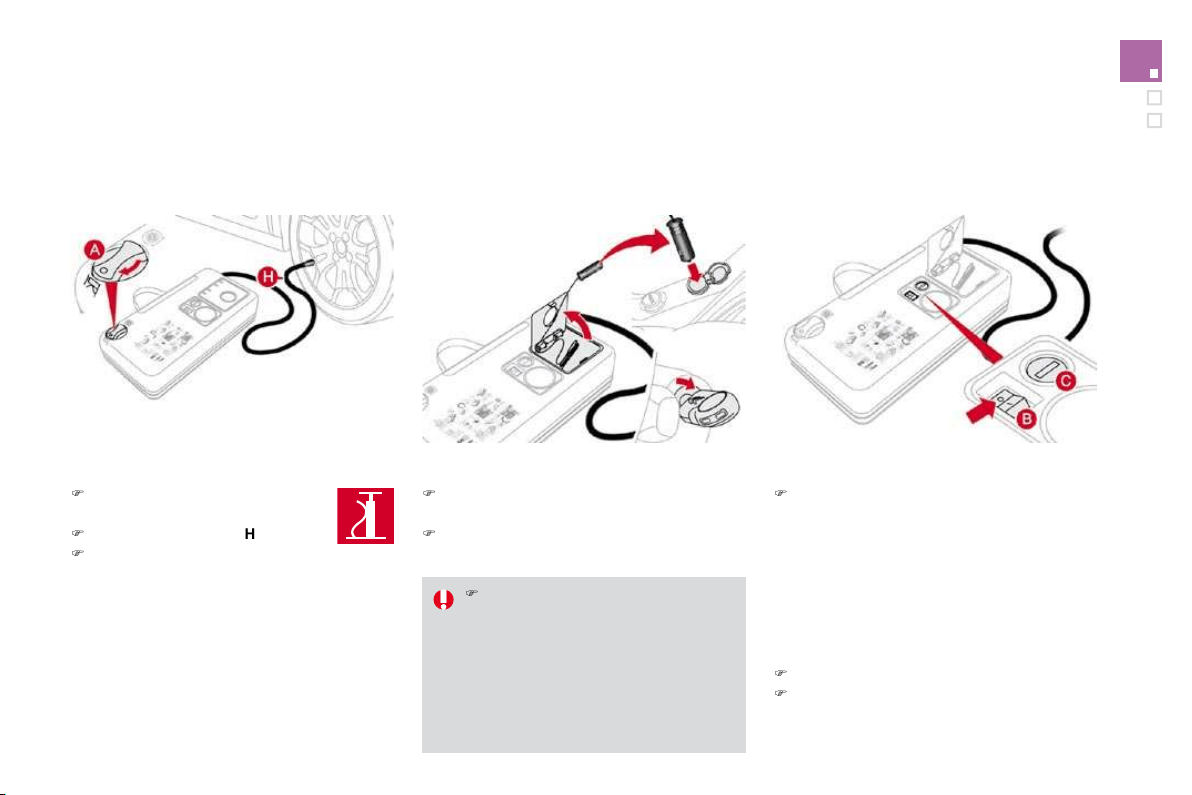
)
Place the jack
2
in contact with one of the
t
w
o
fr
o
nt
A
o
r r
ea
r
B
locations provided on
t
he underbody, whichever is closest to the
w
heel to be chan
g
ed.
O
n vehicles
f
itted with sill
f
inshers, the
j
ac
ki
n
g
l
ocat
i
on
i
s
i
n
di
cate
d
by
a mar
ki
n
g
on the
f
inisher. The
j
ack must be placed
c
entra
ll
y
i
n
li
ne w
i
t
h
t
hi
s mar
ki
ng, at t
h
e
jacking point located behind the
f
inisher
and not on the plastic finisher itself.
)
Remove the bolts and store them in a clean
p
lace.
)
R
e
m
o
v
e
th
e
wh
ee
l.
)
Extend the jack
2
until its base plate is in
c
ontact with the ground. Ensure that the
c
entreline of the jack base plate is directly
be
l
o
w th
e
l
oca
ti
o
n
A
o
r
B
used
.
)
R
a
i
se
th
e
v
e
hi
c
l
e
u
ntil th
e
r
e
i
s
suff
i
c
i
e
nt
space
b
etween t
h
e w
h
ee
l
an
d
t
h
e
g
roun
d
so that the spare
(
not punctured
)
wheel can
t
hen be
f
itted without di
ff
iculty.
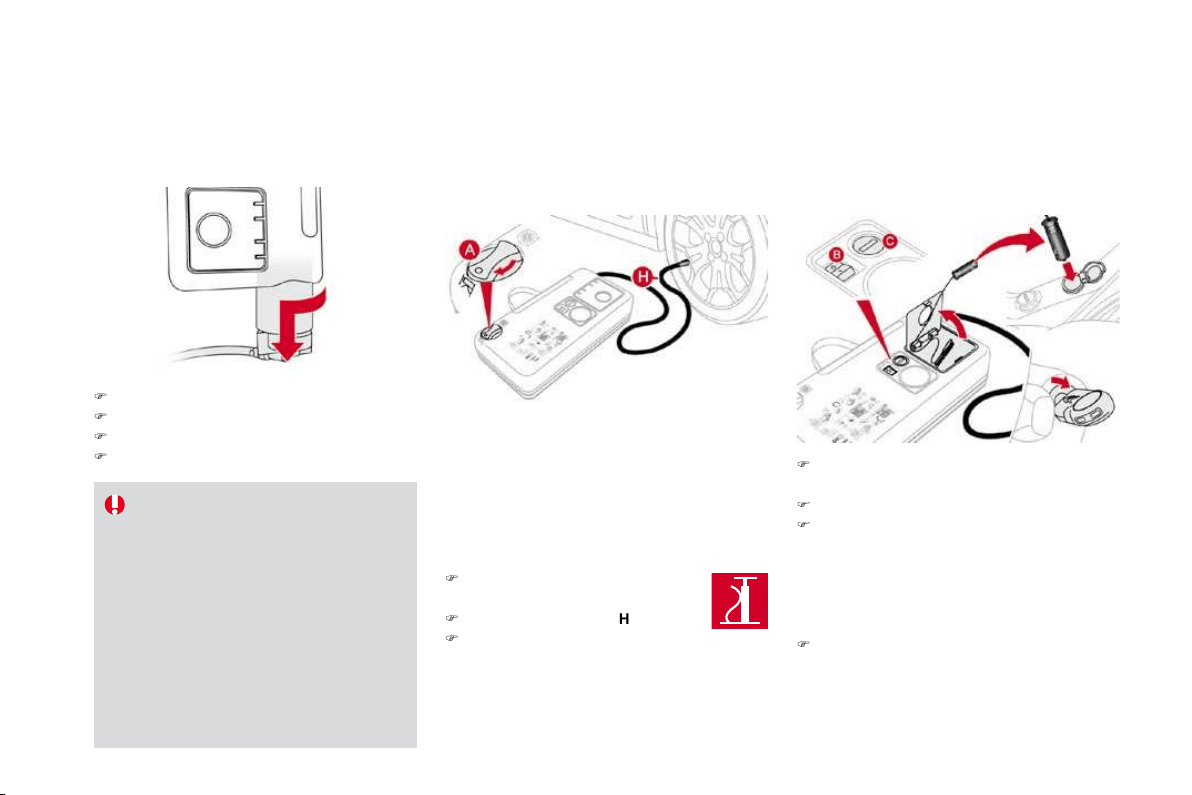
181
Practical information
Fitting the wheel
Af
ter chan
g
in
g
a wheel
To store the punctured wheel in the
b
oot correctly, first remove the central
co
v
e
r.
Wh
en us
i
n
g
t
h
e
"
space-saver
"
t
y
pe
temporar
y
use spare w
h
ee
l
,
d
o not
e
xceed 50 mph
(
80 km
/
h
)
.
Have the tightening o
f
the bolts and the
p
ressure o
f
the spare wheel checked by
a
CITROËN dealer without delay.
Have the punctured wheel repaired and
r
eplace it on the vehicle as soon as
p
ossible.
Do
n
o
t
d
r
i
v
e
w
i
t
h
m
o
r
e
t
ha
n
o
n
e
temporar
y
use spare wheel
f
itted to the
v
e
hi
c
l
e at one t
i
me.
List of o
p
erations
)
P
ut t
h
e w
h
ee
l
i
n
pl
ace on t
h
e
h
u
b
.
)
S
crew in the bolts b
y
hand.
)
P
re-t
igh
ten t
h
e secur
i
t
y
b
o
l
t us
i
n
g
t
h
e
wh
ee
lb
race
1
f
itted with the socket 4.
)
Pre-tighten the other bolts using the
w
heelbrace
1
only.

)
Lower the vehicle fully.
)
Fold the jack
2
a
n
d
de
t
ac
h it.
)
Tighten the security bolt using the
wheelbrace
1
fitt
ed
with th
e
soc
k
e
t
4
.
)
Tighten the other bolts using the
wheelbrace
1
onl
y
.
)
R
ef
it th
e
c
hr
o
m
ed
bo
lt
co
v
e
r
s
o
n
eac
h
of
the
bol
t
s
.
)
S
tore the tools in the box.

183
Practical information
Changing a bulb
Procedure for replacing a faulty bulb with a new bulb.
The headlam
p
s are
f
itted with
po
l
ycar
b
onate g
l
ass w
i
t
h
a protect
i
ve
c
oating:
)
do not clean them using a dry
or abrasive cloth, nor with a
detergent or solvent product,
)
use a sponge and soapy water,
)
w
h
en us
i
n
g
a
high
pressure was
h
e
r
on persistent marks, do not direct
at the lam
p
s or their outlines
f
o
r
too
l
ong, so as not to
d
amage t
h
e
i
r
protective coating and seals.
)
D
o not touc
h
t
h
e
b
u
lb
di
rect
ly
w
i
t
h
y
our
f
in
g
ers, use lint-
f
ree cloths.
C
hanging a halogen bulb should only
b
e done after the headlamp has been
s
witched off for a few minutes (risk o
f
s
erious burns).
It is imperative to use onl
y
anti-
ultraviolet
(
UV
)
t
y
pe bulbs in order not
to
d
ama
g
e t
h
e
h
ea
dl
amp.
Front lamps
1
.
D
irection indicators (PY21W amber).
2.
S
idelamps
(
W5W
)
.
3
. Main beam headlamps
(
H1-55W
)
.
4.
D
ipped beam headlamps
(
H7-55W
)
.
5.
F
ront
f
o
g
lamps
(
P
S
X24W
).
6
.
LED
lamps
(
diodes
)
.
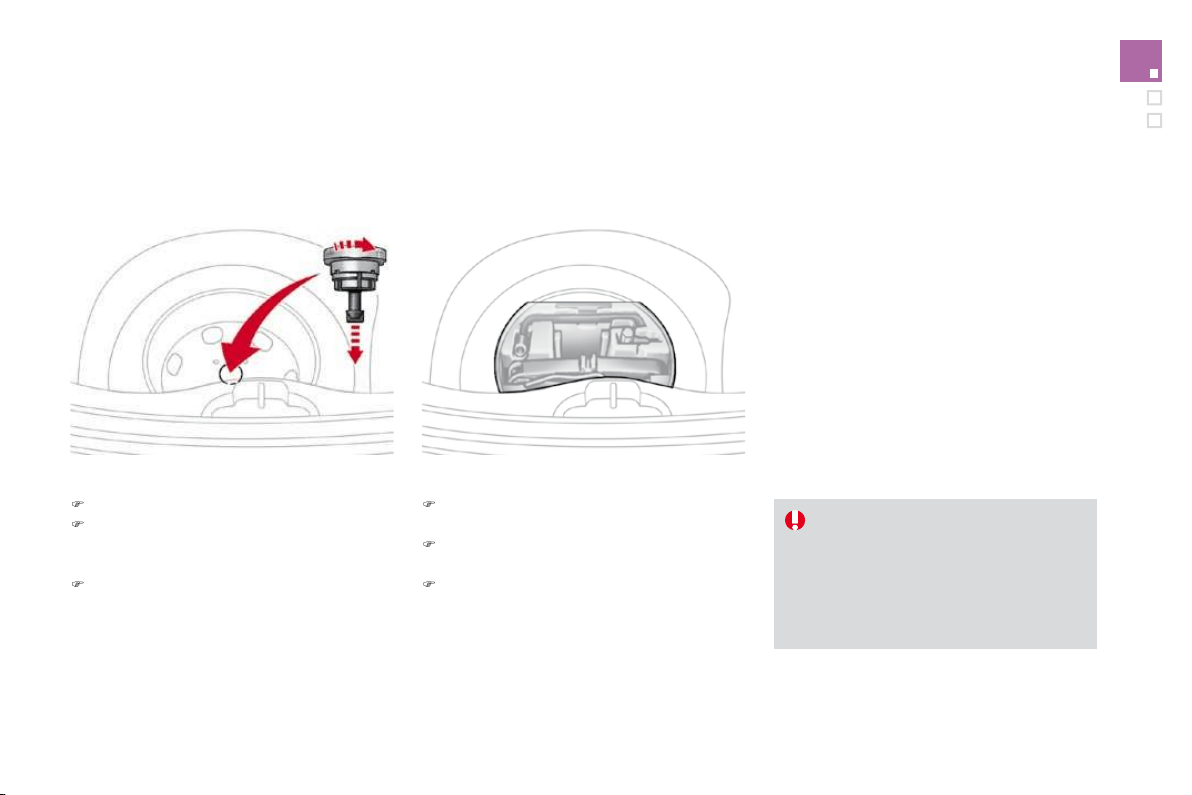
Chan
g
in
g
direction indicato
r
bulbs
When refittin
g
, close the protective
c
over care
f
ull
y
to preserve the sealin
g
o
f
the headlam
p
.
A
m
b
er co
l
oure
d
b
u
lb
s, suc
h
as t
h
e
di
rect
i
on
i
n
di
cators, must
b
e re
pl
ace
d
w
ith bulbs of identical specifications
a
nd colour.
Rapid flashing of the direction indicator
w
arnin
g
lamp
(
ri
g
ht or left
)
indicates the
fa
il
u
r
e
of
a
bu
l
b
o
n th
a
t
s
i
de
.
)
Turn the bulb holder a quarter of a turn and
e
xtr
ac
t
i
t.
)
Pull out the bulb and change it.
To re
f
it, carr
y
out these operations in reverse
order.
Chan
g
in
g
dipped beam headlamp
b
u
lb
s
)
R
emove t
h
e protect
i
ve cover
by
pu
lli
n
g
on
t
h
e ta
b
.
)
Di
sconnect t
h
e
b
u
lb
connector.
)
S
pread the springs to release the bulb.
)
Extract the bulb and change it.
To refit, carry out these operations in reverse
o
r
de
r.

185
Practical information
Chan
g
in
g
main beam headlamp
bulbs
)
Remove the protective cover by pulling on
t
h
e ta
b
.
)
Disconnect the bulb connector.
)
Spread the springs to release the bulb.
)
Remove the bulb and change it.
To refit, carry out these operations in reverse
o
r
de
r.
Chan
g
in
g
sidelamp bulbs
)
R
emove t
h
e protect
i
ve cover
by
pu
lli
n
g
on
the
t
ab
.
)
P
u
ll
t
h
e
b
u
lb
h
o
ld
er press
i
n
g
on t
h
e ta
b
s on
both sides.
)
P
u
ll
t
h
e
b
u
lb
an
d
c
h
ange
i
t.
To refit, carry out these operations in reverse
o
r
de
r.
Chan
g
in
g
inte
g
rated direction
i
n
di
cator s
id
e re
p
eaters
)
In
se
rt
a
sc
r
e
w
d
riv
e
r t
o
w
a
r
ds
th
e
ce
ntr
e
of
t
h
e re
p
eater
b
etween t
h
e re
p
eater an
d
t
h
e
base o
f
the door mirror.
)
Tilt the screwdriver to extract the repeater
a
n
d
remove
i
t.
)
Di
sconnect t
h
e re
p
eater connector.
)
Replace the module.
To re
f
it, carr
y
out these operations in reverse order.
Contact a CITROËN dealer to obtain a
replacement side repeater module.

T
o o
b
ta
i
n a re
pl
acement mo
d
u
l
e,
c
ontact
y
our CITRO
Ë
N dealer.
I
f
you experience any di
ff
iculty in
r
eplacing bulbs, contact your CITROËN
dealer.
Chan
g
in
g
front fo
g
lamp bulbs
)
Access to the
f
ront
f
o
g
lamp is throu
g
h the
aperture below the bumper.
)
Di
sconnect t
h
e
bl
ac
k
b
u
lb
h
o
ld
er connector,
b
y press
i
ng on t
h
e ta
b
at t
h
e top.
)
R
emove t
h
e
b
u
lb
-
h
o
lb
er
b
y press
i
ng on t
h
e
2 clips (at the top and the bottom).
)
Replace the module.
To refit, carry out these operations in reverse
order.
Chan
g
in
g
the LED lamps
For the replacement o
f
this type o
f
diode lamp,
contact a CITROËN dealer.
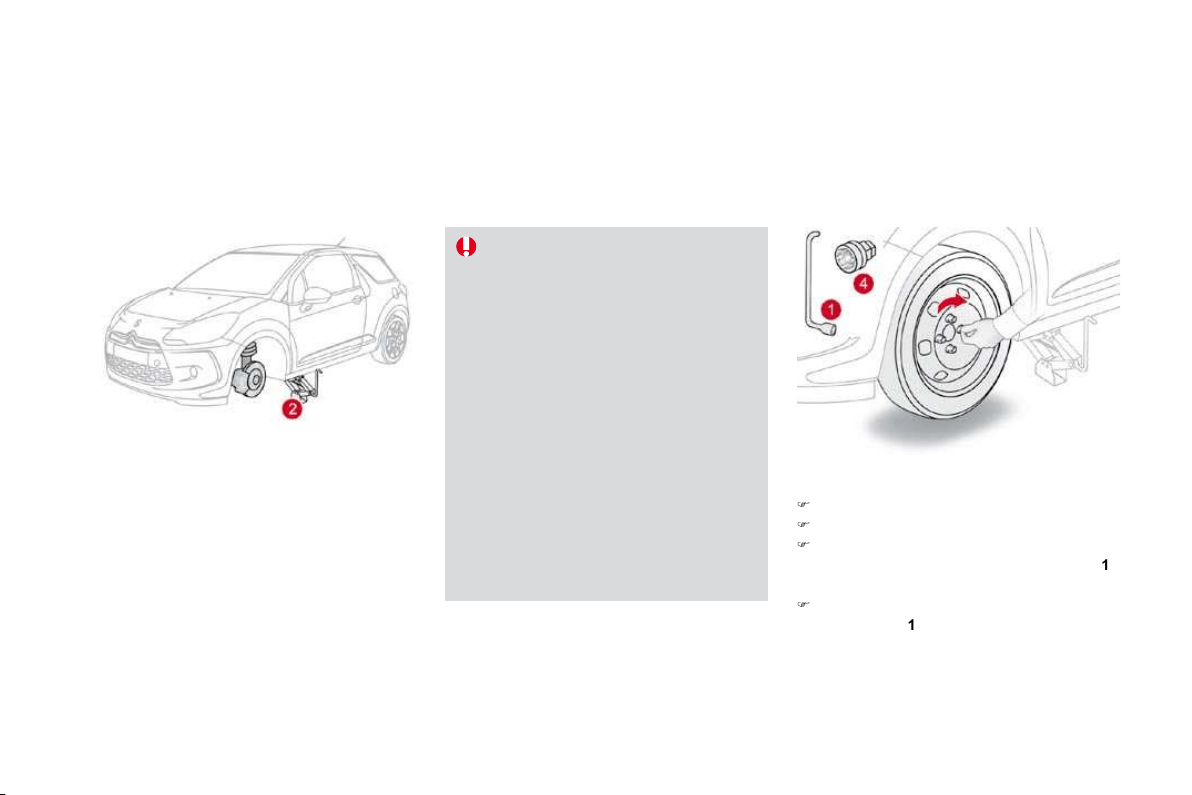
18
7
Practical information
1
.
Brake lamps/sidelamps (P21/5W).
2.
Sidelamps (P5W).
3.
Direction indicators (PY21W amber)
4.
F
o
g
lamp, le
f
t-hand side
(
PR21W red
)
Reversing lamp
,
right-hand side (P21W).
Rear lamps
Amber or red bulbs, such as those
for the direction indicators and rear
f
oglamp, must be replaced by bulbs o
f
t
he same rating and colour.
Chan
g
in
g
bulbs
)
Open the boot.
) Remove the access
f
la
p
f
rom the
c
orrespon
di
ng s
id
e tr
i
m pane
l
.
) Unscrew the butterfly nut securing the
lamp unit.
)
Unclip the lamp unit connector.
)
Extract the lamp unit carefull
y
pullin
g
in its
m
iddle
t
o
w
a
r
ds
t
he
ou
t
side
.
)
Sp
read the
f
our tabs and remove the bulb
h
o
ld
er.
)
Turn the bulb a
q
uarter o
f
a turn and
change it.
To refit, carry out these operations in reverse
o
r
de
r.
Take care to en
g
a
g
e the lamp unit in its
g
uides,
whil
e
k
eep
i
n
g
i
t
i
n
li
ne w
i
t
h
t
h
e ve
hi
c
l
e.

Changing the number plate lamp
bulbs (W5W)
)
In
se
rt
a
thin
sc
r
e
w
d
riv
e
r int
o
o
n
e
of
th
e
ou
t
e
r h
o
l
es
of
th
e
l
e
n
s
.
)
Push it outwards to unclip.
)
R
emove t
h
e
l
ens.
)
Pull the bulb out and change it.
T
hird brake lamp
(
4 W5W bulbs
)
)
Open the boot.
)
R
emove t
h
e p
l
u
g
s
A
on t
h
e
i
nner
p
ane
l
.
)
Push on the centre o
f
the lamp usin
g
t
wo screw
d
r
i
vers to
l
ever
i
t outwar
d
s.
)
Disconnect the connector and i
f
necessary
t
he screenwash pipe from the lamp.
)
Turn the bulb holder for the faulty bulb a
q
uarter of a turn.
)
Pull out the bulb and chan
g
e it.
To re
f
it, carr
y
out these operations in reverse
o
r
de
r.
Third brake lamp
(
diodes
)
For the replacement o
f
this t
y
pe o
f
diode lamp,
contact a
C
ITR
OË
N dealer.
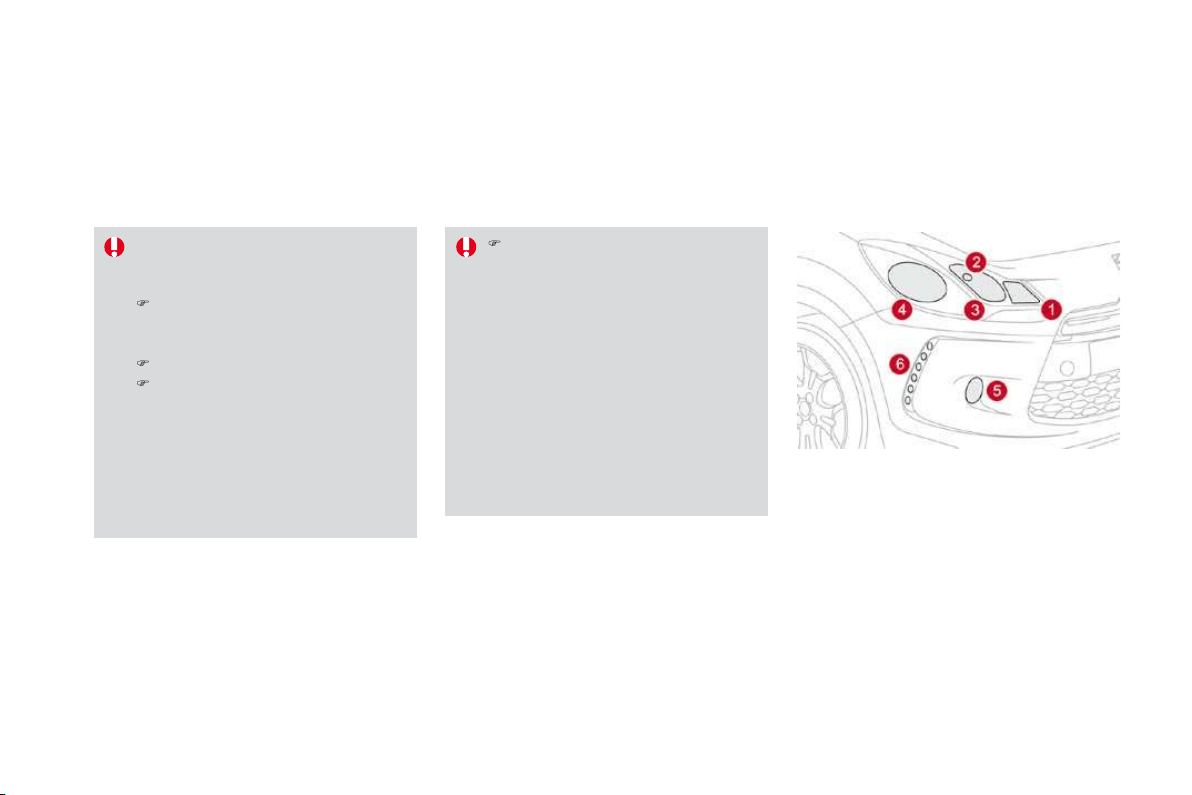
189
Practical information
Interior lighting
Interior lamp (1/W5W)
Detach the cover of the interior lamp
1
with a
thin screwdriver, close to the button, to access
the faulty bulb.
Map reading lamps (2/W5W)
Detach the cover of the interior lamp
1
. To
access the
f
ault
y
bulb, detach the partition
f
o
r
t
h
e rea
di
ng
l
amp
2
concerne
d
.
Boot illumination
(
W5W
)
Detach the unit b
y
pushin
g
it rearwards.
Footwell and central storage
i
llumination
(
W5W
)
Detach the unit
f
or access to the bulb.
G
love box illumination (W5W)
D
e
t
ac
h th
e
u
nit f
o
r
access
t
o
th
e
bu
l
b
.
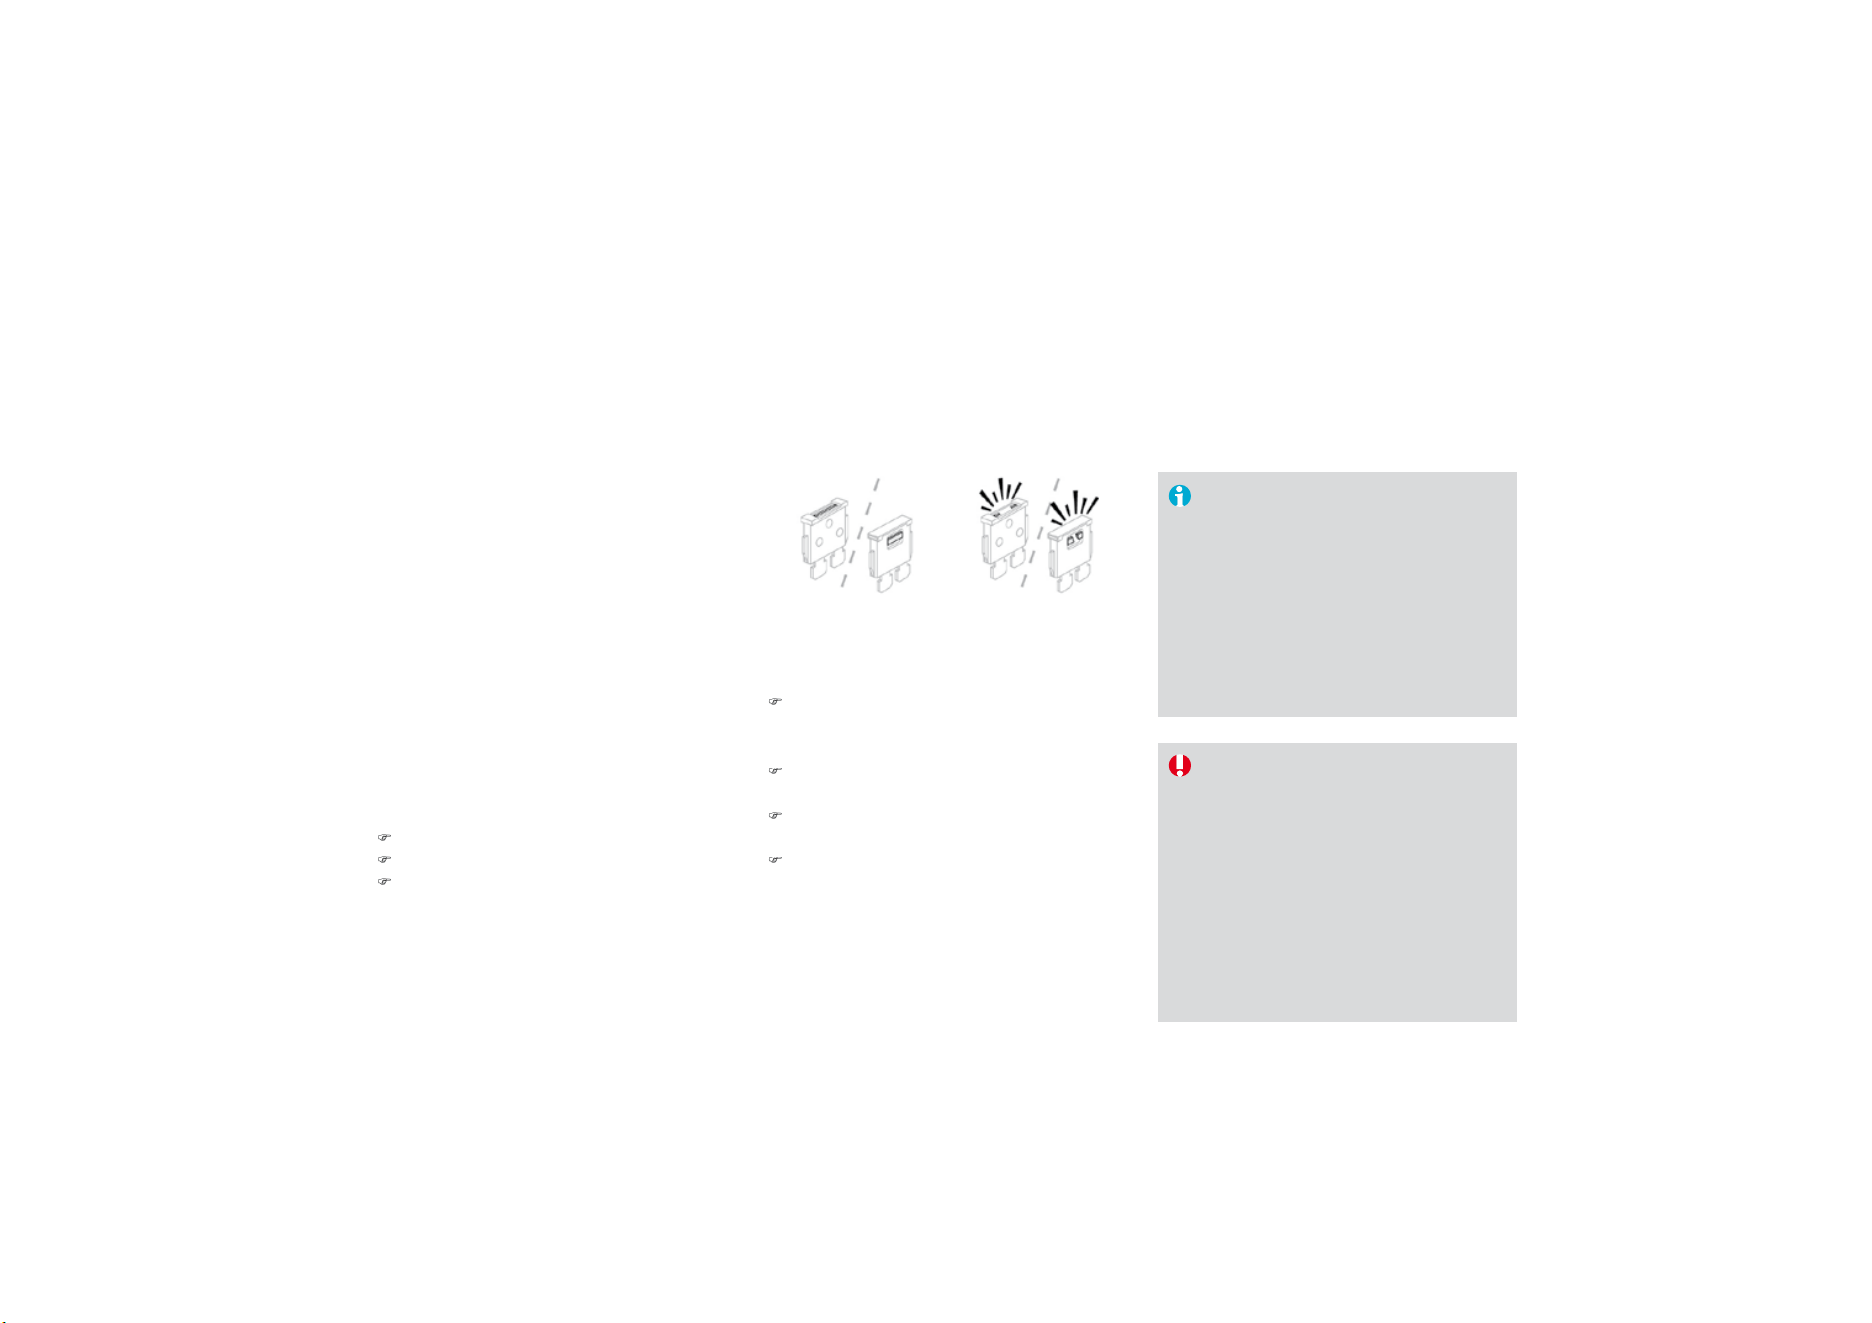
Changing a fuse
I
nsta
lli
ng e
l
ectr
i
ca
l
accessor
i
es
Y
our ve
hi
c
l
e
'
s e
l
ectr
i
ca
l
s
y
stem
i
s
d
es
i
gne
d
to operate w
i
t
h
stan
d
ar
d
or
op
tional e
q
ui
p
ment.
Before installing other electrical
e
quipment or accessories on you
r
vehicle
,
contact a CITROËN dealer.
CITROËN will not accept responsibility
f
or the cost incurred in repairing your
vehicle or for rectif
y
in
g
malfunctions
resultin
g
f
rom the installation o
f
accessor
i
es not su
ppli
e
d
an
d
not
recommended b
y
CITRO
Ë
N and
not
i
nsta
ll
e
d
i
n accor
d
ance w
i
t
h
i
ts
i
nstruct
i
ons,
i
n
p
art
i
cu
l
ar w
h
en t
h
e
combined consumption of all of the
additional equipment connected
e
xceeds
10
milliamperes.
The extraction pliers and the spare fuse
storage locations are fitted to the back of the
dashboard fuse box cover.
Fo
r
access
t
o
t
he
m:
)
unc
li
p t
h
e cover
by
pu
lli
n
g
on t
h
e s
id
e,
)
remove the cover completely,
)
remove t
h
e
pli
ers.
Access to the tools
Before changing a fuse, the cause of the failure
m
us
t
be
i
de
ntifi
ed
a
n
d
r
ec
tifi
ed
.
)
Identif
y
the fault
y
fuse b
y
checkin
g
the
co
n
d
iti
o
n
of
it
s
f
il
a
m
e
nt.
C
hanging a
f
use
Correct Incorrect
)
Use the special pliers to extract the fuse
f
rom its housin
g
.
)
Alwa
y
s replace the
f
ault
y
f
use with a
f
use
of
the same ratin
g
.
)
C
heck the corres
p
ondence between the
num
b
er etc
h
e
d
on t
h
e
b
ox, t
h
e rat
i
ng
etched on the fuse and the tables below.
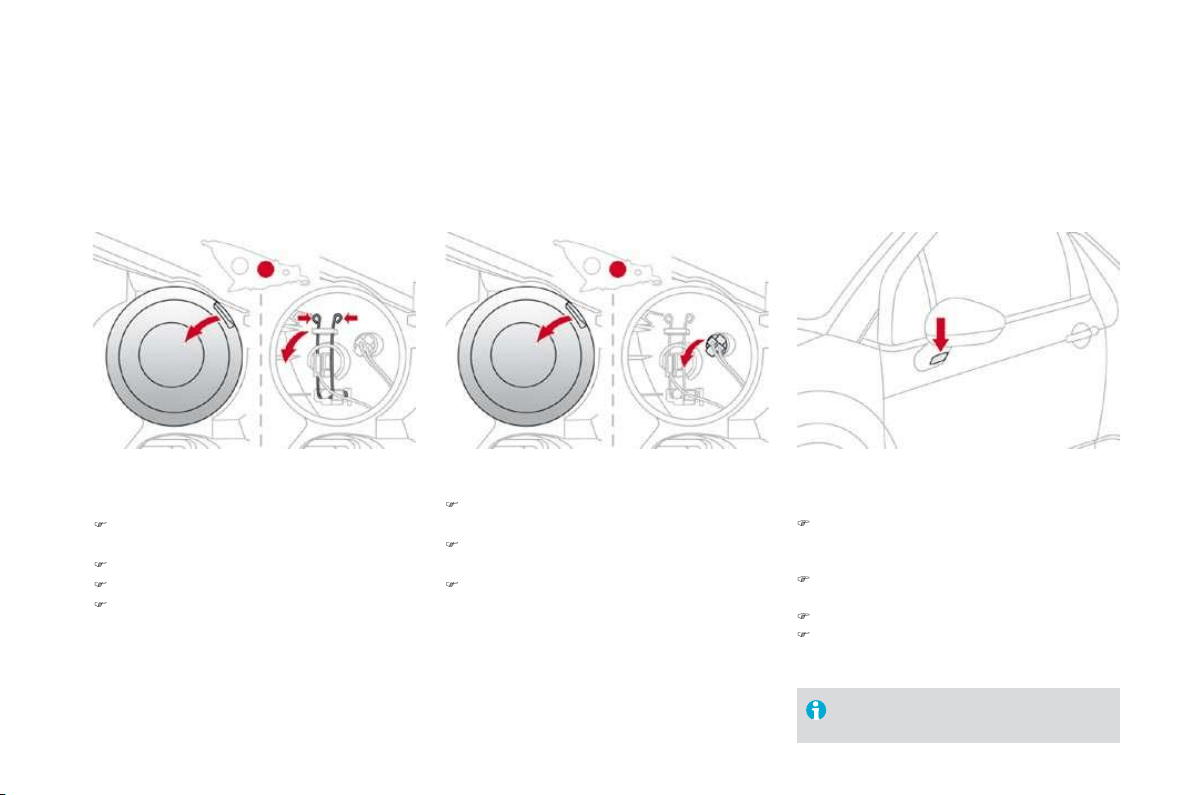
191
Practical information
Dashboard fuse box
The fuse box is placed in the lower section of
the dashboard (left-hand side).
Access to the fuses
)
Re
f
er to the para
g
raph "Access to the tools".
Fuse tables
Fuse
N
°
R
at
i
n
g
Fu
n
ctio
n
s
FH36
5
A
Trailer rela
y
unit.
FH
3
7
-
N
o
t
used
.
FH38
20
A
Hi-Fi amplifier.
F
H
39
20
A
H
eate
d
seats.
F
H4
0
30
A
T
ra
il
er re
l
a
y
un
i
t.
Rating Functions
F
1
15
A
R
ear w
ip
er.
F2
-
N
ot use
d
.
F3
5
A
Ai
r
b
a
g
s an
d
pretens
i
oners contro
l
un
i
t.
F4
1
0
A
Ai
r con
di
t
i
on
i
n
g
, c
l
utc
h
sw
i
tc
h
, e
l
ectroc
h
romat
i
c m
i
rror,
p
article
f
ilter pump
(
Diesel
)
, dia
g
nostic socket, air
f
low
sensor
(
Diesel
)
.
F
5
30
A
El
ectr
i
c w
i
n
d
ows pane
l
, passen
g
er
'
s e
l
ectr
i
c w
i
n
d
ow contro
l
,
f
ront electric window motor.
F6
30
A
D
r
i
v
e
r
's
elec
tr
ic
w
i
n
do
w m
o
t
o
r.
F7
5
A
Courtes
y
lamp,
g
love box li
g
htin
g
.

Fuse
N
°
R
at
i
n
g
Fu
n
ctio
n
s
F
8 20 A
Multi
f
unction screen, audio s
y
stem, navi
g
ation radio, alarm
c
ontro
l
un
i
t, a
l
arm s
i
ren.
F
9
30
A
12
V socket, portable navigation support supply.
F10
15
A
S
teering wheel controls.
F11
1
5
A
Ig
n
i
t
i
on,
di
a
g
nost
i
c soc
k
et, automat
i
c
g
ear
b
ox contro
l
un
i
t.
F12
15 A Rain/bri
g
htness sensor, trailer rela
y
unit.
F
13
5
A
Main stop switch, engine relay unit.
F14
1
5
A
Parking sensors control unit, airbag control unit, instrument
panel, di
g
ital air conditionin
g
, USB Box, Hi-Fi amplifier.
F
1
5
3
0
A
Lockin
g
.
F
16
-
N
o
t
used
.
F
1
7
40
A Rear screen and door mirrors demisting/defrosting.
SH
-
PAR
C
shunt.

193
Practical information
Engine compartment fuse
b
ox
The fuse box is placed in the engine
compartment near the battery (left-hand side).
Access
to
t
h
e
fuses
)
U
nc
lip
t
h
e cover.
) Change the fuse (see corresponding
paragraph).
)
When you have finished, close the cover
c
arefull
y
to ensure the sealin
g
of the fuse
bo
x.

F
use ta
bl
e
F
use N° Rating Functions
F
1
20
A
Engine control unit supply, cooling
f
an unit control relay,
multifunction engine control main relay, injection pump
(Diesel).
F2
1
5
A
H
orn.
F
3
1
0
A Front
/
rear wash-wi
p
e.
F4
20
A LED lamps.
F5
15
A
Diesel heater
(
Diesel
)
, particle
f
ilter additive pump
(
Diesel
)
,
air
f
low sensor
(
Diesel
)
, blow-by heater and electrovalves
(VTi).
F
6
1
0
A
A
B
S/
E
S
P control unit, secondar
y
stop switch.
F7
10 A Electric power steerin
g
, automatic
g
earbox.
F8
2
5 A Starter control.
F
9
10
A Switching and protection unit (Diesel).
F
1
0
30
A
Fuel heater (Diesel), blow-by heater (Diesel), fuel pump
(VTi), injectors and ignition coils (petrol).
F11
40
A H
ea
t
e
r
b
l
o
w
e
r.
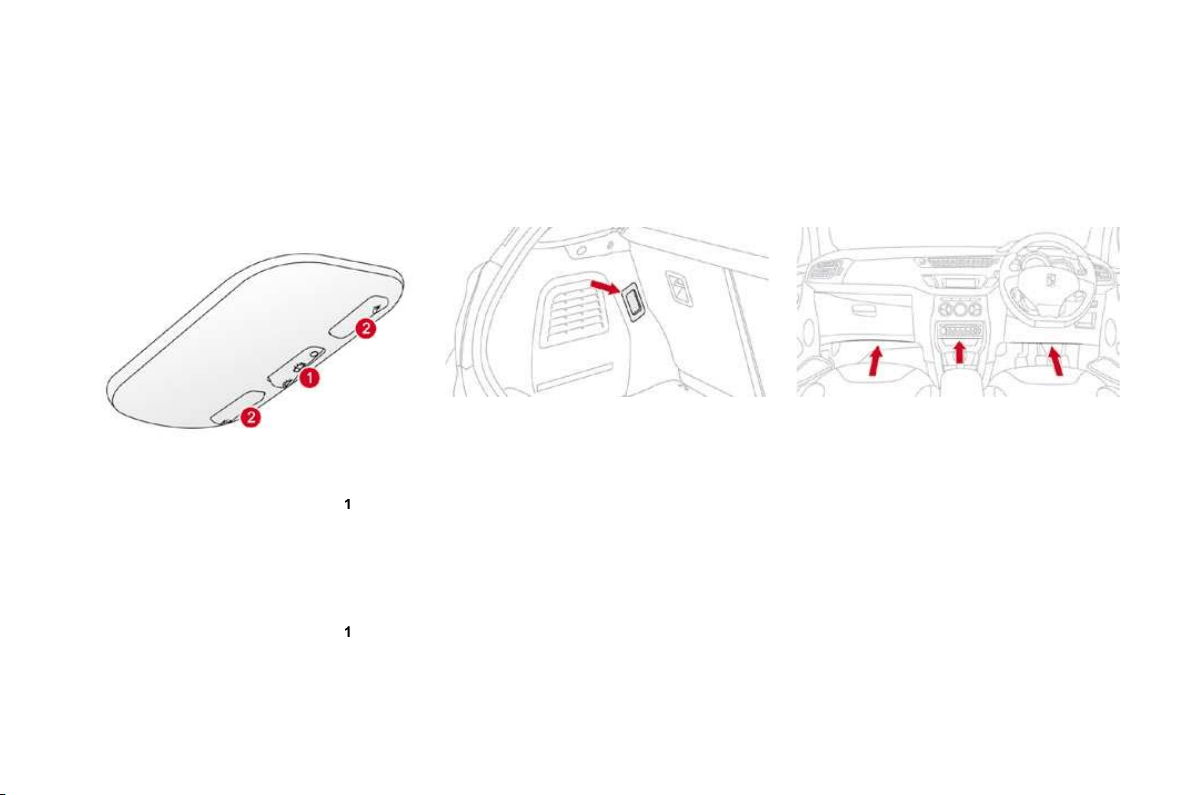
195
Practical information
F
use
N
°
R
at
i
n
g
Fu
n
ctio
n
s
F12
30
A
Windscreen wipers slow/fast speed.
F
1
3
4
0
A Built-in s
y
stems inter
f
ace suppl
y
(
i
g
nition positive
)
.
F14
30
A
Valvetronic suppl
y
(
VTi
)
.
F
1
5
10
A
Right-hand main beam headlamps.
F
16
10
A
Le
f
t-hand main beam headlam
p
s.
F17
15
A
Le
f
t-hand di
pp
ed beam headlam
p
s.
F1
8
15
A
Righ
t-
h
an
d
di
ppe
d
b
eam
h
ea
dl
amps.
F19
1
5
A
Oxygen sensors and electrovalves (VTi), electrovalves (Diesel), EGR electrovalve (Diesel).
F20
10
A
Pumps, electronic thermostat (VTi), timimg electrovalve (THP), water in fuel sensor (Diesel).
F21
5
A
Fan assembl
y
control suppl
y
, AB
S/
E
S
P, turbo pump
(
THP
)
.
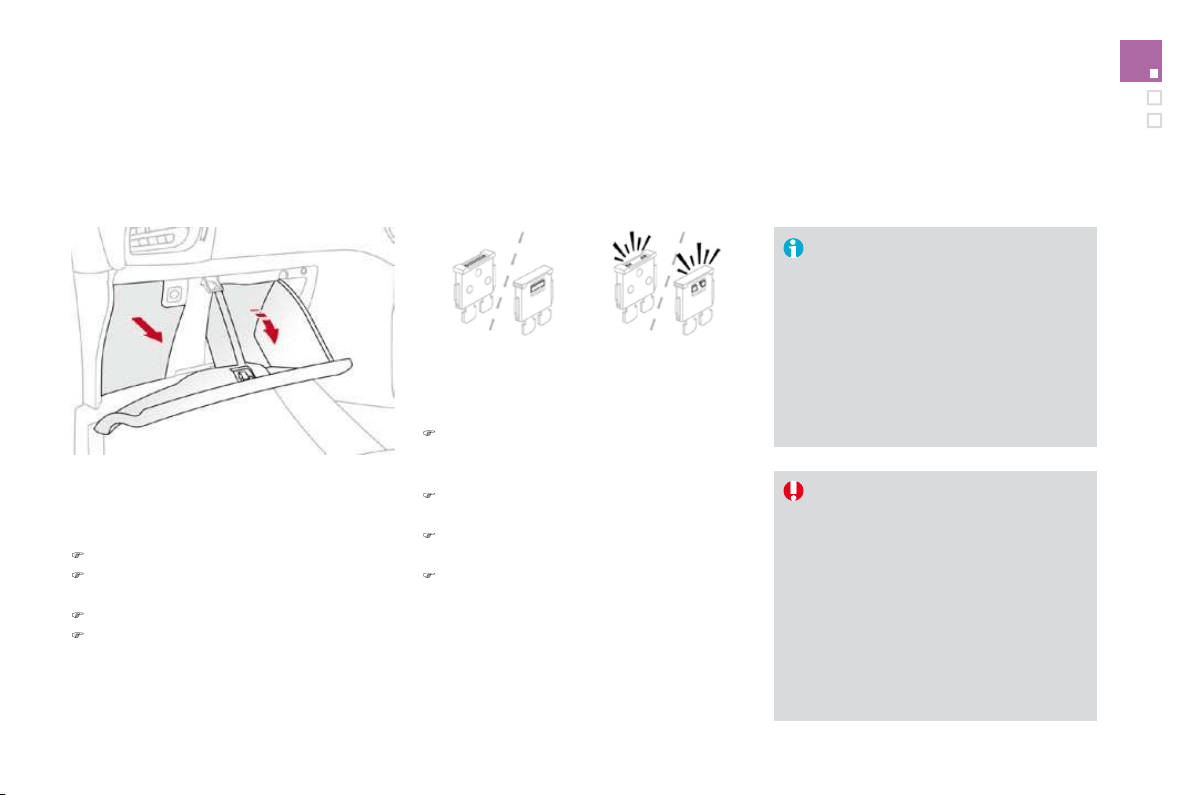
T
ab
l
e
o
f m
a
xi-f
uses
F
use
N
°
R
at
i
n
g
Fu
n
ctio
n
s
MF1*
60
A
F
an assem
bly
.
MF2*
30
A
A
B
S/
E
S
P
p
um
p
.
MF3 *
3
0
A
ABS/ESP electrovalves.
MF4 *
60
A
Built-in Systems Interface (BSI) supply.
MF
5
*
60
A
Built-in
S
ystems Inter
f
ace
(
B
S
I
)
supply.
M
F
6
*
20
A
A
dditional coolin
g
f
an unit
(
THP
)
.
MF7
*
-
Dashboard fusebox.
M
F8 *
-
Not used.
* The maxi-fuses provide additional protection for the electrical s
y
stems. All work on the maxi-fuses must be carried out b
y
a CITROËN dealer.
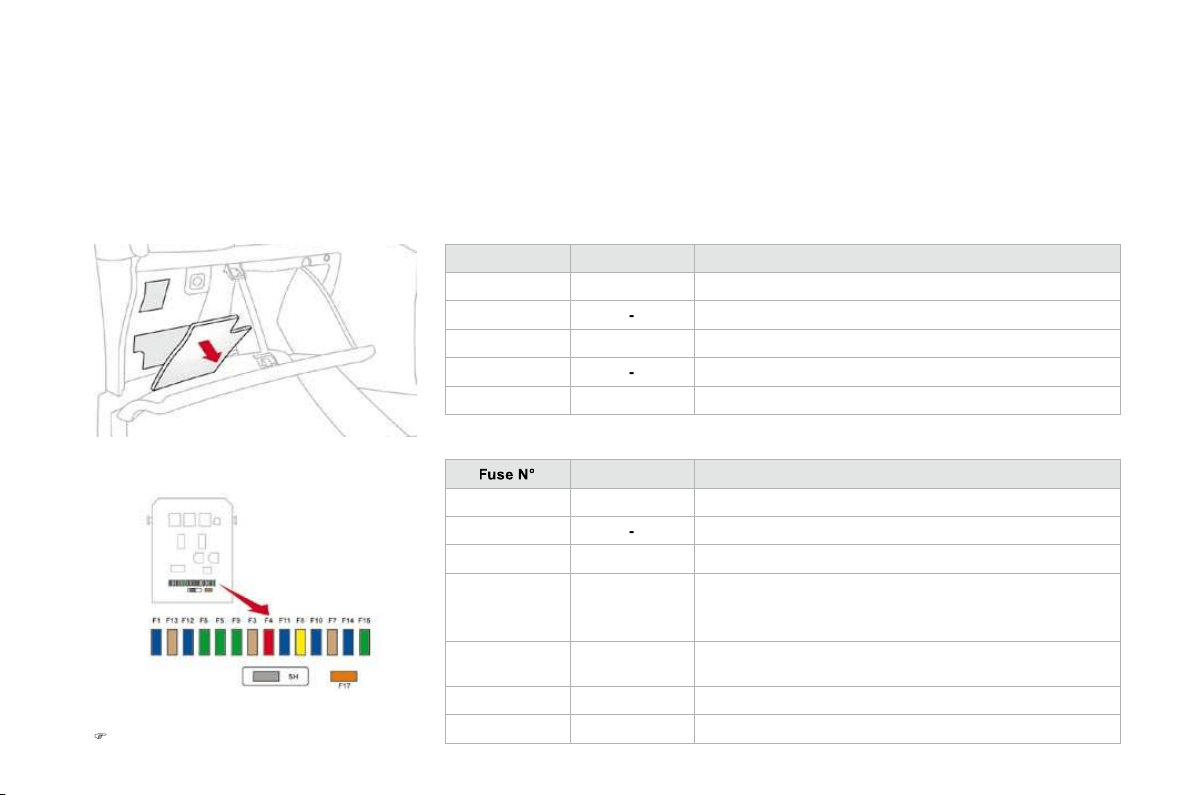
Practical information
Battery
Procedure for charging your battery when it is flat or for starting the engine using another battery.
The battery is located under the bonnet.
To gain access to it:
)
open the bonnet using the interior release
lever, then the exterior sa
f
et
y
catch,
)
secure the bonnet stay,
)
remove the plastic cover by pulling on its
grip for access to the two terminals,
)
unclip the
f
usebox to remove the battery, i
f
necessary.
Access to the battery
)
C
onnect the red cable to the
p
ositive
t
erminal (+) of the flat battery A
,
then to the
positive terminal (+) of the slave battery
B
.
S
tarting using another
b
atter
y
)
C
onnect one end o
f
the green or black
cable to the negative terminal (-) of the
s
lave battery
B
.
)
Connect the other end of the green or black
cable to the ne
g
ative terminal
(
-
)
of the flat
b
atter
y
A
.
)
S
tart the slave vehicle.
)
Operate the starter of the broken down
v
ehicle and let the engine run.
)
Wait until the engine returns to idle and
d
i
sco
nn
ec
t th
e
cab
l
es
.

Charging the battery using
a
batter
y
char
g
er
B
atteries contain harm
f
ul substances
s
uch as sulphuric acid and lead. They
must be disposed of in accordance
w
ith re
g
ulations and must not, in an
y
circumstances, be discarded with
household
w
as
t
e
.
Take used remote control batteries and
ve
hi
c
l
e
b
atter
i
es to a s
p
ec
i
a
l
co
ll
ect
i
on
point.
I
t
i
s a
d
v
i
sa
bl
e to
di
sconnect t
h
e
b
atter
y
if the vehicle is to be left unused for
more than one month.
D
o not
di
sconnect t
h
e term
i
na
l
s w
hil
e t
h
e en
gi
ne
i
s runn
i
n
g
.
Do not char
g
e the batteries without disconnectin
g
the terminals
f
irst.
)
Disconnect the batter
y
f
rom the vehicle.
)
Follow the instructions
f
or use provided b
y
t
he manu
f
acturer o
f
the char
g
er.
)
R
econnect start
i
ng w
i
t
h
t
h
e negat
i
ve
t
erminal
(
-
)
.
)
Check that the terminals and connectors
a
re clean. If they are covered with sulphate
(whitish or greenish deposit), remove them
a
n
d
c
l
ea
n th
e
m.
Be
f
ore disconnectin
g
t
h
e
b
atter
y
Wait 2 minutes a
f
ter switchin
g
o
ff
the
ig
nition be
f
ore disconnectin
g
the batter
y
.
C
lose the windows and the doors be
f
ore
di
sconnect
i
n
g
t
h
e
b
atter
y
.
Followin
g
reconnection o
f
th
e
b
atter
y
Followin
g
reconnection o
f
the batter
y
,
s
witch on the i
g
nition and wait 1 minute
be
f
ore startin
g
to permit initialisation o
f
the electronic s
y
stems. However, i
f
mino
r
problems persist
f
ollowing this operation,
contact a CITROËN dealer.
Referring to the corresponding section,
you should yourself reinitialise:
- the remote control ke
y
,
- the
G
P
S
satellite navi
g
ation s
y
stem.
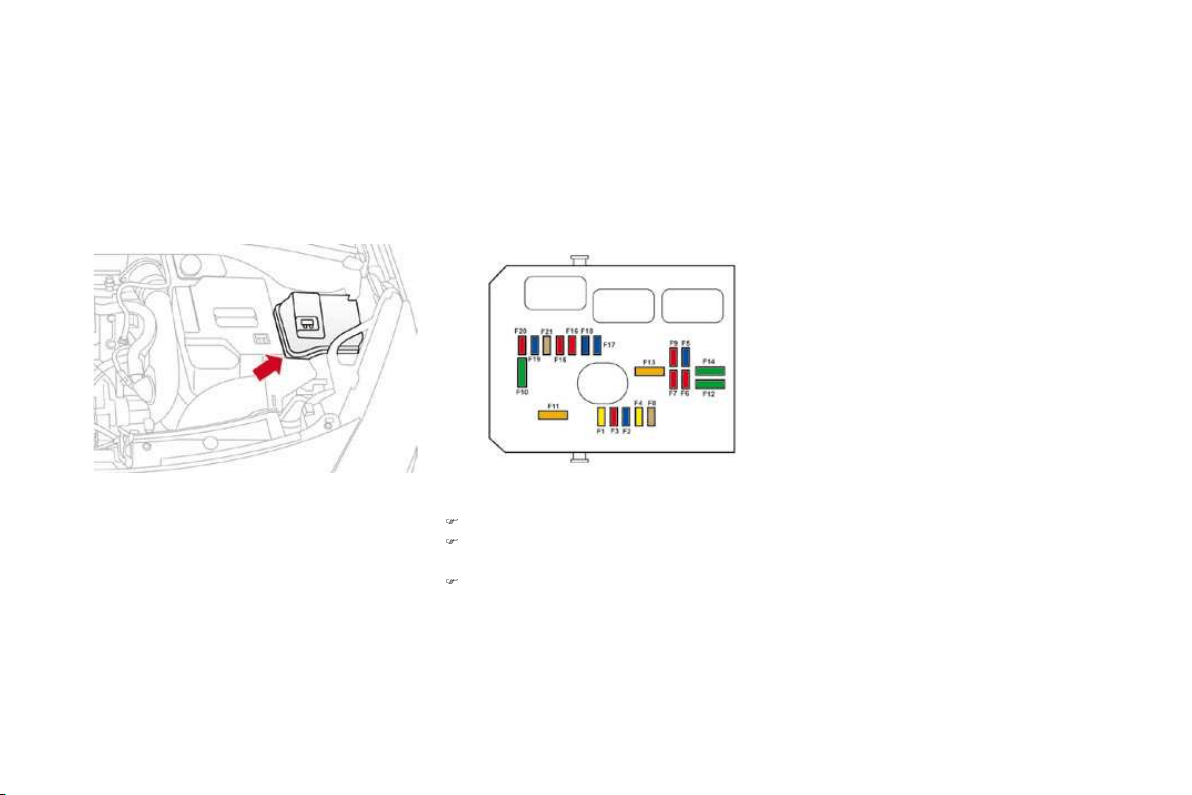
199
Practical information
Load reduction mode
System which manages the use of certain
functions accordin
g
to the level of char
g
e
remaining in the battery.
Wh
en t
h
e ve
hi
c
l
e
i
s
b
e
i
n
g
d
r
i
ven, t
h
e
l
oa
d
reduction function temporarily deactivates
certain functions, such as the air conditioning,
t
h
e
h
eate
d
rear screen...
The deactivated functions are reactivated
automatically as soon as conditions permit.
Energy economy mode
This period ma
y
be
g
reatl
y
reduced i
f
the batter
y
is not
f
ull
y
char
g
ed.
A
f
lat batter
y
prevents the en
g
ine
f
rom
startin
g
(
re
f
er to the correspondin
g
paragraph
)
.
I
f
the telephone is bein
g
used at
t
h
e same t
i
me on t
h
e
MyW
a
y
au
di
o
n
av
i
gat
i
on system,
i
t w
ill
b
e
i
nterrupte
d
af
ter 10 minutes.
System which manages the period of use o
f
ce
rt
a
in f
u
n
c
ti
o
n
s
t
o
co
n
se
rv
e
a
su
ffi
c
i
e
nt l
e
v
e
l
o
f
char
g
e in the batter
y
.
Af
ter the en
g
ine has stopped,
y
ou can still
u
se
f
unctions such as the audio e
q
ui
p
ment,
wi
n
d
screen w
ip
ers,
dipp
e
d
b
eam
h
ea
dl
am
p
s,
c
ourtesy lamps, etc.
f
or a maximum combined
p
eriod of thirty minutes.
Switchin
g
to econom
y
mode
Once this period has elapsed, a messa
g
e
a
ppears on the multi
f
unction screen indicatin
g
th
at t
h
e ve
hi
c
l
e
h
as sw
i
tc
h
e
d
to econom
y
mo
d
e
a
nd the active
f
unctions are put on standb
y
.
Exiting economy mode
These functions are reactivated automaticall
y
th
e
n
e
xt tim
e
th
e
v
e
hi
c
l
e
i
s
d
riv
e
n.
)
In
o
r
de
r t
o
r
esu
m
e
th
e
use
of
th
ese
f
unctions immediatel
y
, start the en
g
ine and
let it run
f
or a
f
ew minutes.
Th
e t
i
me ava
il
a
bl
e to you w
ill
t
h
en
b
e
d
ou
bl
e
the period for which the engine is left running.
H
owever, this period will always be between
f
ive and thirty minutes.

Changing a front or rear wiper blade
Procedure for replacing a worn wiper blade with a new one without the use of tools.
Be
f
ore removing a
f
ront
w
i
per
bl
a
d
e
)
Within one minute a
f
ter switchin
g
o
ff
the
ig
n
i
t
i
on, operate t
h
e w
i
per sta
lk
to pos
i
t
i
on
th
e w
ip
er
bl
a
d
es
i
n t
h
e vert
i
ca
l
p
os
i
t
i
on.
Thi
s
p
os
i
t
i
on must
b
e use
d
i
n or
d
er to avo
id
damaging the wiper blade and the bonnet.
R
emova
l
)
R
a
i
se t
h
e correspon
di
n
g
w
i
per arm.
)
U
nc
lip
t
h
e w
ip
er
bl
a
d
e an
d
remove
i
t.
Fitting
)
At the front, check the size of the wipe
r
b
l
ade
as
th
e
s
h
o
rt
e
r
b
l
ade
i
s
fitt
ed
t
o
th
e
passen
g
er side of the vehicle.
)
P
ut t
h
e correspon
di
n
g
new w
i
per
bl
a
d
e
i
n
pl
ace an
d
c
lip
i
t.
)
Fold down the wiper arm care
f
ull
y
.
After fittin
g
a front wipe
r
blade
)
S
witch on the ignition.
)
Operate the wiper stalk again to park the
wiper blades.

201
Practical information
Towing the vehicle
Procedure for having your vehicle towed or for towing another vehicle using a removable towing eye.
The towing eye is installed in the boot under
th
e
fl
oo
r.
To
g
ain access to it:
)
o
p
en t
h
e
b
oot,
)
raise the floor,
)
remove the polystyrene storage box,
)
remove the towing eye from the holder.
) On the front bumper, unclip the cover by
pressing at the bottom.
)
Screw the towing eye in fully.
)
Install the towin
g
bar.
)
Switch on the hazard warnin
g
lamps on the
to
w
ed
v
ehicle
.
)
Place the
g
ear lever in neutral
(
position
N
f
or an automatic
g
earbox
)
.
)
On the rear bumper, unclip the cover by
p
ressing at the bottom.
)
Screw the towin
g
e
y
e in full
y
.
)
Install the towin
g
bar.
)
S
witch on the hazard warnin
g
lamps on the
towe
d
ve
hi
c
l
e.
Towing your vehicle Towing another vehicle A
ccess
to
t
h
e
too
l
s
F
a
il
ure to o
b
serve t
hi
s s
p
ec
i
a
l
con
di
t
i
on
could result in damage to certain
b
raking components and the absence
of braking assistance the next time the
e
n
g
ine is started.
When towing with all four wheels on the
ground, always use a towing bar.
When towin
g
with onl
y
two wheels on
t
he
g
round, alwa
y
s use pro
f
essional
l
i
f
tin
g
equipment.
When towin
g
with the en
g
ine o
ff
, there
is no longer any assistance
f
or braking
o
r steering.

Towing a trailer, a caravan, etc.
Towbar suitable for the attachment of a
trailer or caravan with additional lighting and
signalling.
Your vehicle is primarily designed for
transporting people and luggage, but it may
also be used for towing a trailer.
We recommend the use o
f
genuine
CITROËN towbars and their harnesses
t
hat have been tested and approved
from the design stage of your vehicle,
a
nd that the fittin
g
of the towbar is
entrusted to a
C
ITR
OË
N dealer.
If the trailer is not fitted b
y
a CITRO
Ë
N
dealer, it is im
p
erative that it is
f
itted
u
s
i
ng t
h
e e
l
ectr
i
ca
l
pre-equ
i
pment
i
nstalled at the rear o
f
the vehicle, in
a
ccordance with the manufacturer's
i
n
s
tr
uc
ti
o
n
s
.
D
r
i
v
i
n
g
w
i
t
h
a tra
il
er su
bj
ects t
h
e tow
i
n
g
ve
hi
c
l
e
to more si
g
ni
f
icant stress and its driver must be
p
articularl
y
care
f
ul.

203
Practical information
Th
e rear par
ki
n
g
sensors w
ill
b
e
d
eactivated automaticall
y
i
f
a
g
enuine
C
ITR
OË
N towbar is used.
Drivin
g
advice
Di
st
ri
but
i
o
n
o
f l
oads
)
Dis
tr
ibu
t
e
t
he
load
i
n t
he
tr
aile
r
so
t
ha
t t
he
heaviest items are as close as possible to
t
h
e ax
l
e an
d
t
h
e nose we
igh
t approac
h
es t
h
e
maximum permitted without exceeding it.
Ai
r
d
ens
i
ty
d
ecreases w
i
t
h
a
l
t
i
tu
d
e, t
h
us
reducing engine performance. Above
1
000
metres, the maximum towing load
must be reduced by 10 % and so on for every
1 000 metres of altitude.
Refer to the "Technical Data" section for details
o
f
the wei
g
hts and towin
g
loads which appl
y
to
y
our ve
hi
c
l
e.
Side wind
)
Take into account the increased sensitivity
to s
id
e w
i
n
d
.
Coolin
g
T
ow
i
n
g
a tra
il
er on a s
l
ope
i
ncreases t
h
e
t
em
p
erature o
f
the coolant.
A
s the
f
an is electricall
y
controlled, its coolin
g
c
apac
i
t
y
i
s not
d
epen
d
ent on t
h
e en
gi
ne spee
d
.
)
T
o
l
ower t
h
e eng
i
ne spee
d
, re
d
uce your
speed.
The maximum towing load on a long slope
depends on the gradient and the ambient
t
empera
t
ure.
I
n a
ll
cases, pa
y
attent
i
on to t
h
e coo
l
ant
t
em
p
era
t
ure.
Braking
T
ow
i
n
g
a tra
il
er
i
ncreases t
h
e
b
ra
ki
n
g
di
stance.
Ty
res
)
C
heck the t
y
re pressures o
f
the towin
g
v
ehicle and o
f
the trailer, observin
g
the
recommen
d
e
d
p
ressures.
L
igh
t
i
n
g
)
Check the electrical li
g
htin
g
and si
g
nallin
g
o
n t
he
tr
aile
r.
)
If the warning lamp and the
STOP
warning lamp come on,
s
top the vehicle and switch of
f
the en
g
ine as soon as possible.
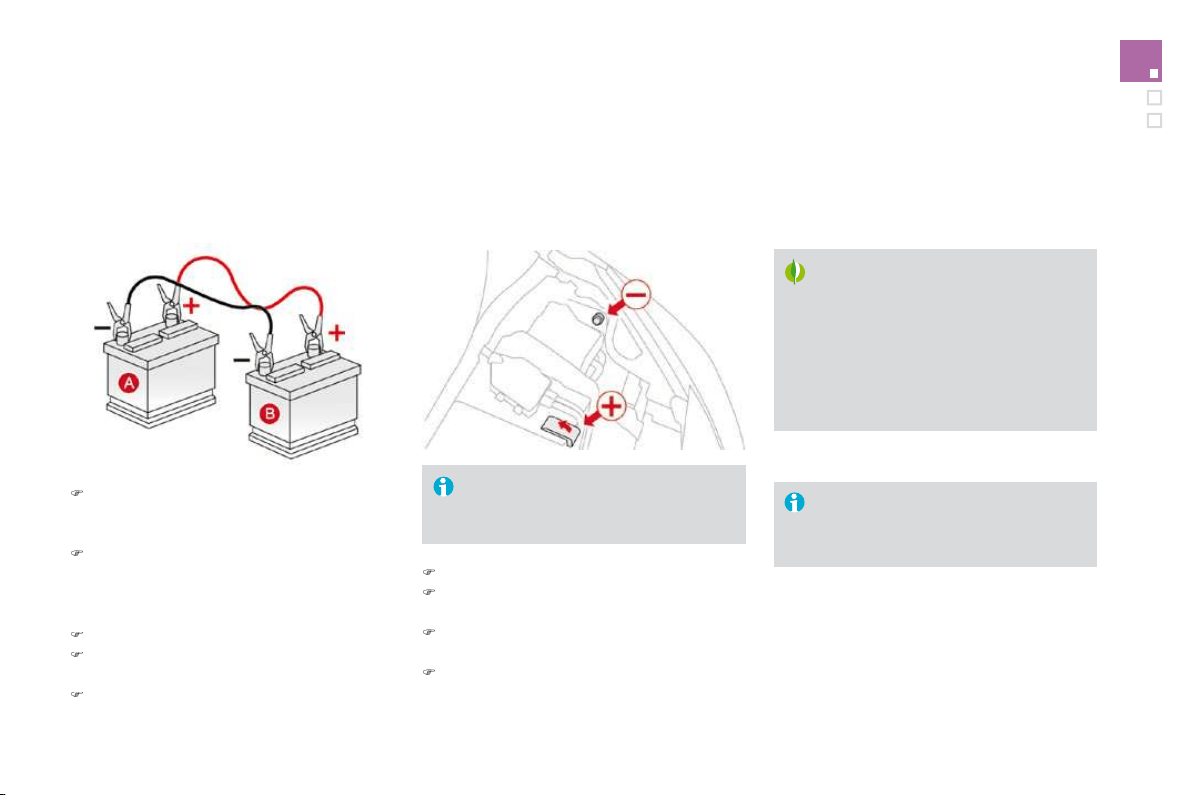
A wide range of accessories and genuine parts
i
s offered by the CITROËN dealer network.
These accessories and parts have been tested
and approved for reliability and safety.
Accessories
In
sta
ll
at
i
o
n
of
r
ad
i
o
co
mm
u
ni
cat
i
o
n
t
r
a
n
s
mi
tte
r
s
Before instaliin
g
on
y
our vehicle an
y
a
ft
e
r-m
a
rk
e
t r
ad
i
o
co
mm
u
ni
ca
ti
o
n
transm
i
tter w
i
t
h
externa
l
aer
i
a
l
,
w
e recommen
d
t
h
at
y
ou contact a
C
ITR
OË
N dealer.
The CITRO
Ë
N dealer network will give
you the speci
f
ication
f
or transmitters
w
hich can be fitted (frequency,
maximum power, aerial position,
specific installation requirements
)
, in
l
ine with the Vehicle Electroma
g
netic
C
ompatibilit
y
Directive
(
2004
/
104
/
E
C)
.
The
y
are all adapted to
y
our vehicle and
benefit from CITROËN's recommendation and
w
arrant
y
.
This product range is structured around 5 categories:
"P
r
otectio
n
"
: anti-the
f
t alarm, wheel anti
-
theft devices, stolen vehicle tracking system,
breathalyser, first aid kit, warning triangle, high
v
isibility safety jacket, snow chains, non-skid
covers, parkin
g
sensors, transluscent bumper
protection strips...
"Comfort and leisure": mats * , boot tray, boot
c
arpet, boot net, load fixing kit for boot carpet,
mudflaps, sun blinds, door deflectors, isotherm
module, fra
g
rance cartrid
g
es, transverse roof
b
ars, bic
y
cle carrier, ski carrier, roo
f
boxes,
t
owbars, wirin
g
harnesses, 230 V socket, coat
han
g
er
f
ixed to head restraint,
f
ront centre
armrest, c
hild
seats an
d
b
ooster cus
hi
ons,
moveable mirror...
"N
av
i
gat
i
on an
d
commun
i
cat
i
on
"
:
Bluetoot
h
®
hands-free kit, universal mobile
®
phone charger, audio equipment, portable
satellite navigation system, semi-integral
portable navi
g
ation s
y
stem carrier, speed
c
amera warnin
g
, DVD pla
y
er, auxiliar
y
cable
f
o
r
c
onnectin
g
a portable MP3 pla
y
er, U
S
B Box,
s
p
eakers, subwoo
f
er s
p
eakers...
*
To avoid an
y
risk o
f
j
ammin
g
o
f
the pedals:
- ensure t
h
at t
h
e mat
i
s
p
os
i
t
i
one
d
an
d
secure
d
correct
ly
,
- never
f
it one mat on to
p
o
f
another.

205
Practical information
"
Personalisation":
seat covers, leather
steering wheel, coloured and leather gear lever
k
no
b
s, co
l
oure
d
i
nter
i
or tr
i
m
ki
ts, a
l
um
i
n
i
um
f
ootrest, spoiler, allo
y
wheels, coloured wheel
tr
i
ms, co
l
oure
d
w
h
ee
l
centres, exter
i
or st
i
c
k
ers,
exterior chrome kit...
"Accessories":
windscreen wash fluid
,
i
nterior and exterior cleanin
g
and maintenance
p
ro
d
ucts,
b
o
dy
wor
k
touc
h
-up aeroso
l
an
d
pen...
Dependin
g
on the countr
y
in which the
v
ehicle is sold, it ma
y
be compulsor
y
to have a hi
g
h visibilit
y
sa
f
et
y
j
acket,
w
arn
i
n
g
tr
i
an
gl
e an
d
spare
b
u
lb
s
a
va
il
a
bl
e
i
n t
h
e ve
hi
c
l
e.
The fitting of electrical equipment
o
r
accesso
ri
es
whi
c
h
a
r
e
n
o
t
recommended b
y
CITROËN ma
y
result
in a
f
ailure o
f
y
our vehicle's electronic
s
y
stem an
d
excess
i
ve e
l
ectr
i
ca
l
c
onsum
p
t
i
on.
Please note this speci
f
ic warning. You
are advised to contact a CITRO
Ë
N
representative to be shown the range
o
f recommended equipment and
accesso
ri
es
.

MODELS:
ENGINES AND GEARBOXES
Model
codes
:
S
A...
8FR0 5F
S
0 5F
S
9 5FXH
PETR
O
L EN
G
INE
S
VTi
95
VTi 12
0
THP 1
50
Cubic capacit
y
(
cc
)
1
39
7
1
598
1
598
Bore x stroke (mm)
77
x
75
77 x
8
5.
8
77 x
8
5.
8
Max power: EU standard (kW)
7
0
88
11
5
110
*
Max power engine speed (rpm)
6
000
6
000
6
000
Max torque: EU standard (Nm)
136
160
2
4
0
Max torque engine speed (rpm)
4
000
4
2
5
0
1
4
00
Fuel
U
n
l
ea
d
e
d
U
n
l
ea
d
e
d
U
n
l
ea
d
e
d
C
atal
y
tic converte
r
yes
yes
yes
G
EARB
O
X
M
a
n
ua
l
(5-speed)
M
a
n
ua
l
(
5-speed
)
Au
t
o
(
4-speed
)
M
a
n
ua
l
(
6-speed
)
OIL CAPACITIES (in litres)
Engine (with filter replacement)
4.2
4.2
4.2
4.2
Gearbox - Final drive
2.
0
2.
0
-
2.
0
* Belgium only.

M
O
DEL
S
: EN
G
INE
S
AND
G
EARB
O
XE
S
Model codes:
SA...
8HZC
9
HP
0
9
HR
8
DIESEL ENGINES
HDi 70 PEF HDi 90 PEF HDi 110 PEF
Cubic capacity (cc)
1
398
1
5
60
1
5
60
Bore x stroke
(
mm
)
- x - 75 x 88.3 75 x 88.3
Max power: EU standard
(
kW
)
-
68
8
2
Max power en
g
ine speed
(
rpm
)
-
4
000
3
600
Max torque: EU standard (Nm)
-
230
2
7
0
Max torque engine speed
(
rpm
)
- 1 750 1 750
Fuel
Diesel
Di
ese
l
Di
ese
l
C
atal
y
tic converte
r
yes
yes
yes
Particle emissions filter (PEF)
yes
yes yes
G
EARB
O
X
Manual
(
5-speed)
M
anua
l
(
5-speed)
M
anua
l
(6-speed)
OIL CAPACITIES (in litres)
Engine (with filter replacement)
3
.7
5
3
.7
5
3
.7
5
Gearbox - Final drive
2
.
0
1
.
9
2
.
2

209
Technical data
WEI
G
HT
S
AND T
O
WED L
O
AD
S
(
in k
g)
Petrol engines
V
Ti
9
5 VTi
120
THP
1
5
0
Gearboxes Manual Manual Auto Manual
Model codes:
SA...
8
FR
0
5
F
S0
5
F
S9
5FXH
-
U
n
l
a
d
en we
igh
t 1
0
7
5
1
0
7
5
1 14
5
1 1
65
- Kerb weight
1
150
1
150
1
220
1
2
4
0
- Gross vehicle weight (GVW)
1
55
2
1
554
1
5
8
7
1
5
9
7
- Gross train weight (GTW)
o
n a 12 % gradient
2 4
5
2 2 4
5
42 4
8
7 2 4
9
7
- Braked trailer (within the GTW limit)
o
n a 12
%
gradient
900
900
900
900
- Braked trailer *
(
with load transfer within the
G
TW limit
)
1
1
5
0
1
1
5
0
1
1
5
0
1
1
5
0
- Unbraked trailer
5
7
0
5
7
0
5
7
0
5
7
0
- Recommended nose weight
4
6
4
6
4
6
4
6
*
The weight o
f
the braked trailer can be increased, within the
G
TW limit, i
f
the
G
VW o
f
the towing vehicle is reduced by an equal amount. Warning:
towing using a lightly loaded towing vehicle may have an adverse effect on its road holding.
The
G
TW and towed load values indicated are valid up to a maximum altitude o
f
1 000 metres; the towed load mentioned must be reduced b
y
10
%
f
or
e
ach additional 1
000
metres o
f
altitude.
The speed o
f
a towin
g
vehicle must not exceed 60 mph
(
100 km
/
h
)
(
compl
y
with the le
g
islation in
f
orce in
y
our countr
y)
.
High ambient temperatures may result in a reduction in the per
f
ormance o
f
the vehicle to protect the engine; i
f
the ambient temperature is above 37
°C
,
li
m
i
t t
h
e towe
d
l
oa
d
.

211
Technical data
W
EI
G
HT
S
AND T
O
WED L
O
AD
S
(
in k
g)
Diesel engines
HDi 70
PEF
H
Di
90
PEF
H
Di
110
PEF
Gearbox
Manual
Manual
M
anual
Model codes:
S
A..
.
8
HZC
9
HP
0
9
HR
8
-
U
n
l
a
d
en we
igh
t
-
1
080
1
090
- Kerb weight
-
1
155
1
165
- Gross vehicle weight (GVW) -
1
5
8
4
1
612
- Gross train weight (GTW)
o
n a 12 % gradient
-
2 4
8
4 2
5
12
- Braked trailer
(
within
G
TW limit
)
o
n 12
%
gradient
-
900
900
- Braked trailer *
(
with load transfer with the
G
TW limit
)
-
1
1
5
0
1
1
5
0
- Unbraked trailer
-
5
7
0
5
7
0
- Recommended nose weight
-
4
6
4
6
The
G
TW and towed load values indicated are valid up to a maximum altitude o
f
1 000 metres; the towed load mentioned must be reduced b
y
10
%
f
or
e
ach additional 1 000 metres o
f
altitude.
The speed o
f
a towing vehicle must not exceed 60 mph
(
100 km
/
h
)
(
comply with the legislation in
f
orce in your country
)
.
High ambient temperatures may result in a reduction in the performance of the vehicle to protect the engine; if the ambient temperature is above 37 °C,
limit th
e
t
o
w
ed
l
oad
.
*
The wei
g
ht o
f
the braked trailer can be increased, within the
G
TW limit, i
f
the
G
VW o
f
the towin
g
vehicle is reduced b
y
an equal amount. Warnin
g
:
towin
g
usin
g
a li
g
htl
y
loaded towin
g
vehicle ma
y
have an adverse e
ff
ect on its road holdin
g
.
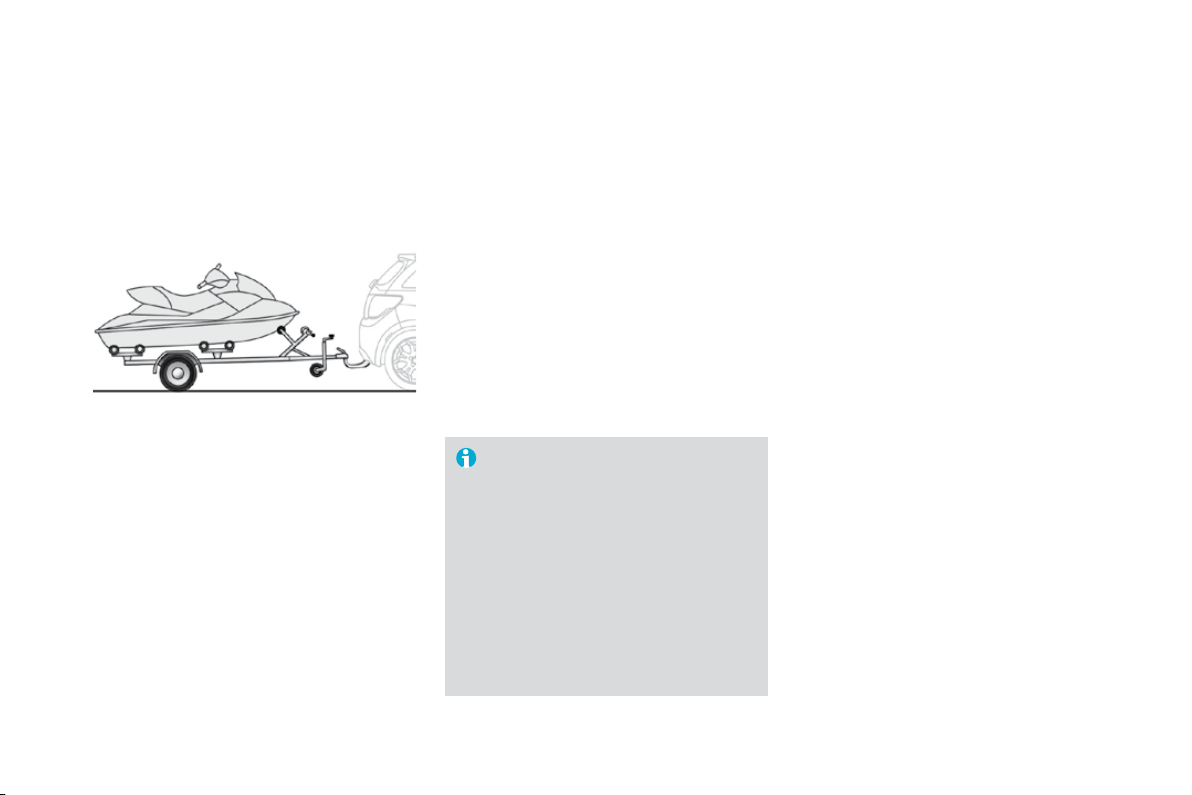
Dimensions (in mm)
213
Technical data
,GHQWL¿FDWLRQPDUNLQJV
Various visible markings for the identification of your vehicle.
A. Vehicle identification number (VIN) under
the
bo
nn
et
.
This number is engraved on the bodywork near
the damper mounting.
B. Vehicle identification number on the
d
ashboard.
This number is indicated on a self-adhesive
label which is visible throu
g
h the windscreen.
D. Tyre/paint label.
This label is affixed to the driver's centre pillar.
Wheels which are
f
itted with 2
05/
4
5
R17
t
yres cannot be
f
itted with snow chains.
F
or
f
urther in
f
ormation, contact a
CITROËN dealer.
If the inflation pressures are too low,
t
his increases fuel consumption.
The inflation pressures must be
c
hecked when the tyres are cold, at
leas
t
o
n
ce
a
m
o
nth.
C
. M
a
n
ufactu
r
e
r'
s
l
abe
l.
The VIN is indicated on a sel
f
-destro
y
in
g
label
aff
ixed to the driver's centre
p
illar.
It bears the following information:
- the t
y
re pressures, for unladen and laden
conditions
,
- t
h
e w
h
ee
l
r
i
m an
d
t
y
re s
i
zes,
- the brands o
f
t
y
re recommended b
y
the
m
anu
f
acturer,
- the spare tyre in
f
lation pressure,
- the paint colour code.
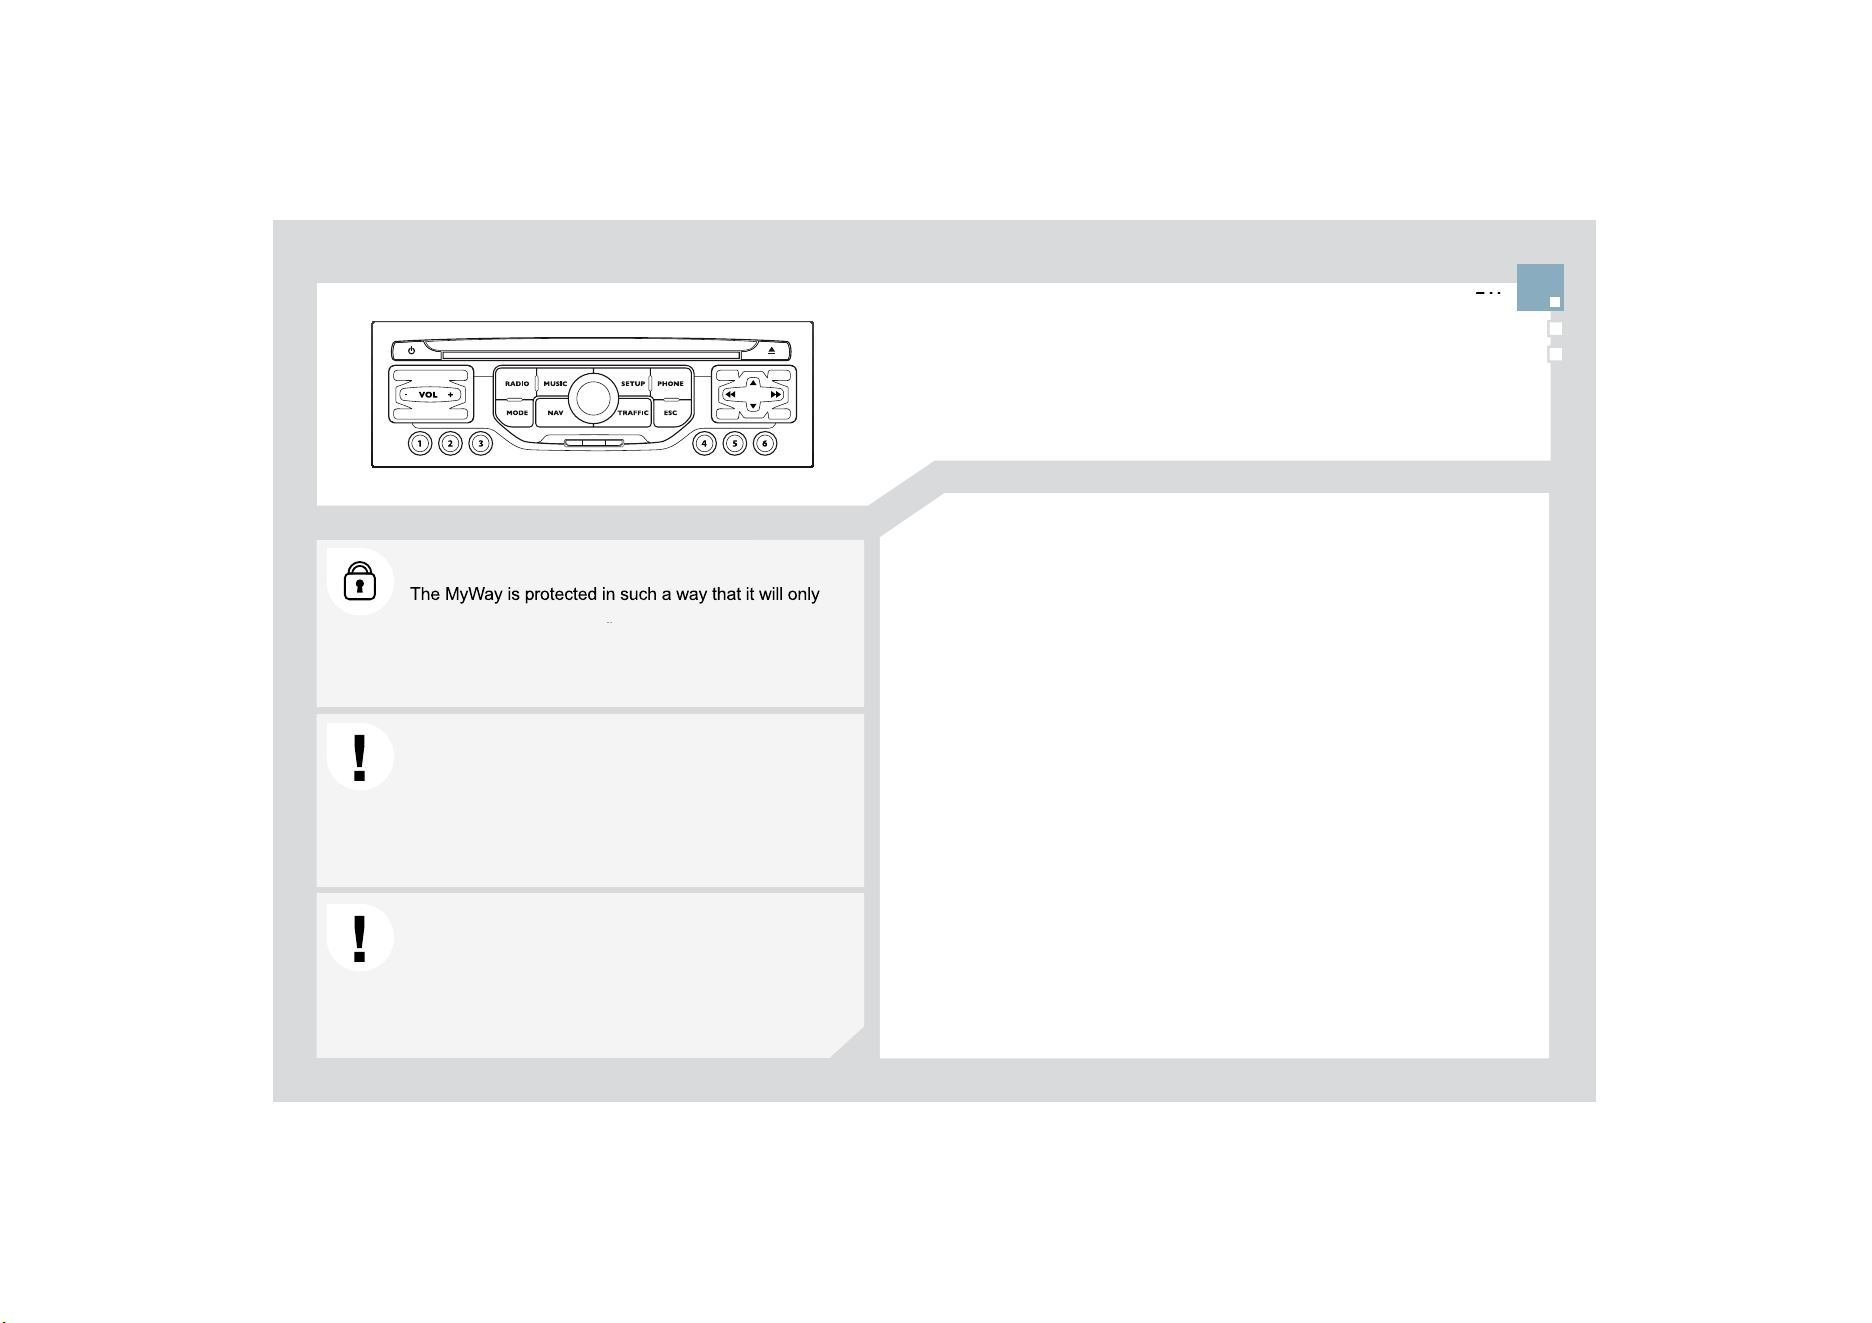
217
o
perate in
y
our vehicle. I
f
it is to be installed in another
YHKLFOHFRQWDFWD&,752É1GHDOHUIRUFRQ¿JXUDWLRQRI
y
t
he s
y
stem.
Certain functions described in this handbook will become
D
YDLODEOHGXULQ
J
WKHFRXUVHRIWKH
\
HDU
MyWay
CO
NTENT
S
Ɣ
)LUVWVWHSV S
Ɣ
*
HQHUDORSHUDWLRQ S
Ɣ1DYL
J
DWLRQ
*
XLGDQFH S
Ɣ7UD
I¿
FLQ
I
RUPDWLRQ S
Ɣ
5DGLR S
Ɣ
0XVLFPHGLDSOD
\
HUV S
Ɣ
%OXHWRRWKWHOHSKRQH S
Ɣ
&
RQ
¿
J
XUDWLRQ S
Ɣ
6
WHHULQ
J
PRXQWHGFRQWUROVS
Ɣ
6
FUHHQPHQXPDS S
Ɣ)UHTXHQWO
\
DVNHGTXHVWLRQV S
For sa
f
et
y
reasons, it is imperative that the driver carries
R
XWRSHUDW
L
RQVZ
KL
F
K
UHTX
L
UHSUR
O
RQJH
G
DWWHQW
L
RQZ
KLO
H
t
he vehicle is stationar
y
.
:KHQWKHHQJLQHLVVZLWFKHGR
II
DQGWRSUHYHQW
G
LVFKDU
J
LQ
J
RIWKHEDWWHU
\
WKH0
\
:D
\
VZLWFKHVRI
I
I
ROORZLQJWKHDFWLYDWLRQR
I
WKH(QHUJ\(FRQRP\PRGH
08/7,0(',$$8',2(
4
8,30(17%/8(7227+7(/(3+21(
*
3
6
(
8
5
2
3(%<
6
'&$5'

1
2
11
7
12
(QJLQHQRWUXQQLQJ
- Short press: on/off.
/RQJSUHVV&'SDXVHPXWHIRUWKHUDGLR
(QJLQHUXQQLQJ
6KRUWSUHVV&'SDXVHPXWHIRUWKHUDGLR
/RQ
J
SUHVVUHLQLWLDOLVDWLRQR
I
WKHV
\
VWHP
9ROXPHDGMXVWPHQWHDFKVRXUFHLVLQGHSHQGHQWLQFOXGLQJ
DOVRQDYL
J
DWLRQPHVVD
J
HVDQGDOHUWV
$FFHVVWRWKH5DGLR0HQX'LVSOD\WKHOLVWRIVWDWLRQV
$FFHVVWRWKH0XVLF0HQX'LVSOD\WKHWUDFNV
$FFHVVWRWKH3KRQH0HQX'LVSOD\WKHFDOOOLVW
$FFHVVWRWKH0
2
'(PHQX
Selection of the successive display of:
5DGLR0DS1$9
LIQDYL
J
DWLRQLVLQSUR
J
UHVV
7HOHSKRQH
LID
FRQYHUVDWLRQLVLQSUR
J
UHVV
7ULSFRPSXWHU
/RQJSUHVVGLVSOD\RIDEODFNVFUHHQ'$5.
$
FFHVVWRW
K
H
1
DY
LJ
DW
L
RQ
0
HQX
'L
VS
O
D
\
W
K
H
O
DVW
G
HVW
L
QDW
L
RQV
$FFHVVWRWKH7UDI¿F0HQX'LVSOD
\
WKHFXUUHQWWUDI¿FDOHUWV
(6&DEDQGRQWKHRSHUDWLRQLQSURJUHVV
&
'H
M
HFW
Selection of the
p
revious/next radio station from the list.
S
election o
f
the previous
/
next MP3 director
y
.
6HOHFWLRQRIWKHSUHYLRXVQH[WSDJHRIDOLVW
Selection of the
p
revious/next radio station.
6HOHFWLRQRIWKH
S
UHYLRXVQH[W&'RU03WUDFN
S
election o
f
the previous
/
next line o
f
a list.
Buttons 1 to
6
:
S
election o
f
the stored radio station.
/RQJSUHVVVWRUHWKHFXUUHQWUDGLRVWDWLRQ
6
'FDUGUHDGHU
QDYL
J
DWLRQ
6
'FDUGRQO
\
'LDOIRUVHOHFWLRQRIWKHVFUHHQGLVSOD
\
DQGDFFRUGLQ
J
WRWKH
co
nt
e
xt
of
th
e
m
e
n
u
.
6KRUW
S
UHVVFRQWH[WXDOPHQXRUFRQ¿UPDWLRQ
/RQ
J
SUHVVSUHVVFRQWH[WXDOPHQXVSHFL¿FWRWKHOLVW
di
sp
l
a
y
e
d
.
),5
6
7
6
7(3
6
0
\
:D
\
&21752/3$1(/
/RQJSUHVVDFFHVVWRWKHDXGLRVHWWLQJVIURQWUHDUDQGOHIW
U
L
J
KWEDODQFHEDVV
WUHEOHHTXDOL]HUORXGQHVVDXWRPDWLF
Y
R
O
XPHD
GM
XVWPHQW
L
Q
L
W
L
D
OL
VHW
K
HVHWW
L
QJV
$FFHVVWRWKH
6
(7
8
3PHQX
/RQJSUHVVDFFHVVWRWKH
*
3
6
FRYHUDJHDQGWKH
demonstration mode.

*
(1(5$/
2
3(5$7,
2
1
)RUDGHWDLOHGJOREDOYLHZRIWKHPHQXVDYDLODEOH
r
e
f
er to section 1
0
.
3
UHVVWKH0
2
'(EXWWRQVHYHUDOWLPHVLQVXFFHVVLRQ
I
RUDFFHVVWRWKH
I
ROORZLQJPHQXV
)RUFOHDQLQJWKHVFUHHQWKHXVHRIDVRIWQRQDEUDVLYHFORWK
VSHFWDFOHVFORWK
LVUHFRPPHQGHGZLWKQRDGGLWLRQDOSURGXFW
5$',2086,&0(',$3/$<(56
7(/(3+
2
1(
,IDFRQYHUVDWLRQLVLQSUR
J
UHVV
)8//6&5((10$3
1$9,*$7,21
,
I
J
XLGDQFHLVLQSUR
J
UHVV
SETUP
:
V\
VWHPODQ
J
XD
J
HGDWHDQGWLPHGLVSOD
\
YHKLFOHVHWWLQJV
XQLWDQGV\VWHPVHWWLQJV'HPR
m
ode"
.
75$)),
&
70
&
LQ
I
RUPDWLRQDQGPHVVDJHV
'HSHQGLQJRQPRGHO
1
2
3
3
2
1
1
1
3
1
1
1
1
1
1
1
1
1
1
2
2
2
2
1
1
2
1
2
2
2
2
2
2
2
1
1
1
1
1
1
1
*(1(5$/0(18
$SUHVVRQWKH2.GLDOJLYHVDFFHVVWR
VKRUWFXWPHQXVDFFRUGLQJWRWKHGLVSOD\
on the screen.
0
86
,
&
0(',$3/$<(5
6
1$9,*$7,21,)*8,'$1&(,6,1352*5(66
$%257*8,'$1&(
5(3($7$'9,&(
%/2&.52$'
5287(,1)2
6
+
2
:'(
6
7,1$7,
2
1
75,3,1)
2
5
RXWHW
\
SH
$
YR
LG
6DWH
OOL
WHV
=2206&52//
VOICE ADVICE
5
28
7(
2
37,
2
1
6
5$',2
,1)00
2
'(
7
5$)),&,1)2
7$
5'
6
5
$',
2
7(;7
5(
*
,
2
1$/35
2*
AM
IN AM M
O
DE
TA
5()5(
6
+$0/,
6
7
)0
)
8
//
6
&5((10$3
'
,63/$<$&&25',1*727+(&217(;7
75$)),
&
,1)
2
7$
3/$<
2
37,
2
1
6
1250$/25'(5
5$1'2075$&.
5(3($7)
2
/'(5
SC
AN
S
ELE
C
T MU
S
I
C
7(/(3+21(
END CALL
+
2
/'&$//
DIA
L
'70)7
2
1(
6
35,9$7(02'(
0,&522))
$%
2
57
*8
,'$1
&
(5(
68
0(
*8
,'$1
&
(
S
ET DE
S
TINATI
O
N
3
2
,
6
1($5%<
3
26
,7,
2
1,1)
2
0$3
6
(77,1
*6
=
22
0
6&
5
2
//

1
2
221
1$9,
*
$7,
2
1
*8
,'$1&(
6
(/(&7,1
*
$'(
6
7,1$7,
2
1
3
UHVVW
K
H
1$9
E
XWWRQDJD
L
QRUVH
O
HFW
WKH1DYLJDWLRQ0HQXIXQFWLRQDQG
SUHVVWKHGLDOWRFRQ
¿
UP
6
HOHFWWKH'HVWLQDWLRQLQSXW
I
XQFWLRQ
D
QG
S
UHVVWKHGLDOWRFRQ¿UP
Press the NAV button.
Select the letters of the town one b
y
RQHFRQ
¿
UPLQ
J
HDFKWLPHE
\
SUHVVLQ
J
t
he
dial
.
O
nce the country has been selected,
t
u
rn t
he
dial
a
n
d
selec
t t
he
t
o
wn
I
XQFWLRQ3UHVVWKHGLDOWRFRQ
¿
UP
1$9,
*
$7,
2
10(18
DESTINATION INPUT
,QVHUWWKH6'FDUGLQWKHIURQWSDQHOUHDGHUDQGOHDYHLWWKHUHWRXVHWKH1DYLJDWLRQIXQFWLRQV
7KHQDYL
J
DWLRQ
6
'FDUGGDWDPXVWQRWEHPRGL
¿
HG
Ma
p
data u
p
dates are available from CITROËN dealers.
$
SUHVHWOLVW
E
\
HQWHULQ
J
WKH¿UVWIHZOHWWHUV
RIWKHWR
Z
Z
QVLQWKH
c
ountry selected can be accessed via the LI
S
T button on the virtual
k
e
y
pa
d
.
S
elect the "Address input"
f
unction
D
QG
S
UHVVWKHGLDOWRFRQ¿UP
$''5(
66
,1387
7KHOLVWR
I
WKHODVWGHVWLQDWLRQVDSSHDUVXQGHUWKH
1
1DYLJDWLRQ
M
e
n
u
f
u
n
c
ti
o
n.
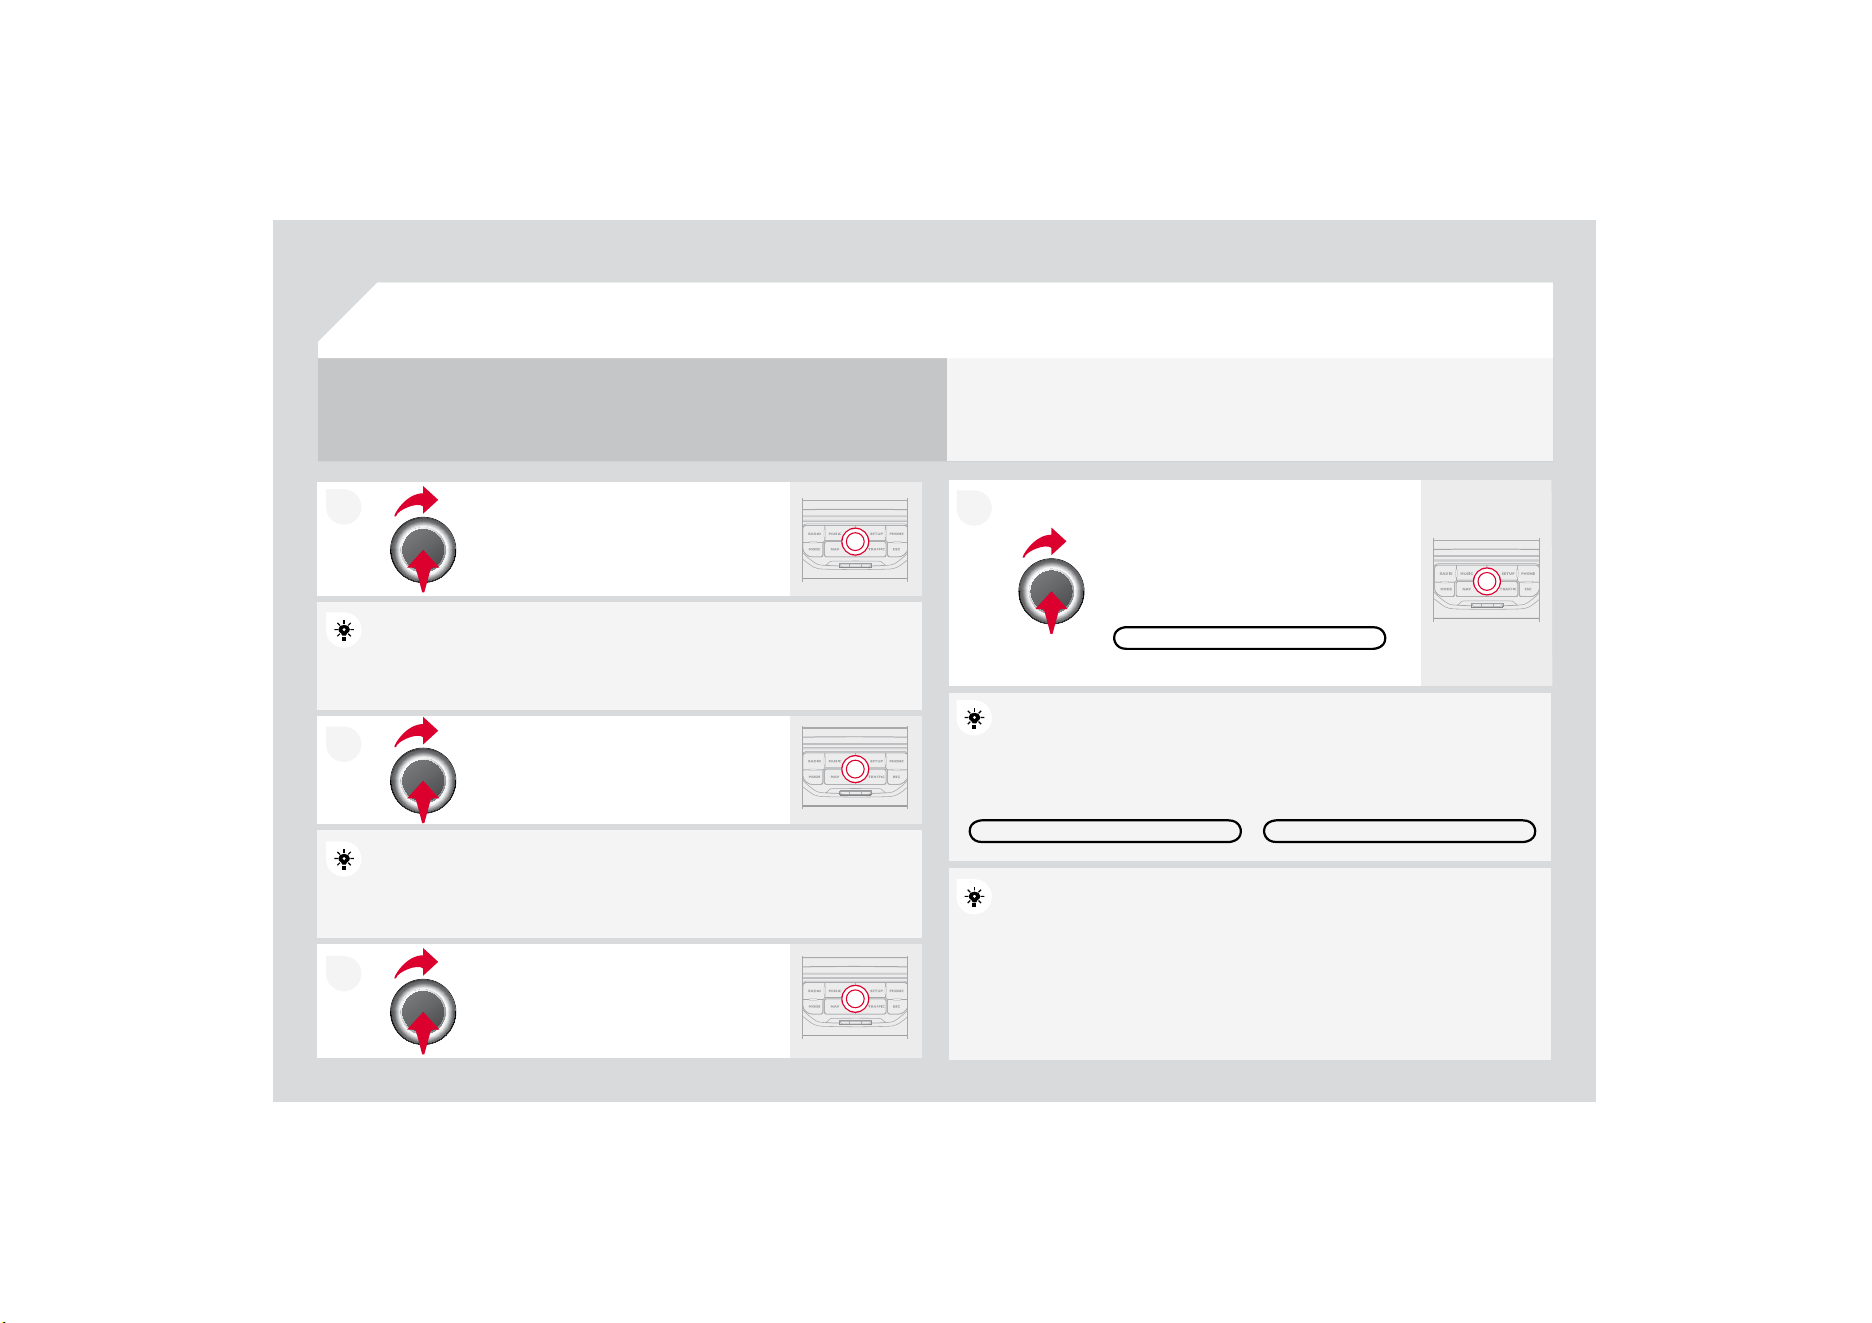
7
To clear a destination; from ste
p
s 1 to 3, select "Choose from last destinations".
$
ORQJSUHVVRQRQHR
I
WKHGHVWLQDWLRQVGLVSOD\VDOLVWR
I
DFWLRQV
I
URPZKLFK\RXFDQVHOHFW
'HOHWHHQWU
\
'HOH
W
H
OLV
W
Repeat steps 5 to 7 for the "Street"
a
n
d
"H
ouse
n
u
m
be
r" f
u
n
c
ti
o
n
s
.
7XUQWKHGLDODQGVHOHFW
2
.
3UHVVWKHGLDOWRFRQ¿UP
Select the "Save to address book" function to record t
t
he address
HQWHUHGLQDGLUHFWRU
\
¿OH3UHVVWKHGLDOWRFRQ¿UPWK
H
H
VHOHFWLRQ
0\:D\DOORZVXSWRFRQWDFW¿OHVWREHUHFRUGHG
G
To speed up the process, the post code can be entere
ed directly after
V
HOHFWLQJWKH3RVWDOFRGH
I
XQFWLRQ
8VHWKHYLUWXDONH\SDGWRHQWHUWKHOHWWHUVDQGGLJLWV
7KHQVHOHFW
6
WDUWURXWHJXLGDQFH
DQGWKH
S
UHVVWKHGLDOWRFRQ¿UP
'
XU
L
QJJX
LG
DQFHSUHVV
L
QJW
K
HHQ
G
RIWKHOLJKWLQJVWDONUHSHDWVWKHODVW
JXLGDQFHLQVWUXFWLRQ
<RXFDQ]RRPLQ
]RRPRXWRQWKHPDSXVLQJWKHGLDO
I
t
i
s
p
oss
ibl
e to scro
ll
t
h
e ma
p
or se
l
ect
i
ts or
i
entat
i
on
v
vi
a t
h
e s
h
ort-
F
XWPHQXR
I
WKH)
8
//
6&
5((10$33UHVVWKHGLDOW
K
K
HQVHOHFW
0
DSVHWW
L
QJV
Select the route type:
)DVWURXWH6KRUWURXWHRU2
S
WLPL]HGURXWHDQG
S
U
H
H
VVWKHGLDOWR
F
RQ
¿
UP
It is also
p
ossible to select a destination via "Choose f
r
r
om address
book" or "
C
hoose
f
rom last destinations".
&+226()520/$67'(67,1$7,216&+226()520$''5(66%22.
6
7$575
28
7(
*8
,'$1
&
(
1$9,
*
$7,
2
1
*8
,'$1&(
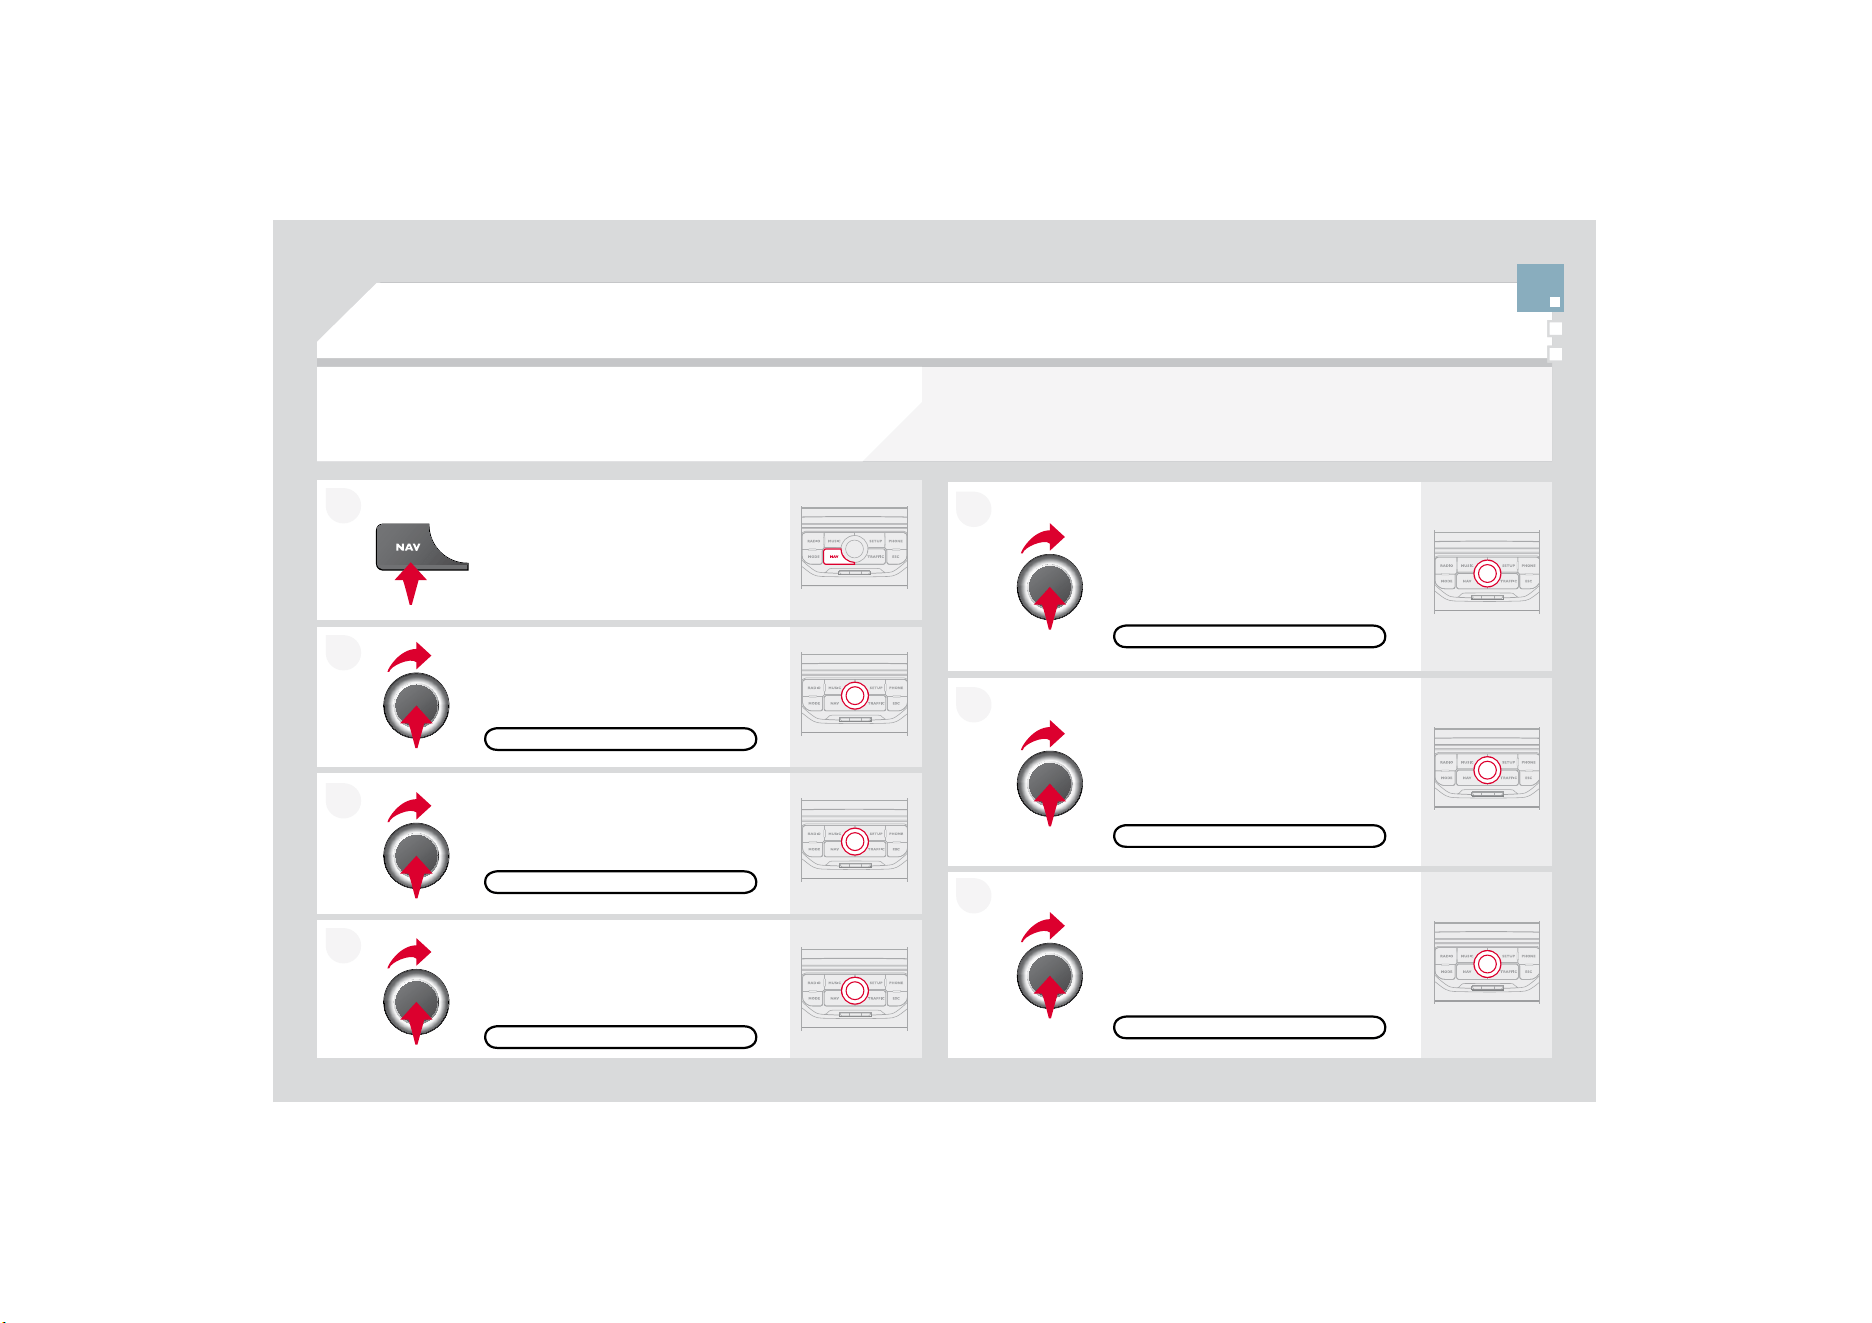
2
1
7
1$9,
*
$7,
2
1
*8
,'$1&(
5
28
7(
2
37,
2
1
6
S
elect the "Route dynamics"
f
unction.
7KLVIXQFWLRQ
J
LYHVDFFHVVWRWKH
7UD
I¿
FLQGHSHQGHQWRU
6
HPL
dy
nam
i
c
"
opt
i
ons.
S
elect the "Avoidance criteria"
f
unction. This
f
unction provides
D
FFHVVWRWKH$92,'R
S
WLRQV
PRWRUZD
\
VWROOURDGV
I
HUULHV
Turn the dial and select the
"
R
eca
l
cu
l
a
t
e
" f
u
n
c
ti
o
n t
o
t
a
k
e
int
o
a
ccount the route options selected.
3UHVVWKHGLDOWRFRQ¿UP
Press the NAV button.
3
UHVVW
K
H
1$9
E
XWWRQD
J
D
L
QRUVH
O
HFW
WKH1DYLJDWLRQ0HQXIXQFWLRQDQG
S
UHVVWKHGLDOWRFRQ¿UP
S
elect the "Route type"
f
unction and
S
UHVVWKHGLDOWRFRQ¿UP7KLVIXQFWLRQ
D
OORZV
\
RXWRFKDQ
J
HWKHURXWHW
\
SH
Select the "Route options" function
D
QGSUHVVWKHGLDOWRFRQ
¿
UP
5(&$/&8/$7(
$
9
2
,'$1
&
(
&
5,7(5,$
5287('<1$0,&6
5
28
7(7<3(
5
28
7(
2
37,
2
1
6
1$9,*$7,210(18
The route selected by the MyWay audio
/
telephone depends directly on the route options.
&KDQ
J
LQ
J
WKHVHRSWLRQVPD
\
FKDQ
J
HWKHURXWHFRPSOHWHO
\
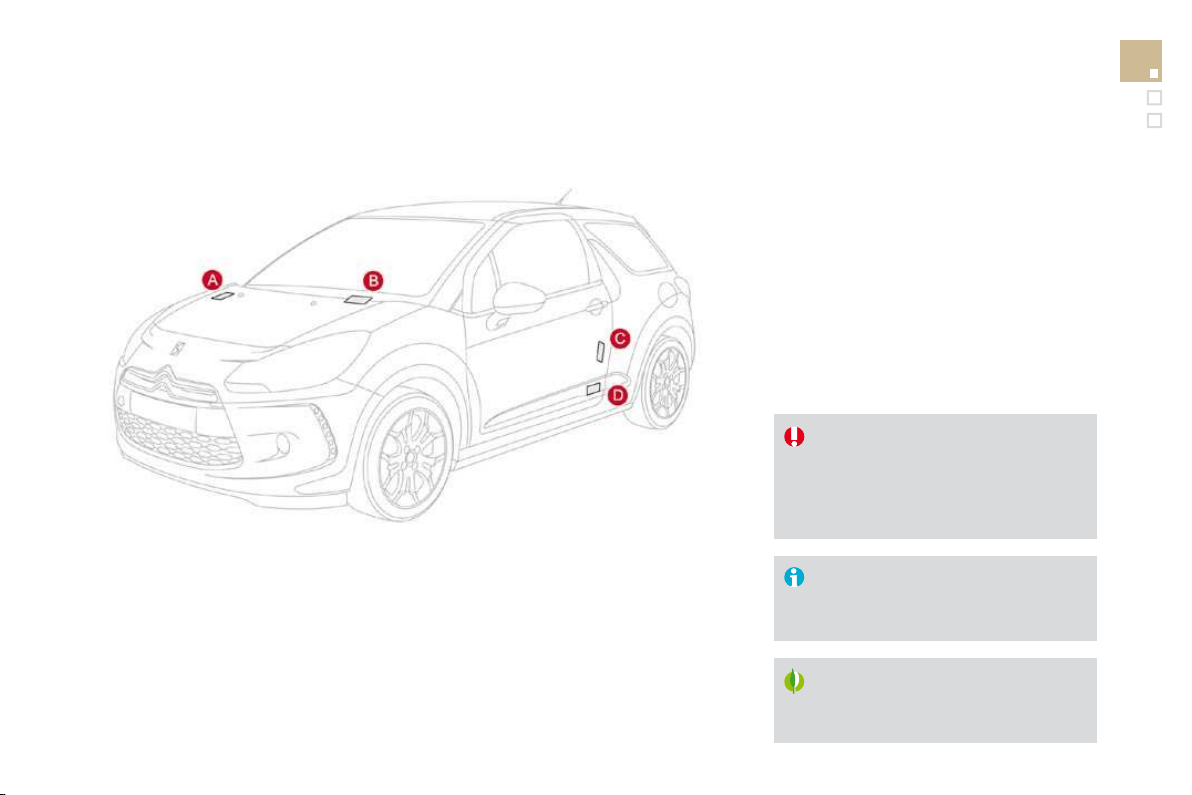
7
2
1
$'',1*$672329(5
(QWHUDQHZDGGUHVV
I
RUH[DPSOH
Once the new address has been
H
QWHUHGVHOHFW
2
.DQGSUHVVWKHGLDO
WRFRQ¿UP
S
elect "Recalculate" and press the
G
L
D
OW
R
FR
Q¿UP
Press the NAV button.
3
UHVVW
K
H
1$9
E
XWWRQDJD
L
QRUVH
O
HFW
WKH1DYL
J
DWLRQ0HQXIXQFWLRQDQG
SUHVVWKHGLDOWRFRQ
¿
UP
Select the "Add stopover" function
VWRSRYHUVPD[LPXP
DQGSUHVVWKH
G
L
D
OW
R
FR
Q¿UP
Select the "Stopovers" function and
SUHVVWKHGLDOWRFRQ
¿
UP
2
.
$''5(
66
,13
8
7
$''672329(5
6
7
2
3
2
9(5
6
1$9,*$7,210(18
5(&$/&8/$7(
7KHVWRSRYHUPXVWEHFRPSOHWHGRUGHOHWHGLQRUGHU
IR
R
UWKH
J
XLGDQFH
to continue to the next destination.
O
therwise, the My
W
W
ay will always
return
y
ou to the previous stopover.
S
topovers can be added to the route once the destination has been selected.
1$9,
*
$7,
2
1
*8
,'$1&(
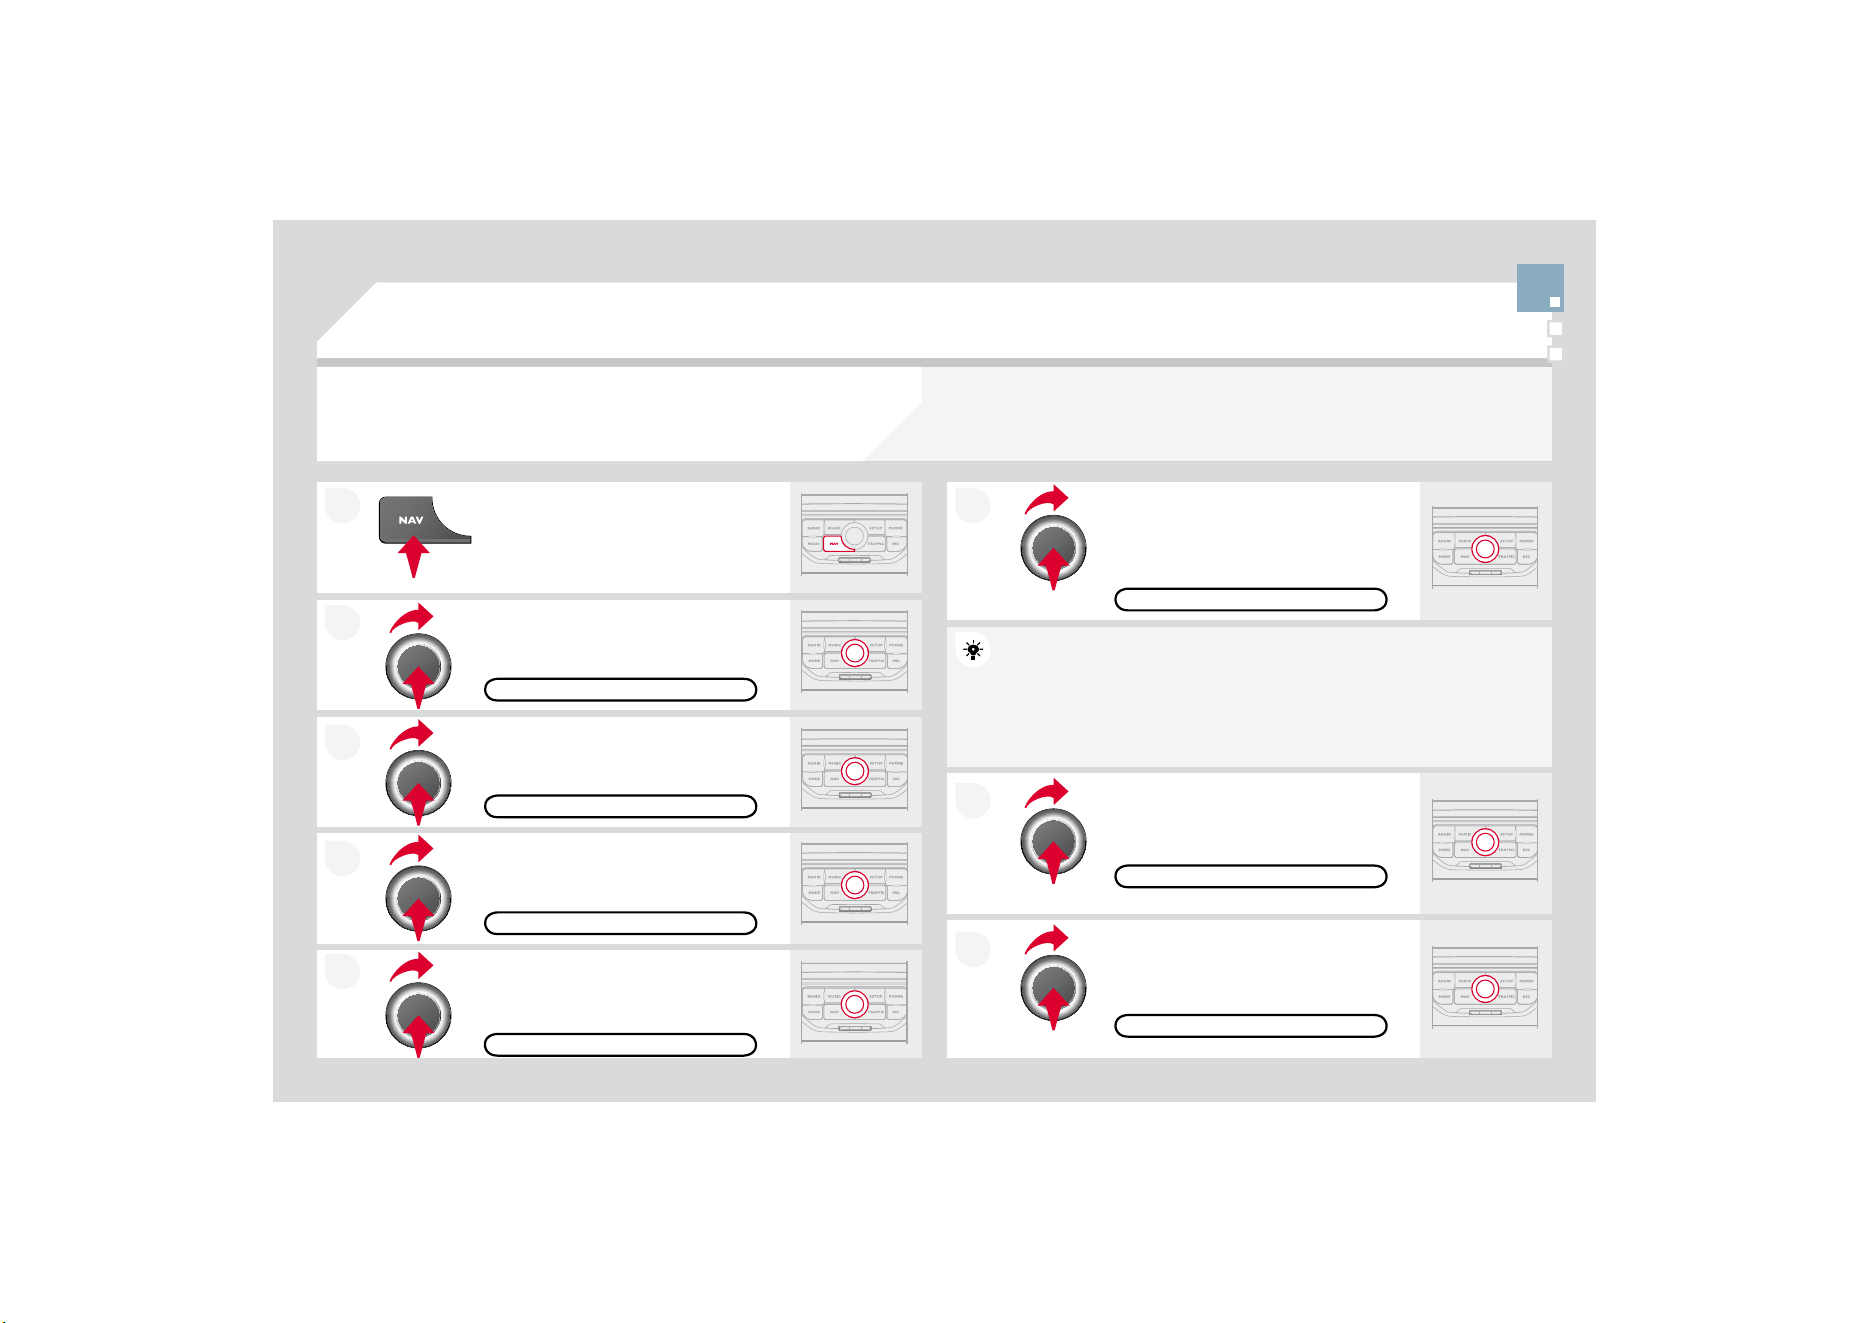
7
2
1
1$9,
*
$7,
2
1
*8
,'$1&(
6($5&+,1*)2532,1762),17(5(67
32,
Press the NAV button.
3
UHVVW
K
H
1$9
E
XWWRQDJD
L
QRUVH
O
HFW
WKH1DYLJDWLRQ0HQXIXQFWLRQDQG
SUHVVWKHGLDOWRFRQ
¿
UP
S
elect the "P
O
I nearb
y
"
f
unction to
search for POIs around the vehicle.
S
elect the "P
O
I search"
f
unction and
S
UHVVWKHGLDOWRFRQ¿UP
1$9,*$7,210(18
32,6($5&+
3
2
,1($5%<
Select the "POI in city" function to
s
earch
f
or P
O
Is in the cit
y
required.
S
elect the country then enter the
QDPHRIWKHFLW
\
XVLQ
J
WKHYLUWXDO
k
eypa
d
.
S
elect the "P
O
I near route" function to
s
earch
f
or P
O
Is near the route.
Select the "POI in countr
y
" function
t
o search
f
or P
O
Is in the country
re
q
u
i
re
d
.
Select the "POI near destination"
f
unction to search
f
or P
O
Is near the
point of arrival of the route.
32,1($5'(67,1$7,21
3
2
,1($55
28
7(
32,,1&28175
<
3
2
,,1
&
,7
<
A
list of cities present in the countr
y
selected can be
a
a
ccessed via
the LI
S
T button on the virtual ke
y
pad.
7KHSRLQWVR
I
LQWHUHVW
3
2
,
LQGLFDWHDOOR
I
WKHVHUYLFHORFDWLRQVLQWKHYLFLQLW\
KRWHOVYDULRXVEXVLQHVVHVDLUSRUWV
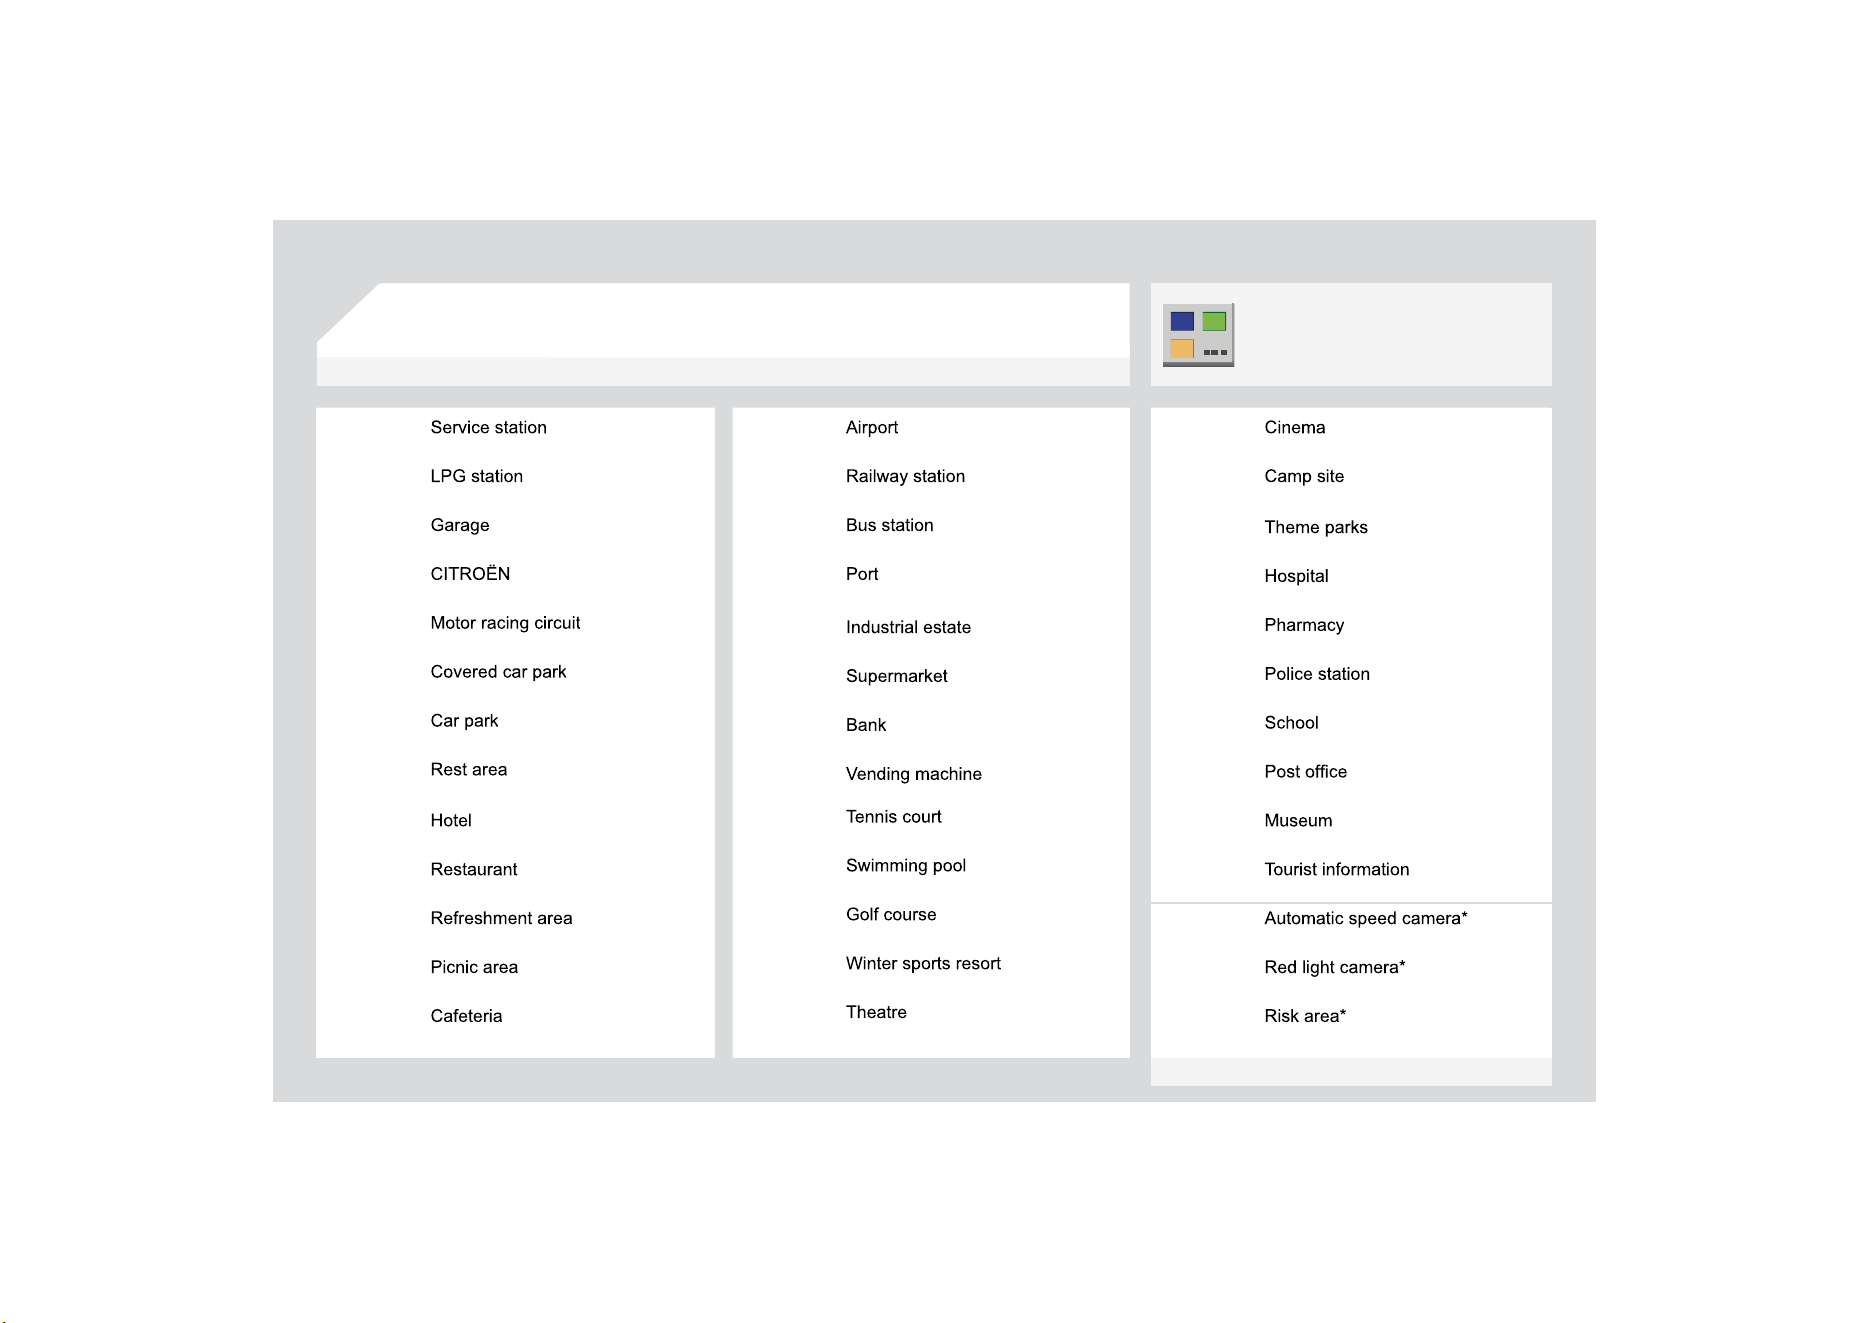
1$9,*$7,21*8,'$1&(
/,
6
7
2
)35,1
&
,3$/3
2
,17
6
2
),17(5(
6
7
3
2
,
$FFRUGLQJWRDYDLODELOLW\LQWKHFRXQWU\
7KLVLFRQDSSHDUVZKHQVHYHUDO3
2
,VDUH
J
URXSHG
WRJHWKHULQWKHVDPHDUHD=RRPLQJLQRQWKLVLFRQ
shows details o
f
the P
O
Is.
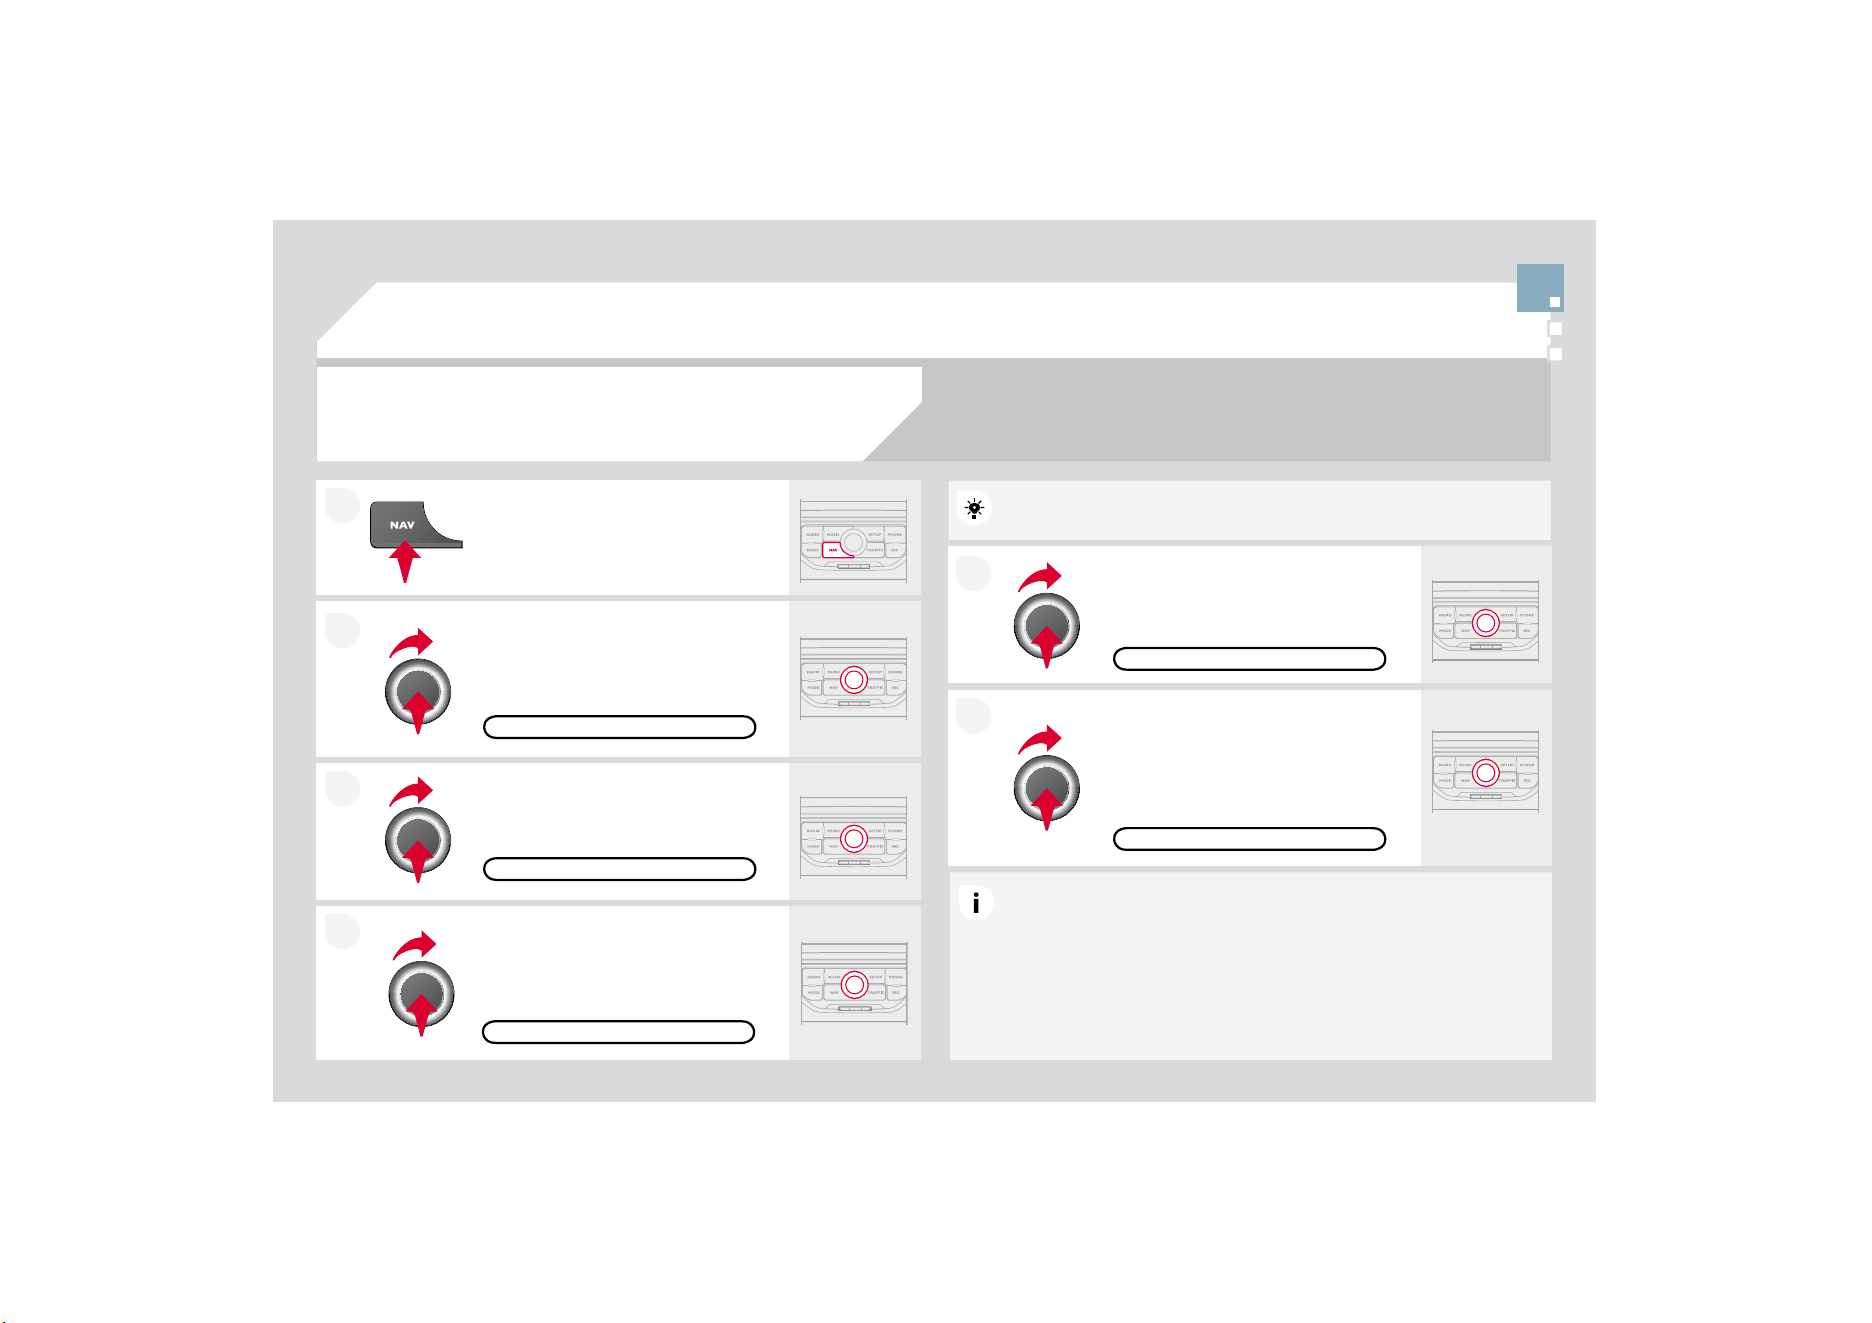
2
1
227
1$9,*$7,216(77,1*6
Select "Set
p
arameters for risk areas"
WRJD
L
QDFFHVVWRW
K
H
'L
VS
O
D\RQ
m
a
p
", "Visual alert" and "Sound alert"
f
unctions.
6
HOHFWWKH3
2
,FDWHJRULHVRQ0DS
f
unction to select the P
O
Is to be
displayed on the map by de
f
ault.
P
ress t
h
e
NAV
b
utton.
3UHVVWKH1$9EXWWRQDJDLQRUVHOHFW
W
KH1DYL
J
DWLRQ0HQXIXQFWLRQDQG
SUHVVWKHGLDOWRFRQ¿UP
6HOHFWWKH6HWWLQJVIXQFWLRQDQG
SUHVVWKHGLDOWRFRQ¿UP
32,&$7(*25,(6210$3
6(77,1*6
6(73$5$0(7(56)255,6.$5($6
1$9,
*
$7,
2
10(1
8
1$9,
*
$7,
2
1
*8
,'$1&(
S
elect the "Navi volume"
f
unction and
turn the dial to set the volume of each
Y
RLFHV
\
QWKHVLVHU
WUD
I¿
FLQ
I
RUPDWLRQ
D
OHUWPHVVDJHV«
NAVI V
O
L
U
ME
$
GMXVWLQJWKHYROXPH
I
RUWKH5LVN$UHDV3
2
,VLVGRQHRQO\GXULQJ
t
h
e
tr
a
n
s
mi
ss
i
o
n
o
f
a
n
a
l
e
rt.
8
3'$7,1
*
7+(5,
6
.$5($
6
3
2
,
V
Contact a CITRO
Ë
N dealer for the
p
rocedure to follow to obtain the
5,
6
.$5($3
2
,V
7KLVUHTXLUHVDQ6'+&+LJK&DSDFLW\FRPSDWLEOHUHDGHU
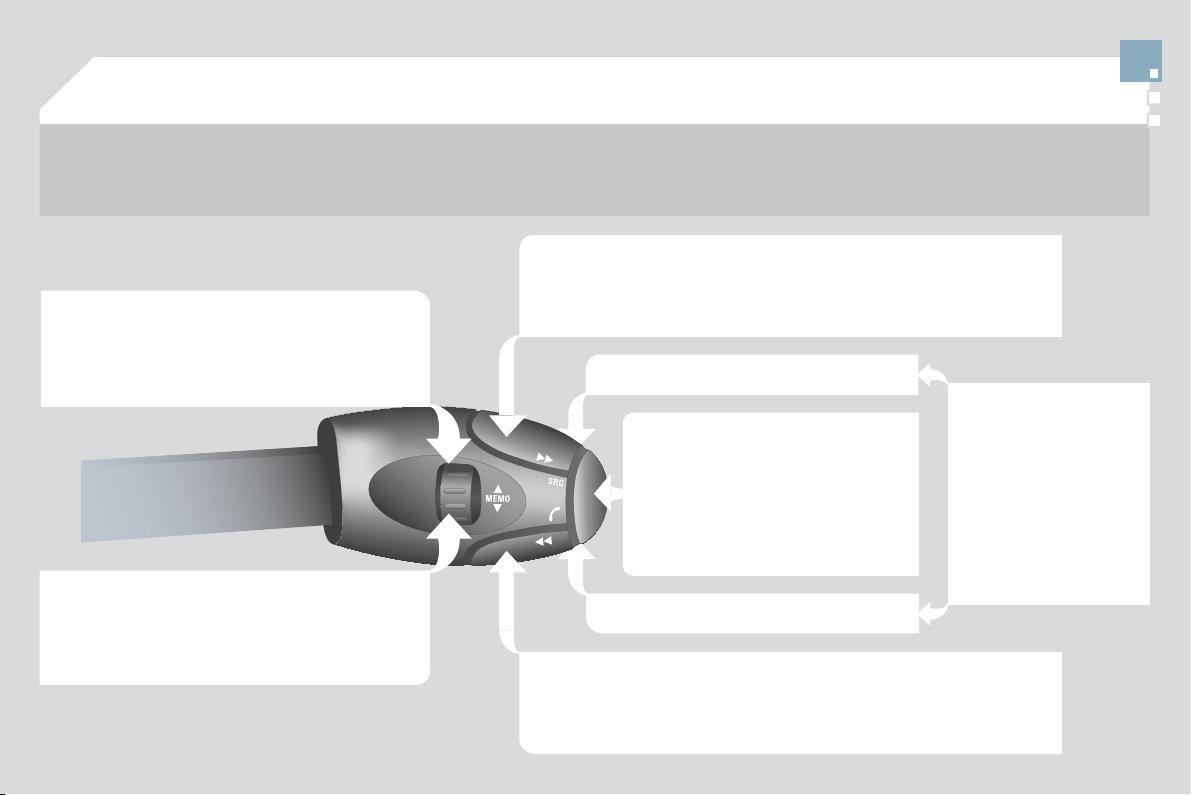
2
1
75$)),&,1)
2
50$7,
2
1
&
2
1),
*8
5(7+(),/7(5,1
*
$1'
',63/$<2)70&0(66$*(6
7KHQVHOHFWWKHUDGLXVR
I
WKH
¿
OWHU
LQ
P
LOHV
NP
UHTXLUHGLQDFFRUGDQFH
w
ith the route,
p
ress the dial to
F
RQ
¿
UP
:KHQDOORIWKHPHVVD
J
HVRQWKH
r
oute are selected
,
the addition o
f
a
JHRJUDSKLFDO¿OWHULVUHFRPPHQGHG
ZLWKLQDUDGLXVR
I
PLOHV
NP
I
RU
H[DPSOHWRUHGXFHWKHQXPEHURI
P
HVVD
J
HVGLVSOD
\
HGRQWKHPDS
7
KHJHRJUDSKLFDO
¿
OWHU
I
ROORZVWKH
mo
v
e
m
e
nt
o
f th
e
v
e
hi
c
l
e
.
7KH
¿
OWHUVDUHLQGHSHQGHQWDQGWKHLUUHVXOWVDUHFXP
X
X
ODWLYH
:HUHFRPPHQGD
¿
OWHURQWKHURXWHDQGD
¿
OWHUDURXQ
G
G
WKHYHKLFOHR
I
PLOHV
NP
RUPLOHV
NP
IRUDUH
J
LRQZLWKK
H
H
DY
\
WUDI¿F
PLOHV
NP
I
RUDUHJLRQZLWKQRUPDOWUD
I¿
F
PLOHV
NP
IRUORQ
J
M
RXUQH
\
V
PRWRUZD
\
3UHVVWKH75$)),&EXWWRQDJDLQRU
VH
O
HF
WWK
H
7U
D
I¿
F
0
H
Q
X
I
X
Q
F
WL
R
Q
D
Q
G
SUHVVWKHGLDOWRFRQ
¿
UP
Press the TRAFFIC button.
70&7UDI¿F0HVVDJH&KDQQHOPHVVDJHVFRQWDLQLQIRUPDWLRQRQWUDI¿FDQGZHDWKHUFRQGLWLRQV
rece
iv
ed
in r
ea
l tim
e
a
n
d
tr
a
n
s
mitt
ed
t
o
th
e
d
riv
e
r in th
e
fo
rm
of
aud
i
b
l
e
a
nn
ou
n
ce
m
e
nt
s
a
n
d
V\
PEROVRQWKHQDYL
J
DWLRQPDS
7KHQDYLJDWLRQV\VWHPFDQWKHQVXJJHVWDQDOWHUQDWLYHURXWHWRDYRLGDWUD
I¿
FSUREOHP
6
HOHFWWKH
*
HR)LOWHU
I
XQFWLRQDQG
S
UHVVWKHGLDOWRFRQ¿UP
0(66$*(6215287(
7KHOLVWRI70&PHVVDJHVDSSHDUVXQGHUWKH7UDI¿F0
0
HQXVRUWHGLQ
o
rder of proximit
y
.
2
1/<:$51,1
*6
2
15
28
7(
75$)),
&
0(1
8
6HOHFWWKH¿OWHURI
\
RXUFKRLFH
$//:$51,1*0(66$*(6
$//0(
66
$
*
(
6
7KHPHVVDJHVDSSHDURQWKHPDS
and on the list.
7RH[LWSUHVV(6&
*(2),/7(5
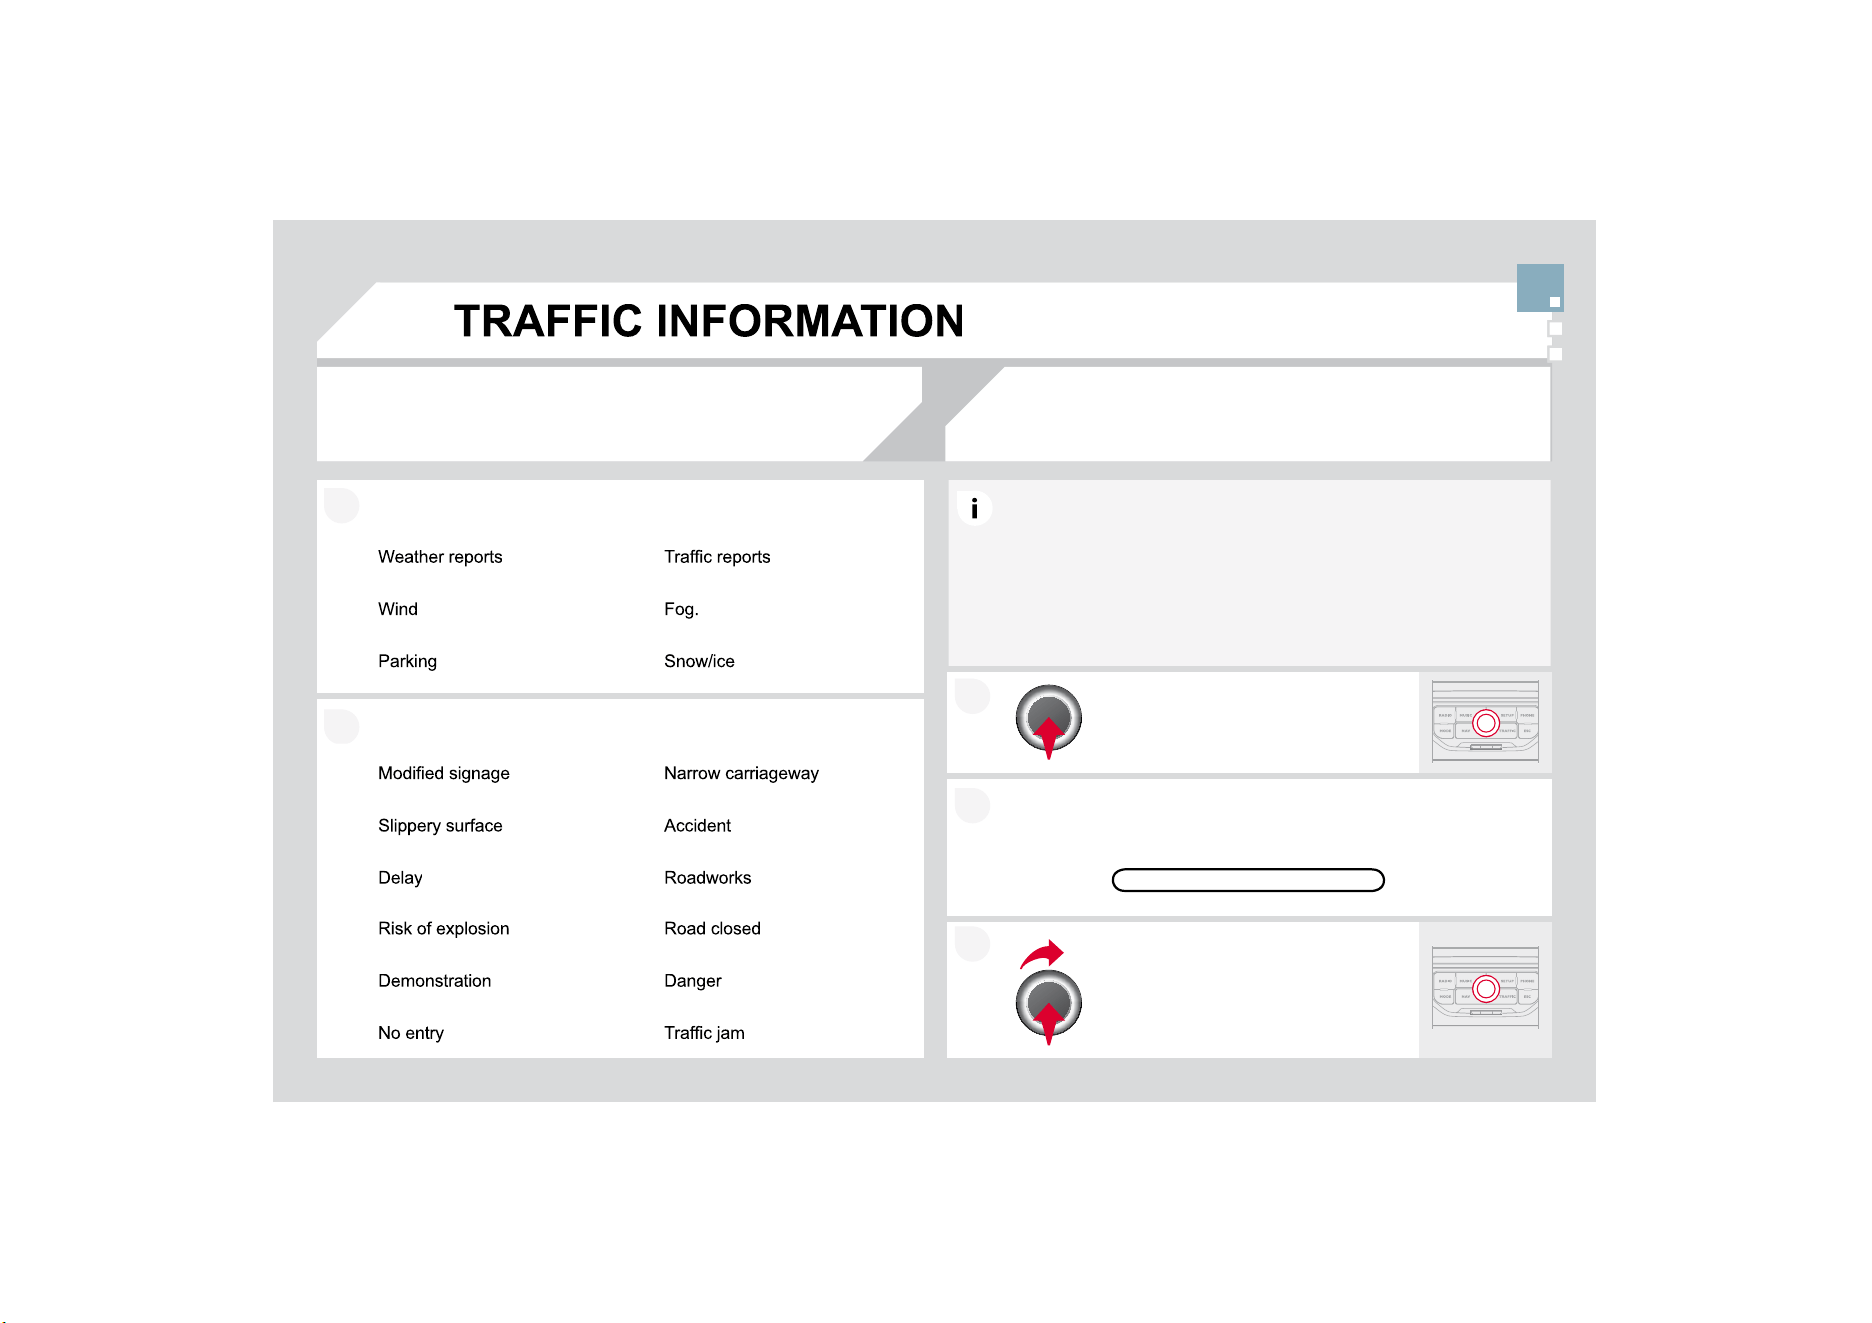
2
1
2
1
35,1&,3$/70&6<0%2/6
5HGDQG\HOORZWULDQJOHWUDI¿FLQIRUPDWLRQSDUH[DPSOH
%ODFNDQGEOXHWULDQJOHJHQHUDOLQIRUPDWLRQIRUH[DPSOH
With th
e
cu
rr
e
nt
aud
i
o
sou
r
ce
displayed on the screen, press the
dial
.
7KHVKRUWFXWPHQX
I
RUWKHVRXUFHDSSHDUVDQGJLYHV
D
D
FFHVVWR
6HOHFW7UDI¿F$QQRXQFHPHQWV
7$
DQGSUHVVWKHGLDOWRFRQ
¿
UPDQGJR
WRW
K
HDVVRF
L
DWH
G
VHWW
L
Q
J
V
7KH7$7UDI¿F$QQRXQFHPHQWIXQFWLRQJLYHVSULRULW\WR7$DOHUW
P
HVVD
J
HV7RRSHUDWHWKLV
I
XQFWLRQQHHGV
J
RRGUHFHSWLRQR
I
DUDGLR
V
WDWLRQWUDQVPLWWLQJWKLVW\SHRIPHVVDJH:KHQDWUDI¿FUHSRUWLV
W
UDQVPLWWHGWKHFXUUHQWDXGLRVRXUFH
5DGLR
&
'-XNHER[
LV
L
QWHUUXSWH
G
DXWRPDW
L
FD
OO
\WRS
O
D\W
K
H
7$
PHVVDJH
1
RUPD
O
S
O
D\
E
DF
N
o
f th
e
aud
i
o
sou
r
ce
r
esu
m
es
a
t th
e
e
n
d
o
f th
e
tr
a
n
s
mi
ss
i
o
n
o
f th
e
PHVVDJH
5
(&(,9,1
*
7$0(
66
$
*
(
6
TA

2
1
1
6
(/(&7,1
*
$
6
7$7,
2
1
Wh
en t
h
e current ra
di
o stat
i
on
i
s
displa
y
ed on the screen, press the
di
a
l
.
The radio source short-cuts menu appears and provid
e
e
s access to
WKHIROORZLQJVKRUWFXWV
Select the function re
q
uired and
p
ress
WKHGLDOWRFRQ
¿
UPWR
J
DLQDFFHVVWR
W
K
HFRUUHVSRQ
GL
QJVHWW
L
QJV
TA
5'
6
L
I
GLVSOD\HGDOORZV\RXWRFRQWLQXHOLVWHQLQJWRW
K
K
HVDPH
V
WDWLRQE
\
DXWRPDWLFUHWXQLQ
J
WRDOWHUQDWLYHIUHTXHQFLH
V
V
+RZHYHULQ
F
HUWDLQFRQGLWLRQVFRYHUDJHR
I
DQ5'
6
VWDWLRQPD\Q
R
R
WEHDVVXUHG
WKURXJKRXWWKHHQWLUHFRXQWU\DVUDGLRVWDWLRQVGRQRW
F
F
RYHURI
WKHWHUULWRU
\
7KLVH[SODLQVWKHORVVR
I
UHFHSWLRQR
I
WKH
V
V
WDWLRQGXULQ
J
a
j
ourney.
7KHH[WHUQDOHQYLURQPHQW
KLOOEXLOGLQJWXQQHOXQGHUJURXQGFDUSDUN
PD\LQWHU
I
HUHZLWKWKH
UHFHSWLRQLQFOXGLQ
J
LQ5'
6
I
ROORZLQ
J
PRGH7KLVSKHQRPHQRQLVDQRUPDOUHVXOWR
I
WKHZD
\
LQZKLFK
radio waves are transmitted and does not in any way indicate a failure of the audio equipment.
5
'
6
5(
*
,
2
1$/0
2
'(
3UHVVWKH5$',
2
EXWWRQWRGLVSOD
\
t
he list of stations received locally
sorted in alphabetical order.
6
HOHFWWKHVWDWLRQUHTXLUHGE\WXUQLQJ
WKHGLDODQGSUHVVWRFRQ¿UP
:KLOHOLVWHQLQJWRWKHUDGLRSUHVVRQHRIWKH
buttons to select the previous or next station on
the list.
Press one o
f
the buttons on the numeric ke
y
pad
f
or
m
m
ore than
2 seconds to store the current station.
Press the button on the numeric ke
y
pad to recall the
s
stored radio
stat
i
on.
5'6
5$',
2
7(;7
5(
*
,
2
1$/35
2*
AM
5$',
2
$
ORQJSUHVVRIRQHRIWKHEXWWRQVVWDUWVWKH
a
utomatic search
f
or a station with a lower or
KLJKHUIUHTXHQF\
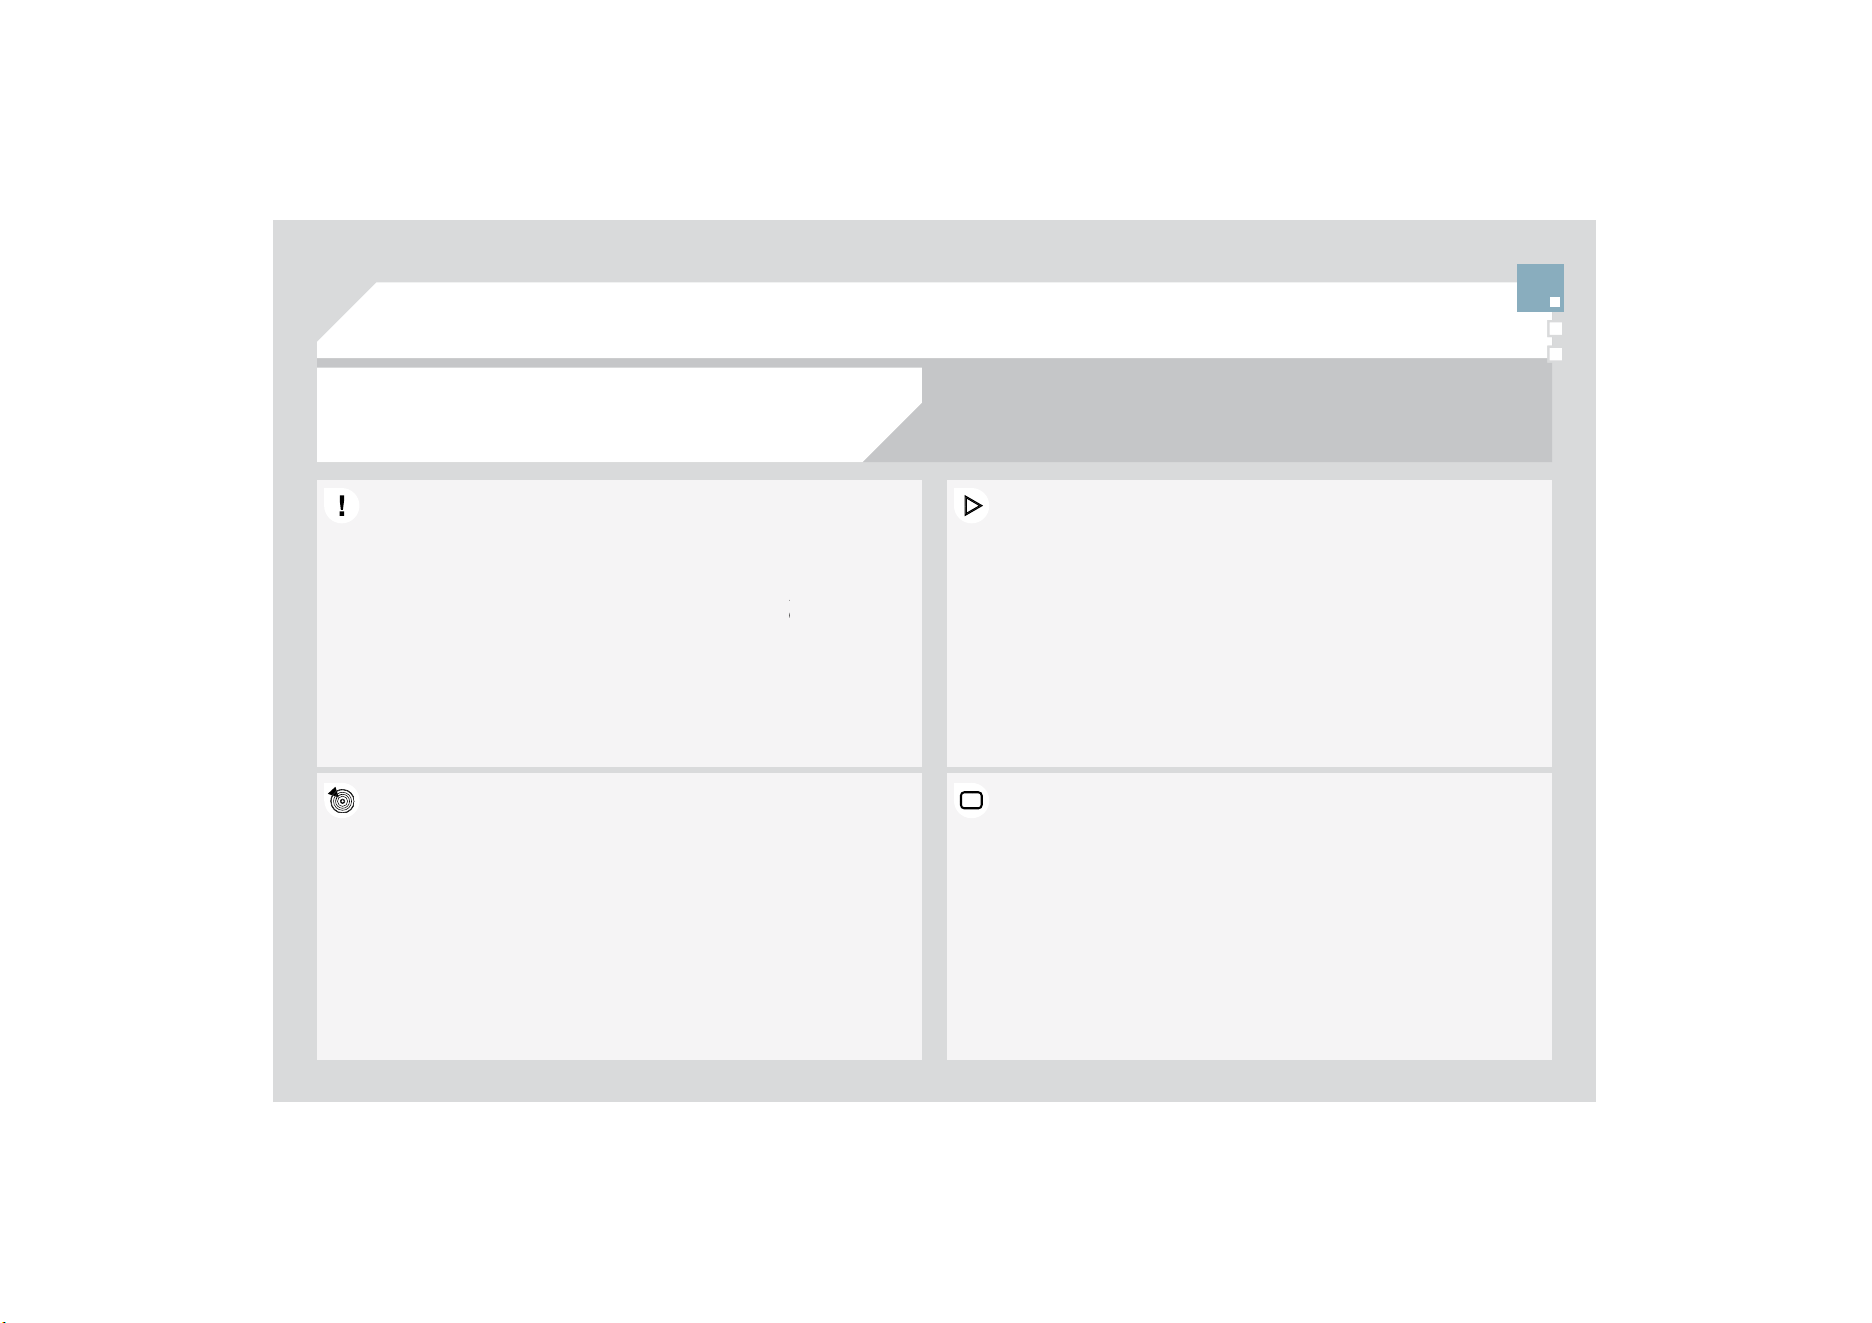
0
86
,&0(',$3/$<(5
6
&'03:0$&'
,1)250$7,21$1'$'9,&(
,QRUGHUWREHDEOHWRSOD\DUHFRUGHG&'5RU&'5:
ZKHQ
UHFRUGLQJLWLVSUHIHUDEOHWRVHOHFWWKH,62OHYHO
RU-ROLHW
standard.
I
f
the disc is recorded in another
f
ormat it ma
y
not be
p
played
correct
l
y.
,WLVUHFRPPHQGHGWKDWWKHVDPHUHFRUGLQ
J
VWDQGDUGL
VDOZD\VXVHG
IRUDQLQGLYLGXDOGLVFZLWKDVORZDVSHHGDVSRVVLEOH
[PD[LPXP
for optimum sound quality.
,QWKHSDUWLFXODUFDVHR
I
DPXOWLVHVVLRQ
&
'WKH-ROLHW
VWDQGDUGLV
recommended.
7KH0
\
:D
\
ZLOORQO
\
SOD
\
DXGLR¿OHVZLWKWKHH[WHQVLRQPSZLWK
DVSHHGR
I
EHWZHHQ.ESVDQG.ESVDQGWKHH[
W
W
HQVLRQZPD
Z
LWKDV
S
HHGRIEHWZHHQ.E
S
VDQG.E
S
V
,WDOVRVXSSRUWVWKH9%5
9DULDEOH%LW5DWH
PRGH
1RRWKHUW\SHRI¿OHPSPXFDQEHSOD\HG
7KH03
I
RUPDWDQDEEUHYLDWLRQR
I
03(
*
$
$
XGLR/D
\
HU
and the WMA format, an abbreviation of Windows Med
d
ia Audio and
the propert
y
of Microsoft, are audio compression stan
d
dards which
S
HUPLWWKHUHFRUGLQJR
I
VHYHUDOWHQVR
I
PXVLF
¿
OHVRQ
D
D
VLQJOHGLVF
,WLVDGYLVDEOHWRUHVWULFW
¿
OHQDPHVWRFKDUDFWHUV
Z
Z
LWKRXWXVLQ
J
V
SHFLDOFKDUDFWHUVHJ"WRDYRLGDQ\SOD\RU
G
G
LVSOD\
problems.
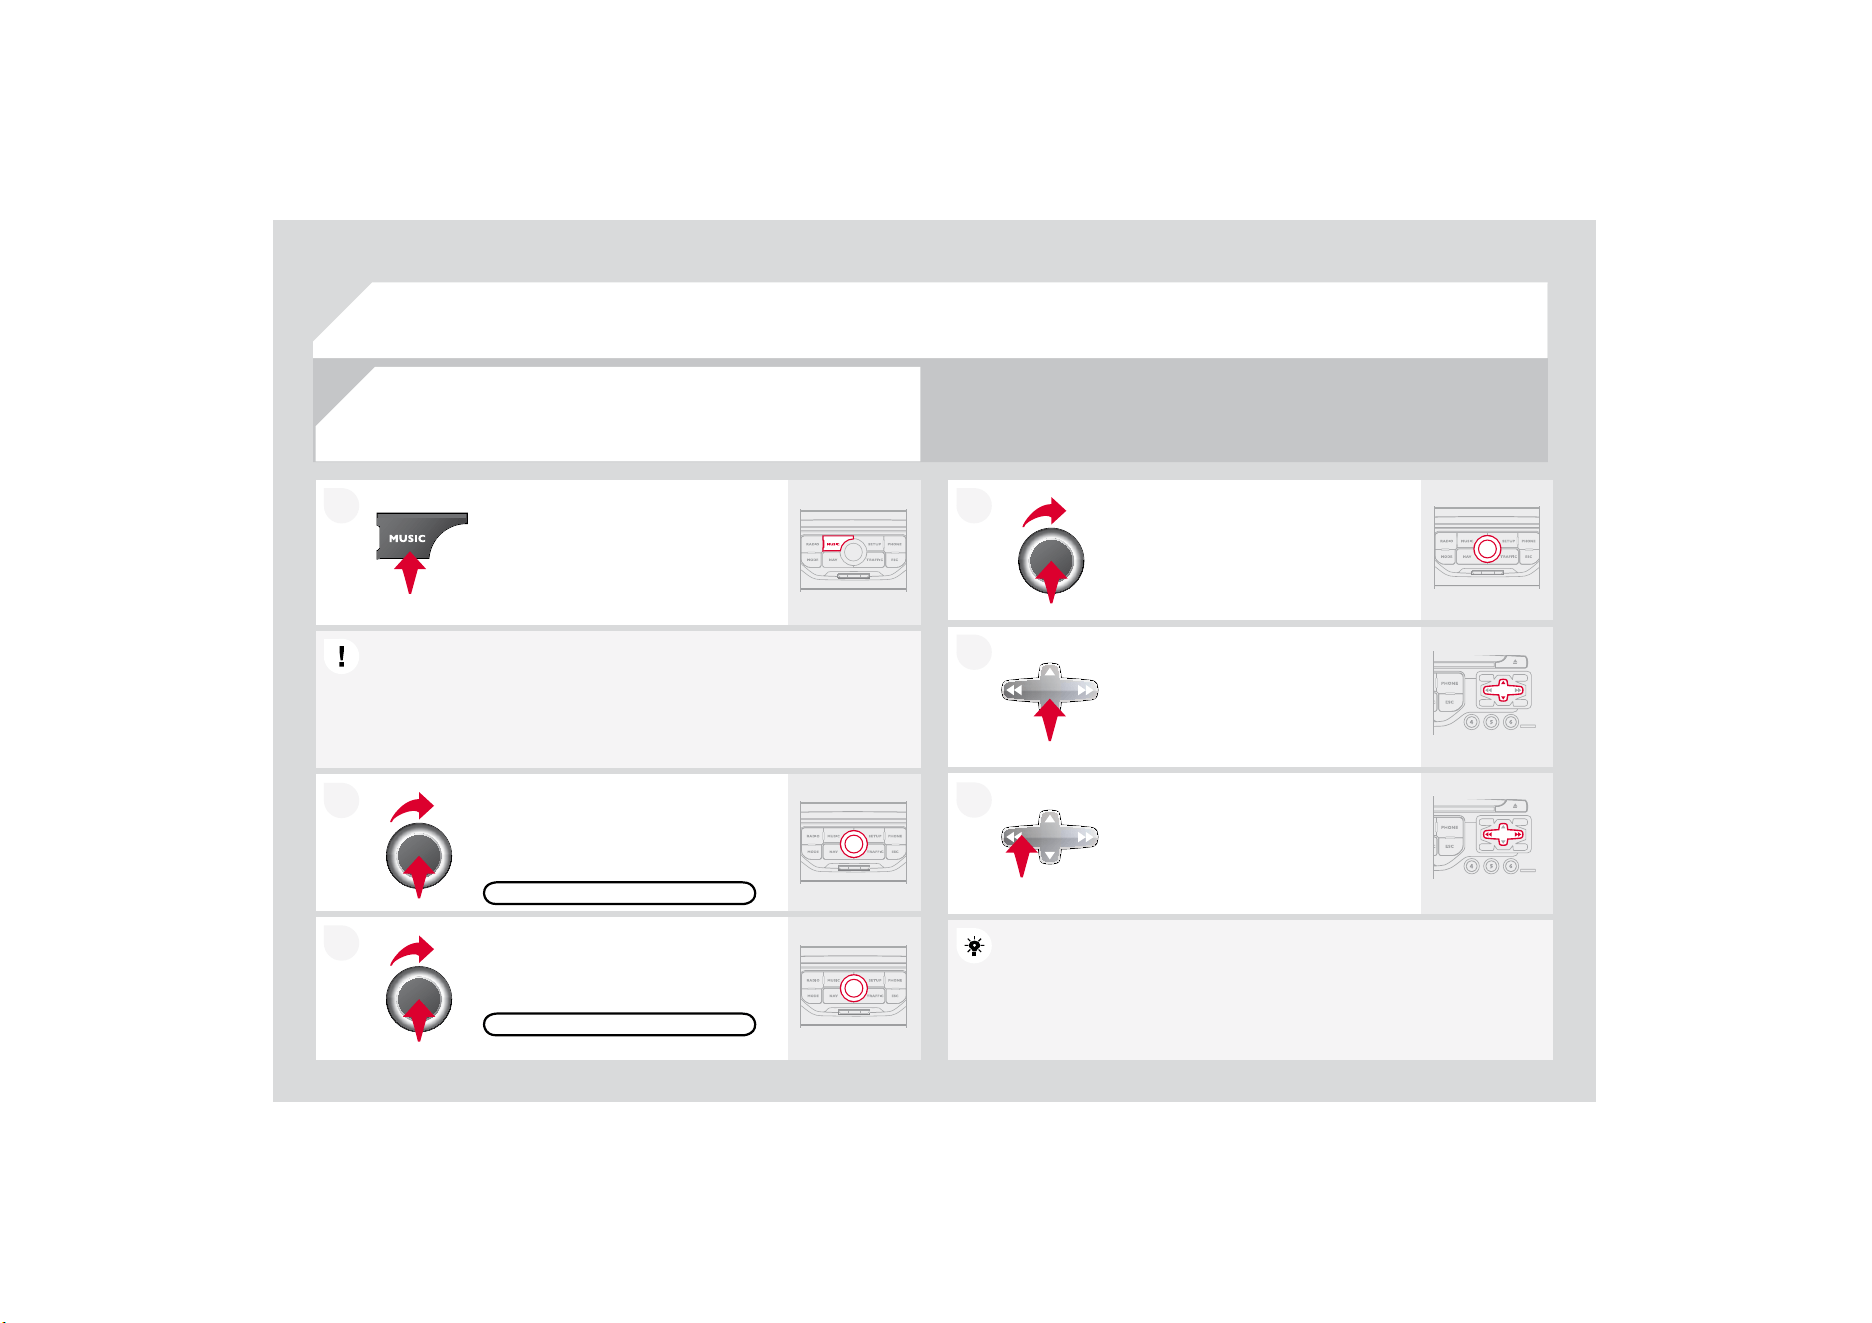
2
1
6(/(&7,1*3/$<,1*086,&
&
'
03:0$&'
7KHSOD
\
LQ
J
DQGGLVSOD
\
LQ
J
R
I
DQ03
:0$FRPSLODWL
R
R
QPD
\
G
HSHQGRQWKHUHFRUGLQJSURJUDPPHDQG
RUWKHVHWWLQJVXVHG
:HUHFRPPHQGWKH,
62
¿OHVWDQGDUG
3UHVVWKH086,&EXWWRQ
Select the "Select music" function and
SUHVVWKHGLDOWRFRQ¿UP
Press the up or down button to select
the next/
p
revious folder.
S
elect the music source required:
&
'
03
:0$
&
'3UHVVWKHGLDOWR
F
RQ¿UP3OD
\
EH
J
LQV
SELECT MUSIC
3UHVVWKH086,&EXWWRQDJDLQRU
se
l
ec
t th
e
"M
us
i
c
" M
e
n
u
f
u
n
c
ti
o
n
a
n
d
SUHVVWKHGLDOWRFRQ¿UP
Press one o
f
the buttons to select a
music
tr
ack
.
Pr
ess
a
n
d
h
o
l
d
o
n
e
of
th
e
bu
tt
o
n
s
fo
r
f
ast forward or rewind play.
"MUSIC" MENU
7KHOLVWR
I
WUDFNVRU03
:0$
¿
OHVDSSHDUVXQGHU0XVLF0HQX
0
86
,&0(',$3/$<(5
6

1
2
Connect the portable
device (MP3/WMA
SOD
\
HU«
WRWKH-$
&
.
VRF
N
HWXV
L
QJDVX
L
WD
EO
H
cab
l
e
.
3UHVVWKH08
6
,
&
EXWWRQWKHQSUHVV
LWDJDLQRUVHOHFWWKH0XVLF0HQX
I
XQFWLRQDQGSUHVVWKHGLDOWRFRQ
¿
UP
6
HOHFWWKH$
8
;PXVLFVRXUFHDQG
S
UHVVWKHGLDOWRFRQ
¿
UP3OD\EHJLQV
a
utomat
i
ca
lly
.
6
HOHFWWKH([WHUQDOGHYLFH
I
XQFWLRQ
a
n
d
p
ress t
h
e
di
a
l
to act
i
vate
i
t.
(;7(51$/'(9,
&
(
'LVSOD
\
DQGPDQD
J
HPHQWRIWKHFRQWUROVDUHYLDWKHSRUWDEOHGHYLFH
86,1*7+($8;,//,$5<,1387$8;
$8',2-$&.&$%/(1276833/,('
0
86
,&0(',$3/$<(5
6
MUSIC MENU
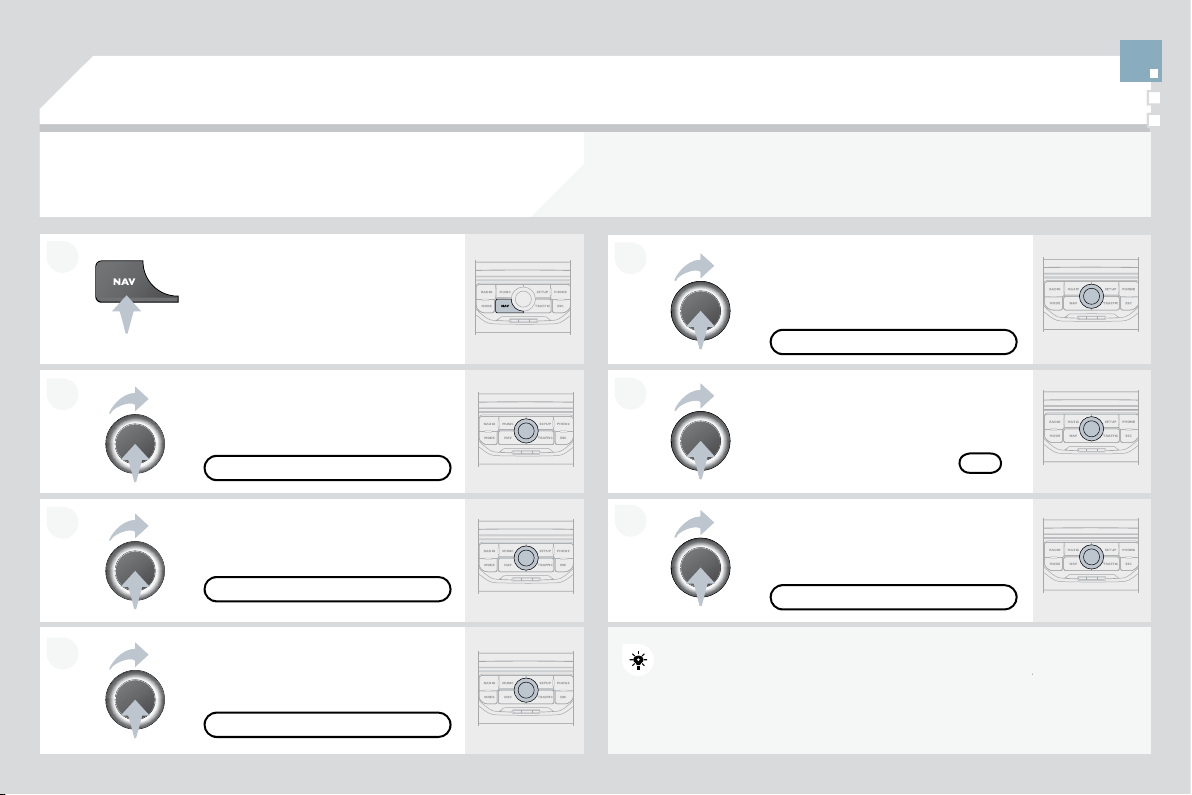
1
2
2
1
7KHVHUYLFHVDYDLODEOHGHSHQGRQWKHQHWZRUNWKH6,0FDUGDQGWKHFRPSDWLELOLW
\
RIWKH%OXHWRRWK
telephone used.
C
heck the telephone manual and with your network provider
f
or details o
f
the
services available to
y
ou. A list o
f
mobile telephones with the best level o
f
compatibilit
y
is available
f
r
o
m th
e
dea
l
e
r n
e
tw
o
rk.
%/
8
(7
22
7+7(/(3+
2
1(
&
2
11(&7,1
*
$7(/(3+
2
1(
)RUUHDVRQVRIVDIHW\DQGEHFDXVHWKH\UHTXLUHSUROR
Q
Q
JHGDWWHQWLRQ
R
QWKHSDUWR
I
WKHGULYHUWKHRSHUDWLRQV
I
RUSDLULQ
J
WKH%OXHWRRWK
mobile telephone to the hands-free system of the My
W
Way must be
F
DUULHGRXWZLWKWKHYHKLFOHVWDWLRQDU
\
7KHL
J
QLWLRQPXVWEHRQ
A
ctivate the tele
p
hone's Bluetooth function.
The last telephone connected is reconnected
automatically.
(
QW
H
UW
KH
DX
W
KH
QW
LFD
W
LR
Q
FRGH
R
QW
KH
telephone. The code to be entered is
di
sp
l
aye
d
on t
h
e screen.
7
RF
K
DQJHW
K
HWH
O
HS
K
RQHFRQQHFWH
G
S
UHVVWKH3+
2
1(EXWWRQWKHQVHOHFW
Ph
one
M
enu an
d
press t
h
e
di
a
l
to
FR
Q¿UP
O
nce the telephone has been connected, M
y
Wa
y
can s
y
nchronise
th
e a
dd
ress
b
oo
k
an
d
t
h
e ca
ll
li
st.
Thi
s sync
h
ron
i
sat
i
o
n
n
may ta
k
e a
IH
ZPLQ
X
W
HV
Select "Connect
p
hone". Select the
WHOHSKRQHDQGSUHVVWRFRQ
¿
UP
7KHOLVWRIWHOHSKRQHVFRQQHFWHGSUHYLRXVO\PD[LPXPDSSHDUV
on the multifunction screen. Select the telephone requ
u
ired for a new
connection.
3UHVVWKH3+21(EXWWRQ
)RUD¿UVWFRQQHFWLRQVHOHFW
"
S
earch phone" and press the dial to
FR
Q¿UP7K
H
Q
VH
O
HF
WWK
H
Q
D
P
H
R
IWK
H
telephone.
6
($5
&
+3+
2
1(
&2
11(
&
73+
2
1(
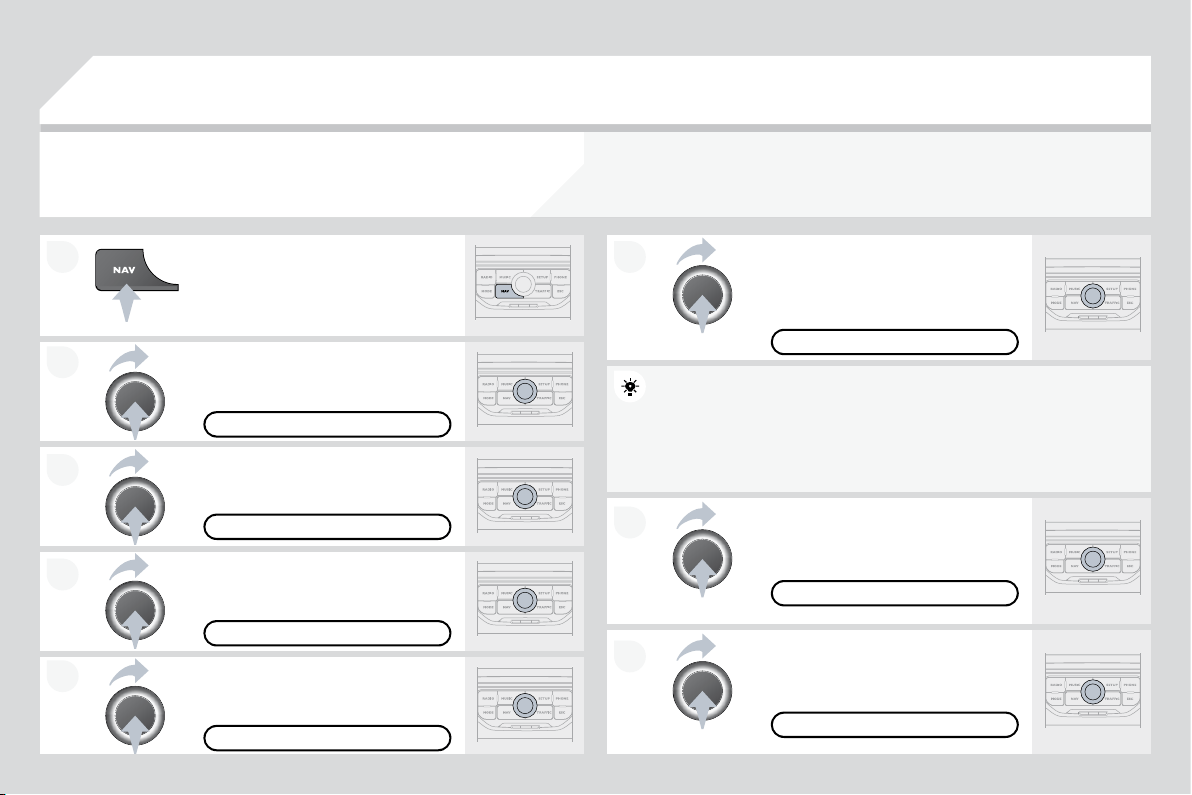
2
1
1
2
3UHVVWKHHQGRIWKHVWHHULQJZKHHOFRQWUROWRDFFHSWWKHFDOORUHQG
WK
HFD
OO
L
QSURJUHVV
Select the "Yes" tab to acce
p
t or "No"
W
RUH
I
XVHDQGFRQ
¿
UPE
\
SUHVVLQ
J
WKH
di
a
l
.
5(&(,9,1
*
$&$// 0$.,1
*
$&$//
$QLQFRPLQJFDOOLVDQQRXQFHGE\DULQJDQGDVXSHULP
PSRVHGGLVSOD\
o
n the multi
f
unction screen.
<(6
7RKDQ
J
XSSUHVVWKH3+21(EXWWRQ
R
USUHVVWKHGLDODQGVHOHFW(QGFDOO
W
KHQFRQ¿UPE\SUHVVLQJWKHGLDO
END
C
ALL
3UHVVWKH3+
2
1(EXWWRQ
6HOHFW'LDOQXPEHUWKHQGLDOWKH
WHOHSKRQHQXPEHUXVLQJWKHYLUWXDO
k
e
y
pa
d
.
S
elect the "Phone" Menu
f
unction and
S
UHVVWKHGLDOWRFRQ¿UP
The list of the last 20 calls made and received in the v
e
e
hicle a
pp
ears
under "Phone" Menu. You can select a number and p
r
r
ess the dial to
make
t
he
call
.
N
O
It is also possible to select a number
f
rom the addres
s
s
book. You can
V
HOHFW'LDOIURPDGGUHVVERRN7KH0\:D\SHUPLWV
W
W
KHUHFRUGLQJRI
up to 4
000
entries.
3UHVVWKHHQGRIWKHVWHHULQJZKHHOFRQWUROIRUPRUHW
K
K
DQWZR
V
HFRQGVWR
J
DLQDFFHVVWRWKHDGGUHVVERRN
3+
2
1(0(18
',$
/
180%(5
7RGHOHWHDQXPEHU
S
UHVVWKH3+21(EXWWRQWKHQ
S
U
H
H
VVDQGKROGRQ
DFDOOQXPEHUWRGLVSOD
\
DOLVWR
I
DFWLRQVLQFOXGLQ
J
'
H
O
HWHHQWU\
'
H
O
H
W
H
OL
V
W
%/
8
(7
22
7+7(/(3+
2
1(
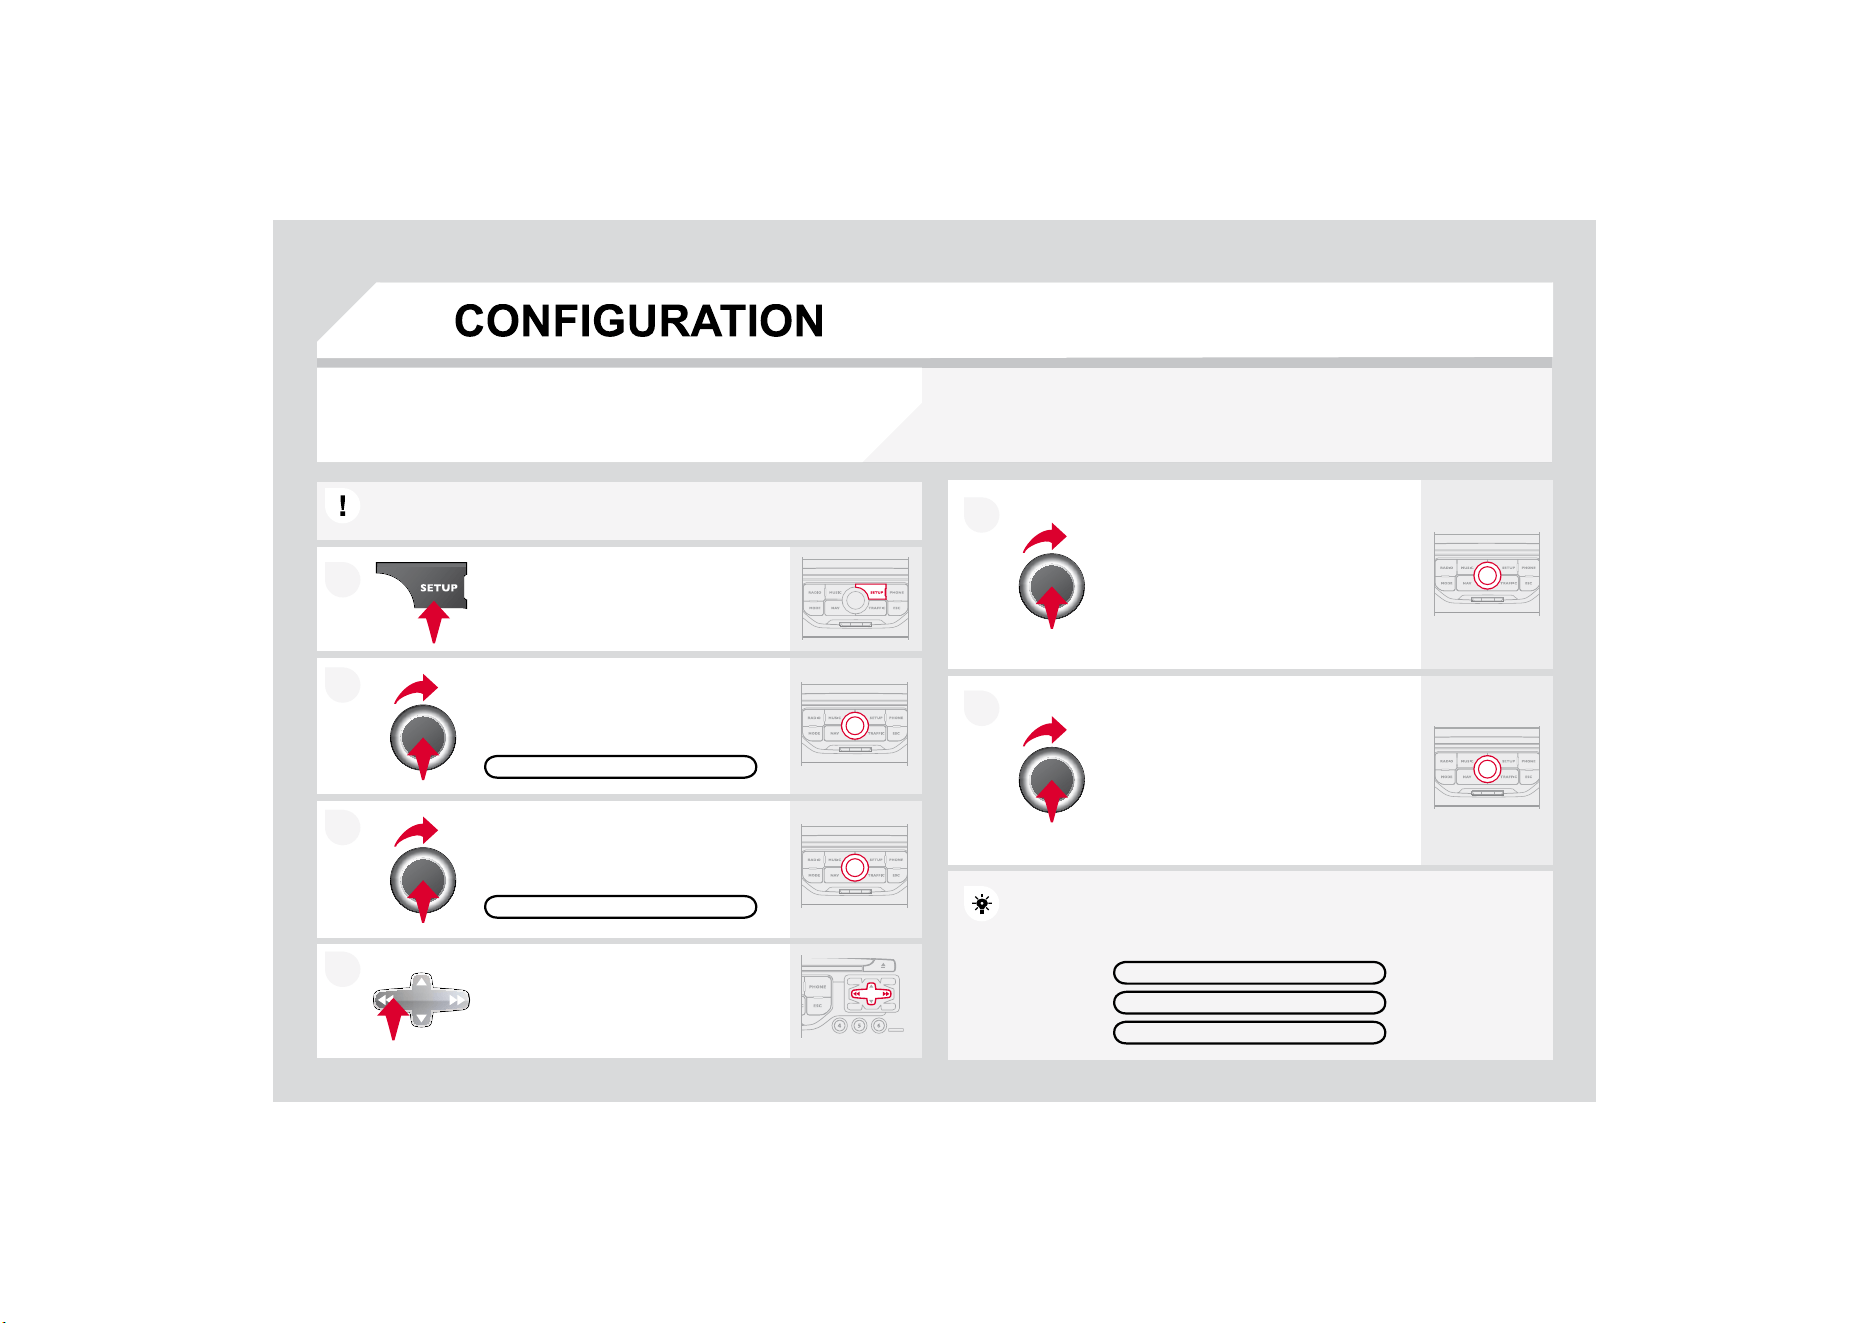
2
1
6(77,1*7+('$7($1'7,0(
7KH
6
(783
I
XQFWLRQJLYHVDFFHVVWRWKH
I
ROORZLQJRSWLRQV
6
\VWHPODQJXDJH'DWH
7LPH'LVSOD\
%UL
J
KWQHVV&RORXU0DSFRORXU
9HKLFOH8QLWV6
\
VWHP
6
HWWKHSDUDPHWHUVRQHE
\
RQHXVLQ
J
WKHGLUHFWLRQDUURZVDQGFRQ¿UPE\
m
ea
n
s
o
f th
e
d
i
a
l.
6HOHFWWKH'DWHIRUPDWIXQFWLRQDQG
S
UHVVWKHGLDOWRFRQ¿UP
6HOHFWWKH6HWGDWHWLPHIXQFWLRQ
D
QGSUHVVWKHGLDOWRFRQ
¿
UP
&
RQ
¿
UPWKH
I
RUPDWUHTXLUHGXVLQJWKHGLDO
3UHVVLQ
J
WKH6(783EXWWRQIRUPRUHWKDQVHFRQ
G
G
V
J
LYHVDFFHVV
t
o:
7KHVHVHWWLQ
J
VPXVWEHUHHQWHUHGLIWKHEDWWHU
\
KDV
E
E
HHQ
di
sconnecte
d
.
3UHVVWKH6(783EXWWRQ
&RQ¿UPWKHIRUPDWUHTXLUHGXVLQJ
the dial.
Select the "Time format" function and
S
UHVVWKHGLDOWRFRQ
¿
UP
S
ET DATE
&
TIME
6HOHFWWKH'DWH
7LPHIXQFWLRQDQG
S
UHVVWKHGLDOWRFRQ¿UP
'(6&5,37,212)7+(81,7
*36&29(5$*(
DEMO MODE
DATE
&
TIME

5$',
2
VHOHFWLRQR
I
WKHSUHYLRXVVWRUHGVWDWLRQ
Selection of the previous entry in the address book.
5$',2VHOHFWLRQRIWKHQH[WVWRUHGVWDWLRQ
Selection of the next entry in the address book.
5$',2FKDQ
J
HWRWKHQH[WUDGLRVWDWLRQRQWKHOLVW
/RQJSUHVVDXWRPDWLFVHDUFK
I
RUDKLJKHU
I
UHTXHQF\
&
'VHOHFWLRQRIWKHQH[WWUDFN
&
'FRQWLQXRXVSUHVV
I
DVW
I
RUZDUGSOD
\
5$',
2
FKDQ
J
HWRWKHSUHYLRXVUDGLRVWDWLRQRQWKH/LVW
/RQJSUHVVDXWRPDWLFVHDUFK
I
RUDORZHU
I
UHTXHQF\
&'VHOHFWLRQRIWKH
S
UHYLRXVWUDFN
&
'FRQWLQXRXVSUHVV
I
DVWUHYHUVH
&
KDQJHWKHVRXQGVRXUFH
- M
a
k
e
a
ca
ll fr
o
m th
e
add
r
ess
boo
k.
3LFNXS
+DQJXSWKHWHOHSKRQH
- Pr
ess
f
o
r m
o
r
e
th
a
n 2
seco
n
ds
:
access to the address book.
Volume increase.
Volu
m
e
dec
r
ease
.
M
u
t
e
: f
u
n
c
ti
o
n
ac
tiv
a
t
ed
E
\SUHVV
L
QJW
K
HYR
O
XPH
in
c
r
ease
a
n
d
dec
r
ease
b
uttons simultaneously.
Restore the sound b
y
SUHVVLQJRQHRIWKHWZR
v
o
l
u
m
e
bu
tt
o
n
s
.
6
7((5,1
*
0
28
17('
&2
175
2
/
6

1
2
3
1
2
4
1
2
3
4
3
3
3
3
2
2
2
2
4
4
4
4
4
3
3
3
3
3
2
3
2
2
3
3
3
4
4
4
4
4
3
3
1
2
3
3
2
3
3
5$',
2
0(18
0
$,1)
8
1
&
7,
2
1
&
+
2
,
&
($
F
K
R
L
FH
$
F
K
R
L
FH
$
&+
2
,&(%
6
&5((10(1
8
0$3
6
"MUSIC" MENU
75$)),
&
0(18
0(
66
$
*
(
6
2
15
28
7(
2
1/<:$51,1
*6
2
15
28
7(
$//:$51,1*0(66$*(6
$//0(
66
$
*
(
6
*
(
2
),/7(5
:LWKLQPLOHVNP
:LWKLQPLOHVNP
:LWKLQPLOHV
NP
:LWKLQPLOHV
NP
:LWKLQPLOHVNP
S
ELECT M
US
IC
6281'6(77,1*6
%DODQFH)DGHU
%DVV7UHEOH
(TXDOL]HU
Linear
Classic
-
D]]
Rock/Po
p
Techno
Vocal
/RX
G
QHVV
6S
HHGGH
S
HQGHQWYROXPH
5HVHWVRXQGVHWWLQJV
:$9(%$1'
)0
AM
MAN
U
AL T
U
NE
628
1'
6
(77,1
*6
%
D
O
D
Q
FH
)
DGH
U
%DVV
7UHEOH
(T
XD
OL
]HU
Lin
ea
r
Classic
-
D]]
Rock
/
Pop
Tech
n
o
V
oca
l
/
RXG
Q
HVV
6SHHGGHSHQGHQWYROXPH
5
HVHWVRXQ
G
VHWW
L
Q
J
V
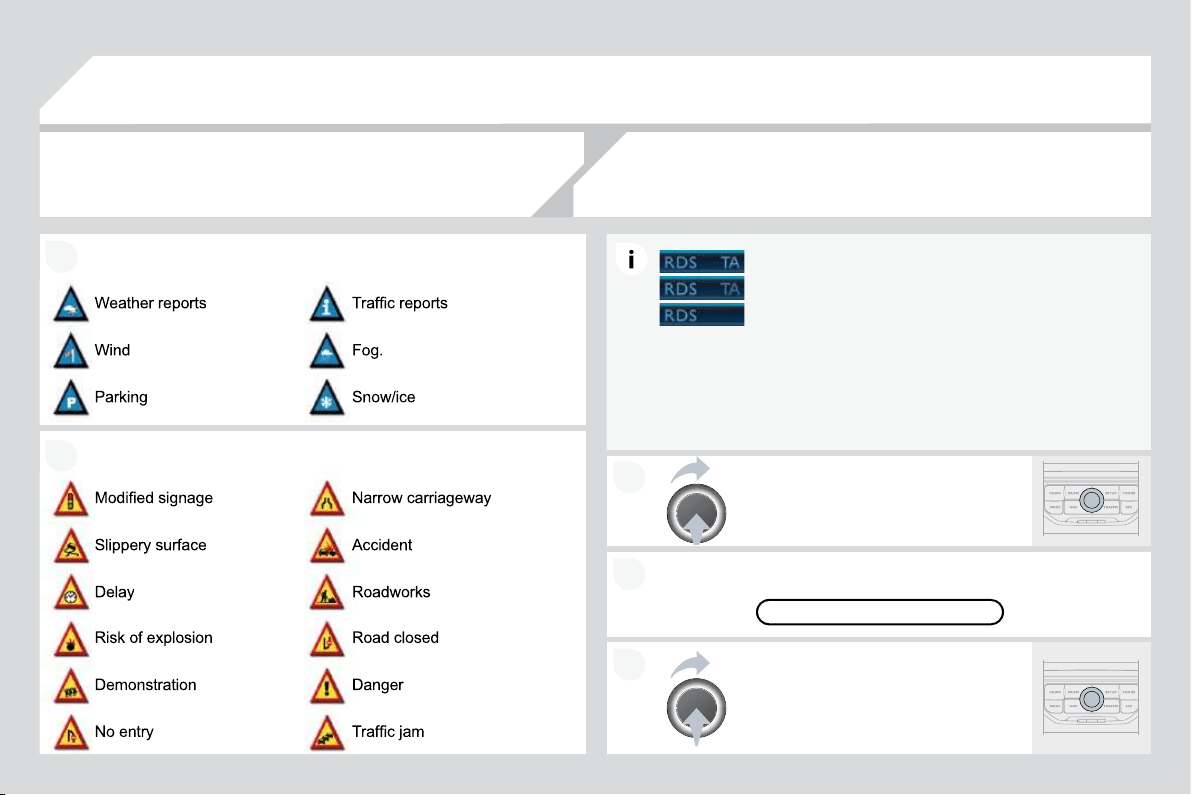
1
2
4
2
3
4
2
3
4
4
4
4
4
4
4
4
4
4
4
3
3
3
3
2
4
4
4
3
3
3
3
4
4
4
2
3
3
3
3
3
3
3
3
4
4
2
4
4
4
4
4
3
3
3
3
4
4
4
5
2
87(
2
37,
2
1
6
5RXWHW\SH
Fast route
S
hort route
2
SWLPL]HGURXWH
5
RXWH
G
\QDP
L
FV
7UDI¿FLQGH
S
HQGHQW
Semi-dynamic
$
Y
R
L
GD
Q
FH
F
UL
WH
UL
D
A
vo
id
motorwa
y
s
A
v
oid
t
oll
r
oads
A
v
o
i
d
f
e
rri
es
5
HFD
O
FX
O
DWH
6
7
2
3
2
9(5
6
$
GGVWR
S
RYHU
Address input
1DYLJDWH+20(
C
hoose
f
rom address book
C
hoose
f
rom last destinations
5HDUUDQJHURXWH
5HSODFHVWRSRYHU
'HOHWHVWRSRYHU
5
HFD
O
FX
O
DWH
Fas
t r
ou
t
e
Short route
2
S
WLPL]HGURXWH
1$9,
*
$7,
2
10(1
8
$%257*8,'$1&(5(680(*8,'$1&(
32,6($5&+
32,QHDUE
\
3
2
,QHDUGHVWLQDWLRQ
3
2
,LQFLW\
3
2
,LQFRXQWU\
32,QHDUURXWH
DESTINATION INPUT
$GGUHVVLQSXW
C
ountr
y
C
ity
Street
House number
6WDUWURXWHJXLGDQFH
Postal code
S
ave to address book
Intersection
City district
*
HRSRVLWLRQ
M
ap
1DYLJDWH+
2
0(
&
K
RRVH
I
U
R
P
DGG
U
HVV
ERR
N
&
K
RRVH
I
U
R
PO
DVW
GHVW
LQ
DW
L
R
Q
V
70&VWDWLRQLQIRUPDWLRQ
6(77,1*6
1
DY
L
YR
O
XPH
3
2
,FDWHJRULHVRQ0DS
6
HW
S
DUDPHWHUV
I
RUULVNDUHDV
'LVSOD\RQPDS
Vi
sua
l
a
l
ert
S
ound alert

1
2
3
4
1
3
4
3
4
2
2
2
3
4
4
4
4
2
3
3
3
2
3
3
3
2
3
4
4
4
4
2
4
3
4
3
3
3
3
3
3
3
3
2
4
4
2
3
4
4
3
4
4
4
2
3
3
3
3+
2
1(0(1
8
"
S
ET
U
P" MEN
U
',$/180%(5
',$/)5
2
0$''5(
66
%
22
.
6
<
6
7(0/$1
*8
$
*
(
'
HXWVF
K
(Q
J
OLVK
(
VSDxR
O
)
UDQoD
L
V
,WDOLDQR
1HGHUODQGV
3ROVNL
3
RUWX
J
XHVH
'$7(
7,0(
6HWGDWHWLPH
'
DWH
IR
UP
DW
7LPHIRUPDW
'D
U
N
EOXH
0D
S
FRORX
U
'D\PRGHIRUPDS
1L
J
KWPRGHIRUPDS
$
XWR'D
\
1L
J
KW
I
RUPDS
9
(+,
&
/(
9H
KL
F
O
H
LQ
IR
UP
DW
L
R
Q
$
OHUWORJ
S
tatus of functions
',63/$
<
%
U
L
J
K
WQHVV
&RORXU
Po
p
titanium
To
ff
ee
Blue
s
t
eel
7HFKQRJUH\
UNITS
7
HP
S
HUDWXUH
Celsius
Fahrenheit
0HWULF
,PSHULDO
.LORPHWUHV
&
RQVXPSWLRQO
.LORPHWUHV
&
RQVXPSWLRQNP
O
0LOHV&RQVXPSWLRQ03*
6
<
6
7(0
)
DFWRU
\
UHVHW
6RIWZDUHYHUVLRQ
$
XWRPDW
L
FVFUR
OOL
QJ
CALL LI
S
T
S
&211(&73+21(
6
HDUFK
S
KRQH
3KRQHVFRQQHFWHG
'LVFRQQHFWSKRQH
Rename phone
'HOHWHSDLULQJ
'
H
O
HWHD
OO
SD
L
U
L
QJV
Show details
6
(77,1
*6
6HOHFWULQ
J
WRQH
3KRQH
5LQ
J
WRQHYROXPH
(
QWHUPD
LOE
R[QXP
E
HU
$YDLODEOHDFFRUGLQJWRPRGHO
There is a di
ff
erence in
soun
d
qua
li
ty
b
etween
t
he di
ff
erent audio
VRXUFHVUDGLR&'
&KHFNWKDWWKHDXGLRVHWWLQ
J
V
9ROXPH%DVV
7UHEOH$PELHQFH/RXGQHVV
DUHDGDSWHGWR
t
he
sou
r
ces
lis
t
e
n
ed
t
o
.
I
t
is
ad
v
isable
t
o
se
t
WKH$8',
2
I
XQFWLRQV
%DVV7UHEOH)URQW5HD
U
%
DODQFH/HIW5LJKW%DODQFHWRWKHPLGGOH
p
osition, select the Linear musical ambience
a
n
d
set t
h
e
l
ou
d
ness correct
i
on to t
h
e
"A
ct
i
ve
"
S
RVLWLRQLQ
&
'PRGHRUWRWKH,QDFWLYHSRVLWLRQ
i
n ra
di
o mo
d
e.
)RURSWLPXPVRXQGTXDOLW
\
WKHDXGLRVHWWLQ
J
V
9ROXPH%DVV7UHEOH
$
PELHQFH/RXGQHVV
FDQEHDGDSWHGWRWKHGL
II
HUHQWVRXQGVRXUFHV
ZKLFKPD
\
UHVXOWLQDXGLEOHGLIIHUHQFHVZKHQFKDQ
J
LQ
J
VRXUFH
UDGLR
&
'
7KH
&
'LVH
M
HFWHG
a
utomat
i
ca
ll
y or
i
s not
played by the player.
7KH
&
'LVSURWHFWHGE
\
DQDQWLSLUDWLQ
J
SURWHFWLRQ
V
\VWHPZ
KL
F
K
L
VQRWUHFRJQ
L
VH
G
E
\W
K
HDX
GL
R
e
quipment.
&KHFNWKDWWKH&'LVLQVHUWHGLQWKHSOD\HUWKH
U
L
J
KWZD
\
XS
&
KHFNWKHFRQGLWLRQR
I
WKH
&
'WKH
&
'FDQQRW
E
HSOD
\
HGLILWLVWRRGDPD
J
HG
-
C
heck the content in the case o
f
a recorded
&
'FRQVXOWWKHDGYLFHLQWKH$XGLRVHFWLRQ
-
7KHDXGLRHTXLSPHQWV
&
'SOD
\
HUGRHVQRWSOD
\
'9'V
- Because of their quality level, certain writeable
&
'VZLOOQRWEHSOD
\
HGE
\
WKHDXGLRV
\
VWHP
7KH
&
'LVLQVHUWHGXSVLGHGRZQLVXQSOD
\
DEOHGRHVQRWFRQWDLQDQ
\
DXGLR
d
ata or contains an audio format which the player cannot play.
7KH
&
'SOD\HUVRXQG
i
s
p
oor.
,QVHUWJRRGTXDOLW\&'VDQGVWRUHWKHPLQ
su
it
ab
l
e
co
n
d
iti
o
n
s
.
7KH
&
'XVHGLVVFUDWFKHGRUR
I
SRRUTXDOLW\
7KHDXGLRHTXLSPHQWVHWWLQ
J
V
EDVVWUHEOHDPELHQFHV
DUHXQVXLWDEOH
6HWWKHWUHEOHRUEDVVOHYHOWRZLWKRXWVHOHFWLQJ
a
n
a
m
b
i
e
n
ce
.
48(67,21
62
/87,
2
1
$
16:(5
)5(
4
8(17/<$6.('
4
8(67,216

62
/
8
7,
2
1
$
1
6
:(5
The quality o
f
reception
o
f th
e
r
ad
i
o
s
t
a
ti
o
n
OLVWHQHGWRJUDGXDOO\
deteriorates or the
s
t
o
r
ed
s
t
a
ti
o
n
s
do
n
ot
f
unction
(
no
VRXQG0K]LV
GLVSOD\HG
The vehicle is too
f
ar
f
rom the transmitter used by the station listened to or
W
K
HUH
L
VQRWUDQVP
L
WWHU
L
QW
K
HJHRJUDS
KL
FD
O
DUHDW
K
URXJ
K
Z
KL
F
K
W
K
HYH
KL
F
O
H
L
VWUDYHOOLQ
J
7KHHQYLURQPHQWKLOOVEXLOGLQJVWXQQHOVEDVHPHQWFDUSDUNVEORFN
UHFHSWLRQLQFOXGLQ
J
LQ5'
6
PRGH
7KHDHULDOLVDEVHQWRUKDVEHHQGDPD
J
HG
I
RUH[DPSOHZKHQ
J
RLQ
J
WKURXJKDFDUZDVKRULQWRDQXQGHUJURXQGFDUSDUN
$
FWLYDWHWKH5'
6
I
XQFWLRQWRHQDEOHWKHV\VWHP
to check whether there is a more
p
owerful
WUDQVPLWWHULQWKH
J
HR
J
UDSKLFDODUHD
Thi
s
ph
enomenon
i
s norma
l
an
d
d
oes not
i
ndicate a
f
ailure o
f
the audio equipment.
Have the aerial checked by a CITRO
Ë
N dealer.
Sound cut-outs of 1
to
2
seconds in radio
mode
.
'XULQ
J
WKLVEULHIVRXQGFXWRXWWKH5'6VHDUFKHVIRUDQ
\
IUHTXHQF
\
S
HUPLWWLQJEHWWHUUHFHSWLRQR
I
WKHVWDWLRQ
'HDFWLYDWHWKH5'6IXQFWLRQLIWKH
S
KHQRPHQRQ
i
s too
f
requent and always on the same route.
:LWKWKHHQJLQHRII
the audio equipment
switches off after a few
m
in
u
t
es
o
f
use
.
:KHQWKHHQJLQHLVVZLWFKHGRIIWKHDXGLRHTXLSPHQWRSHUDWLQJWLPH
G
HSHQGVRQWKHEDWWHU
\
FKDU
J
H
The switch-o
ff
is normal: the audio equipment switches to economy mode
DQGVZLWFKHVRIIWRSUHYHQWGLVFKDU
J
LQ
J
RIWKHYHKLFOHVEDWWHU
\
6WDUWWKHYHKLFOHVHQJLQHWRLQFUHDVHWKHEDWWHU\
F
KDU
J
H
The stored stations do
not
f
unction
(
no sound,
0K]LVGLVSOD\HG
An incorrect waveband is selected.
3UHVVWKH%$1'$
6
7EXWWRQWRUHWXUQWRWKH
Z
DYHEDQG
$0)0)0)0$
6
7
RQZKLFKWKH
s
t
a
t
io
n
s
a
r
e
s
t
o
r
ed
.

48(67,21
62
/
8
7,
2
1
$16:(5
The TA box is ticked.
+
RZHYHUFHUWDLQWUDI¿F
MDPVDORQJWKHURXWH
a
re not
i
n
di
cate
d
i
n rea
l
tim
e
.
2
QVWDUWLQJLWLVVHYHUDOPLQXWHVEH
I
RUHWKHV\VWHPEHJLQVWRUHFHLYHWKH
WUDI¿FLQIRUPDWLRQ
:DLWXQWLOWKHWUD
I¿
FLQ
I
RUPDWLRQLVEHLQJUHFHLYHG
FRUUHFWO\GLVSOD\LQJRIWKHWUDI¿FLQIRUPDWLRQ
V
\
PEROVRQWKHPDS
,QFHUWDLQFRXQWULHVRQO\PDMRUURXWHVPRWRUZD\VDUHOLVWHGIRUWKH
WUDI¿FLQIRUPDWLRQ
The time taken to
calcula
t
e
a
r
ou
t
e
sometimes seems
O
RQJHUW
K
DQXVXD
O
Thi
s p
h
enomenon
i
s norma
l
.
Th
e system
i
s
GH
S
HQGHQWRQWKHWUDI¿FLQIRUPDWLRQDYDLODEOH
7KHSHU
I
RUPDQFHR
I
WKHV\VWHPPD\VORZGRZQWHPSRUDULO\L
I
D
&
'LV
E
H
L
Q
J
FRS
L
H
G
RQWRW
K
H
-
X
N
H
E
R[DWW
K
HVDPHW
L
PHDVDURXWH
L
V
E
H
L
Q
J
c
alculated.
:DLWXQWLOWKH
&
'KDVEHHQFRSLHGRUVWRSWKH
FRS
\
LQ
J
EHIRUHVWDUWLQ
J
WKH
J
XLGDQFHIXQFWLRQ
The
al
t
i
t
ude
is
n
o
t
displa
y
ed.
2QVWDUWLQJWKHLQLWLDOLVDWLRQRIWKH*36PD\WDNHXSWRPLQXWHVWR
r
eceive more than
3
satellites correctl
y
.
W
a
i
t unt
il
t
h
e system
h
as starte
d
up comp
l
ete
l
y.
&
KHFNWKDWWKHUHLVD
*
3
6
FRYHUD
J
HR
I
DWOHDVW
VDWHOOLWHVORQJSUHVVRQWKH6(783EXWWRQ
W
KHQVHOHFW
*
3
6
FRYHUD
J
H
'HSHQGLQ
J
RQWKH
J
HR
J
UDSKLFDOHQYLURQPHQW
WXQQHO
RUWKHZHDWKHUWKH
F
RQGLWLRQVR
I
UHFHSWLRQR
I
WKH
*
3
6
VLJQDOPD\YDU\
This phenomenon is normal. The s
y
stem is
dependent on the conditions o
f
reception o
f
the
*
36VL
J
QDO
The route is not
calculated successfully.
7KHH[FOXVLRQFULWHULDPD
\
FRQÀLFWZLWKWKHFXUUHQWORFDWLRQ
H[FOXVLRQRI
WROOURDGVRQDPRWRUZD\ZLWKWROOV
C
heck the exclusion criteria.
I receive a speed
camera alert for a
camera which is not on
my route.
The audible speed
ca
m
e
r
a
ale
rt
is
n
o
t
Z
RUNLQ
J
7K
HV
\
VWHPDQQRXQFHVD
OO
VSHH
G
FDPHUDV
O
RFDWH
G
L
QDFRQ
L
FD
O
]RQH
forward of the vehicle.
I
t ma
y
detect speed cameras on nearb
y
or parallel
r
oads
.
Audible alerts are not active.
Th
e
a
l
e
rt v
o
l
u
m
e
l
e
v
e
l i
s
se
t t
o
minim
u
m.
=RRPWKHPD
S
WRYLHZWKHH[DFW
S
RVLWLRQRIWKH
speed camera.
$
FW
L
YDWHDX
GLEO
HD
O
HUWV
L
Q
1
DY
LJ
DW
L
RQ
0
HQX
6
HWWLQ
J
V
6
HWSDUDPHWHUV
I
RUULVNDUHDV
Increase the s
p
eed camera alert volume.
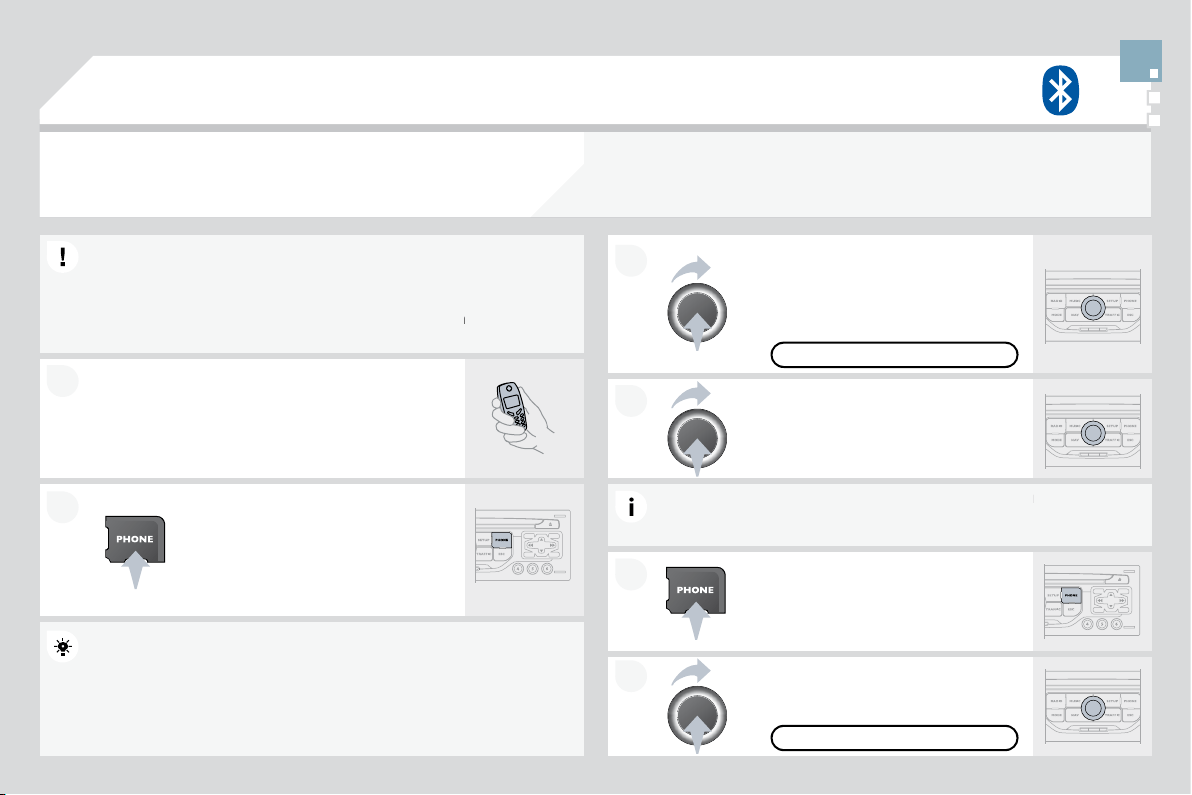
7KHUHLVDORQ
J
ZDLWLQ
J
WLPHDIWHULQVHUWLQJD&'
When a new medium is inserted, the s
y
stem reads a certain amount of
G
DWD
GLUHFWRU\WLWOHDUWLVWHWF
7KLVPD\WDNHD
I
HZVHFRQGV
This
p
henomenon is normal.
I cannot connect my
Bl
uetoot
h
te
l
e
ph
one.
A
te
l
e
ph
one connecte
d
by Bluetooth is
inaudible.
The telephone's Bluetooth
f
unction ma
y
be deactivated or the equipment
may not
b
e v
i
s
ibl
e.
Th
e vo
l
ume
l
eve
l
d
epen
d
s on
b
ot
h
t
h
e s
y
stem an
d
t
h
e te
l
ep
h
one.
-
C
heck that
y
our telephone's Bluetooth
f
unction
is
ac
t
i
v
a
t
ed
.
-
C
heck that
y
our telephone is visible.
,
QFUHDVHW
K
H
0\:
D
\
YR
O
XPHVHWW
L
Q
J
SRVV
LEO\
WR
m
aximum, and increase the telephone volume
level if necessary.
4
8(
6
7,
2
1
62
/
8
7,
2
1
$
1
6
:(5
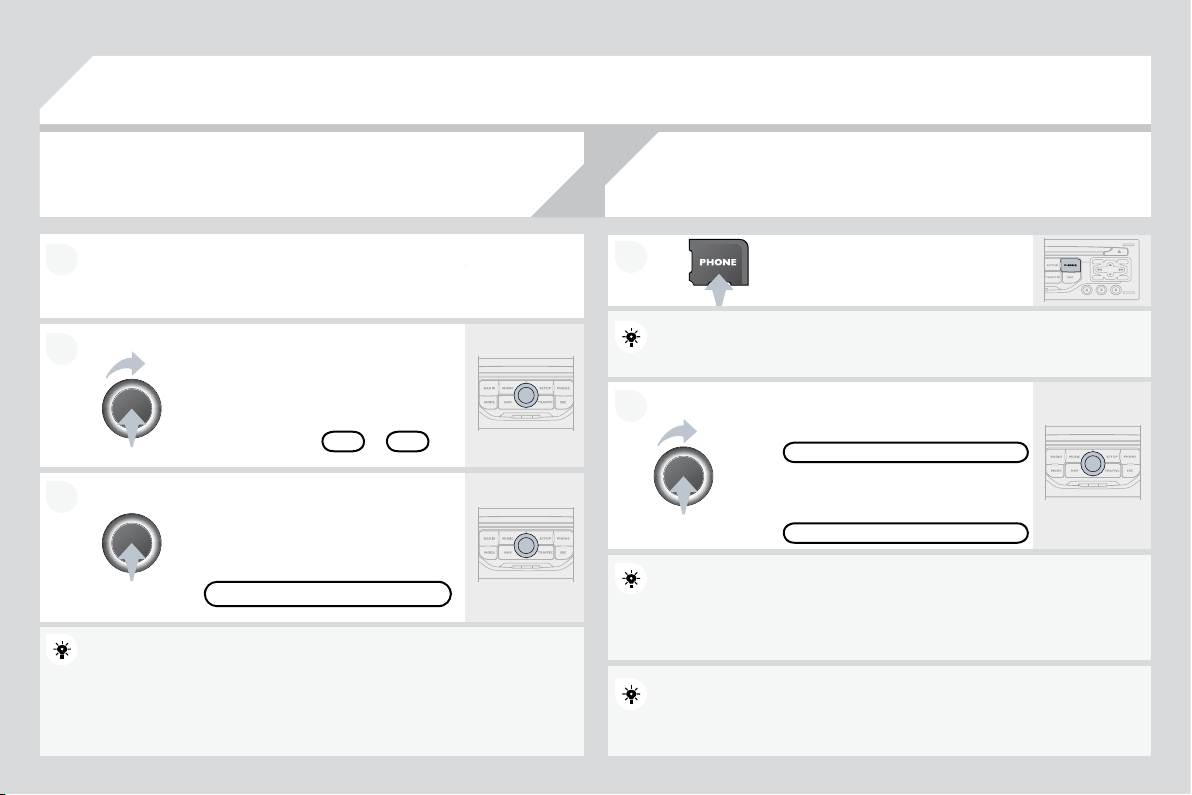
$
X
GL
RV
\
VWHP
CO
NTENT
S
Ɣ
)LUVWVWHSV S
Ɣ
*
HQHUDOPHQX S
Ɣ
$XGLR S
Ɣ8
6
%3OD
\
HU S
Ɣ%OXHWRRWK
I
XQFWLRQV S
Ɣ
6
WHHULQ
J
PRXQWHGFRQWUROV S
Ɣ
&
RQ
¿
J
XUDWLRQ S
Ɣ
6
FUHHQPHQXPDS S
Ɣ)UHTXHQWO
\
DVNHGTXHVWLRQV S
Y
our
A
u
di
o system
i
s co
d
e
d
i
n suc
h
a way t
h
at
i
t w
ill
on
l
y
operate in
y
our vehicle. I
f
it is to be installed in another
YHKLFOHFRQWDFWD&,752É1GHDOHUIRUFRQ¿JXUDWLRQRI
y
the s
y
stem.
For safety reasons, the driver must carry out operations
Z
KLFKUHTXLUHSURORQ
J
HGDWWHQWLRQZKLOHWKHYHKLFOHLV
s
tat
i
onary.
:KHQWKHHQ
J
LQHLVVZLWFKHGRIIDQGWRSUHYHQW
GLVFKDUJLQJR
I
WKHEDWWHU\\RXU$XGLRV\VWHPPD\VZLWFK
off after a few minutes.
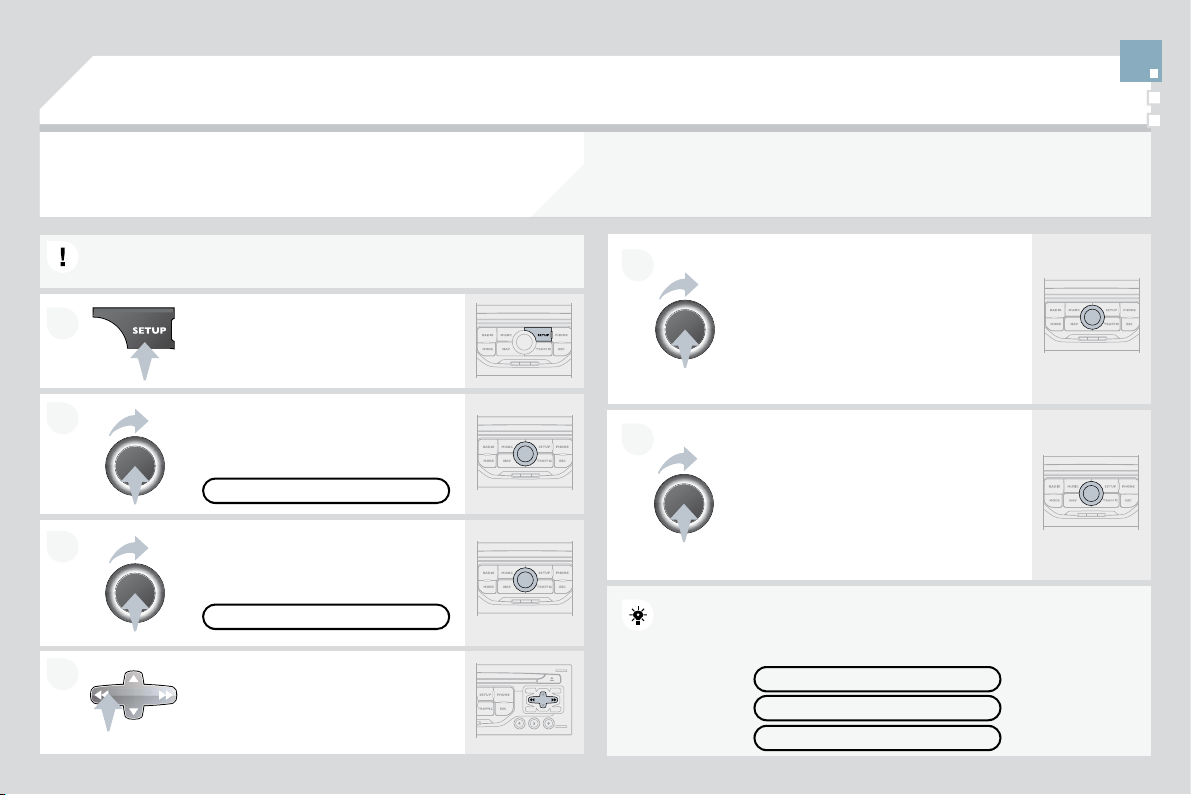
1
2
11
7
12
O
n
/Off
and volume adjustment.
&
'H
M
HFW
6HOHFWLRQRIWKHGLVSOD\RQWKHVFUHHQIURPWKHIROORZLQJ
modes:
$XGLR
$8',
2
7ULS
&
RPSXWHU
75,3
DQG7HOHSKRQH
7(/
functions.
Selection of source:
UDGLRDXGLR&'03&'86%-DFNFRQQHFWLRQ6WUHDPLQJ
Selection of FM1, FM2, FMast and AM wavebands.
6
HWWLQ
J
DXGLRRSWLRQV
I
URQW
UHDUEDODQFHOH
I
W
UL
J
KWEDODQFH
l
ou
d
ness, soun
d
am
bi
ence.
'LVSOD
\
WKHOLVWR
I
ORFDOVWDWLRQVR
I
WKHWUDFNVRQWKH
&
'RUR
I
the MP3
f
olders.
Ab
an
d
on current operat
i
on.
7$
7UD
I¿
F$QQRXQFHPHQW
I
XQFWLRQRQ
R
II
/RQJSUHVVDFFHVVWRWKH37<7\SHVRIUDGLRSURJUDPPH
m
o
d
e.
&RQ¿UPDWLRQ
$XWRPDWLFVHDUFK
I
RUDORZHU
KLJKHU
I
UHTXHQF\
6HOHFWLRQRI
S
UHYLRXVQH[W&'03RU86%WUDFN
6
HOHFWLRQR
I
DORZHU
KLJKHUUDGLR
I
UHTXHQF\
Selection of the
p
revious/next MP3 folder.
6
HOHFWLRQR
I
WKHSUHYLRXV
QH[W8
6
%HTXLSPHQW
I
ROGHU
J
HQUH
artist/playlist.
'L
VS
O
D
\
W
K
H
J
HQHUD
O
PHQX
Buttons 1 to 6:
S
election o
f
a stored radio station.
/
RQJSUHVVVWRUHDVWDW
L
RQ
7K
H
'$5.
E
XWWRQF
K
DQJHVW
K
H
GL
VS
O
D\RQW
K
HVFUHHQWR
LPSURYHGULYLQJFRPIRUWDWQLJKW
VWSUHVVOL
J
KWLQ
J
WKHXSSHUEDQGRQO
\
2nd press: display o
f
a black screen.
3rd press: return to the standard display.

*
(1(5$/0(18
$8',2)81&7,21
6
:
UDGLR&'86%RSWLRQV
75,3&20387(5
:
5
alerts, status of functions.
7
(/(3+
2
1
(
:
K
DQGVIUHHNLWSDLULQJ
P
DQD
J
HPHQWR
I
DFDOO
3(5621$/,6$7,21
&2
1),
*8
5$7,
21
:
Y
HKLFOHSDUDPHWHUVGLVSOD\ODQJXDJHV
!0212&+520(6&5((1&
!0
2
1
2&
+5
2
0(
6&
5((1
$
)RUDGHWDLOHGJOREDOYLHZR
I
WKH
m
enus available, refer to the
"
S
creen menu map" section o
f
t
hi
s c
h
a
p
ter.
2
2
1
1
2
2
1
1
AUDIO
3UHVVWKH6285&(EXWWRQVHYHUDO
times in succession and select the
r
a
di
o.
3UHVVWKH%$1'$67EXWWRQWRVHOHFW
a waveband: FM
1
, FM
2
, FMast, AM.
%ULH
À
\SUHVVRQHR
I
WKHEXWWRQVWR
c
arr
y
out an automatic search of the
radio stations.
Press one o
f
the buttons to carry out a
ma
n
ua
l
sea
r
c
h
o
f th
e
r
ad
i
o
s
t
a
ti
o
n
s
.
3UHVVWKH/,675()5(6+EXWWRQWR
d
ispla
y
the list o
f
stations received
ORFDOO\VWDWLRQVPD[LPXP
To u
p
date this list,
p
ress for more than
two secon
d
s.
6HOHFW$&7,9$7()5(48(1&
<
)
2
//
2
:,1
*
5'
6
WKHQSUHVV
2
.
5'6DSSHDUVRQWKHGLVSOD\
6
HOHFWWKH)0:$9(%$1'
3
5()(5(1&(6IXQFWLRQWKHQ
S
UHVV
2
.
6
HOHFW$
8
',
2
)
8
1
&
7,
2
1
6
WKHQ
S
UHVV
2
.
3
UHVVW
K
H
0(18
E
XWWRQ
7KHH[WHUQDOHQYLURQPHQWKLOOVEXLOGLQJVWXQQHOVEDVHPHQWFDUSDUNVPD\EORFNUHFHSWLRQ
LQFOXGLQ
J
LQ5'
6
PRGH7KLVLVDQRUPDOH
II
HFWR
I
WKHZD
\
LQZKLFKUDGLRZDYHVDUHWUDQVPLWWHGDQG
does not indicate any failure of the audio equipment.
5'6
7KH5'6LIGLVSOD
\
HGHQDEOHV
\
RXWRFRQWLQXHOLVWHQLQ
J
WRWKHVDPH
V
WDWLRQE\DXWRPDWLFUHWXQLQJWRDOWHUQDWLYH
I
UHTXHQFLHV+RZHYHULQ
F
HUWDLQFRQGLWLRQVFRYHUD
J
HRIDQ5'6VWDWLRQPD
\
QRWEHDVVXUHG
W
KURXJKRXWWKHFRXQWU\DVUDGLRVWDWLRQVGRQRWFRYHU
R
I
WKH
W
HUULWRU
\
7KLVH[SODLQVWKHORVVRIUHFHSWLRQRIWKHVWDWLRQGXULQ
J
D
M
RXUQH
\
5
$',
2
6
(/(
&
7,1
*
$
6
7$7,
2
1
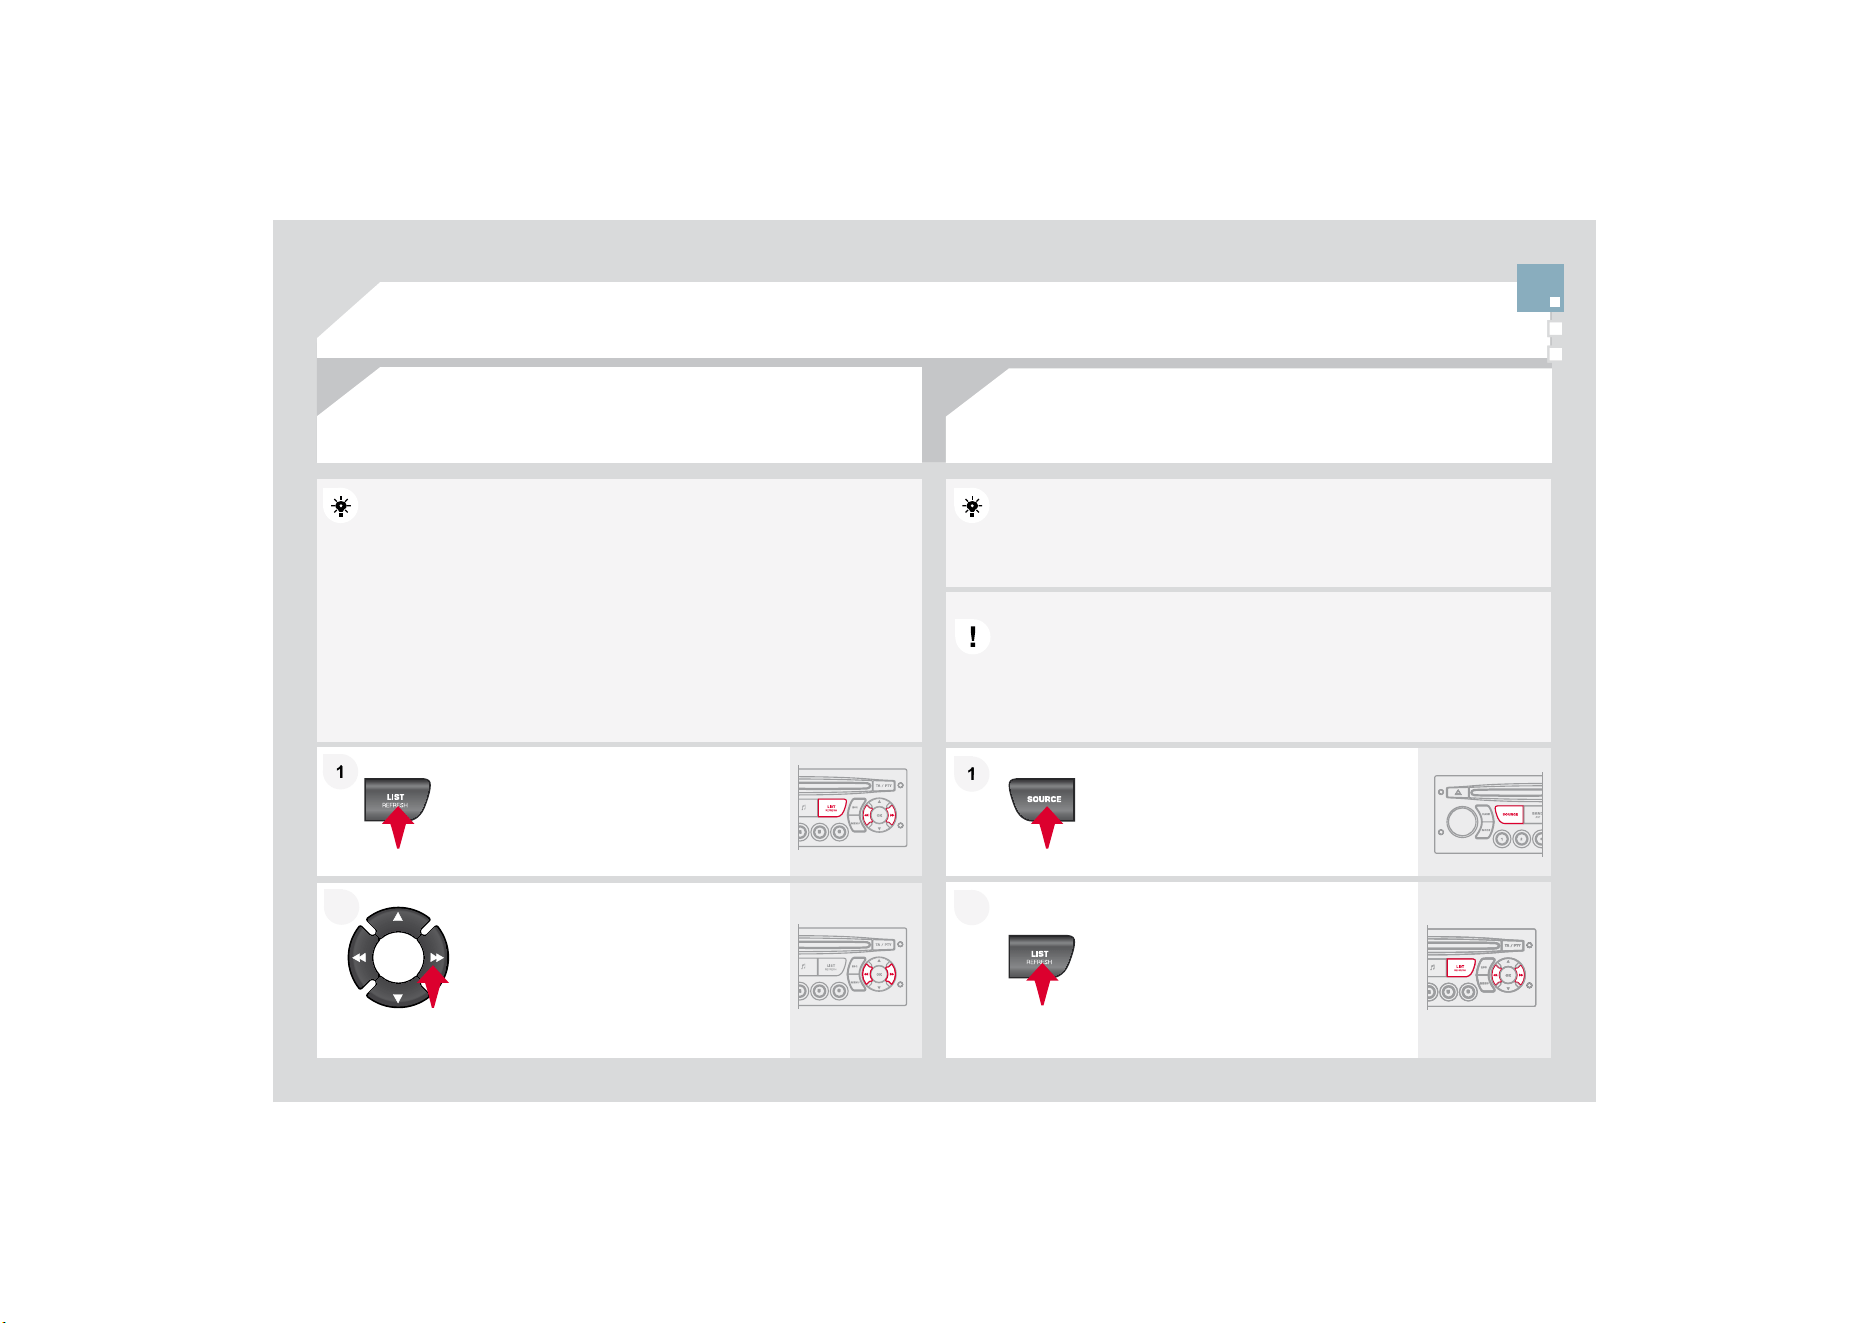
1
1
2
2
1
1
2
2
Insert circular compact discs only.
6RPHDQWLSLUDWLQJV\VWHPVRQRULJLQDOGLVFVRU&'VFRSLHGXVLQJD
SHUVRQDOUHFRUGHUPD
\
FDXVH
I
DXOWVZKLFKDUHQRUH
À
HFWLRQRQWKH
T
XDOLW\RIWKHRULJLQDOSOD\HU
:LWKRXWSUHVVLQJWKH(-(&7EXWWRQLQVHUWD&'LQWKHSOD\HUSOD\
E
HJ
L
QVDXWRPDW
L
FD
OO
\
7RSOD\DGLVFZKLFKKDVDOUHDG\EHHQLQVHUWHGSUHVVWKH6285&(
EXWWRQVHYHUDOWLPHVLQVXFFHVVLRQDQGVHOHFW
&
'
Pr
ess
o
n
e
o
f th
e
bu
tt
o
n
s
t
o
se
l
ec
t
a
WUDFNRQWKH
&
'
3UHVVWKH/,675()5(6+EXWWRQWR
GLVSOD
\
WKHOLVWRIWUDFNVRQWKH&'
Pr
ess
a
n
d
h
o
l
d
o
n
e
of
th
e
bu
tt
o
n
s
fo
r
fast forward or backward.
Insert an MP
3
compilation in the player.
The audio equipment searches for all of the music tracks, which ma
y
WDNHDQ\WKLQJEHWZHHQD
I
HZVHFRQGVDQGVHYHUDOWHQVR
I
VHFRQGV
EHIRUHSOD
\
EH
J
LQV
2QDVLQ
J
OHGLVFWKH&'SOD
\
HUFDQUHDGXSWR03¿OHVVSUHDG
over 8 directory levels. However, it is advisable to keep to a limit o
f
WZROHYHOVWRUHGXFHWKHDFFHVVWLPHEHIRUHWKH&'LVSOD
\
HG
:KLOHWKH
&
'LVEHLQ
J
SOD
\
HGWKHGLUHFWRU
\
À
RZFKDUWLVQRW
I
ROORZHG
$
OORIWKH¿OHVDUHGLVSOD\HGRQDVLQJOHOHYHO
To pla
y
a disc which has alread
y
been
L
QVHUWHG
S
UHVVWKH6285&(EXWWRQ
se
v
e
r
a
l tim
es
in
success
i
o
n
a
n
d
V
HOHFW
&
'
Pr
ess
o
n
e
o
f th
e
bu
tt
o
n
s
t
o
se
l
ec
t
a
WUDFNRQWKH
&
'
3UHVVWKH/,675()5(6+EXWWRQWR
d
ispla
y
the list o
f
directories o
f
the
M
P3 com
p
ilation.
Pr
ess
a
n
d
h
o
l
d
o
n
e
o
f th
e
bu
tt
o
n
s
f
o
r
f
ast
f
orward or backward play.
CD
3/$<,1
*
$
&
'
03
&
'
3/$<,1
*
$103
&2
03,/$7,
2
1
AUDIO
7KH03
I
RUPDWDQDEEUHYLDWLRQR
I
03(
*
$
$XGLR/D\HU
LVDQDXGLRFRPSUHVVLRQVWDQGDUGZKLFKSHUPLWVWKH
H
UHFRUGLQ
J
RI
V
HYHUDOWHQVR
I
PXVLF
¿
OHVRQDVLQ
J
OHGLVF
,QRUGHUWREHDEOHWRSOD\DUHFRUGHG
&
'5RU
&
'5:ZKHQUHFRUGLQJ
L
WLV
S
UHIHUDEOHWRVHOHFWVWDQGDUGV,62OHYHORU-ROLHW
I
f
the disc is recorded in another
f
ormat, it may not be
played
c
orrect
l
y.
,WLVUHFRPPHQGHGWKDWWKHVDPHUHFRUGLQ
J
VWDQGDUGL
VDOZD\VXVHG
IRUDQLQGLYLGXDOGLVFZLWKDVORZDVSHHGDVSRVVLEOH
[PD[LPXP
f
or optimum sound qualit
y
.
,QWKHSDUWLFXODUFDVHR
I
DPXOWLVHVVLRQ
&
'WKH-ROLHW
VWDQGDUGLV
recommended.
7KHDXGLRHTXLSPHQWZLOORQO
\
SOD
\
¿OHVZLWKWKHH[WHQ
V
V
LRQPS
Z
LWKDVDPSOLQJUDWHR
I
.+]RU.+]1RRW
K
K
HUW\SHR
I
¿
OH
ZPDPSPXFDQEHSOD\HG
,WLVDGYLVDEOHWRUHVWULFW¿OHQDPHVWRFKDUDFWHUVZLWKRXWXVLQ
J
V
SHFLDOFKDUDFWHUV
H
J
"
WRDYRLGDQ
\
SOD
\
LQ
J
R
R
UGLVSOD
\
LQ
J
p
ro
bl
ems.
03&'
,1)250$7,21$1'$'9,&(
AUDIO

1
1
1
1
2
2
8
6
%%
2
;
7KHV
\
VWHPSXWVWR
J
HWKHUSOD
\
OLVWV
WHPSRUDU
\
PHPRU
\
FUHDWHGRYHU
DSHULRGZKLFKGHSHQGVRQWKHFDSDFLW\R
I
WKH8
6
%HTXLSPHQW
7KHRWKHUVRXUFHVDUHDYDLODEOHGXULQ
J
WKLVWLPH
7KHSOD\OLVWVDUHXSGDWHGHDFKWLPHWKHLJQLWLRQLVVZLWFKHGR
II
RU
HDFKWLPHD86%PHPRU
\
VWLFNLVFRQQHFWHG
:KHQFRQQHFWLQ
J
I
RUWKH
¿
UVWWLPHWKHFODVVL
¿
FDWLRQVX
JJ
HVWHGLVE
\
IROGHU:KHQ\RXUHFRQQHFWWKHFODVVL¿FDWLRQVHOHFWHGSUHYLRXVO\LV
r
e
t
a
in
ed
.
C
onnect the memory stick to the port, directly or
X
VLQ
J
DOHDG,IWKHDXGLRHTXLSPHQWLVVZLWFKHG
RQ
WKH8
6
%VRXUFHLVGHWHFWHGDVVRRQDVLWLV
F
RQQHFWHG3OD
\
EH
J
LQVDXWRPDWLFDOO
\
DIWHUDGHOD
\
Z
KLFKGHSHQGVRQWKHFDSDFLW
\
R
I
WKH8
6
%VWLFN
7KH¿OHIRUPDWVUHFRJQLVHGDUHPS
PSH
J
OD
\
HURQO
\
ZPD
VWDQGDUGRQO
\
NELWVVHFFRPSUHVVLRQZDYDQGRJJ
The pla
y
lists t
y
pes accepted are m3u, .pls, .wpl.
7KLVXQLWFRQVLVWVRID86%
S
RUWDQGD-DFN
VRFNHW
7KHDXGLR
¿
OHVDUHWUDQVPLWWHG
I
URP
SRUWD
EO
HHTX
L
SPHQWVXF
K
DVD
GLJL
WD
O
S
O
D
\
HURUD
86
%PHPRU\VWLFNWR\RXU$XGLRV\VWHPWREH
li
stene
d
to v
i
a t
h
e ve
hi
c
l
e
'
s s
p
ea
k
ers.
8
6
%NH
\
DQG
RU,SRG
®
of
®
JHQHUDWLRQRUODWHU
8
6
%PHPRU
\
VWLFNVVKRXOGEH
I
RUPDWWHG)$7
R
U)$717)6QRWVXSSRUWHG
- the I
p
od
®
lead is essential,
®
QDYLJDWLRQWKURXJKWKH
¿
OHGDWDEDVHLVE\
PHDQVRIWKHVWHHULQ
J
ZKHHOFRQWUROV
WKH,3RGVR
I
WZDUHVKRXOGEHUHJXODUO\XSGDWHG
for the best connection.
Other I
p
od
®
SOD\HUVRIHDUOLHUJHQHUDWLRQVDQG
®
SOD\HUVXVLQJWKH073SURWRFRO
SOD
\
YLD-DFN-DFNOHDGRQO
\
QRWVXSSOLHG
QDYL
J
DWLRQWKURX
J
KWKH
¿
OHGDWDEDVHLV
I
URPWKH
p
orta
bl
e e
q
u
ip
ment.
The list o
f
compatible equipment and the compression rates supported
a
re available from CITRO
Ë
N dealers.
86
,1
*
7+(
86
%%
2
;
&2
11(
&
7,1
*
$
86
%0(0
2
5<
6
7,
&
.
$FFRUGLQJWRYHKLFOH
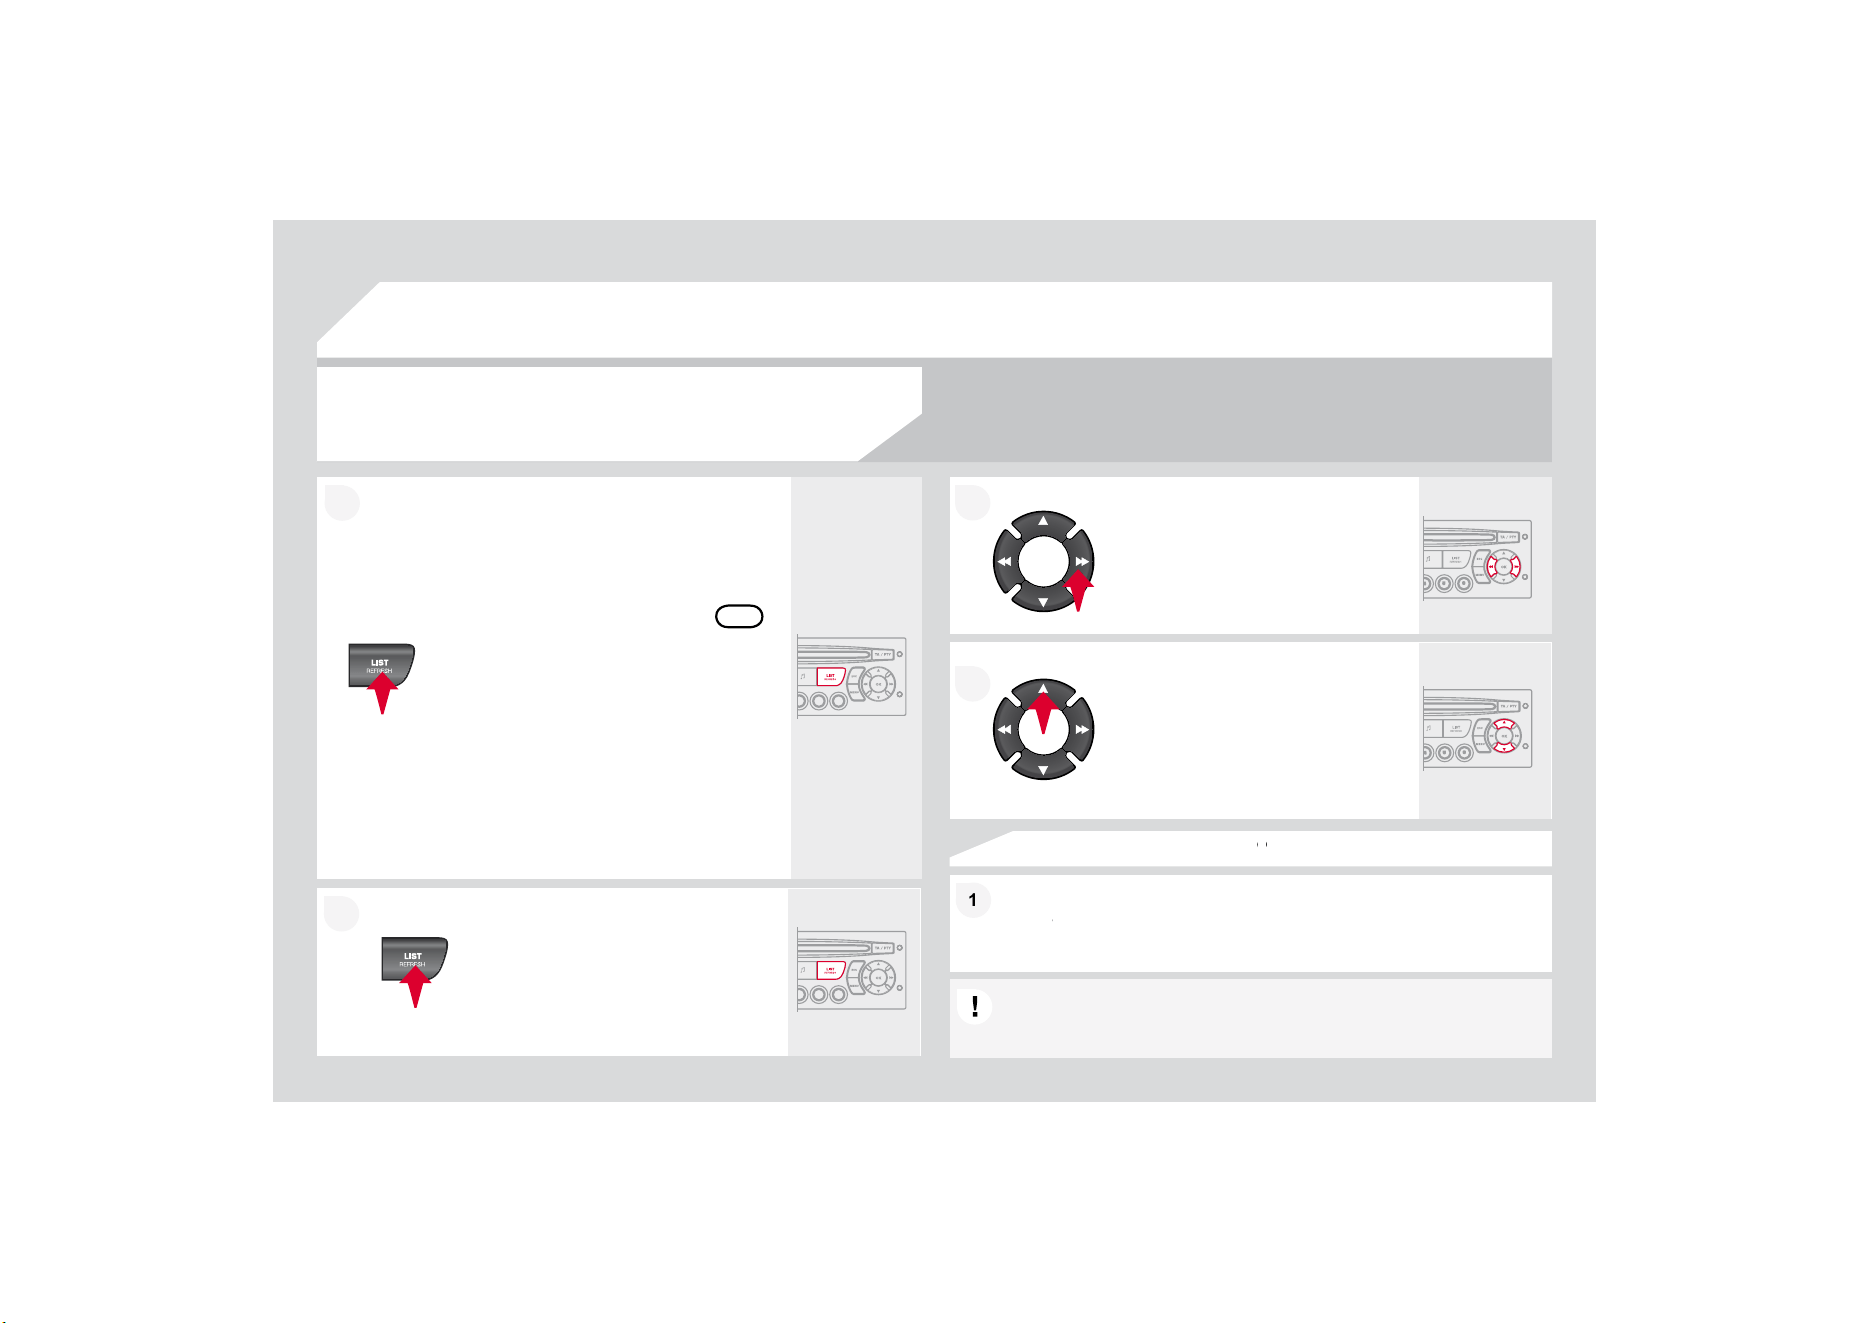
1
1
2
2
86%3OD\HU
86
,1
*
7+(
86
%
62&
.(7
3UHVV/,
6
7EULH
À
\
WRGLVSOD
\
WKH
SUHYLRXVO\VHOHFWHGFODVVL¿FDWLRQ
1DYL
J
DWHWKURX
J
KWKHOLVWXVLQ
J
WKH
OHIWULJKWDQGXSGRZQEXWWRQV
&RQ¿UPWKHVHOHFWLRQE
\
SUHVVLQ
J
2.
7KHOLVWVDYDLODEOHDUH$UWLVW
*
HQUHDQG3OD
\
OLVW
DVGH
¿
QHGRQWKH
iP
o
d
®
®
6HOHFWLRQDQG1DYL
J
DWLRQDUHGHVFULEHGLQVWHSVWRDERYH
'RQRWFRQQHFWDKDUGGLVNRU86%GHYLFHVRWKHUWKDQDXGLR
HTXLSPHQWWRWKH8
6
%SRUW7KLVFRXOGGDPD
J
H
\
RXULQVWDOODWLRQ
&211(&7,1*$1,32'
®
9,$7+(86%3257
®
3UHVVRQHRIWKHVHEXWWRQVWR
J
DLQ
a
ccess to the previous
/
next track on
WKHFODVVL¿FDWLRQOLVWFXUUHQWO\EHLQJ
p
la
y
ed.
Press and hold one of the buttons for
f
ast
f
orward or backward pla
y
.
3UHVVRQHRIWKHVHEXWWRQVWRJDLQ
D
FFHVVWRWKHSUHYLRXV
QH[W
*
HQUH
F
o
ld
er,
A
rt
i
st or
Pl
ay
li
st on t
h
e
F
ODVVL¿FDWLRQOLVWFXUUHQWO
\
EHLQ
J
pl
aye
d
.
Press and hold LIST to display the
GL
II
HUHQWFODVVL
¿
FDWLRQV
6HOHFWE\)ROGHU$UWLVW*HQUH3OD\OLVW
S
UHVV
2
.WRVHOHFWWKHFODVVL
¿
FDWLRQ
U
HTXLUHGWKHQSUHVV
2
.DJDLQWRFRQ
¿
UP
E\)ROGHUDOO
I
ROGHUVFRQWDLQLQJDXGLR
¿
OHVUHFRJQLVHGRQWKHSHULSKHUDO
GHYLFHFODVVL
¿
HGLQDOSKDEHWLFDORUGHU
Z
LWKRXWIROORZLQJWKHÀRZFKDUW
- b
y
Artist: all o
f
the artist names
GH
¿
QHGLQWKH,'7DJVFODVVL
¿
HGLQ
al
p
habetical order.
E\
*
HQUHDOOR
I
WKHJHQUHVGH
¿
QHGLQ
WKH,'7D
J
V
- by Playlist: in accordance with the
S
OD\OLVWVUHFRUGHGRQWKH86%GHYLFH
2
.
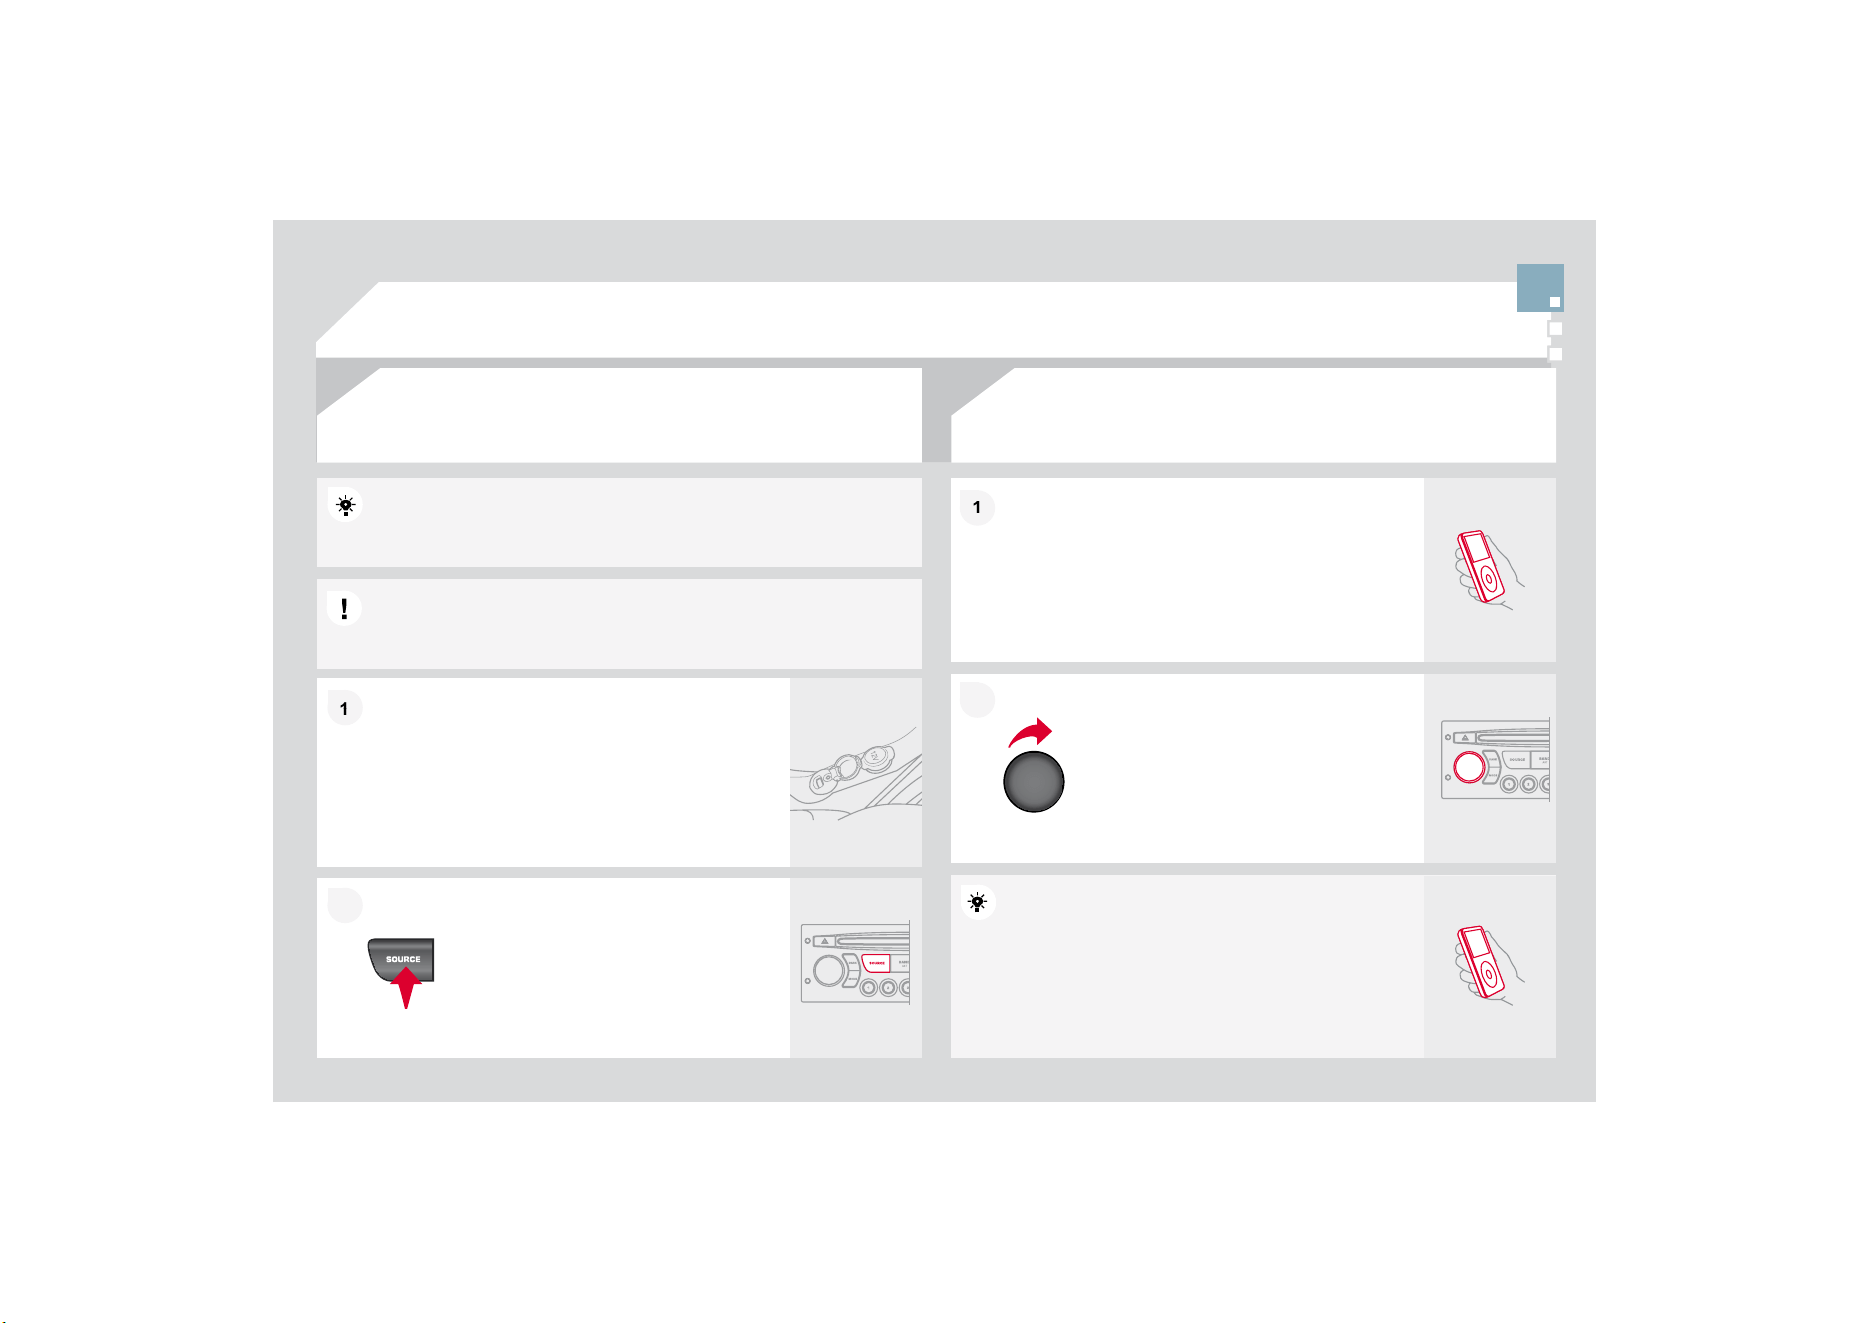
1
1
2
2
2
2
1
1
7KHFRQWUROVDUHGLVSOD
\
HGDQGPDQD
J
HGYLDWKH
p
orta
bl
e equ
i
pment.
First ad
j
ust the volume of
y
our portable equipment.
Then adjust the volume o
f
your audio
e
q
u
ip
ment.
7KHDX[LOLDU\VRFNHW-$&.RU5&$SHUPLWVWKHFRQQHFWLRQRI
SRUWDEOHHTXLSPHQW03SOD\HU
Connect the portable equipment (MP3
SOD
\
HU«
WRWKH-$&.VRFNHWRUWRWKHDXGLR
VRFNHWV
ZKLWHDQGUHG5
&
$W\SH
XVLQJD
VXLWDEOHFDEOH
QRWVXSSOLHG
3UHVVWKH6285&(EXWWRQVHYHUDO
WLPHVLQVXFFHVVLRQDQGVHOHFW$
8
;
86
,1
*
7+($8;,/,$5<
62&
.(7$8;
-$&.62&.(7255&$62&.(7DFFRUGLQJWRYHKLFOH
$'-867,1*7+(92/80(2)7+(
$8;,/,$5<6285&(
'RQRWFRQQHFWDVLQ
J
OHSLHFHRIHTXLSPHQWYLDWKH86%SRUWDQGWKH
-$
&
.VRFNHWDWWKHVDPHWLPH
8
6
%3OD
\
HU

1
1
2
2
7
7
%/8(7
22
7+)81
&
7,
2
1
6
)RUVDIHW\UHDVRQVDQGEHFDXVHWKH\UHTXLUHSURORQJHGDWWHQWLRQ
RQWKHSDUWRIWKHGULYHUWKHRSHUDWLRQVIRUSDLULQJRIWKH%OXHWRRWK
mobile telephone with the Bluetooth hands-free system of your audio
equipment must be carried out with the vehicle stationary and the
LJQLWLRQRQ
3
UHVVW
K
H
0(18
E
XWWRQ
$ZLQGRZLVGLVSOD\HGZLWK6HDUFKLQJ
A
ctivate the telephone's Bluetooth
f
unction.
In the menu, select:
- Bluetooth tele
p
hone function - Audio
%OXHWRRWKFRQ¿JXUDWLRQ
- Perform a Bluetooth search
The services offered depend on the network, the SIM card and the compatibility of the Bluetooth
equ
i
pment use
d
.
&RQVXOW\RXUWHOHSKRQHVPDQXDODQG\RXURSHUDWRUWR¿QGRXWZKLFKVHUYLFHVDUHDYDLODEOHWR\RX
$
OLVWR
I
PRELOHWHOHSKRQHVZKLFKR
II
HUWKHEHVWUDQ
J
HR
I
VHUYLFHVLVDYDLODEOH
I
URPWKHQHWZRUN
&
RQVXOW
a
CITROËN dealer.
%/8(7
22
7+7(/(3+
2
1(
6&5((1&
7KH7(/(3+
2
1(PHQXSHUPLWVDFFHVVWRWKH
I
ROORZLQJ
I
XQFWLRQVLQ
SDUWLFXODU'LUHFWRU
\
&DOOOLVW3DLULQ
J
PDQD
J
HPHQW
7KH
¿
UVWWHOHSKRQHVUHFRJQLVHGDUHGLVSOD\HGLQWKLVZLQGRZ
A
virtual ke
y
pad is displa
y
ed on the
VFUHHQHQWHUDFR
G
HZ
L
W
K
DW
O
HDVW
GL
J
L
WV
&RQ¿UPE
\
SUHVVLQ
J
2.
,ISDLULQ
J
IDLOVWKHQXPEHURIDWWHPSWVLVQRWOLPLWHG
Select the telephone to be connected from the list. Only one
t
elephone can be connected at a time.
$
PHVVDJHLVGLVSOD\HGRQWKHVFUHHQRIWKH
W
HOHSKRQHFKRVHQWRDFFHSWWKHSDLULQ
J
HQWHU
W
KHVDPHFRGHRQWKHWHOHSKRQHWKHQFRQ
¿
UPE\
SUHVVLQ
J
2.
3DLULQJR
I
1DPHBWHOHSKRQHVXFFHVV
I
XODSSHDUVRQWKHVFUHHQ
The automatic connection authorised is onl
y
active after the
WHOHSKRQHKDVEHHQFRQ
¿
J
XUHG7KHGLUHFWRU
\
DQGWKHFDOOOLVWFDQEH
a
ccessed after the synchronisation period.
3$,5,1*$7(/(3+21(
,
I
\RXUWHOHSKRQHLV
I
XOO\FRPSDWLEOH
7KHSDLULQ
J
FDQDOVREHLQLWLDWHG
I
URPWKHWHOHSKRQH

1
1
2
2
1
1
1
1
2
2
2
2
$
Q
L
QFRP
L
QJFD
OO
L
VDQQRXQFH
G
E
\DU
L
QJDQ
G
DVXSHU
L
PSRVH
G
GL
VS
O
D\
on the multifunction screen.
,QLWLDWHWKHSDLULQ
J
EHWZHHQWKHWHOHSKRQHDQGWKH
YHKLFOH7KLVSDLULQJFDQEHLQLWLDWHG
I
URPWKHYHKLFOHV
t
elephone function menu or via the telephone's ke
y
pad.
6
HHVWHSVWRRQWKHSUHYLRXVSDJHV'XULQJWKH
SD
L
U
L
Q
J
S
K
DVHW
K
HYH
KL
F
O
HPXVW
E
HVWDW
L
RQDU
\
Z
L
W
K
W
K
H
N
H
\
LQWKHL
J
QLWLRQ
S
elect the telephone to be connected
f
rom the telephone
f
unction
m
e
n
u
.
The audio s
y
stem connects to a newl
y
paired telephone
a
utomat
i
ca
ll
y.
6
HOHFWWKH<(
6
WDERQWKHGLVSOD\
XVLQJWKHEXWWRQVDQGFRQ¿UPE\
SUHVVLQ
J
2
.
3UHVVWKHVWHHULQ
J
ZKHHOFRQWURO
2
.WRDFFHSWWKHFDOO
)URPWKH%OXHWRRWKWHOHSKRQHIXQFWLRQ$XGLRPHQXVHOHFW0DQDJH
WKHWHOHSKRQHFDOOWKHQ&DOO&DOOOLVWRU'LUHFWRU\
3UHVVWKHHQGRIWKHVWHHULQ
J
ZKHHOFRQWUROIRUPRUH
WKDQWZRVHFRQGVWRJDLQDFFHVVWR\RXUGLUHFWRU\
O
r
To dial a number, use your telephone's keypad, with
the vehicle stationary.
0$.,1*$&$//
%/8(7227+$8',2675($0,1*
$9$,/$%/('85,1*7+(<($5
:LUHOHVVWUDQVPLVVLRQR
I
WKHWHOHSKRQHVPXVLF
¿
OHVYLDWKHDXGLR
HTXLSPHQW7KHWHOHSKRQHPXVWEHDEOHWRPDQD
J
HWKHDSSURSULDWH
EOXHWRRWKSUR
¿
OHV
3UR
¿
OHV$'3
$95
&
3
,QFHUWDLQFDVHVSOD
\
LQ
J
RIWKH$XGLR¿OHVPXVWEHLQLWLDWHGIURPWKH
k
eypa
d
.
,IWKHWHOH
S
KRQHVX
SS
RUWVWKHIXQFWLRQ
$
FWLYDWHWKHVWUHDPLQ
J
VRXUFHE
\
SUHVVLQJWKH
62
85
&
(EXWWRQ
7KH
t
racks to be pla
y
ed can be controlled
a
s usual via the buttons on the Radio
FRQWUR
O
SDQH
O
DQ
G
W
K
HVWHHU
L
Q
J
Z
K
HH
O
FRQWUROV
7KHFRQWH[WXDOLQ
I
RUPDWLRQ
can
b
e
di
sp
l
aye
d
on t
h
e screen.
%/8(7
22
7+)81
&
7,
2
1
6
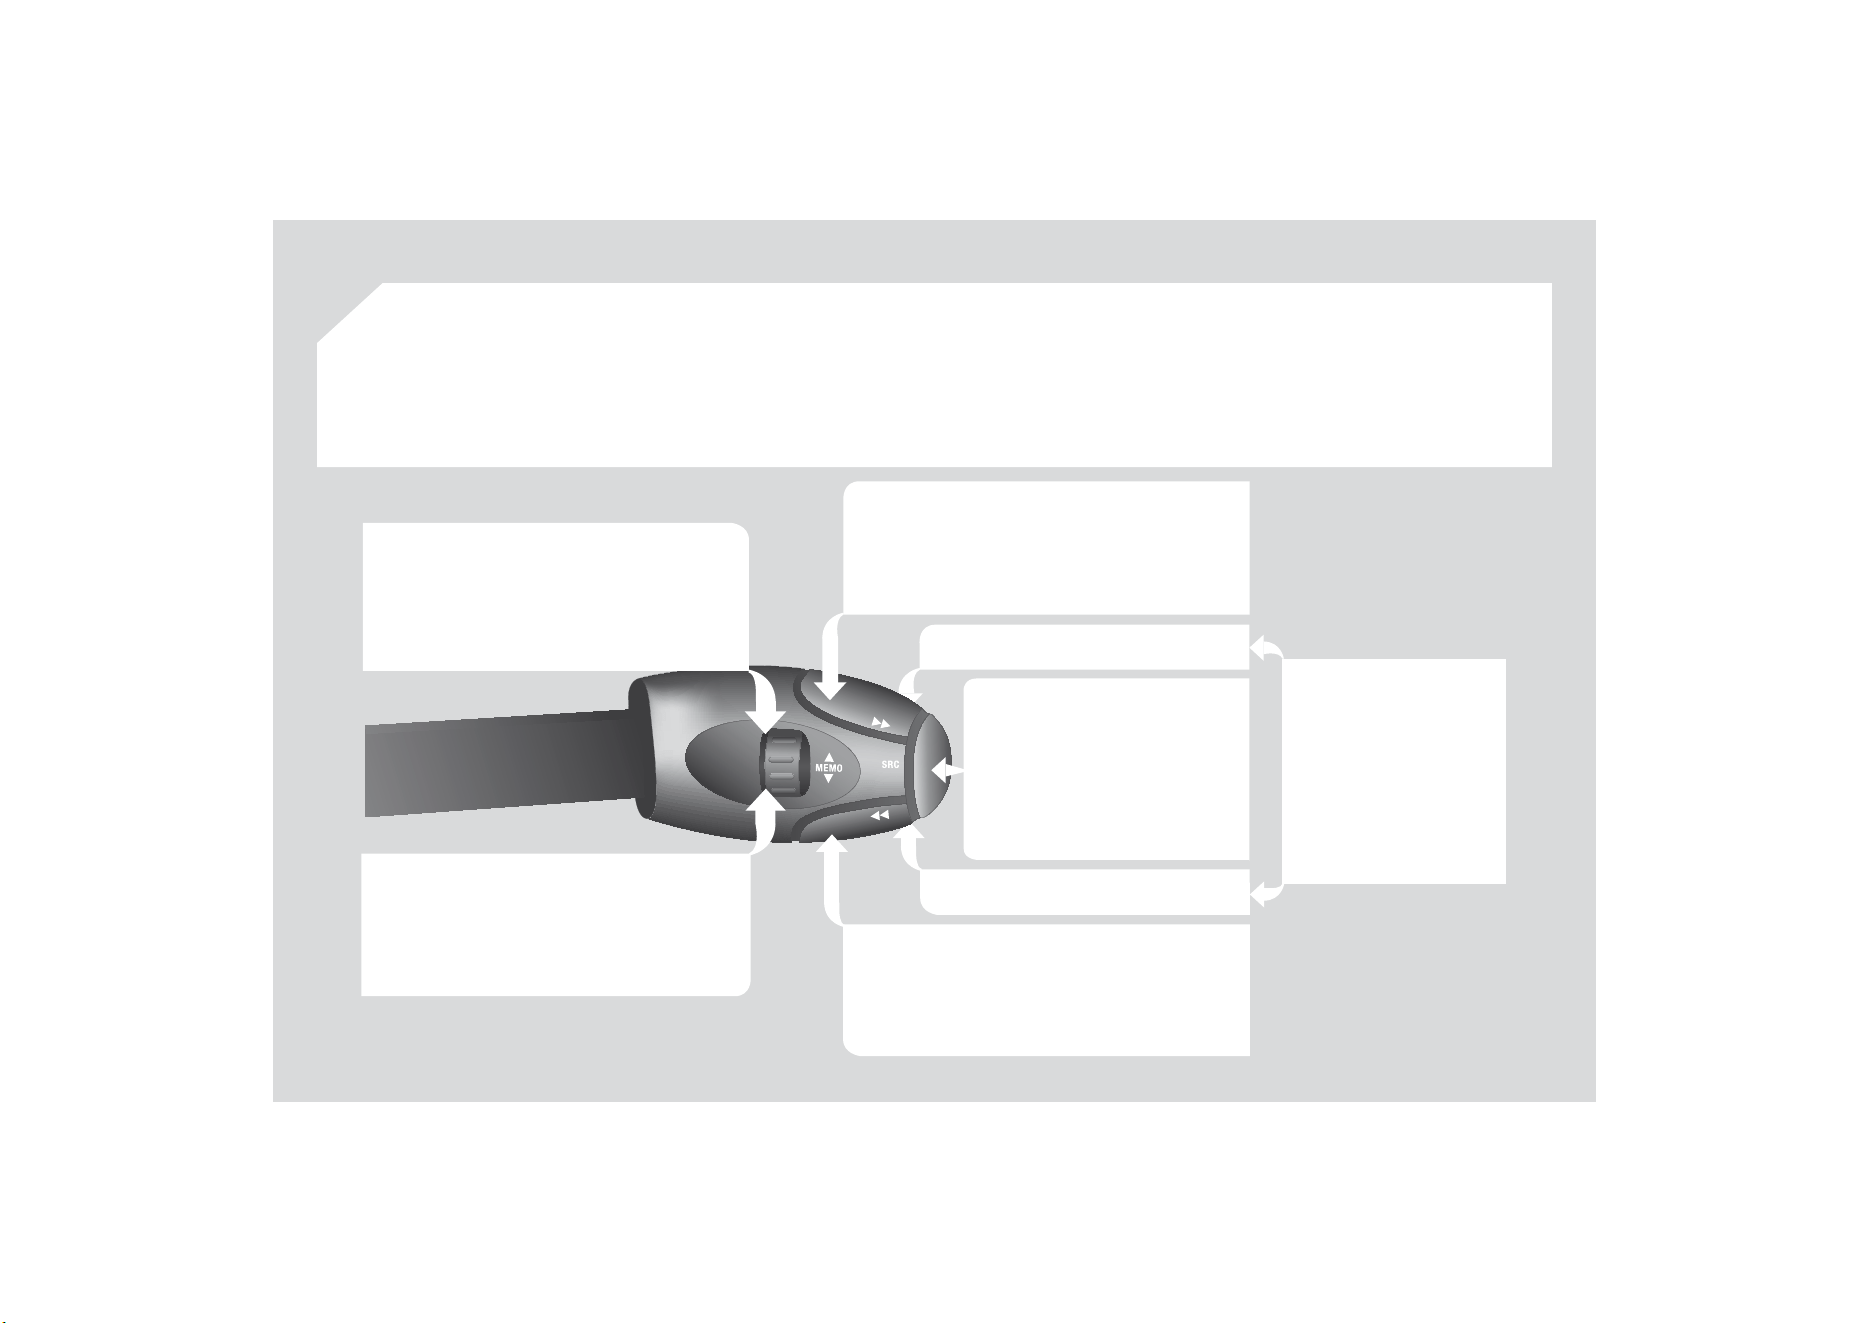
5$',2VHOHFWLRQRIWKHQH[WVWRUHGVWDWLRQ
8
6
%VHOHFWLRQR
I
WKHQH[W
J
HQUH
DUWLVW
GLUHFWRU\IURPWKHFODVVL¿FDWLRQOLVW
Selection of the next item on a menu.
5$',2VHOHFWLRQRIWKHSUHYLRXVVWRUHG
station.
8
6
%VHOHFWLRQR
I
WKHSUHYLRXV
J
HQUH
DUWLVW
GLUHFWRU\IURPWKHFODVVL¿FDWLRQOLVW
S
election o
f
the previous item on a menu.
5$',
2
DXWRPDWLFVHDUFK
I
RUDKL
J
KHU
I
UHTXHQF
\
&'0386%VHOHFWLRQRIWKHQH[WWUDFN
&
'
8
6
%FRQWLQXRXVSUHVV
I
DVW
I
RUZDUGVSOD
\
Selection of the
p
revious item.
5$',
2
DXWRPDWLFVHDUFK
I
RUDORZHU
I
UHTXHQF
\
&'0386%VHOHFWLRQRIWKH
S
UHYLRXVWUDFN
&
'
8
6
%FRQWLQXRXVSUHVV
I
DVWUHYHUVH
Selection of the next item.
V
o
l
ume
i
ncrease.
V
o
l
u
m
e
dec
r
ease
.
6
7((5,1
*
:+((/
&2
175
2
/
6
Mute: press the volume
i
ncrease an
d
d
ecrease
buttons simultaneousl
y
.
The sound is restored b
y
SUHVVLQJRQHR
I
WKHWZR
v
olu
m
e
bu
tt
o
n
s
.
&
KDQJHR
I
VRXQGVRXUFH
&
RQ¿UPDWLRQRIDVHOHFWLRQ
3LFNXS
+DQJXSWKH
t
e
l
e
ph
one.
- Press
f
or more than 2 seconds:
access to t
h
e te
l
e
ph
one menu.
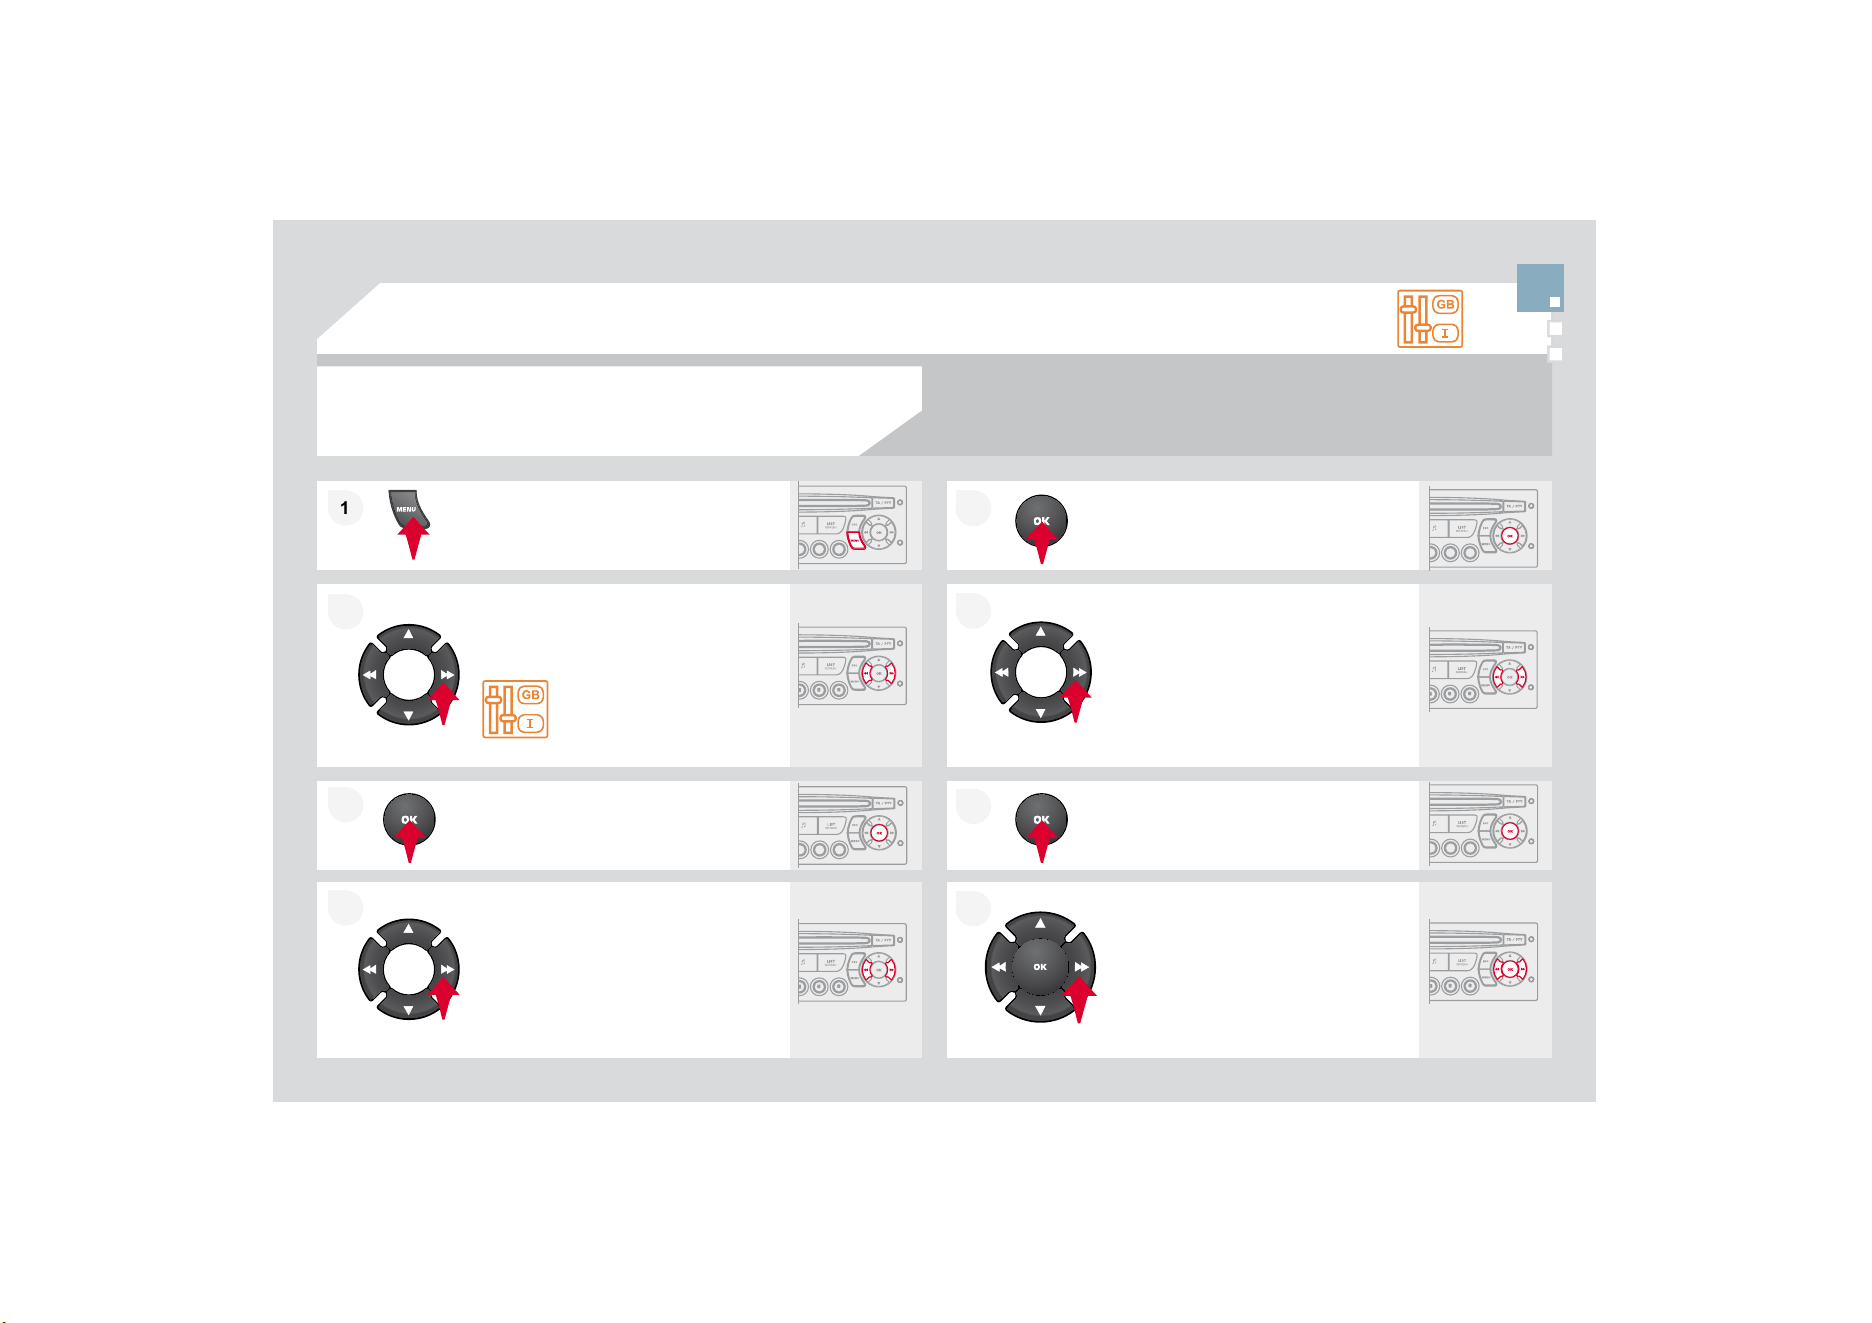
1
1
2
2
7
7
&21),*85$7,21
3
UHVVW
K
H
0(18
E
XWWRQ
8VLQJWKHDUURZVVHOHFW
3(5
62
1$/,
6
$7,
2
1
&21),*85$7,21
3UHVVWRFRQ¿UPWKHVHOHFWLRQ
8VLQJWKHDUURZVVHOHFW',63/$
<
&2
1),
*8
5$7,
2
1
3U
HVV
W
R
FR
Q¿UPWK
H
VH
O
HF
WL
R
Q
3UHVVWRFRQ
¿
UPWKHVHOHFWLRQ
8VLQ
J
WKHDUURZVVHOHFW$'-867
'$7($1'7,0(
$GM
XVWW
K
HVHWW
L
QJVRQH
E
\RQH
FRQ¿UPLQ
J
E
\
SUHVVLQ
J
WKH2.EXWWRQ
1H[WVHOHFWWKH
2
.WDERQWKHVFUHHQ
W
K
H
Q
FR
Q¿UP
6(77,1*7+('$7($1'7,0(
6&5((1&
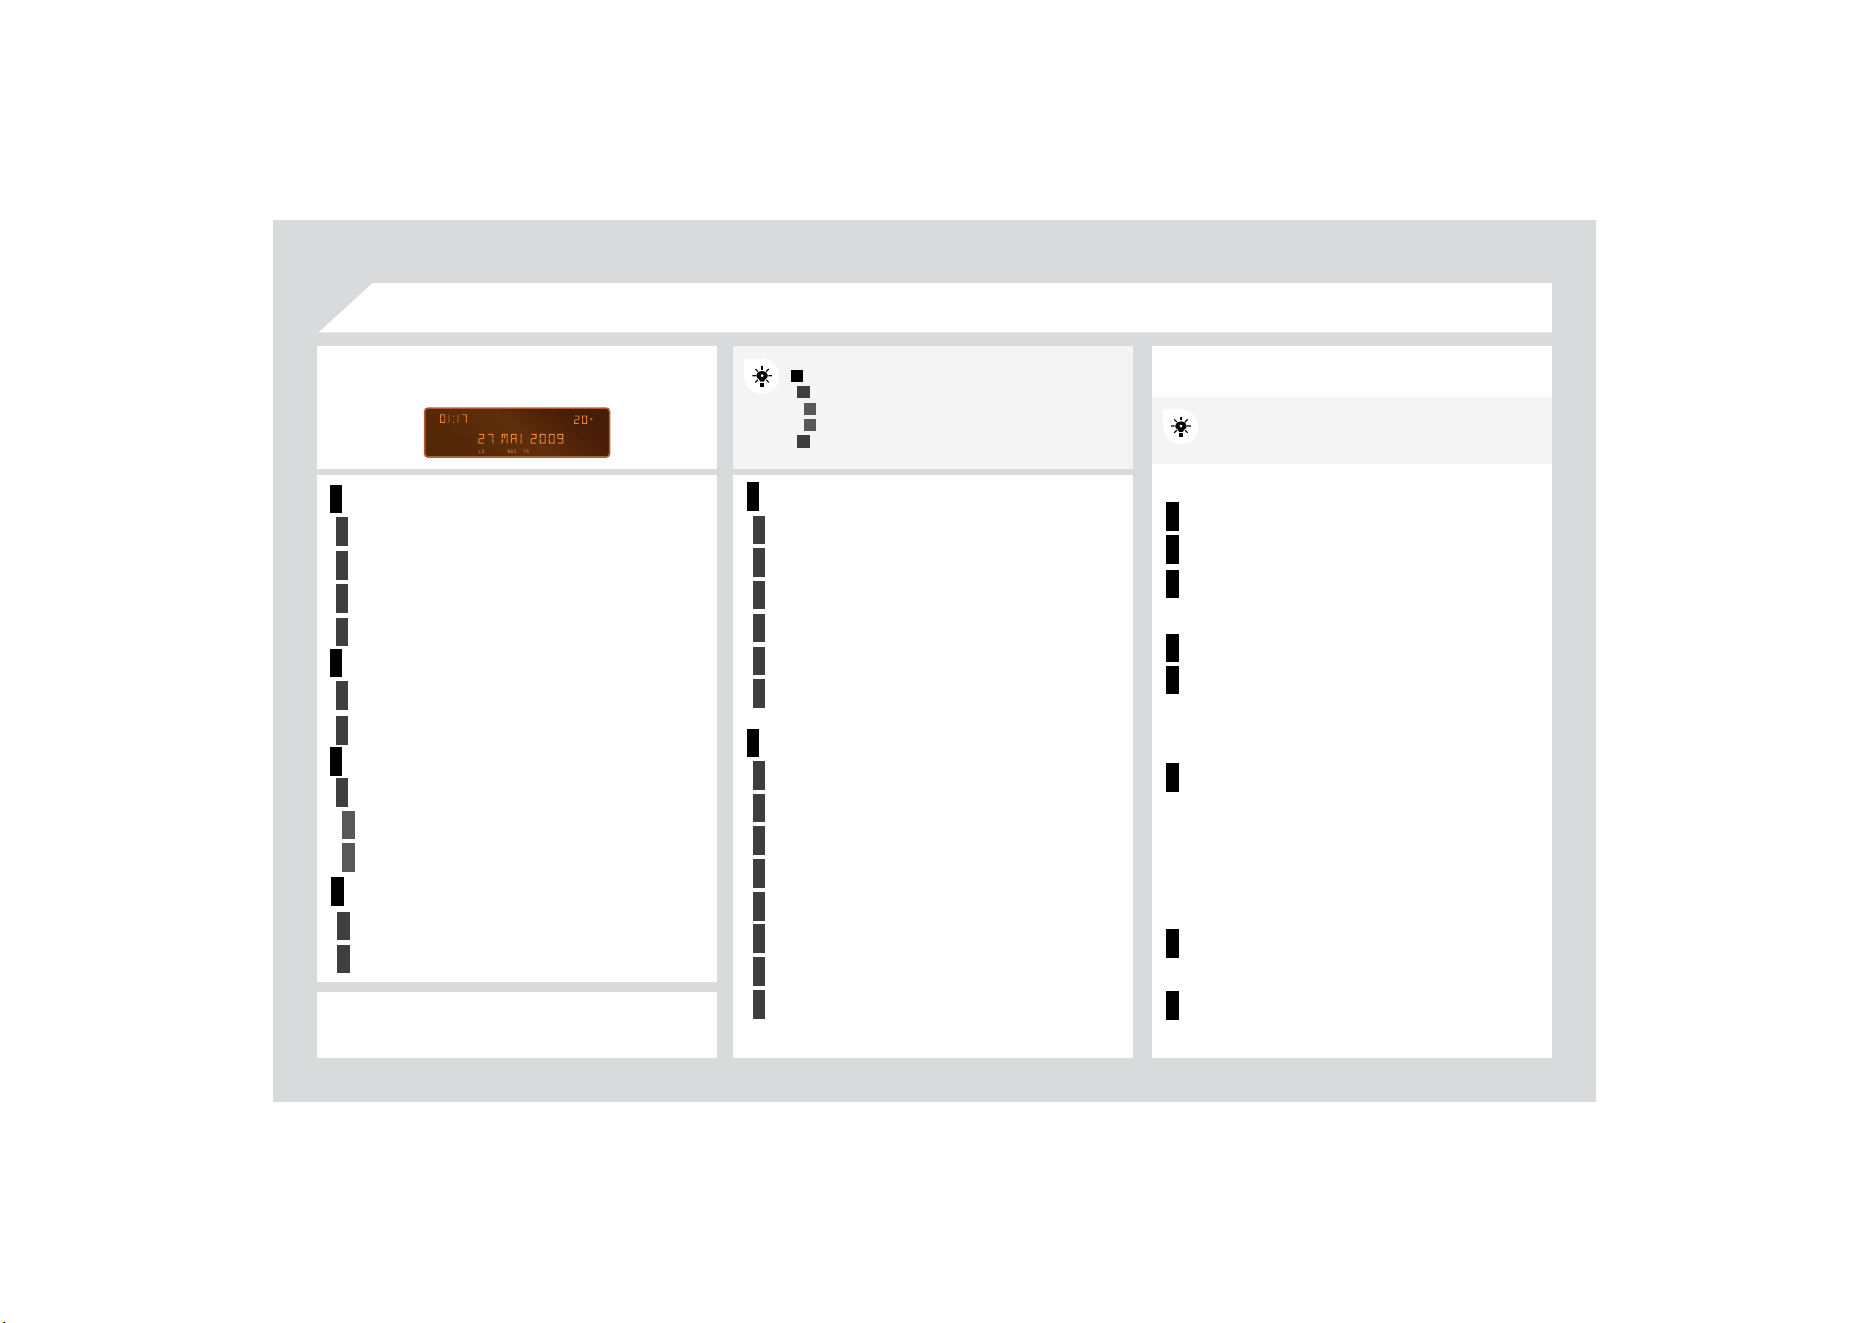
1
2
2
2
2
1
2
2
1
2
3
3
1
2
2
2
2
2
2
1
2
2
2
2
2
2
2
2
1
2
2
1
2
3
2
3
1
1
1
1
1
1
1
1
5$',2&'
',
6
3/$<$'
-86
7
<($5
0
2
17+
'$<
+
28
5
MINUTES
++02'(
6
&5((10(1
8
0$3
6
0$,1)
8
1&7,
2
1
7KHSDUDPHWHUVYDU\DFFRUGLQJWRYHKLFOH
&
+
2
,
&
(
$
&
K
R
L
FH
$
&
K
R
L
FH
$
&
+
2
,
&
(%
/$1
*
8$
*
(
)5$1
&
$,
6
ITALIANO
1('(5/$1'6
32578*8(6
32578*8(6%5$6,/
'(876&+
(1
*
/,
6
+
ESPANOL
3UHVVWKH
2
.GLDO
I
RUDFFHVVWRVKRUWFXW
PHQXVDFFRU
GL
Q
J
WRW
K
H
GL
VS
O
D
\
RQW
K
H
screen
:
PRQRFKURPH$
PRQRFKURPH&
5$',2
DFWLYDWH
GHDFWLYDWH5'6
DFWLYDWH
GHDFWLYDWH5(*PR
G
H
DFW
LY
DWH
GHDFW
LY
DWH
U
DG
L
RWH
[
W
5$1'
2
03/$<
5'66($5&+
5(
*
0
2
'(
&'5(3($7
9(+,&/(&
2
1),
*
5(9:,3($&7
*8,'(/$036
OPTIONS
',$*1267,&6
FRQVXOW
DEDQGRQ
UNIT
S
T
E
03(5$785(&(/6,86)$+5(1+(,7
)
8
(/&
2
1
6
8
037,
2
1.0//
03
*
&
'03
&
'
DFW
LY
DWH
GHDFW
LY
DWH
LQ
W
U
R
DFWLYDWH
GHDFWLYDWHWUDFNUHSHDW
DXGLRFG
FKDQJHUWKHHQWLUHFG
03
CD
/
0
3
FKDQJHUWKHHQWLUHFXUUHQW
I
ROGH
U
DFWLYDWHGHDFWLYDWHUDQGRPSOD\
DXG
L
R
C
DFKDQ
J
HUWKHHQWLUH
C
D
03
CD
WKHHQWLUHFXUUHQWIROGH
U
03
FKDQJHUDOOR
I
WKH
I
ROGHUV
8
6
%
DFWLYDWHGHDFWLYDWHWUDFNUHSHDW
FXUUHQWIROGHUVDUWLVW
J
HQUHSOD
\
OLVW
DFWLYDWH
GHDFWLYDWHUDQGRPSOD
\
FXUUHQW
I
ROGHUVDUWLVWJHQUHSOD\OLVW

1
2
2
2
2
1
2
2
1
2
3
3
1
2
2
2
2
2
2
1
2
2
2
2
2
2
2
2
1
2
2
1
2
3
2
3
1
1
1
1
1
1
1
1
5$',2&'
',
6
3/$<$'
-86
7
<($5
0
2
17+
'$<
+
28
5
MINUTES
++02'(
6
&5((10(1
8
0$3
6
0$,1)
8
1&7,
2
1
7KHSDUDPHWHUVYDU\DFFRUGLQJWRYHKLFOH
&
+
2
,
&
(
$
&
K
R
L
FH
$
&
K
R
L
FH
$
&
+
2
,
&
(%
/$1
*
8$
*
(
)5$1
&
$,
6
ITALIANO
1('(5/$1'6
32578*8(6
32578*8(6%5$6,/
'(876&+
(1
*
/,
6
+
ESPANOL
3UHVVWKH
2
.GLDO
I
RUDFFHVVWRVKRUWFXW
PHQXVDFFRU
GL
Q
J
WRW
K
H
GL
VS
O
D
\
RQW
K
H
screen
:
PRQRFKURPH$
PRQRFKURPH&
5$',2
DFWLYDWH
GHDFWLYDWH5'6
DFWLYDWH
GHDFWLYDWH5(*PR
G
H
DFW
LY
DWH
GHDFW
LY
DWH
U
DG
L
RWH
[
W
5$1'
2
03/$<
5'66($5&+
5(
*
0
2
'(
&'5(3($7
9(+,&/(&
2
1),
*
5(9:,3($&7
*8,'(/$036
OPTIONS
',$*1267,&6
FRQVXOW
DEDQGRQ
UNIT
S
T
E
03(5$785(&(/6,86)$+5(1+(,7
)
8
(/&
2
1
6
8
037,
2
1.0//
03
*
&
'03
&
'
DFW
LY
DWH
GHDFW
LY
DWH
LQ
W
U
R
DFWLYDWH
GHDFWLYDWHWUDFNUHSHDW
DXGLRFG
FKDQJHUWKHHQWLUHFG
03
CD
/
0
3
FKDQJHUWKHHQWLUHFXUUHQW
I
ROGH
U
DFWLYDWHGHDFWLYDWHUDQGRPSOD\
DXG
L
R
C
DFKDQ
J
HUWKHHQWLUH
C
D
03
CD
WKHHQWLUHFXUUHQWIROGH
U
03
FKDQJHUDOOR
I
WKH
I
ROGHUV
8
6
%
DFWLYDWHGHDFWLYDWHWUDFNUHSHDW
FXUUHQWIROGHUVDUWLVW
J
HQUHSOD
\
OLVW
DFWLYDWH
GHDFWLYDWHUDQGRPSOD
\
FXUUHQW
I
ROGHUVDUWLVWJHQUHSOD\OLVW
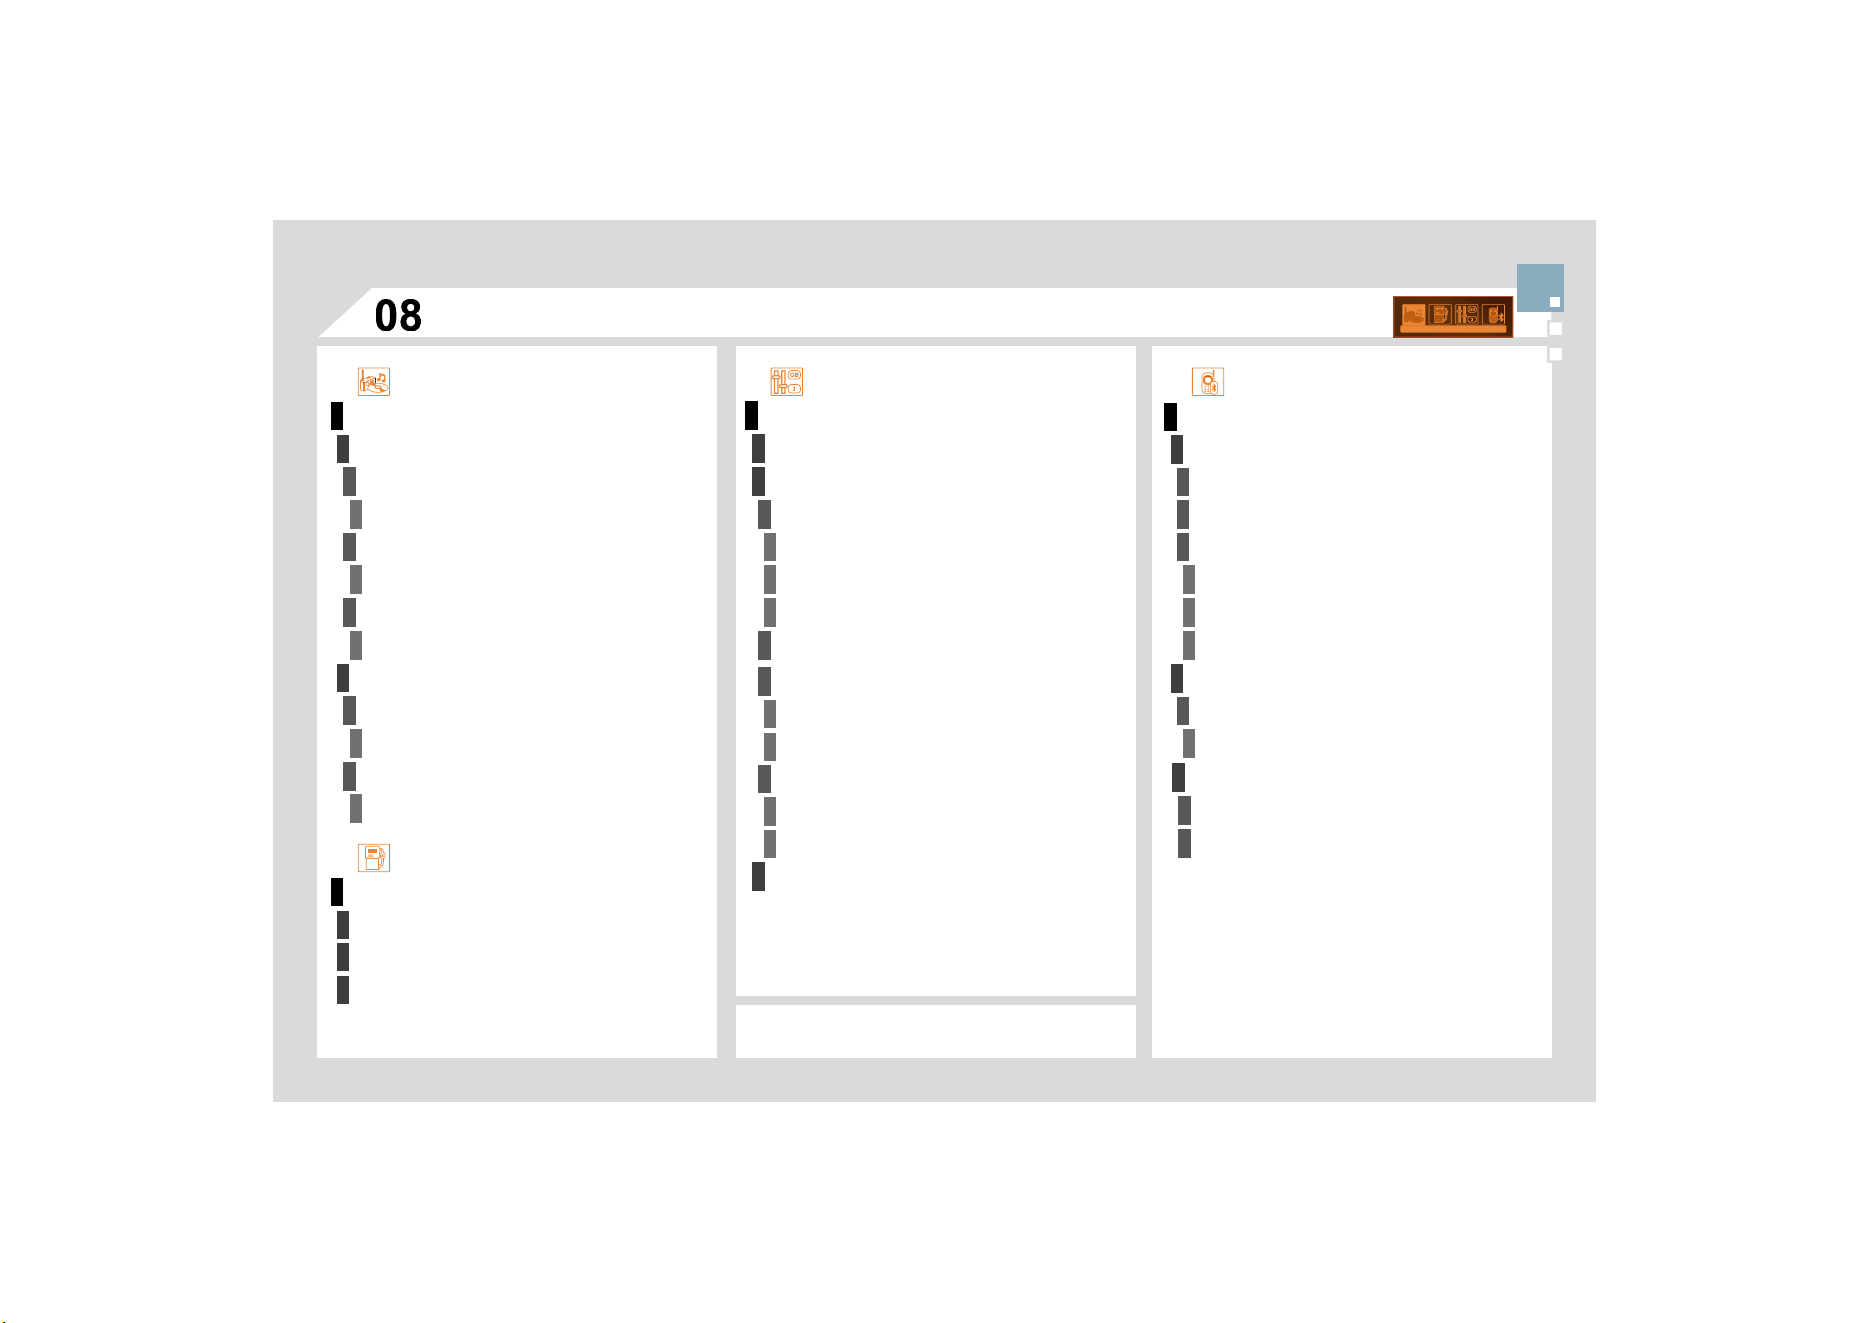
1
1
2
3
4
3
4
3
4
2
3
4
3
4
2
3
4
2
4
4
3
3
4
4
1
2
2
2
2
3
4
4
1
2
3
3
3
4
4
4
2
3
4
2
3
3
$8',
2
)81
&
7,
2
1
6
)0%$1'35()(5(1
&
(
6
DOWHUQDWLYHIUHTXHQFLHV
5'6
activate/deactivate
UH
J
LRQDOPRGH
5(*
activate/deactivate
UDGLRWH[WLQ
I
RUPDWLRQ5'7;7
activate/deactivate
3/$<02'(6
DOEXPUHSHDW
537
activate/deactivate
WUDFNUDQGRPSOD\5'0
activate/deactivate
(17(5',67$1&(72'(67,1$7,21
:$51,1
*
/
2*
67$7862))81&7,216
3(5
62
1$/,
6
$7,
2
1
&2
1),
*
85$7,
2
1
7KHSDUDPHWHUVYDU
\
DFFRUGLQ
J
WRYHKLFOH
'(),1(7+(9(+,
&
/(3$5$0(7(5
6
',
6
3/$<&
2
1),
*8
5$7,
2
1
Y
LG
HR
E
U
LJK
WQHVVD
GM
XVWPHQW
normal video
inverse video
EULJKWQHVVDGMXVWPHQW
GDWHDQGWLPHDG
M
XVWPHQW
GD
\
PRQWK
\
HDUDG
M
XVWPHQW
hour
/
minute adjustment
choice of 12 h/24 h mode
FKRLFHRIXQLWV
ONPPSJNPO
°Celsius/°Fahrenheit
&
+
2
,
&
(
2
)/$1
*
8$
*
(
%/8(7
22
7+7(/(3+
2
1(
0$1$
*
(7+(7(/(3+
2
1(
&
$//
7
H
UPLQ
DWH
W
K
H
FX
UU
H
Q
W
FD
OO
$
FW
L
YDWHSU
L
YDWHPR
G
H
%/
8
(7
22
7+
&2
1),
*8
5$7,
2
1
&
R
QQ
HFW
'L
VFR
QQ
HFW
D
GH
YL
FH
7HOHSKRQHIXQFWLRQ
$
XGLR6WUHDPLQ
J
IXQFWLRQ
Consult the
p
aired device
'HOHWHD
S
DLUHGGHYLFH
Perform a Bluetooth search
C
ALL
&DOOVOLVW
'LUHFWRU\
6
&5((10(1
8
0$3
6
75,3
&2
0387(5
PRQRFKURPH&

sound qualit
y
between
t
h
e
d
iff
e
r
e
nt
aud
i
o
VRXUFHVUDGLR&'
&KHFNWKDWWKHDXGLRVHWWLQ
J
V
9ROXPH%DVV
7UHEOH$PELHQFH/RXGQHVV
DUHDGDSWHGWR
t
he
sou
r
ces
lis
t
e
n
ed
t
o
.
I
t
is
ad
v
isable
t
o
se
t
WKH$8',
2
I
XQFWLRQV
%DVV7UHEOH)URQW5HD
U
%
DODQFH/HIW5LJKW%DODQFHWRWKHPLGGOH
p
osition, select the musical ambience "None"
a
n
d
set t
h
e
l
ou
d
ness correct
i
on to t
h
e
"A
ct
i
ve
"
S
RVLWLRQLQ&'PRGHRUWRWKH,QDFWLYH
S
RVLWLRQ
i
n ra
di
o mo
d
e.
)RURSWLPXPVRXQGTXDOLW
\
WKHDXGLRVHWWLQ
J
V
9ROXPH%DVV7UHEOH
$
PELHQFH/RXGQHVV
FDQEHDGDSWHGWRWKHGL
II
HUHQWVRXQGVRXUFHV
ZKLFKPD\UHVXOWLQDXGLEOHGLIIHUHQFHVZKHQFKDQJLQJVRXUFHUDGLR
&
'
7KH
&
'LVHMHFWHG
a
utomat
i
ca
lly
or
i
s not
played by the player.
&
KHFNWKDWWKH
&
'LVLQVHUWHGLQWKHSOD\HUWKH
ULJK
WZD
\
XS
&
KHFNWKHFRQGLWLRQR
I
WKH
&
'WKH
&
'FDQQRW
E
HSOD\HGLILWLVWRRGDPDJHG
-
C
heck the content in the case o
f
a recorded
&'FRQVXOWWKHDGYLFHLQWKH$XGLRVHFWLRQ
7KHDXGLRHTXLSPHQWV&'SOD
\
HUGRHVQRW
SO
D\
'9'
V
'XHWRWKHLUTXDOLW
\
OHYHOFHUWDLQZULWHDEOH&'V
w
ill not be pla
y
ed b
y
the audio s
y
stem.
yy y
7KH
&
'LVLQVHUWHGXSVLGHGRZQLVXQSOD\DEOHGRHVQRWFRQWDLQDQ\DXGLR
d
ata or contains an audio format which the pla
y
er cannot pla
y
.
7KH&'LVSURWHFWHGE\DQDQWLSLUDWLQJSURWHFWLRQV\VWHPZKLFKLVQRW
UHFR
J
QLVHGE
\
WKHDXGLRHTXLSPHQW
7KHPHVVDJH86%
per
i
p
h
era
l
error
"
i
s
displayed on the screen.
5HFKDUJHWKHEDWWHU\R
I
WKHSHULSKHUDOGHYLFH
The Bluetooth connection is cut.
7KHEDWWHU\R
I
WKHSHULSKHUDOPD\QRWEHVX
I¿
FLHQWO\FKDUJHG
7KH86%PHPRU
\
VWLFNLVQRWUHFR
J
QLVHG
The memory stick may be corrupt.
Re
f
ormat the memory stick.
48(67,21
62
/87,
2
1
$
16:(5
)5(48(17/<$6.('48(67,216
7KH&'SOD\HUVRXQG
is poor.
7KH&'XVHGLVVFUDWFKHGRURISRRUTXDOLW\ ,QVHUWJRRGTXDOLW\&'VDQGVWRUHWKHPLQ
s
uitable conditions.
7KHDXGLRHTXLSPHQWVHWWLQJVEDVVWUHEOHDPELHQFHVDUHXQVXLWDEOH 6HWWKHWUHEOHRUEDVVOHYHOWRZLWKRXWVHOHFWLQJ
a
n
a
m
b
i
e
n
ce
.
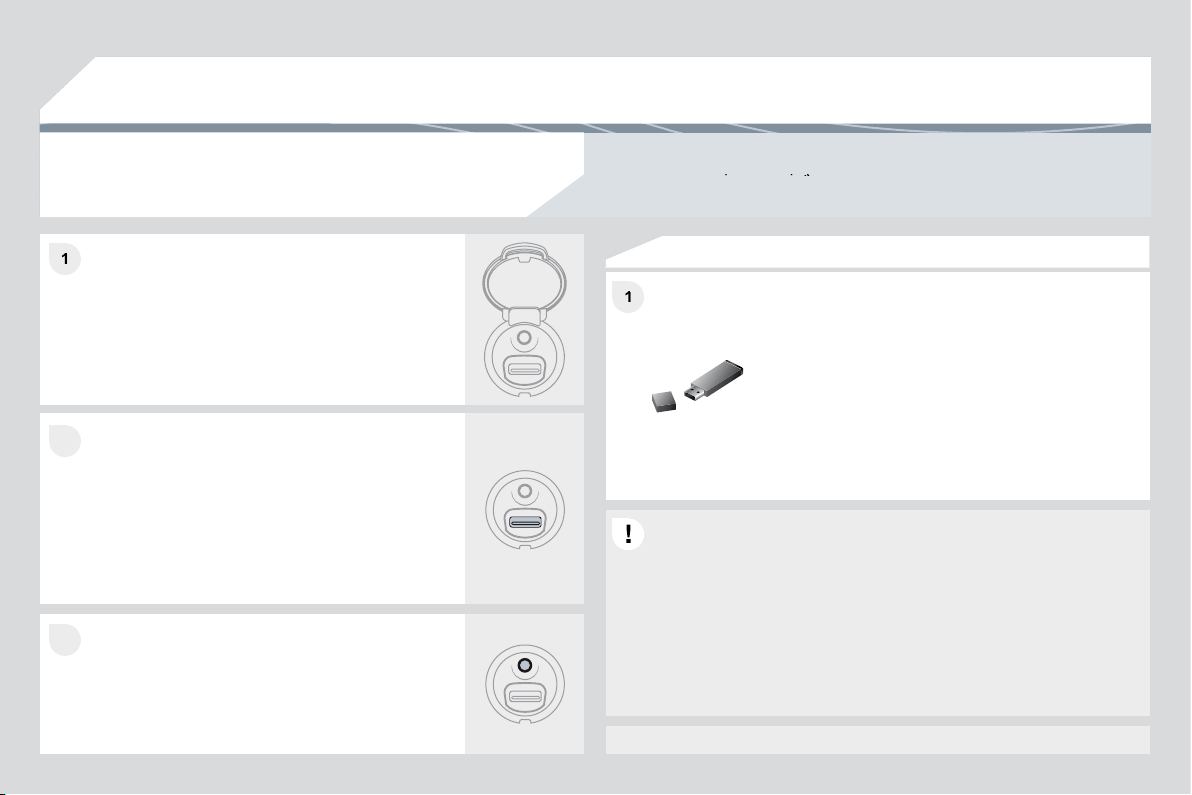
7K
H
WU
DI¿
F
D
QQ
RX
Q
FH
P
H
QW
7$
LVGLVSOD\HG,GR
QRWUHFHLYHDQ
\
WUDI¿F
in
f
ormation.
7XQHWRDUDGLRVWDWLRQZKLFKEURDGFDVWVWUDI¿F
inf
o
rm
a
ti
o
n.
7KHUDGLRVWDWLRQLVQRWSDUWR
I
WKHUH
J
LRQDOWUD
I¿
FLQ
I
RUPDWLRQQHWZRUN
4
8(
6
7,
2
1
62
/87,
2
1
$
1
6
:(5
The qualit
y
of reception
of
the radio station
OLVWHQHGWRJUDGXDOO\
d
eteriorates or the
s
t
o
r
ed
s
t
a
t
io
n
s
do
not
f
unction
(
no
VRXQG0K]LV
G
LVSOD
\
HG
The vehicle is too far from the transmitter used b
y
the station listened to or
WKHUHLVQRWUDQVPLWWHULQWKHJHRJUDSKLFDODUHDWKURXJKZKLFKWKHYHKLFOH
L
VWUDYH
OOL
Q
J
7KHHQYLURQPHQW
KLOOVEXLOGLQ
J
VWXQQHOVEDVHPHQWFDUSDUNV
EORFN
U
HFHSWLRQLQFOXGLQJLQ5'
6
PRGH
7KHDHULDOLVDEVHQWRUKDVEHHQGDPDJHG
I
RUH[DPSOHZKHQJRLQJ
WKURX
J
KDFDUZDVKRULQWRDQXQGHU
J
URXQGFDUSDUN
$
FWLYDWHWKH5'6IXQFWLRQWRHQDEOHWKHV
\
VWHP
t
o check whether there is a more power
f
ul
W
UDQVP
L
WWHU
L
QW
K
H
J
HR
J
UDS
KL
FD
O
DUHD
This
p
henomenon is normal and does not
indicate a
f
ailure o
f
the audio equipment.
Have the aerial checked b
y
a CITROËN dealer.
Sound cut-outs of 1
to
2
seco
n
ds
in r
ad
i
o
mo
d
e.
'XULQJWKLVEULHIVRXQGFXWRXWWKH5'6VHDUFKHVIRUDQ\IUHTXHQF\
SHUPLWWLQ
J
EHWWHUUHFHSWLRQR
I
WKHVWDWLRQ
'HDFWLYDWHWKH5'6IXQFWLRQLIWKH
S
KHQRPHQRQ
is too
f
requent and alwa
y
s on the same route.
:LWKWKHHQJLQHRII
the audio equipment
switches off after a few
min
u
t
es
o
f
use
.
:KHQWKHHQJLQHLVVZLWFKHGRIIWKHDXGLRHTXLSPHQWRSHUDWLQJWLPH
GHSHQGVRQWKHEDWWHU
\
FKDU
J
H
The switch-o
ff
is normal: the audio equipment switches to economy mode
D
QGVZLWFKHVRIIWRSUHYHQWGLVFKDU
J
LQ
J
RIWKHYHKLFOHVEDWWHU
\
6WDUWWKHYHKLFOHVHQJLQHWRLQFUHDVHWKHEDWWHU\
FKDU
J
H
The stored stations do
not
f
unction
(
no sound,
0K]LVGLVSOD\HG
An incorrect waveband is selected.
3UHVVWKH%$1'$
6
7EXWWRQWRUHWXUQWRWKH
Z
DYHEDQG
$0)0)0)0$
6
7
RQZKLFKWKH
s
t
a
t
io
n
s
a
r
e
s
t
o
r
ed
.
7KHPHVVDJHWKHDXGLR
s
y
stem
i
s over
h
eate
d"
appears on the display.
S
witch the audio system o
ff
f
or a
f
ew minutes to
a
ll
ow t
h
e system to coo
l
.
,QRUGHUWRSURWHFWWKHLQVWDOODWLRQL
I
WKHVXUURXQGLQJWHPSHUDWXUHLVWRRKLJK
t
h
e au
di
o e
q
u
ip
ment sw
i
tc
h
es to an automat
i
c t
h
erma
l
p
rotect
i
on mo
d
e
O
HDGLQ
J
WRDUHGXFWLRQR
I
WKHYROXPHRUVWRSSLQ
J
R
I
WKHSOD
\
LQ
J
R
I
WKH
&
'