Loading ...
Loading ...
Loading ...
8
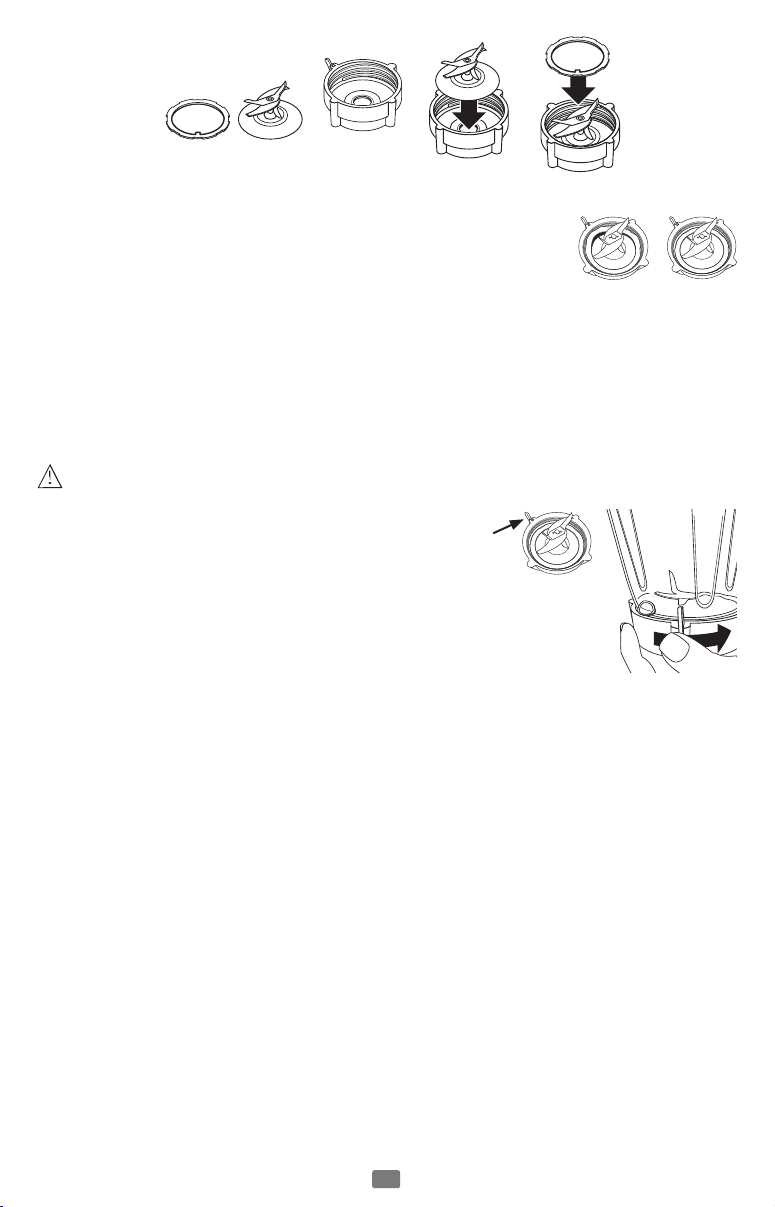
6 Cup glass Jar Assembly
1. Place Blade into Threaded Jar Bottom (Fig.1).
2. Place sealing ring over blade assembly. Carefully press
and tuck sealing ring into locking groove (Fig2).
3. Ensure the locking sealing ring is fully and evenly
tucked in place and holding the blade assembly to the
threaded jar bottom. For correct assembly see (Fig3).
4. Install the Integrated Blade Assembly onto the Jar. Turn clockwise to tighten.
Be sure the Integrated Blade Assembly is tightened to the jar before using.
NOTE: For proper installation onto Blender Motor base, make sure locking
lever rotates past the anti-rotation tabs on the Blender jar or smoothie cup.
See (Fig4).
CAUTION: If Locking Lever is damaged or missing, do not operate blender,
and contact Customer Service for a replacement.
5. Put the ingredients into the jar.
6. Secure the lid and filler cap.
7. Place the jar onto the base.
8. Plug the power cord into a standard household
120/127-volt, 60 hz. AC outlet. You are now ready to start.
ALWAYS PLACE HAND ON CONTAINER COVER
WHILE OPERATING BLENDER.
Using the Push Button Control Panel
1. Make Sure the “OFF” button is pressed before plugging in the blender.
2. Select setting and blend ingredients to desired consistency. Note: Control
panel lists function as well as desired outcome.
3. Press OFF to stop and turn off blender.
4. Press and hold ICE CRUSH / PULSE for ice crushing and chopping. Repeat
as needed.
Fig1
Fig2
Locking
Sealing Ring
Threaded Jar
Bottom with
locking lever
Fig3
Incorrect Correct!
Blade
Fig4
Locking Lever
Loading ...
Loading ...
Loading ...