User Guide for Pet Hand Vacuum
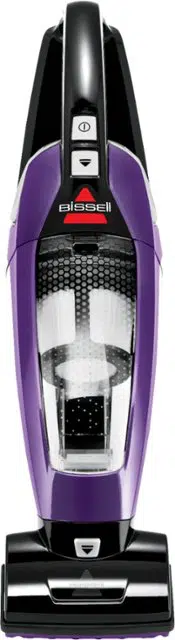
Product View
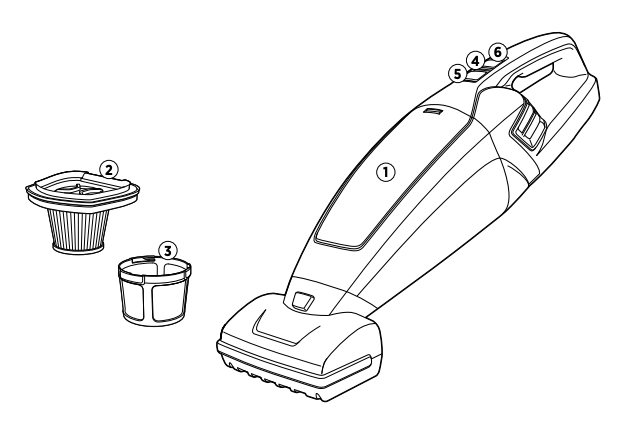
1 Dirt Cup
2 Filter
3 Washable Filter Cup
4 Charging Light
5 Dirt Cup Release
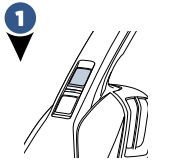
6 Power Button
WARNING Plastic film can be dangerous. To avoid danger of suffocation, keep away from babies and children.
WARNING Do not plug in your hard floor cleaner until you are familiar with all instructions and operating procedures.
WARNING To reduce the risk of electric shock, turn power switch off and disconnect plug from electrical outlet before performing maintenance or troubleshooting checks.
Assembly
WARNING Do not plug in your vacuum until you are familiar with all instructions and operating procedures.
IMPORTANT: ALWAYS TURN UNIT OFF PRIOR TO CHARGING* *failing to do so may result in battery not fully charging
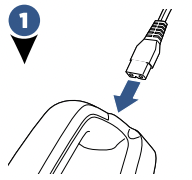
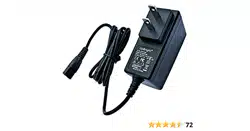
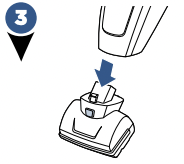
Insert charging adapter plug into the charging port on back of the unit.
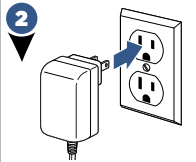
Plug the adapter into the wall outlet. The power LED lights will illuminate when charging.
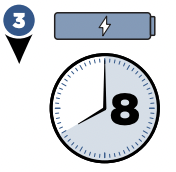
Charge the unit completely for 8 hours prior to first use.
NOTE: The LED light will blink RED when charging and turn GREEN once fully charged. After 10 minutes of being fully charged, the GREEN light will flash once per minute. The adaptor may become warm during charging - this is normal.
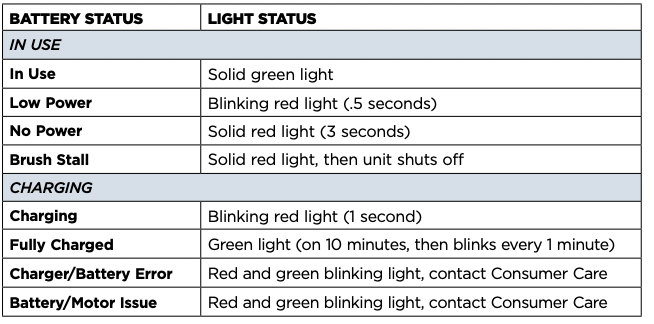
LED Light Display Status
Using Your Hand Vacuum
|

Unplug the machine from the charging adapter.
|
|

The Power Button is located on top of the handle. Push to the ON position.
|
NOTE: The LED light will shine GREEN while in use. When the battery level gets low, the LED light will blink RED. When the battery is fully discharged, the LED light will shut off completely.
Using the Motorized Brush
To attach the motorized brush, make sure the unit is powered OFF.

Firmly insert the motorized brush into the nozzle of the hand vac until it snaps into place.
To detach, turn the machine OFF, then press the button on top of the motorized brush and pull out.
NOTE: The motorized brush can be used to vacuum stairs, upholstery and other hard to reach areas.
Using the Accessories
|

Remove the motorized brush as directed in the “Using the motorized brush” section.
|

Insert the end of the tool into the end of the hand vacuum prior to turning hand vacuum ON.
|
|

If your hand vacuum came with the 2-in-1 dusting brush, simply slide the dusting brush tool on top of the upholstery tool until you hear a click.
|

Accessories can be combined together or used individually based on your cleaning needs.
|
NOTE: The upholstery tool can be rotated either clockwise or counterclockwise for cleaning convenience.
Empty the Dirt Collection Tank
WARNING To reduce the risk of electrical shock, turn power switch off and disconnect polarized plug from electrical outlet before performing maintenance or troubleshooting checks.
|

The dirt collection tank should be emptied before debris reaches the FULL line. Turn power OFF.
|

Hold the hand vacuum vertically and depress release button on the front to release the dirt collection tank.
|
|

Grasp filter tabs and pull vertically to remove filter cup and empty dirt into waste container.
|

Replace filter back into the dirt cup and attach dirt cup to hand vacuum until it snaps securely into place.
|
Cleaning or Replacing the Brush Roll
|

Turn power OFF and detach motorized brush if attached OR turn unit over to access the brush roll.
|

Use a coin to remove the brush roll, turning counter clockwise to unlock.
|
|

Then simply lift the brush out of the foot and clean off hair or other debris from brush roll.
|

Place the cleaned brush roll back into the foot of unit and use coin to turn lock clockwise to lock into place.
|
Cleaning or Replacing the Filter
WARNING Do not operate vacuum with damp or wet filters or without all filters in place.
|

Turn power OFF and remove the dirt cup as directed in “Empty the dirt cup” section.
|

Grasp filter tabs and lift up to remove the washable filter cup from the dirt cup. Grip the filter cup and turn counterclockwise and lift down to remove filter from filter cup.
|
|

Tap firmly against the inside of a waste container, removing any visible dirt.
|

Replace filter back into the filter cup then turn clockwise to lock into place. Attach filter cup back into the dirt cup and attach to hand vacuum until it snaps securely in place.
|
NOTE: After heavy usage, you may clean the filter and filter cup by washing it gently by hand in warm water and mild dish detergent. Rinse thoroughly and make certain it is completely dry before replacing it.
Disposal of Batteries
WARNING This product contains Lithium Ion rechargeable batteries. According to Federal and State regulations, removal and proper disposal of Lithium Ion batteries is required. For removal of the batteries in your Pet Hair Eraser Lithium Ion, see instructions on this page.
NOTICE: Disconnecting the battery will destroy the appliance and invalidate the warranty
Before proceeding, ensure that:
-the unit is disconnected from the charger
-the dirt collection tank and motorized brush have been removed from unit (see removal instructions on pages 8-9)
-you have a flat head and Phillips screwdriver, required for disassembly
|

Unplug charger and remove the dirt collection tank.
|

Using a flathead screwdriver, pry off top cover of handle.
|
|

Using a flathead screwdriver, pry off left and right panels from hand vacuum.
|

Using a flathead screwdriver, remove the plastic vent cover.
|
|

Using a Phillips screwdriver, remove (7) seven screws in the locations referenced in the image.
|

Disconnect and remove entire battery assembly by cutting wires from PCB and wrapping wire ends with insulation tape. Discard remainder of product.
|
NOTE: Keep Battery Pack together – DO NOT separate individual batteries. For specific disposal instructions of batteries, please contact the RBRC (Rechargeable Battery Recycling Corporation) at 1-800-822-8837
Troubleshooting
WARNING To reduce the risk of electric shock, turn power switch off and disconnect plug from electrical outlet before performing maintenance or troubleshooting checks.
| Problem |
Possible causes |
Remedies |
| Vacuum won’t turn on |
Battery is fully discharged |
Charge battery. Follow charging battery instructions on page 5. |
Vacuum cleaner has low suction
|
Dirt container is full |
Empty dirt container. |
| Dirt container is not installed properly |
Position container correctly and snap firmly into place. |
| Filters need cleaning |
Follow filter instructions on page 9 |
| Filters need replacing |
Visit bissell or call 1-800- 237-7691 to order replacement filters. |
| Battery needs charging |
Charge battery. Follow charging battery instructions on page 5. |
| Clog in tool |
Remove tool and remove any debris or hair in either opening of the tool. |
Visible dirt escaping from vacuum
|
Dirt container is full of debris |
Empty dirt container. |
| Filter is missing or installed incorrectly |
Check filter for correct installation. |
Hand vacuum won’t charge
|
Machine is in the ON position |
Set the hand vacuum in the OFF position. |
| Not the correct charger |
Use only the charger that comes with the machine. Correct charger model # is listed on the white warning label on the hand vac. |