Connect the AC adaptor to the unit by pressing the plug firmly.
Fasten the cord by hooking it.
Connect the AC adaptor to the power outlet.
Drive the screws (A) (not supplied) into the wall. if necessary. (B) 25 mm (1 inch)
Note:
The AC adaptor comes connected to the charger at the time of shipment.
The AC adaptor must remain connected at all times. (It is normal for the adaptor to feel warm during use.)
Make sure that the wall and the fixing method are strong enough to support the weight of the unit.
Battery charging
Important:
2 rechargeable Ni-MH batteries are installed in the handset at the time of shipment.
Before initial use: Remove the yellow insulation sheet before using the handset.
Charge for about 7 hours.
Confirm “Charging” is displayed (A).
When the batteries are fully charged. “Fully charged” is displayed.
Note:
If the batteries are fully charged. but the operating time seems to be shorter. clean the battery ends (+, -) and the charge contacts with a dry cloth and charge again.
Handset battery level
Panasonic Ni-MH battery performance
*1 If eco mode is on and booster is off.
Note:
Actual battery performance depends on usage and ambient environment.
Battery installation (for replacement)
Important:
Use the supplied rechargeable batteries. For replacement. we recommend using the Panasonic rechargeable batteries noted on page 3.
USE ONLY rechargeable Ni-MH batteries AAA (R03) size (A).
Do NOT use alkaline/manganese/Ni-Cd batteries.
Confirm correct polarities (+,-)
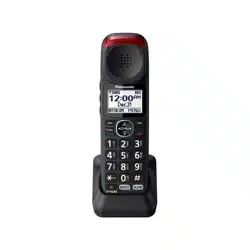
Controls
1. Belt clip holes 2. Speaker 3. [TONE] (Tone control) 4. [+]/[-] (VOL.: Volume up/down) 5. [FLASH] [TALK] 6. Dial keypad : Temporary tone dialing : () Ringer off
7. Headset jack
This jack is used to connect an optional headset or a user-supplied neckloop to the handset. You must set the “Headset type” setting to match the type of device connected.
8. (SP-PHONE: Speakerphone)
9. Microphone
10. Message indicator
11. Receiver
12. Display
13. [OFF]
14. [SLOW] (SLOW TALK) SLOW TALK indicator
15. [BOOST]
BOOST indicator
Light off: Volume booster is turned off.
Light in red: Volume booster is turned on.
Note that when the BOOST indicator is lit in red. the volume booster feature is enabled and the product may emit sounds at very high volume.
16. Charge contacts
Control type
(A) Soft keys
By pressing a soft key. you can select the feature shown directly above it on the display.
(B) Navigator key
– : Scroll through various lists and items.
– VOL. (Volume: ): Adjust the receiver or speaker volume while talking.
– : View the phonebook entry.
– REDIAL: View the redial list.
– CID (Caller ID): View the caller list.
Display icons
Handset display items
Registering a handset to a base unit
1. Base unit: Press and hold [LOCATOR/INTERCOM] for about 5 seconds.
If all registered handsets start ringing. press [LOCATOR/ INTERCOM] again to stop. then repeat this step.
2. Handset: Place the handset on the base unit or charger. then wait until a long beep sounds and is displayed.
Note: If an error tone sounds. or if is displayed. register the handset according to the base unit’s operating instructions.
Language settings
Display language
[MENU]#110
: Select the desired setting. → [SAVE] → [OFF]
Voice announcement language
You can select the language used for the following features.
– Answering system guidance
– Talking Caller ID
– Talking keypad and phonebook
[MENU]#110#112
: Select the desired setting. → [SAVE] → [OFF]
The setting will be applied in about 5 seconds.
Accessibility
This product is designed to provide not only optimal volume. but optimal sound quality as well. ensuring that every call is heard loud and clear.
Note: For information about the addible base unit models and the available features. visit the website below. http://shop.panasonic.com/amplified
Tone control
This feature clarifies the voice of the person you are talking to. producing a more natural-sounding voice that is easier to hear and understand.
This feature can be set for each unit.
The following settings are available.
Handset:
– Receiver: “Tone 1-6” and “Custom tone 1-20”
– Speakerphone: “Tone 1-4”
– Headset: “Tone 1-4” and “Custom tone 1-20”
Handset
You can select a tone control setting while talking on the phone. There are two methods available.
Using the [TONE] key
Press [TONE] on the side repeatedly to select the desired setting while talking.
To exit, press [BACK] or wait for a few seconds.
The selected setting is shown on the handset display while talking.
Note: To select one of the “Custom tone” settings. follow the instructions in “Using the [MENU] key”.
Press [MENU] while talking.
: “Tone control” → [SELECT]
: Select the desired setting. → [OK]
If you select “Custom tone”, select the desired type. → [OK]
The selected setting is shown on the handset display while talking.
Volume booster
This feature allows you to drastically increase the volume of the other party’s voice. This feature can be set for each unit.
WARNING
This feature is designed for users who are hard of hearing. If other users use the phone. be sure to turn this feature off.
Do not use this feature unnecessarily. High volume emitted from the product may cause hearing damage.
Pressing the [BOOST] key activates the volume booster feature. Use this key with care. At its loudest setting (volume and volume booster features set to their highest settings). the product can output sound at up to 40 dB (KX-TGMA44) or 50 dB (KX-TGMA45). To prevent hearing damage. we recommend that you set this product to the lowest volume setting at which you can hear adequately.
Turning on the volume booster
Press [BOOST] while on a call.
The BOOST indicator lights in red.
Press [+] or [-] on the side repeatedly to select the desired volume.
The selected volume setting is shown on the handset display while talking.
The selected volume setting is used for future calls when the booster is turned on.
Note:
Noise reduction is automatically turned on when the booster is turned on. In this case. the menu that allows you to turn off noise reduction is not shown even after you press [MENU] while on a call.
is not shown if the noise reduction feature was turned off before you turned on the volume booster.
If the auto boost feature is turned on. volume booster turns on automatically when you make or answer a call. If the auto boost feature is turned off. volume booster turns off automatically at the end of each call.
Turning on auto boost
If the auto boost feature is turned on. volume booster turns on automatically when you make or answer a call. This feature is useful if the unit is used mainly by a user who is hard of hearing.
[MENU]#782
: Select the desired setting. → [SAVE] → [OFF]
If the volume booster is turned on. the BOOST indicator lights in red during a call.
Note: While on a call. you can temporarily turn the volume booster off by pressing [BOOST]. and adjust the volume by pressing [+] or [-] on the side repeatedly.
Adjusting the volume
While on a call. you can adjust the volume by pressing [+] or [-] on the side repeatedly.
The selected volume setting is shown on the handset display.
The selected volume setting is applied immediately and is also used for future calls. A separate setting is used for when volume booster is on and when it is off.
Available volume settings
The available settings vary by model and whether volume booster is turned on or off.
Speech booster (making your voice louder)
This feature allows you to increase the volume of your voice heard by the other party. This feature can be set for each handset.
WARNING The speech booster feature can be used to increase the volume of your voice heard by the other party. If this feature is used unnecessarily. your voice may be too loud. We recommend that you use this feature only if your voice is too quiet to be heard by the other party.
Press [MENU] while on a call.
: “Boost speech on” or “Boost speech off” → [SELECT] The selected setting is applied immediately and is also used for future calls.
Key tones
Use this procedure to change the volume of the tones that sound when you press keys on the handset. or to turn them off. The default setting is “Low”. Includes confirmation tones and error tones. etc. This feature can be set for each unit.
For handset: [MENU]#165
: Select the desired setting. → [SAVE] → [OFF]
Message indicator
The message indicator on the handset can indicate unit status. as explained below.
Setting the message indicator
You can enable and disable the message indicator for each type of status.
– “Incoming call” (default: On)
– “New message” (default: On)
– “New VM” (default: On)
– “Missed call” (default: Off)
– “Alarm” (default: On) This feature can be set for each unit.
For handset: [MENU]#278
: Select the desired setting and press [SELECT].
“√” is displayed next to enabled items.
To disable an item. select it and press [SELECT] again. “√" disappears.
[SAVE] → [OFF]
Using assistive listening devices
If you use hearing aids that are compatible with a neckloop. you can connect your neckloop to a handset and enjoy hands-free conversations.
When talking on the phone. you can speak using the neckloop’s microphone or the handset’s microphone depending on the neckloop’s features and the handset’s settings.
– Hearing aids that are equipped with a telecoil (T-coil)
– Audio neckloops with a 3-pole. 2.5 mm plug
– Audio neckloops with a 3-pole. 3.5 mm plug*1 In this case. a 3-pole 3.5 mm to 3-pole 2.5 mm adaptor is required.
To use with a T-coil-equipped hearing aid
Set your hearing aid to the "T" setting.
Refer to your hearing aid’s operating instructions for details.
Hold the handset near your hearing aid when talking.
To use a neckloop
When using a neckloop with the handset. you can speak using the neckloop’s microphone or using the handset’s microphone.
Important: You must set the headset type before use.
Connect the neckloop to the headset jack on the side of the handset.
Use the handset as normal.
Refer to your neckloop’s operating instructions for details.
If your neckloop does not have a microphone. speak into the handset’s microphone.
You can use volume booster. speech booster. tone control. and other features even when using a neckloop.
Setting the headset type
Set this setting to match the type of device connected. This feature can be set for each unit.
“Headset” (default): Disables the handset’s microphone. The connected headset is used for talking and listening.
“Neckloop with Mic”: Disables the handset’s microphone. The connected neckloop is used for talking and listening.
“Neckloop w/o Mic”: Enables the handset’s microphone. The connected neckloop is used for listening only.
[MENU]#786
: Select the desired setting. → [SAVE] → [OFF]
One-touch ringer off
Handset
Press and hold 0 until the handset beeps to turn the ringer off. While the ringer is turned off. the handset will not ring for calls.
You can turn the ringer on again by pressing and holding 0 until the handset beeps.
Memory dial
For easy dialing. you can assign a phone number to each dial key (1 to 9) on the handset. All memory dial entries can be used by any handset.
Adding phone numbers to memory dial keys
By entering phone numbers:
Press and hold the desired memory dial key (1 to 9). → [ADD]
: “Manual” → [SELECT]
Enter the party’s name (16 characters max.). → [OK]
Enter the party’s phone number (24 digits max.). → [OK] → [SELECT] → [OFF]
From the phonebook:
Press and hold the desired memory dial key (1 to 9). → [ADD]
: “Phonebook” → [SELECT]
: Select the desired entry. [SAVE] → [OFF]
Note: If you edit a phonebook entry which is assigned to a memory dial key. the edited entry does not transfer to the memory dial key.
Editing an entry
Press and hold the desired memory dial key (1 to 9). → [MENU]
: “Edit” → [SELECT]
Edit the name if necessary. → [OK]
Edit the phone number if necessary. → [OK] → [SELECT] → [OFF]
Erasing an entry
Press and hold the desired memory dial key (1 to 9). → [MENU]
: “Erase” → [SELECT]
: “Yes” → [SELECT] a [OFF]
Viewing an entry/Making a call using the handset
Press and hold the desired memory dial key (1 to 9).


 *1 If eco mode is on and booster is off.

 : Temporary tone dialing
 : (
: ( ) Ringer off
 (SP-PHONE: Speakerphone)
 : Scroll through various lists and items.
  ): Adjust the receiver or speaker volume while talking.
  : View the phonebook entry.
  REDIAL: View the redial list.
  CID (Caller ID): View the caller list.

 is displayed.
 is displayed. register the handset according to the base unit’s operating instructions.
 : Select the desired setting. → [SAVE] → [OFF]
 is not shown if the noise reduction feature was turned off before you turned on the volume booster.
 : “Boost speech on” or “Boost speech off” → [SELECT] The selected setting is applied immediately and is also used for future calls.