Before the first use of the coffeemaker wash the brew basket, the permanent gold-tone filter, the carafe and carafe lid in either the top rack of your dishwasher, or by hand in warm, sudsy water.
The exterior of the coffeemaker, the control panel area and the warming plate should only be cleaned with a soft damp cloth.
NOTE: NEVER clean the warming plate unless it is completely cool.
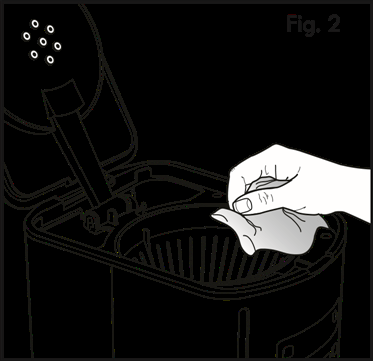
To clean inside of the reservoir, raise the cover and allow it to rest in the open position. Wipe surfaces with a damp cloth (See Fig. 2), and close cover.
NOTE: DO NOT use abrasive cleansers or scouring pads when cleaning your coffeemaker. NEVER immerse the coffeemaker in water or any liquid.
After all parts are washed for the first time, pour cold water up to the 12 cup level mark in the water reservoir. Brew it through the coffeemaker as instructed in BREWING, but do not add coffee grounds to the paper filter. When done, turn off the coffeemaker and discard the water from the carafe.
OPERATING YOUR COFFEEMAKER
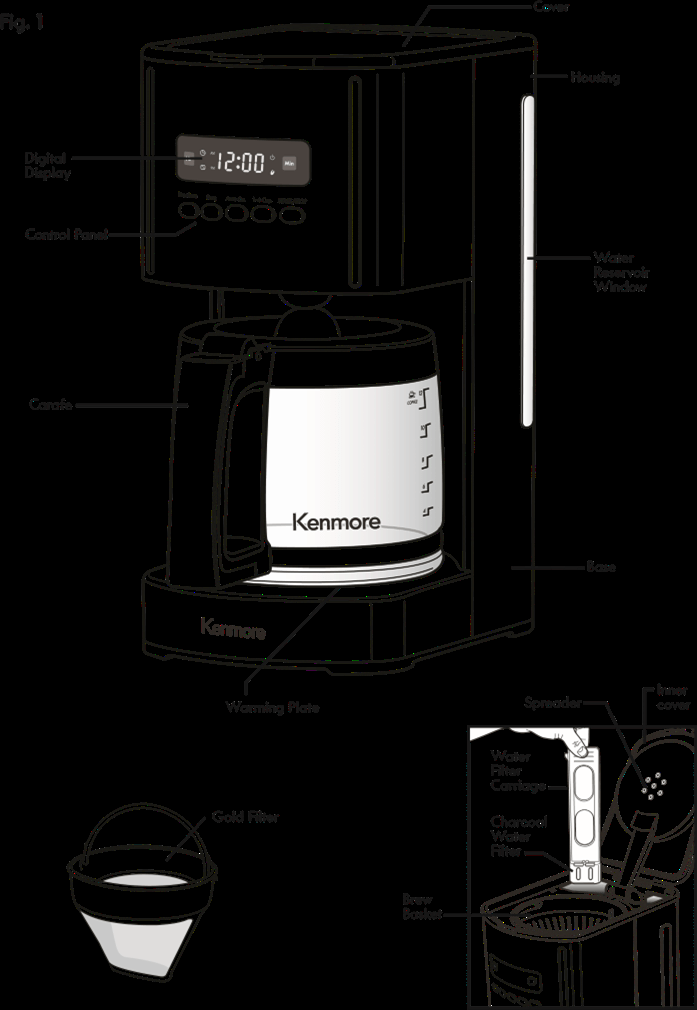
The easy-to-use programmable digital controls let you know when the coffee is ready, and even keeps track of the freshness of each brewed carafe. It’s never been easier to brew the perfect cup of coffee.
BREWING COFFEE
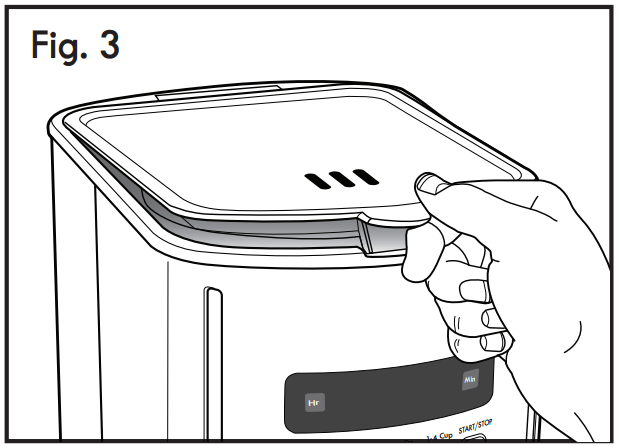
1. Open the top cover (See Fig.3).
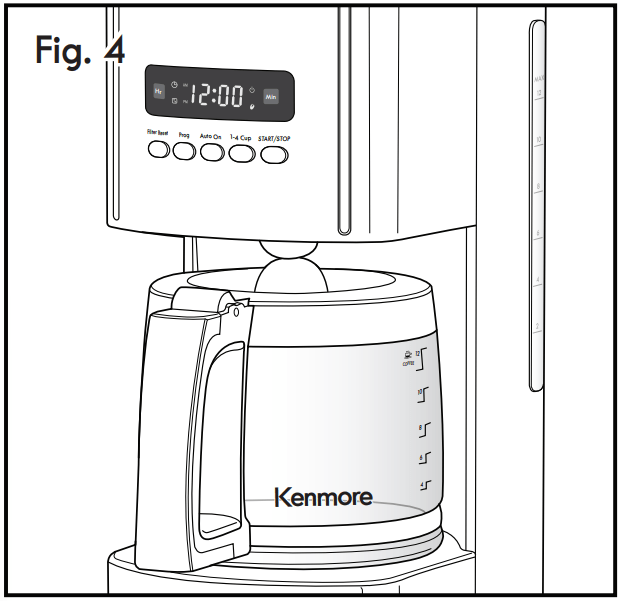
2. Use the carafe to fill the water tank of the coffeemaker to the desired level with cold water. There is a gauge marked from 4 to 12 cups (600ml to 1800ml) on both the coffeemaker’s water tank and on the sides of the carafe (see Fig. 4). These marks show the amount of cold water needed for each cup of coffee.The amount of brewed coffee will differ slightly due to the coffee grinds absorbing some water.
3. Place either the permanent gold-tone filter or a size #4 cone paper filter into the brew basket (see Fig. 5).
4. Add ground coffee. The amount of coffee you use is a matter of personal taste (we recommend one heaping tablespoon for every two cups). Experiment with different amounts of ground coffee per cup until you brew your perfect cup of coffee. You can also try using a paper filter along with the gold-tone filter.
5. Close the cover. Place carafe on the warming plate and plug in the appliance. The display window illuminates green and the coffeemaker beeps for about 1 second if the clock is not set. The clock does not have to be set to brew coffee. To set the clock time, see SETTING THE CLOCK, TIMER AND AUTO-BREWING
6. Turn on the coffeemaker by pushing in the START/STOP button. The START/STOP indicator will illuminate to show that the coffeemaker is brewing. After a few seconds, hot water flows into the filter to brew coffee. When the water stops flowing, brewing is complete, and the coffeemaker automatically switches to the warming mode. For delayed brewing, see SETTING THE CLOCK, TIMER AND AUTO-BREWING.
7. When you have poured out all the coffee in the carafe, press the START/STOP button to turn off the appliance, and remove the carafe from the warming plate.
NOTE: If the coffeemaker is not turned off, it will automatically shut itself off after two hours. BREWING COFFEE cont.
PAUSE AND POUR FEATURE
The pause and pour feature enables you to remove the carafe from the Coffeemaker and pour a cup of coffee before brewing is finished. When the carafe is removed, a special valve stops the flow of coffee from the brew basket to the carafe. Brewing does not stop. IMPORTANT: If the carafe is not replaced under the brew basket after 20 seconds, water and coffee will overflow from the brew basket.
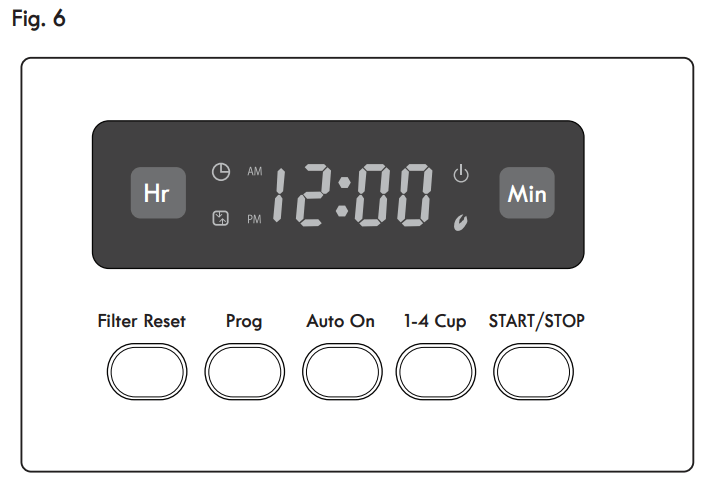
OPERATING THE CONTROL PANEL
SETTING THE CLOCK, TIMER AND AUTO-BREWING
Use the Hour and Min Buttons to Set the Clock:
When the coffeemaker is first plugged in, the clock will flash the default time of 12:00 AM.
Press the Hour button to change the setting to any hour number between 12:00 am to 11:00 pm.
Press the Min button to change the setting to any minute number between 1 and 59
You can make the hours and minutes move more quickly in the clock display by holding the buttons down.
The clock will begin keeping time at the moment the Hour and Min buttons are released.
Use the Prog, Hour and Min Buttons to Program an Automatic Brew Time:
First set the clock. See directions above.
Press the Prog button; the indicator will illuminate.
Set the time you wish the coffeemaker to begin brewing by pressing the “Hour” and “Min” buttons. Be sure to set the correct designation of AM or PM.
Once you have set the correct time to begin the automatic brewing and the clock has returned to the time of day, press the Auto On button.
The Auto Brew can be cancelled at any time by pressing the Auto On button a second time. The Auto On light goes out. To check what time the Auto Brew is set for, push in the Set Auto button and the time will be displayed.
1-4 CUP BUTTON
This special cycle optimizes the flavor when brewing 1 to 4 cups of coffee, but it can also be used to increase the brew strength of any number of cups you are brewing. Push the START/STOP button to start the appliance, and then push the 1-4 CUP button once and both the START/STOP and 1-4 CUP indicators will illuminate, showing that the strong brewing option is activated.
NOTE: The 1-4 Cup button must be pushed after the START/STOP button is pressed. If not, the function of the 1-4 Cup will not be activated. The coffeemaker will shut itself off after 2 hours and signal shutoff with 5 long beeps.
CARE AND CLEANING
ALWAYS UNPLUG the coffeemaker from the electric outlet before cleaning. The exterior of the coffeemaker, the control panel area and the warming plate should only be cleaned with a soft damp cloth.
WARNING: NEVER immerse the coffeemaker in water or any liquid.
WARNING:DO NOT clean the warming plate unless it is completely cool. DO NOT use abrasive cleansers or scouring pads.
To clean the inside of the water reservoir, raise the one-piece cover and allow it to rest in the open position. Pull the water spreader hose out from under the guide on the underside of the cover (See Fig. 2), wipe surfaces with a damp cloth, replace water spreader hose under guide, and close cover. Do not use abrasive cleansers or scouring pads.
CARAFE CARE
A damaged carafe may result in possible burns from a hot liquid.
To avoid breaking:
DO NOT allow all liquid to evaporate from the carafe while on the warming plate and never heat the glass carafe when empty.
DISCARD the carafe if chipped, cracked, or damaged in any manner.
NEVER use abrasive scouring pads or cleansers; they will scratch and weaken the glass.
DO NOT place the carafe on or near a gas or electric burner, in a heated oven, or in a microwave oven.
Avoid rough handling and sharp blows.
DO NOT set a hot carafe down on a wet or cold surface
CLEANING THE COFFEEMAKER AND CHANGING THE CHARCOAL FILTER
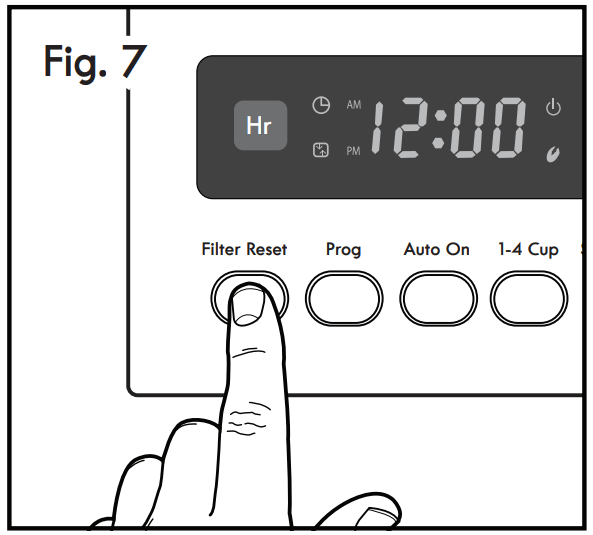
Mineral deposits from water can clog your coffeemaker. After every 70 brewing cycles, three beeps will sound and the following message will blink in the control panel display: Change filter and clean. Also, the Filter Reset button indicator will illuminate. The unit will emit a long beep after the filter is changed. Clean unit and change filter as follows:
To Clean Unit and Change Filter:
Press the Filter Reset button on the control panel to stop the blinking message in the display (Fig. 7).
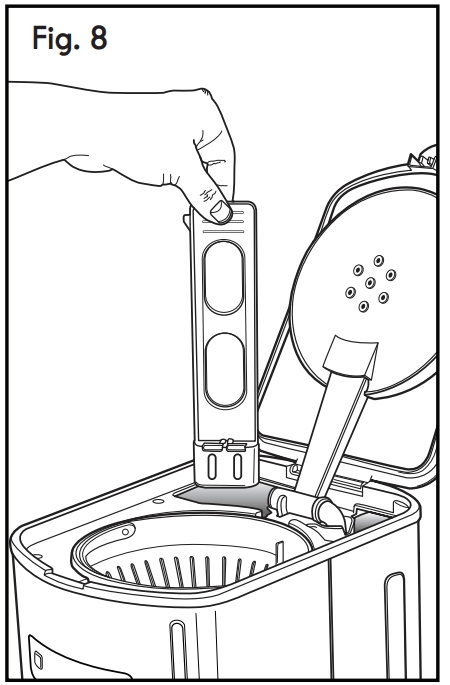
Open the cover of reservoir, and pull out the water filter carriage (Fig. 8).
Pour white vinegar into water reservoir up to the 6-cup level shown inside reservoir.
Add cold water up to the 12-cup line.
Put a paper filter in the brew basket, close cover, and place empty carafe on the warming plate.
Turn ON the coffeemaker and let half of the vinegar water solution brew through and into carafe.
Turn the coffeemaker OFF at this point and let it soak for at least 15 minutes to soften any deposits.
Turn the coffeemaker back ON and brew the remaining solution into the carafe. When brew cycle has stopped, turn OFF coffeemaker, empty carafe, and discard soiled paper filter.
Refill reservoir with cold water and turn ON to run another brew cycle. You may want to repeat again to eliminate any vinegar smell/taste.
Wash the brew basket and carafe.
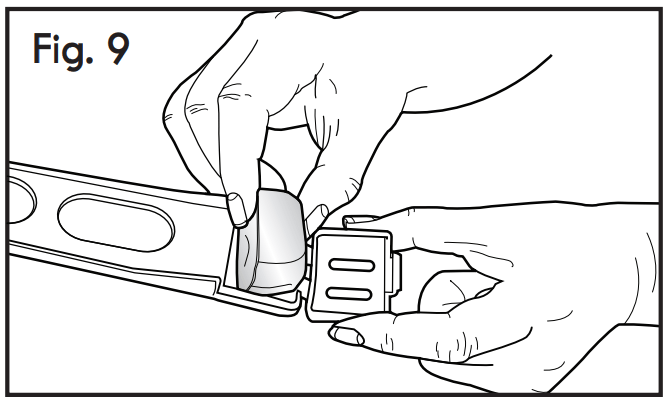
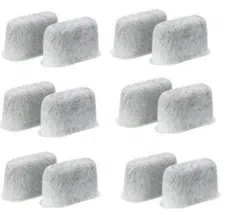
Open the water filter carriage, pull out the used charcoal filter, and replace with a new one of the same size and shape as shown in Fig 9.
Insert the water filter carriage back into the reservoir. Coffeemaker is cleaned and ready for use.
To reset the cycle count and remove the reminder in the control panel display, push the “Filter Reset” button.
Any other service should be performed by a qualified service technician.
IMPORTANT SAFEGUARDS
When using electrical appliances, basic safety precautions should always be followed, including the following:
READ all instructions.
DO NOT touch hot surfaces. Use handles or knobs.
To protect against fire, electric shock and injury to persons, DO NOT immerse cord, plug, or the coffeemaker in water or other liquids.
Close supervision is necessary when any appliance is used by or near children.
ALWAYS UNPLUG coffeemaker from power outlet before cleaning, and when storing. Allow to cool before putting on or taking off parts, cleaning or storing.
DO NOT operate any appliance with a damaged cord or plug, or after the appliance malfunctions or has been dropped or damaged in any manner. Return appliance to the nearest authorized service facility for examination, repair or adjustment.
The use of accessory attachments not recommended by the appliance manufacturer may result in fire, electric shock or injury to persons.
DO NOT use outdoors.
NEVER let the cord hang over the edge of table or counter or touch hot surfaces.
DO NOT place the coffeemaker on or near a hot gas or electric burner or in a heated oven.
DO NOT use this coffeemaker for anything other than its intended use.
The carafe is designed for use only with this coffeemaker.
Scalding may occur if the lid is removed during the brewing cycles. ALWAYS keep the lid on the carafe when in use.
To protect against electrical shock, this appliance is equipped with a cord having a 3-prong grounding-type plug for insertion into a proper grounding-type receptacle. DO NOT alter the plug for use in a 2-prong receptacle. If the plug will not fit into a receptacle, have the proper receptacle installed by a qualified electrician.
Do not set a hot container on wet or cold surface.
Do not use a cracked container or a container having a loose or weakened handle.
Do not clean container with cleansers, steel wool pads, or other abrasive material.
The container is designed for use with this appliance, it must never be used on a range top.
This appliance is for HOUSEHOLD USE ONLY.
Short Power Cord Instructions
A short power-supply cord is to be provided to reduce the risk resulting from becomingentangled in or tripping over a longer cord. Longer detachable power-supply cords or extension cords are available and may be used if care is exercised in their use. If a longer detachable power-supply cord or extension cord is used:
The marked electrical rating of the cord set or extension cord should be at least as great as the electrical rating of the appliance cord.
The cord should be arranged so that it wil not drape over the countertop or tabletop where it can be pulled on by children or tripped over unintentionally.
The extension cord should be a grounding type 3-wire cord.
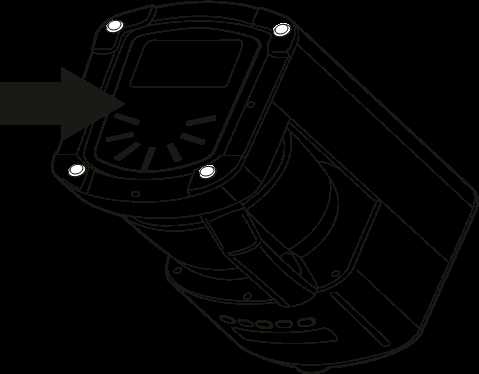
WARNING: To reduce the risk of fire or electric shock, DO NOT remove the cover indicated by the arrow in the figure below. There are no user serviceable parts inside.