Loading ...
Loading ...
Loading ...
12
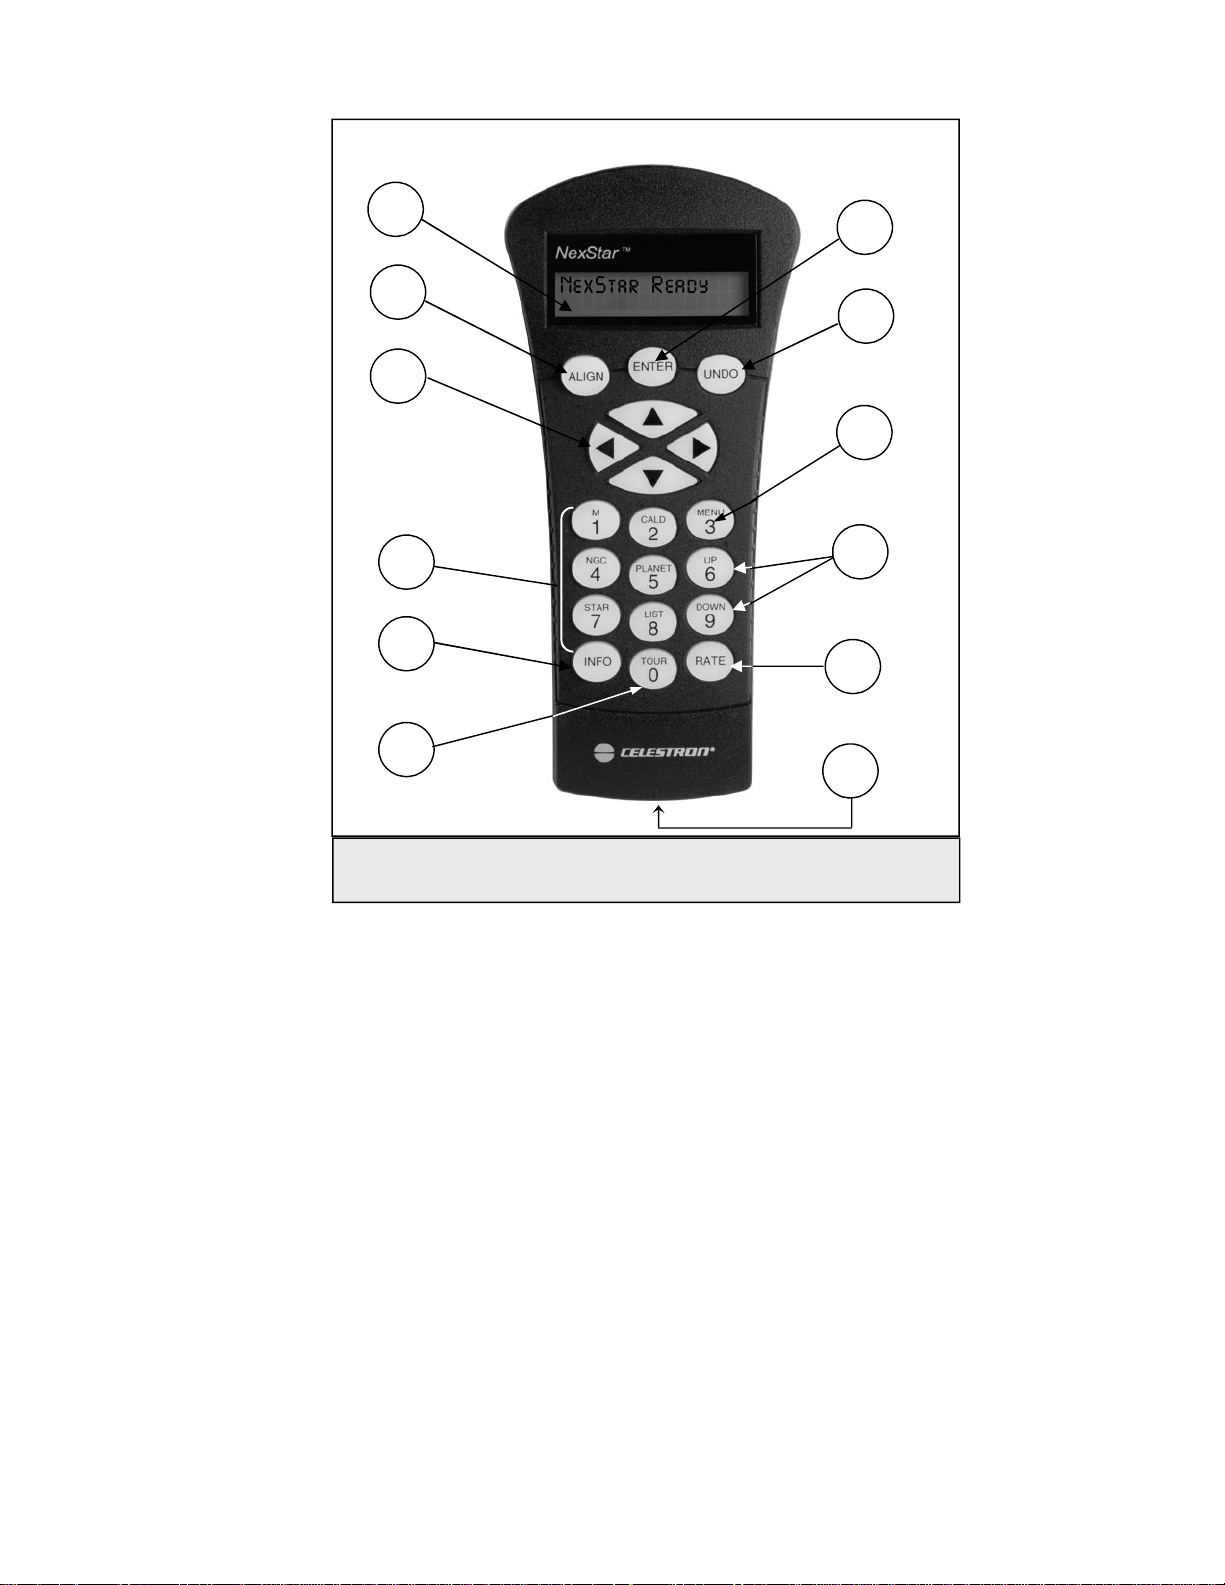
5. Info: Displays coordinates and useful information about objects selected from the NexStar database.
6.
Tour: Activates the tour mode, which seeks out all the best objects for a given month and automatically slews the
NexStar to those objects.
7.
Enter: Pressing Enter allows you to select any of the NexStar functions, accept entered parameters and slew the
telescope to displayed objects.
8.
Undo: Undo will take you out of the current menu and display the previous level of the menu path. Press Undo
repeatedly to get back to a main menu or use it to erase data entered by mistake.
9.
Menu: Displays the many setup and utilities functions such as tracking rate and user defined objects and many
others.
10.
Scroll Keys: Used to scroll up and down within any of the menu lists. A double arrow symbol on the right side of
the LCD indicates that the scroll keys can be used to view additional information.
11.
Rate: Instantly changes the rate of speed of the motors when the direction buttons are pressed.
12.
RS-232 Jack: Allows use with a computer and software programs for point and click slewing capability.
H
H
a
a
n
n
d
d
C
C
o
o
n
n
t
t
r
r
o
o
l
l
O
O
p
p
e
e
r
r
a
a
t
t
i
i
o
o
n
n
This section describes the basic hand control procedures needed to operate the NexStar. These procedures are grouped
into three categories: Alignment, Setup and Utilities. The alignment section deals with the initial telescope alignment as
well as finding objects in the sky; the setup section discusses changing parameters such as tracking mode and tracking
rate; finally, the last section reviews all of the utility functions such as adjusting the telescopes slew limits and backlash
compensation.
1
2
3
4
5
6
7
8
11
12
9
10
Fig
u
u
r
r
e
e
3
3
-
-
1
1
The NexStar Hand Control
Loading ...
Loading ...
Loading ...