Drying time is reduced by the use of an efficient air flow system and an optimized heater.
Innovative Noise Reduction
The optimized design of the air flow system and the vibration reduction technology helps to reduce noise.
Ease of Use
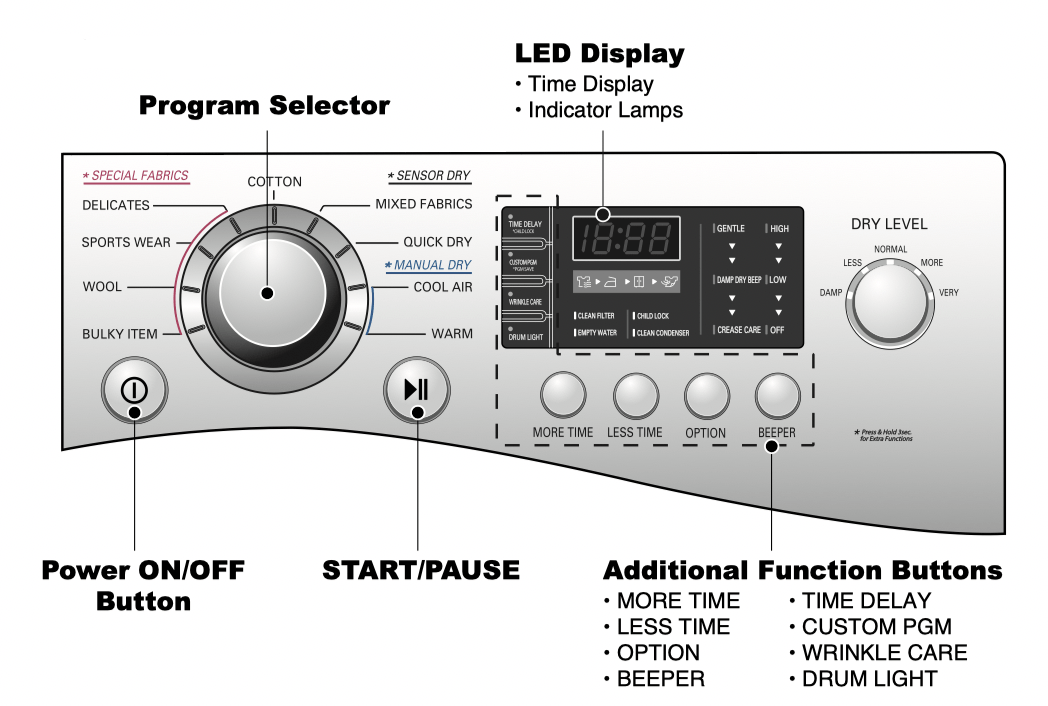
The electronic control has a large, easy to read LED display.
What are Sensor Dry and Manual Dry?
Your dryer provides sensor drying and manual drying programs.
Sensor Dry Dryer electronically senses laundry moisture level and automatically determines operation time based on the dryness of the load and the selected program. The control will change the estimated time remaining if it senses a large change in the time needed to complete the cycle. These large increases or decreases in the time display are normal, and do indicate a product malfunction.
Manual Dry Manual Dry allows you to set the desired dry time manually. Certain types of loads, such as large and/or bulky loads, may not dry properly using Sensor Dry. These loads should be dried using the Manual Dry feature to ensure complete drying.
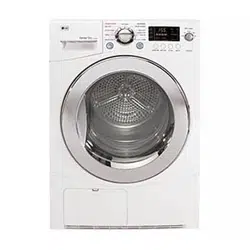
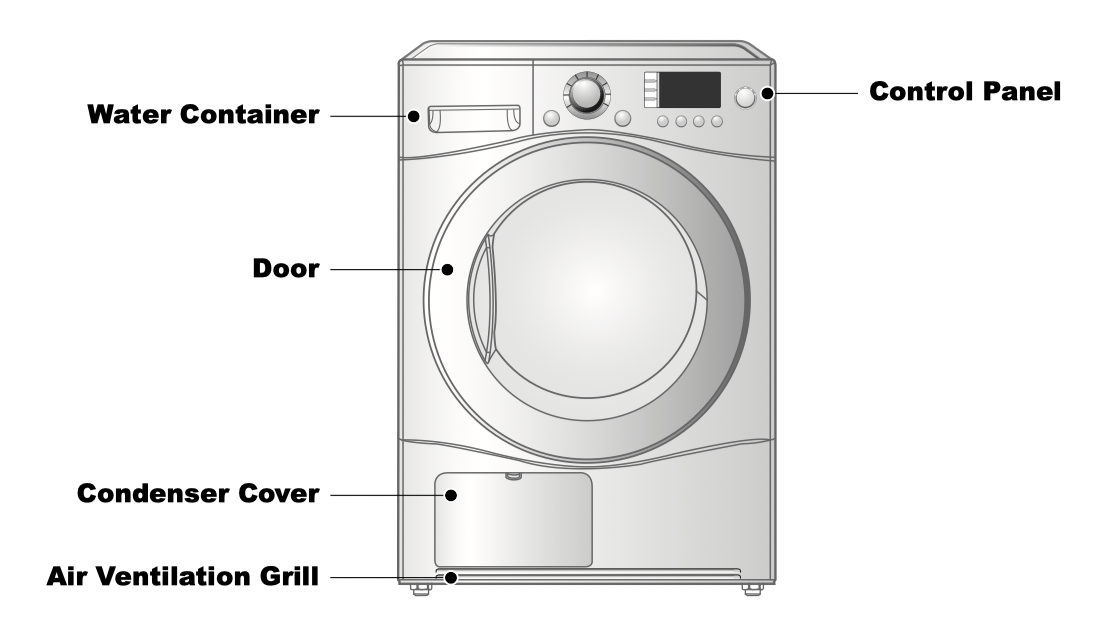
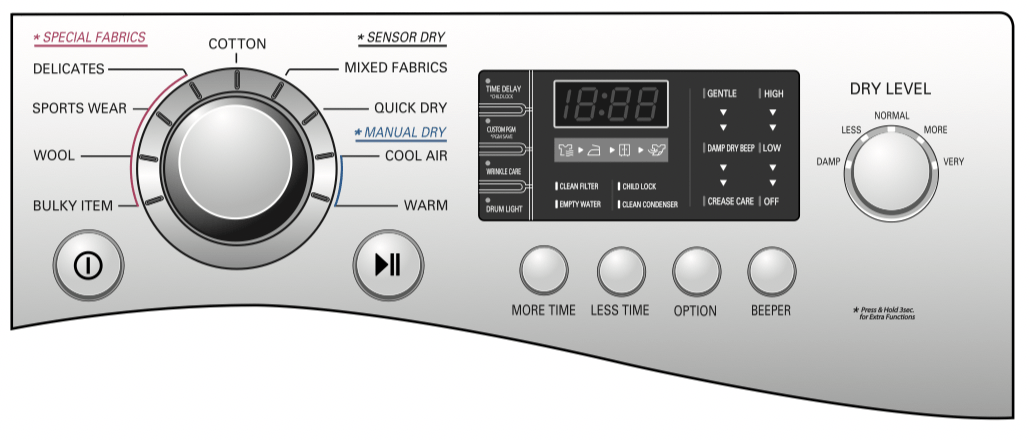
Appearance And Design
Control Panel
Operating Your Dryer
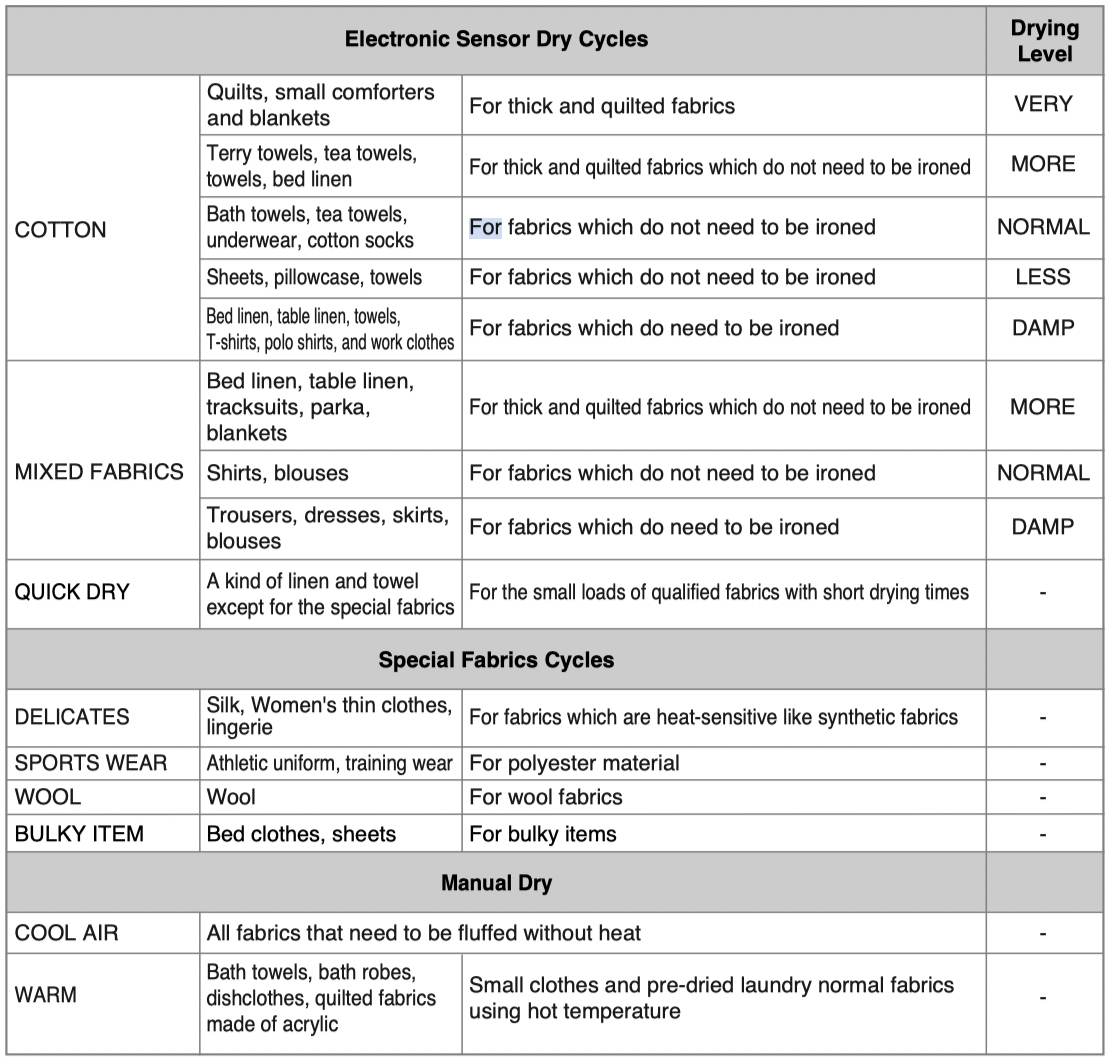
Cycle Selection Table
CAUTION
If the load is less than 2.2lbs (1kg), please use WARM course in MANUAL DRY course Your wool should be used in WOOL program and heat-sensitive fabrics including silk, underwears, lingerie should be used in DELICATES course.
And also please comply with the recommended laundry load when you use the special fabric course. (Refer to page 22) Otherwise, these clothes may not dry properly.
BEFORE YOU USE YOUR DRYER
1. When unpacking your dryer, make sure there is no visible damage to the machine.
2. Follow the installation instructions and use a level to ensure proper installation.
3. Check the water reservoir, condenser, door, gasket and drum for signs of damage.
4. Run the dryer for a few minutes to make sure it is heating properly.
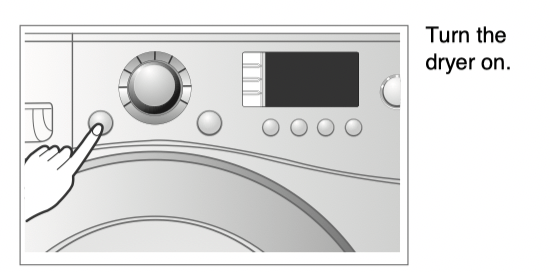
1. Turn power on.
First, press the Power button. The indicator light above the button will become illuminated, indicating that the machine is ready set to run.
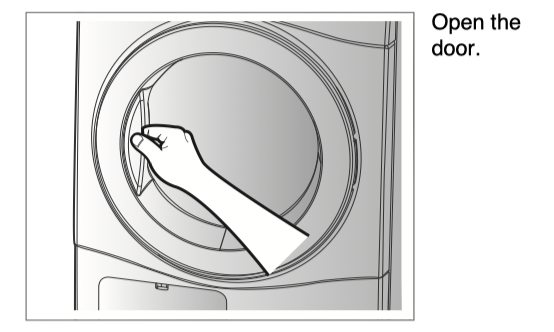
2. Open the door.
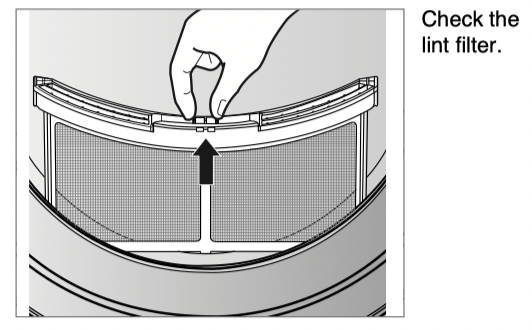
3. Check the lint filter, water container, and condenser.
The lint filter near the door, should be emptied before drying operation.
Open and check if lint filter is cleaned.
If not, clean it referring to page 19.
Water container and condenser are also checked to be emptied and cleaned for better drying result.
4. Place laundry into the drum after sorting.
The clothes should be sorted by fabric type and dryness level and all the strings and belts of clothes should be secured before being put into the drum.
Push the laundry all the way back to keep it away from the door seal.
If not, the door seal and clothes may be damaged.
5. Close the Door.
Before you close the door, make sure fabrics are properly loaded and not caught in the door opening.
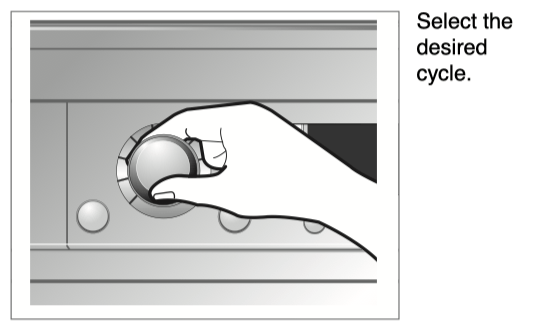
6. Select the Drying Cycle you want.
You can choose a cycle by turning the program control knob until the required program reaches to its indicator. If you press START/PAUSE button without choosing any cycle, the dryer will proceed with the COTTON program. [Please refer to following Cycle Selection table (page 14) for the detailed information]
7 . Press the Start button.
You can hear the drum turning.
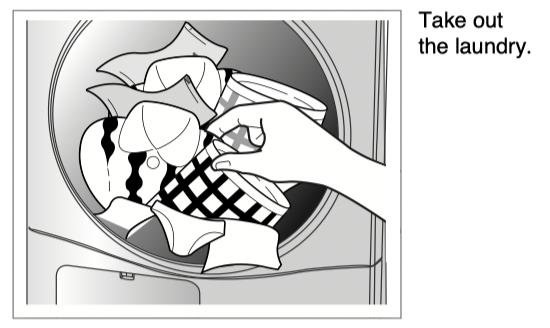
8. After operation is completed, open the door and remove the laundry.
Be careful! Drum inside could be still hot. (Operation time varies depending on your cycle selection or options.)
9. Clean the lint filters and empty water container.
The lint filter should be cleaned after each load.
10. Turn off the Dryer.
Press the power button.
CAUTION
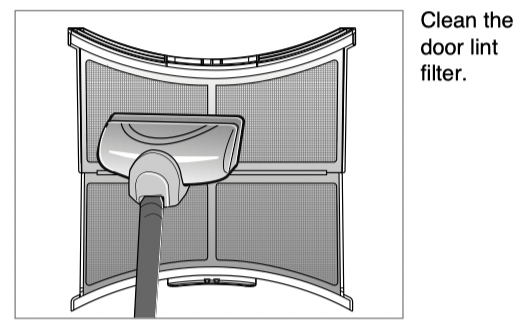
• Be careful the filter is not turn or damaged when using a vacuum cleaner. If there is a little residue buildup on filter, you can scrub lint screen with the brush to remove.
• If you want to open the door while dryer is operating, please press the START/PAUSE button first, wait until drum completely stops and then open the door.
Additional Functions
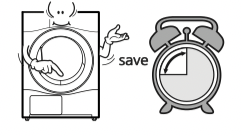
TIME DELAY
The TIME DELAY feature allows you to have the dryer run at a time that is more convenient, for example when electricity rates are cheaper. The cycle can be delayed from 3 hours up to a maximum of 19 hours.
1. Load the dryer and close the door.
2. Press the POWER button.
3. Select the desired cycle and options.
4. Press the TIME DELAY button until the desired delay time is displayed.
5. Press the START/PAUSE button.
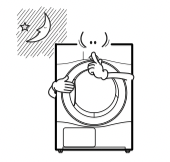
WRINKLE CARE
Selecting this option will tumble the load periodically for a few seconds without heat. This will continue for up to 3 hours after the selected cycle, or until the door is opened. This prevents wrinkling of unremoved dry items until they can be removed.
Note
If the door is opened during the drying portion of a cycle before WRINKLE CARE has started, the cycle will not be cancelled and WRINKLE CARE will begin as soon as the normal drying portion of the cycle is completed.
CUSTOM PROGRAM
If you have a special combination of settings that you use frequently, you can save these settings as a CUSTOM PROGRAM.
* To Save a CUSTOM PROGRAM
1. Turn on the dryer.
2. Select a cycle.
3. Use the cycle modifier buttons to adjust the settings for that cycle.
4. Set any other desired cycle options.
5. Press and hold the CUSTOM PROGRAM button for 3 seconds. You will hear two beeps to confirm the settings have been stored.
To Recall a CUSTOM PROGRAM
1. Press and release the CUSTOM PROGRAM button. The stored settings will be displayed.
2. Press and release the Cycle Selector Knob to start the cycle. The dryer will start automatically.
Note
If the door is opened during the drying portion of a cycle before WRINKLE CARE has started, the cycle will not be cancelled and WRINKLE CARE will begin as soon as the normal drying portion of the cycle is completed.
You can only save one CUSTOM PROGRAM program at a time. If you press and hold the CUSTOM PROGRAM button for 3 seconds, you will overwrite any previously stored CUSTOM PROGRAM settings.
Once CUSTOM PROGRAM has been recalled, any of the memorized modifiers or options can be adjusted. However, if the Cycle Selector Knob is rotated, CUSTOM PROGRAM will be cancelled.
CHILD LOCK
Use this option to prevent cycle settings from being changed while the dryer is operating. Press and hold the TIME DELAY button for 3 seconds to activate or deactivate the CHILD LOCK function.
The lock icon will be shown in the display, and all controls are disabled.
DRUM LIGHT
Press the DRUM LIGHT button to turn on the drum light during dryer operation. This will allow you to more easily observe the load. The drum light will come on any time the door is opened.
MORE TIME/LESS TIME
The MORE TIME and LESS TIME buttons can be used to increase or decrease the dry time when MANUAL dry cycles are selected. These buttons are disabled once the cycle is started.
Note
These buttons are available only with MANUAL DRY, before you push START/PAUSE button.
OPTIONS
GENTLE
- These are functioning to shorten or lengthen the cycle time by increasing or decreasing temperature.
- This option only is used with the COTTON and MIXED FABRICS cycles.
DAMP DRY BEEP
- This option causes the control to beep once the clothes have reached a "damp dry" level. This can be used to alert you to remove articles that you don't want to over dry or that you want to have damp for easier ironing.
- This option only is used with the COTTON and MIXED FABRICS cycles.
CREASE CARE
- This is a function to reduce wrinkles.
- This is a function to set up automatically when you only select the MIXED FABRICS cycle, but cancellation is impossible.
BEEPER
Press the BEEPER button to adjust the volume of the signals from high to off.
Caring For Your Dryer
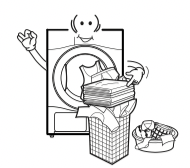
Clean lint filter
To maintain proper air flow and keep your dryer operating a peak efficiency, it is important to empty the lint filter between every load. If the CLEAN FILTER light comes on during a cycle and the beeper sounds, pause the dryer and empty the filter immediately.
1. Open the door.
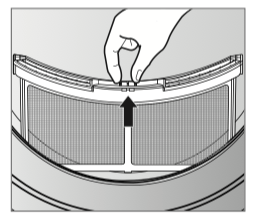
2. Pull the filter out.
3. Open the filter and use your fingers to roll the lint off the screen surfaces. If the lint is difficult to remove or the filter material is showing signs of clogging, follow the cleaning instructions below.
4. Snap the filter closed and replace it in the dryer.
- Push the filter all the way down to avoid Interference with the door
5. Close the door.
Wash the lint screen in warm, soapy, water.
Dry thoroughly and replace.
Clean lint filter during a cycle
If the CLEAN FILTER light flashes and the alarm sounds during operation, clean the filter promptly.
1. Press the POWER button to stop the dryer. The press it again to turn the dryer on.
2. Turn the CYCLE SELECTOR to select the COOL AIR cycle.
3. Press the START/PAUSE button the start the dryer.
4. Let the COOL AIR cycle run for 5 minutes to cool the dryer, then open the door and clean the lint filter.
Note
If the dryer is stopped in the middle of a cycle, the lint filter may be very hot. Failure to follow these cool down instructions could result in injury.
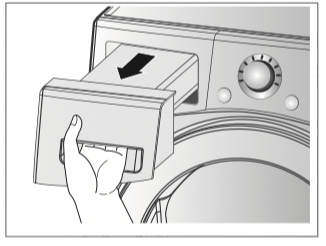
Empty water container
If your dryer is not connected to a household drain, then the water reservoir will capture the water from the drying process. This should be emptied every load. Failure to do so may result in poor drying performance.
If the container becomes full during a cycle, the EMPTY WATER light and alarm will be activated. In this case, the water reservoir should be emptied immediately, but in no case should it continue to be used for more than 1 hour.
1. Using the handle on the front of the drawer, pull out the reservoir.
2. Using the handle on the front of the drawer, pull out the reservoir.
3. Drain the water into a sink.
4. Press the START/PAUSE button to resume the cycle.
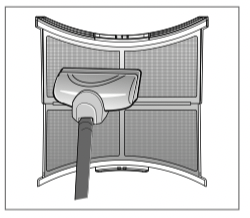
Condenser
The condenser is a very important part of your dryer. This is where the moisture is removed form the air so there is no need for an outside exhaust. If the condenser is not properly maintained, it will greatly increase energy consumption and drying time. The condenser should be cleaned 3 or 4 times a year, or anytime the CLEAN CONDENSER light blinks.
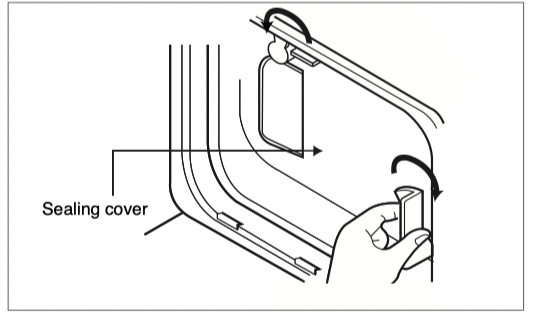
1. Push the tap and open the condenser cover.
2. Unlock the inner plate by rotating the locking levers on either side of the plate. Then slide the plate out of the opening.
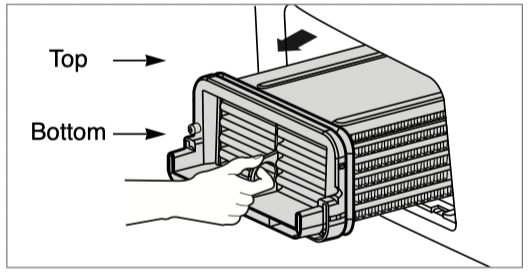
3. Carefully slide the condenser straight out of the housing using the finger ring at the center. Use care when handling the condenser to prevent damage that could reduce its efficiency.
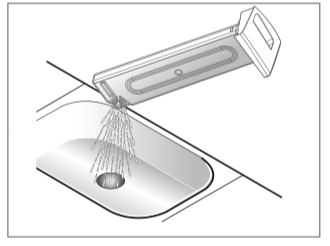
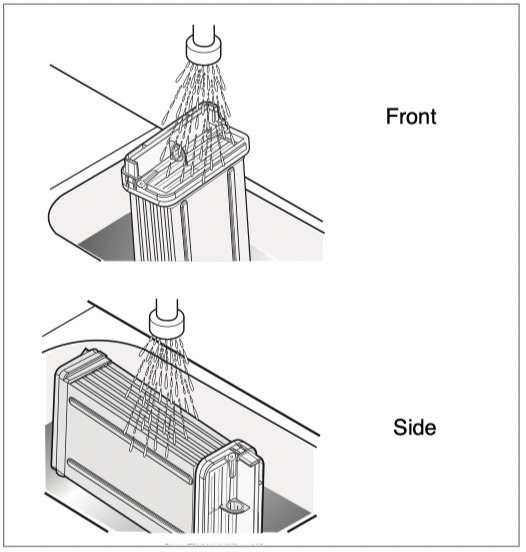
4. Thoroughly clean the condenser by running tap water through it from both the ends and the sides.
5. Slide the clean condenser into the housing. Make sure it is oriented as shown in the drawing in step 3.
6. Insert the inner plate into the opening in front of the condenser, then rotate the locking tabs to lock it in place. Then close the front cover.
CAUTION
• NEVER operate the dryer without the condenser in place.
• Do not operate the dryer with a dirty or clogged condenser. Doing so will increase energy consumption and drying times.
• Handle the condenser with care. Do not use sharp or hard objects to clean the condenser as this could damage the condenser.
• Do not operate the dryer with a damaged condenser. Doing so could result in leaking which may result in property damage.
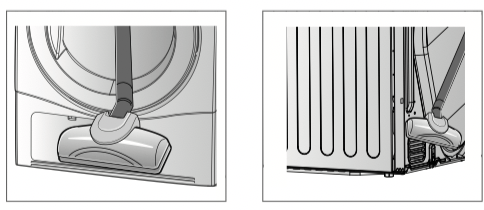
Ventilation Grille and Cool Air Inlet Grille
Use a vacuum cleaner to clean the front ventilation grill and the cool air inlet in the back. Failure to remove any lint or dirt buildup will reduce air flow and increase energy consumption and drying times.
Note
The warm air is exhausted through the ventilation grill.
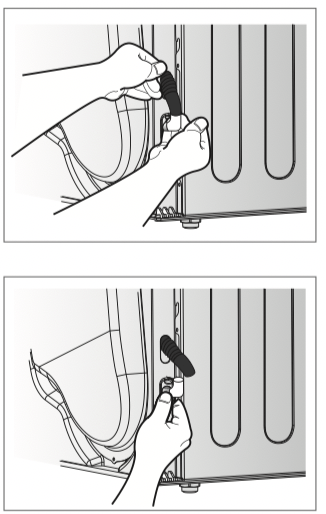
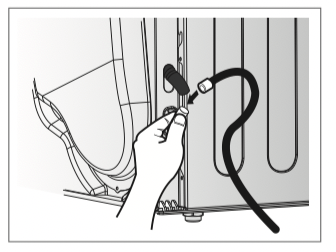
Condensed Water Drain
Condensed water is pumped to the reservoir which must be emptied every load. If a household drain is available, this water can be pumped down the drain so the reservoir is not used.
1. Slide the drain connection out the opening located on the back of the dryer on the right side as your face the rear of the dryer.
2. Disconnect the hose from that goes up to the reservoir.
3. Connect the external drain hose included with the dryer. Route this hose to a permanent drain and secure the hose so it can not come loose.
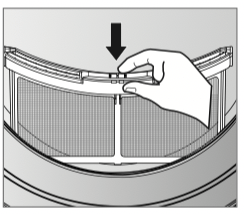
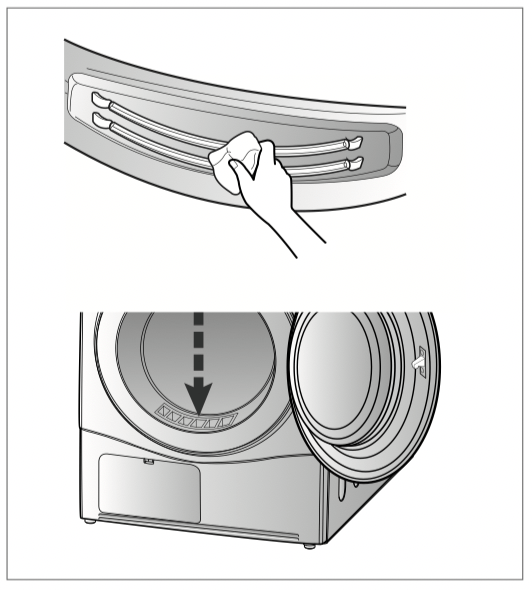
Moisture Sensor
This sensor is used by the control to sense the moisture remaining in the clothes. If the sensor becomes dirty or coated the control will not be able to sense the moisture and the dryer will shut off before the clothes are dry.
Clean the sensor bars as shown below to maintain optimum performance of the Sensor Dry cycles.
Additional Tips For Smart Use
Drying Guide
Woolen Article
Dry woolens in wool cycle. Be sure to follow fabric care label symbols. Wool is not completely dried from the program so don't repeat drying. Pull woolens to their original shape and dry them flat.
Woven and loopknit materials
Some woven and loopknit materials may shrink, depending on quality.
Permanent Press and Synthetics
Do not overload your dryer.
Take out permanent press items as soon as the dryer stops to reduce wrinkles.
Baby clothes and night gowns
Always check the manufacturer’s instructions. Rubber and Plastics
Do not dry any items made from or containing rubber or plastics such as:
a) Aprons, bibs and chair covers
b) Curtains and table clothes
c) Bathmats
Fiber glass
Do not dry fiberglass articles in your dryer.
Glass particles left in the dryer could be picked up by your clothes the next time you use the dryer and irriate your skin.
Fabric Care Labels
Clothes have their own wash care labels so drying according to wash care labels is recommended. Not only that, the laundry must be sorted according to size and fabric type.
Do not overload in order to save energy, time, and best dry performance.
Below are fabric care labels.
Spare Parts
Spare parts in are covered under the terms of warranty. Components covered by warranty are provided free of charge. If coverage is expired, spare parts must be purchased from an authorized service center.
Disposal of the dryer
It is required by law for you to dispose the dryer safely to keep your children away from the possible injury.
The door and lid and other protruded items must be taken away and power cord must be cut off to avoid future use. After that, the dryer is to be disposed safely.
Service contact
If there is something wrong with your dryer, use the troubleshooting table.
In case that you can’t find the same trouble and you can not handle by yourself, please contact an authorized service center or call 800-243-0000.
A service person will ask you some questions like followings:
1. Your name, address, and ZIP code.
2. Your phone number.
3. Description of the problem.
4. The model number and serial number of your dryer.
5. The date of purchase.
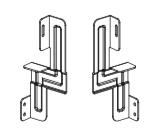
Accessory parts
Your dryer comes with accessories such as
1. Condensing drain hose
2. Hose holder
3. Stacking kit (2EA)
4. Support Holder (2EA)
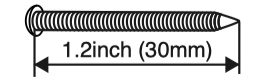
5. Screws (4EA)
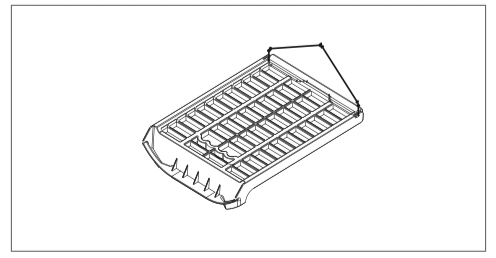
Dryer Rack
Troubleshooting Guide
Troubleshooting Tips
Save time and money! Review the charts on the following pages first and you may not need to call for service.
1. Problem: My dryer won't start
Question
What to Do
Is the dryer plugged in?
Confirm that the dryer's plug is securely and completely pushed into the power outlet
Is the fuse blown, or is the circuit breaker tripped?
Check your home's or laundry room's fuse box/circuit breaker box and replace the fuse or reset the circuit breaker.
2. Problem: My dryer doesn't heat
Question
What to Do
Is the fuse blown, or is the circuit breaker tripped?
If the fuse is blown or the circuit breaker tripped, the dryer might tumble but not heat. Check your home or laundry room fuse box/circuit breaker box and replace the fuse or reset the circuit breaker.
3. Problem: There are greasy spots on my clothes
Question
What to Do
Did you follow the instructions on your fabric softener product?
Check and follow the instructions provided with your fabric softener product.
Are you drying clean and dirty clothes together?
Make sure to use your dryer to dry only clean items, because dirty items can soil clean clothes placed in the same load or later placed in the dryer drum.
Were your clothes entirely clean?
Stains on dried clothes are actually stains that weren't removed during the washing process. Make sure you are following your washing instructions and that the clothes are being completely cleaned.
4. Problem: There is lint on my clothes
Question
What to Do
Is your lint filter full?
Please refer to the manual section on cleaning the lint filter, and please confirm that the lint filter is clean. It is important that the lint filter is clean before each new load of laundry.
Did you properly sort your load of laundry?
In order to reduce the amount of lint in a load of laundry, sort lint producers (like a fuzzy white cotton towel) separately from clothes that might catch lint (such as a pair of black linen pants).
Do your clothes have excess static electricity?
See comments below under item 5, There is static in my clothes after drying.
Did you overload your dryer?
Divide your larger load into smaller loads.
Did you place any paper, tissue, or other similar material in the load?
Sometimes a person might forget to take a piece of paper or a tissue out of the pocket of a pair of pants, and this paper, tissue, or similar material can cause excess lint in a load of laundry. Confirm that the pockets of pants, shirts, and other articles of clothing are empty before washing and drying.
5. Problem: There is static in my clothes after drying
Question
What to Do
Did you use fabric softener?
Try using a fabric softener to reduce static electricity.
Did you over dry the load of laundry?
Overdrying a load of laundry can cause a build up of static electricity. Try using a fabric softener or adjust your settings and use a shorter drying time
Are you drying synthetic, permanent press and blends?
These materials can cause static to build up in a load of dried clothes. Try using a fabric softener.
6. Problem: The drying time is not consistent
Question
What to Do
Are you using consistent heat settings and consistent load sizes?
The drying time for a load will vary depending on the heat setting, the size of the load, the type of fabrics, the wetness of the clothes, and the condition of the lint filter.
7. Problem: It takes too long for my clothes to dry
Question
What to Do
Did you properly sort your loads of laundry?
Separate heavy weight items from light weight items when creating loads.
Are you drying large loads of heavy fabrics?
Heavy fabrics take longer to dry because they tend to retain more moisture.
To help reduce and maintain more consistent drying times for large and heavy fabrics, separate these items into smaller loads of a consistent size.
Are the dryer controls properly set?
Use the appropriate control settings for the type of load you are drying.
Is the lint filter clean before each new load of laundry?
Please confirm that the lint filter is clean prior to each new load of laundry.
Is the fuse blown, or is the circuit breaker tripped?
Check your home's or laundry room's fuse box/circuit breaker box and replace the fuse or reset the circuit breaker.
Did you overload your dryer?
Divide your larger load into a number of smaller loads.
Did you under load your dryer?
If you are only drying a handful of items, add a few extra pieces to help ensure proper tumbling action.
8. Problem: My clothes are wrinkled
Question
What to Do
Are you overdrying your laundry?
Overdrying a load of laundry can lead to wrinkled clothes. Try a shorter drying time, and remove items while they still retain a slight amount of moisture.
Are you removing your laundry from the dryer soon after the drying cycle is complete?
Remove your laundry from the dryer after the drying cycle ends and either hang or fold the items.
9. Problem: My clothes are shrinking
Question
What to Do
Are you following the care instructions for your garment?
To avoid shrinkage, carefully follow the care and use instructions for your garment, because some fabrics will naturally shrink when washed. Other fabrics can be washed but will shrink when dried in a dryer.
Error Mode
LED displays dE in case of the door open. The door must be closed and start Button must be pressed for re-operation.
If display errors continues to occur, unplug the power cords and then call to the Service Center.


 LED displays dE in case of the door open. The door must be closed and start Button must be pressed for re-operation.
 If display errors continues to occur, unplug the power cords and then call to the Service Center.