Loading ...
Loading ...
Loading ...
I 9
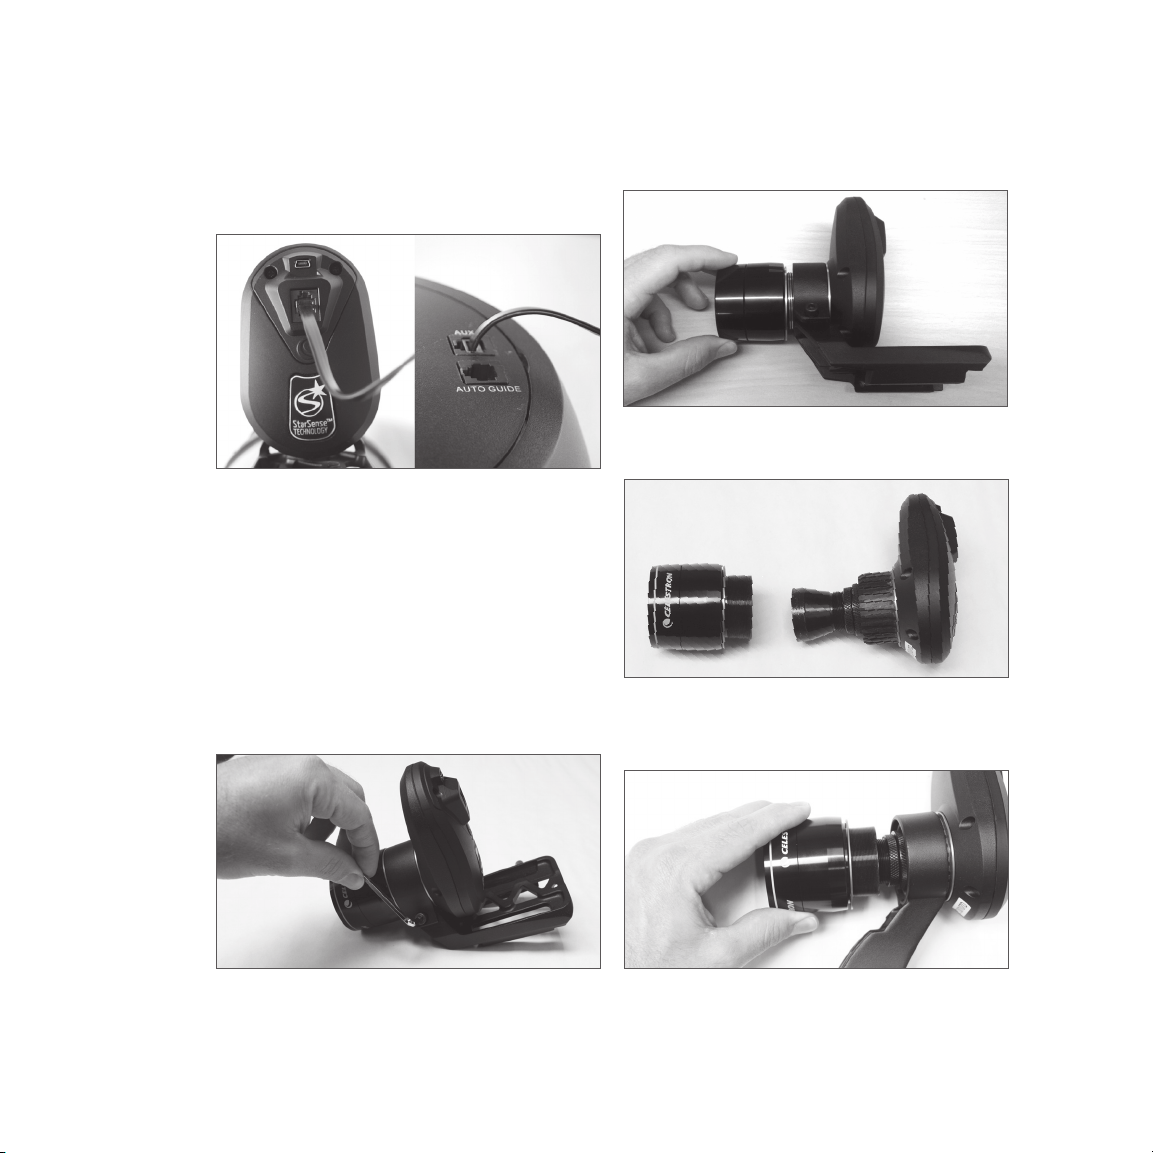
4. Plug the included auxiliary cable into the back
of the StarSense Camera on one end, and your
mount’s auxiliary port on the other end.
Note: If your telescope does not have an auxiliary port,
the Auxiliary Port Splitter, (item #93919 available
from Celestron), is required. First, plug the splitter
into the auxiliary port. Then, plug the hand control
into one port and the cable into the other.
CHANGING BRACKETS
To change from the pre-installed Large Camera
Bracket to the Small Camera Bracket:
1. Slightly loosen the socket head screw using the
included 4mm Allen wrench. Do not remove the
screw entirely.
2. Remove the lens shroud by unthreading it.
3. Slide the bracket off the front of the camera. Be
careful not to lose the two orange rings.
4. Slide the new bracket onto the camera and screw
the lens shroud back on. One orange ring should
be in front of and behind the bracket as shown.
Loading ...
Loading ...
Loading ...