Loading ...
2
Important Cord and Plug Information
This appliance has a polarized plug (one blade is wider than the other). To reduce the risk of electric shock, this plug is intended to fit
into a polarized outlet only one way. If the plug does not fit fully into the outlet, reverse the plug. If it still does not fit, contact a qualified
electrician. Do not attempt to modify the plug in any way.
Connect the power supply cord to a 120VAC electrical outlet only.
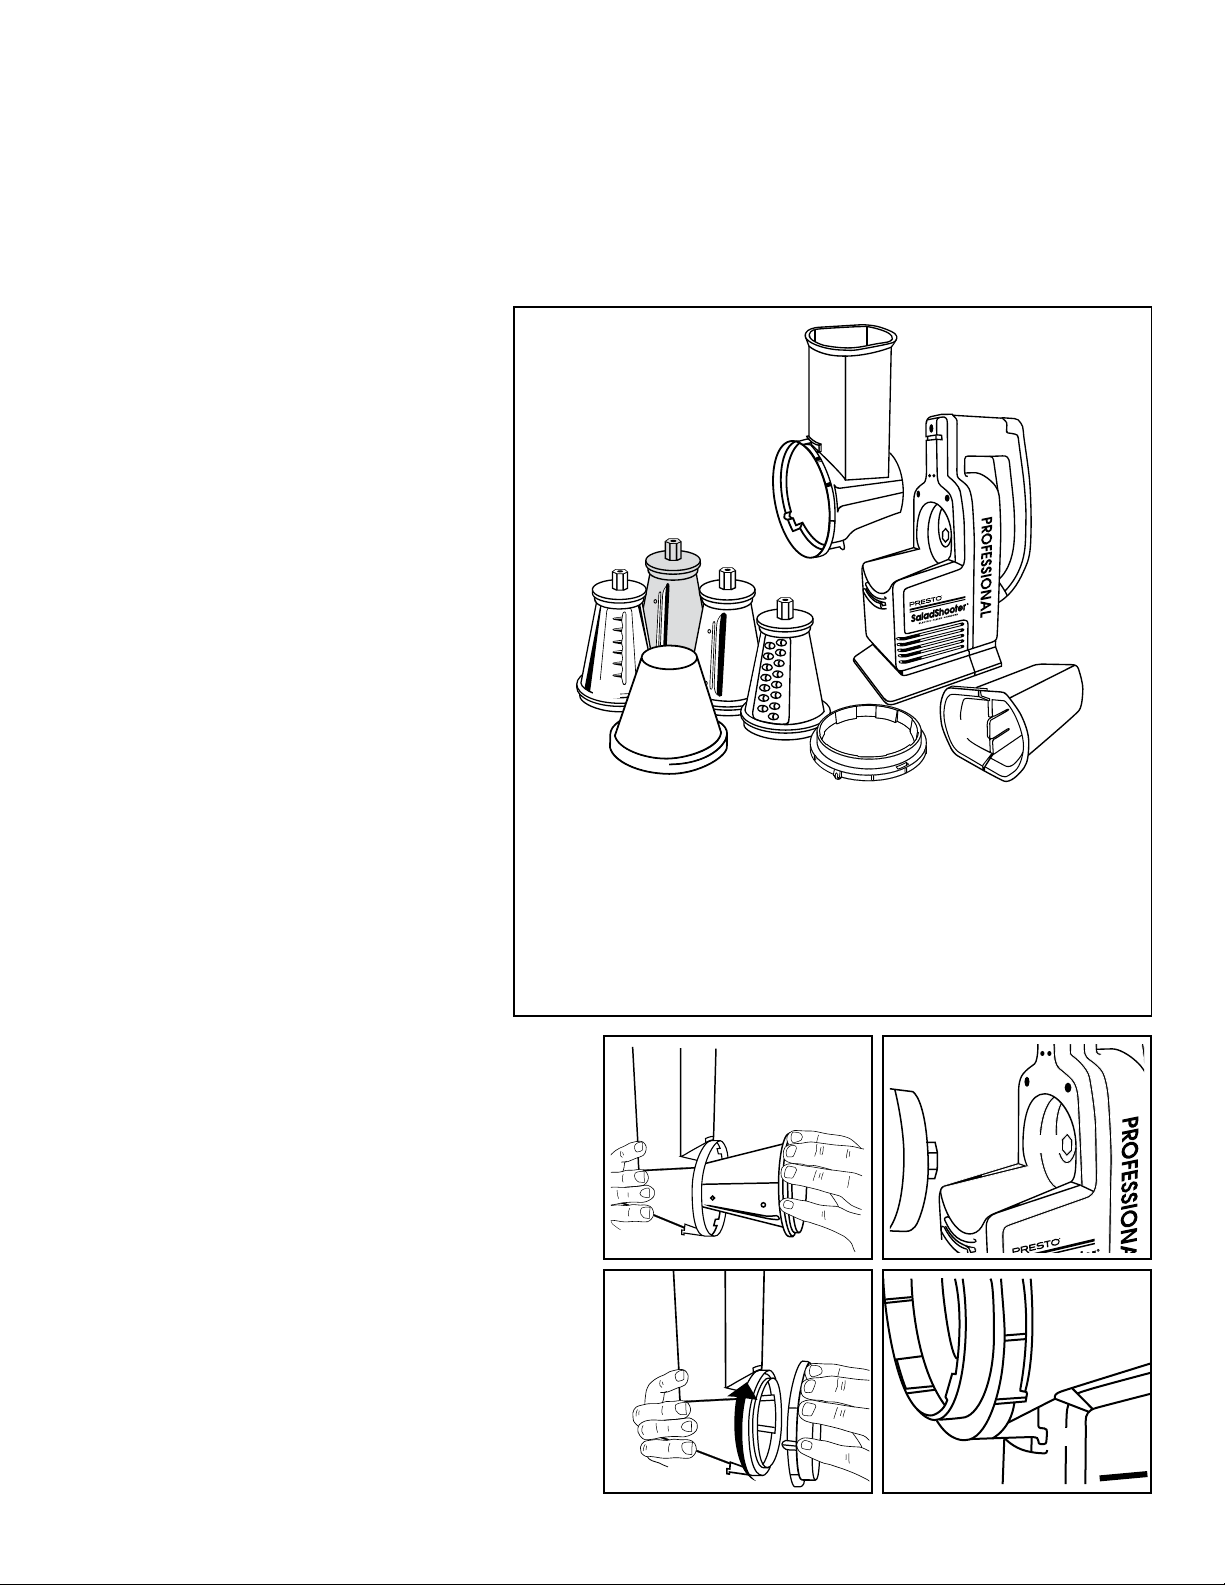
Getting Acquainted
Before using your Presto
Professional SaladShooter
electric slicer/shredder, study the diagram to the right
to become familiar with the various parts of the unit
and read the instructions carefully.
Before initial use, and after each subsequent use,
wash all parts except the motorized base in warm,
sudsy water. Wipe the motorized base with a damp
cloth to clean. Never immerse the motorized base in
water or any other liquid.
NOTE: For your convenience, the thin slice cone is
grey to differentiate it from the thick slice cone. Thin
slices will be approximately ˝ thick. Thick slices
will be approximately ˝ thick.
How To Use
1. Select one of the cones and insert it narrow end
first into the slicing/shredding chute (Fig. A).
Then attach the twist-lock ring by turning it
clockwise until it locks into place (Fig. B). The
metal portions of the slicing and shredding cones
are sharp. Handle with care.
2. Attach the food chamber assembly to the motor-
ized base by inserting the portion containing the
driving end of the slicing or shredding cone into
the socket of the motorized base (Fig. C).
Then rotate the food chamber assembly clockwise
until it is upright and centered with the handle.
To be sure the food chamber assembly is attached
properly, check to see that the interlock bracket
is positioned in the bracket slot (Fig. D).
Proper assembly is important. The unit is designed with
safety in mind. Thus, the food chamber assembly cannot be
removed from the motorized base unless the switch is in the
OFF position. Likewise, the motor will not turn on unless
the food chamber assembly is attached to the unit. The motor
automatically stops if an incorrectly attached assembly slips
off the motorized base during operation.
Should the motor stop in the middle of operation, turn the
switch to the OFF position. Reassemble, making sure the
interlock bracket on the bottom of the slicing/shredding chute
is positioned in the bracket slot on the motorized base before
using the unit again.
3. The adjustable food guide adapts to small or large loads.
For small loads, you will need to separate the two-piece
food guide. With the food guide placed in the food chamber,
pull the lock tab on the food guide away from the handle and
A1 Food chamber
B2 Fingertip power switch
B1 Motorized base
B3 Bracket slot
A5 Adjustable food guide
A2 Slicing/shredding chute
A3 Interlock bracket
C4 Funnel guide
A7 Twist-lock ring
C5 Medium shred cone
C1 Thick slice cone
C3 Ripple cut cone
C6 Driving ends
A6 Lock tab
C2 Thin slice cone (grey)
Fig. A
A1
B2
B1
B3
A5
A2
A3
C4
A7
C5
C1
C3
C6
A6
C2
C6
C6
C6
Fig. B
A4 Food chamber assembly
Fig. C
B4 Socket
Fig. D
A4
A4
B4
B3
A2
A3
A7
C6
A4
A8 Tabs
B5 ON/OFF latch
B3
Loading ...
Loading ...
Loading ...