Loading ...
Loading ...
Loading ...
49-60801 Rev. 2 15
INSTALLATION INSTRUCTIONS
Installation Instructions
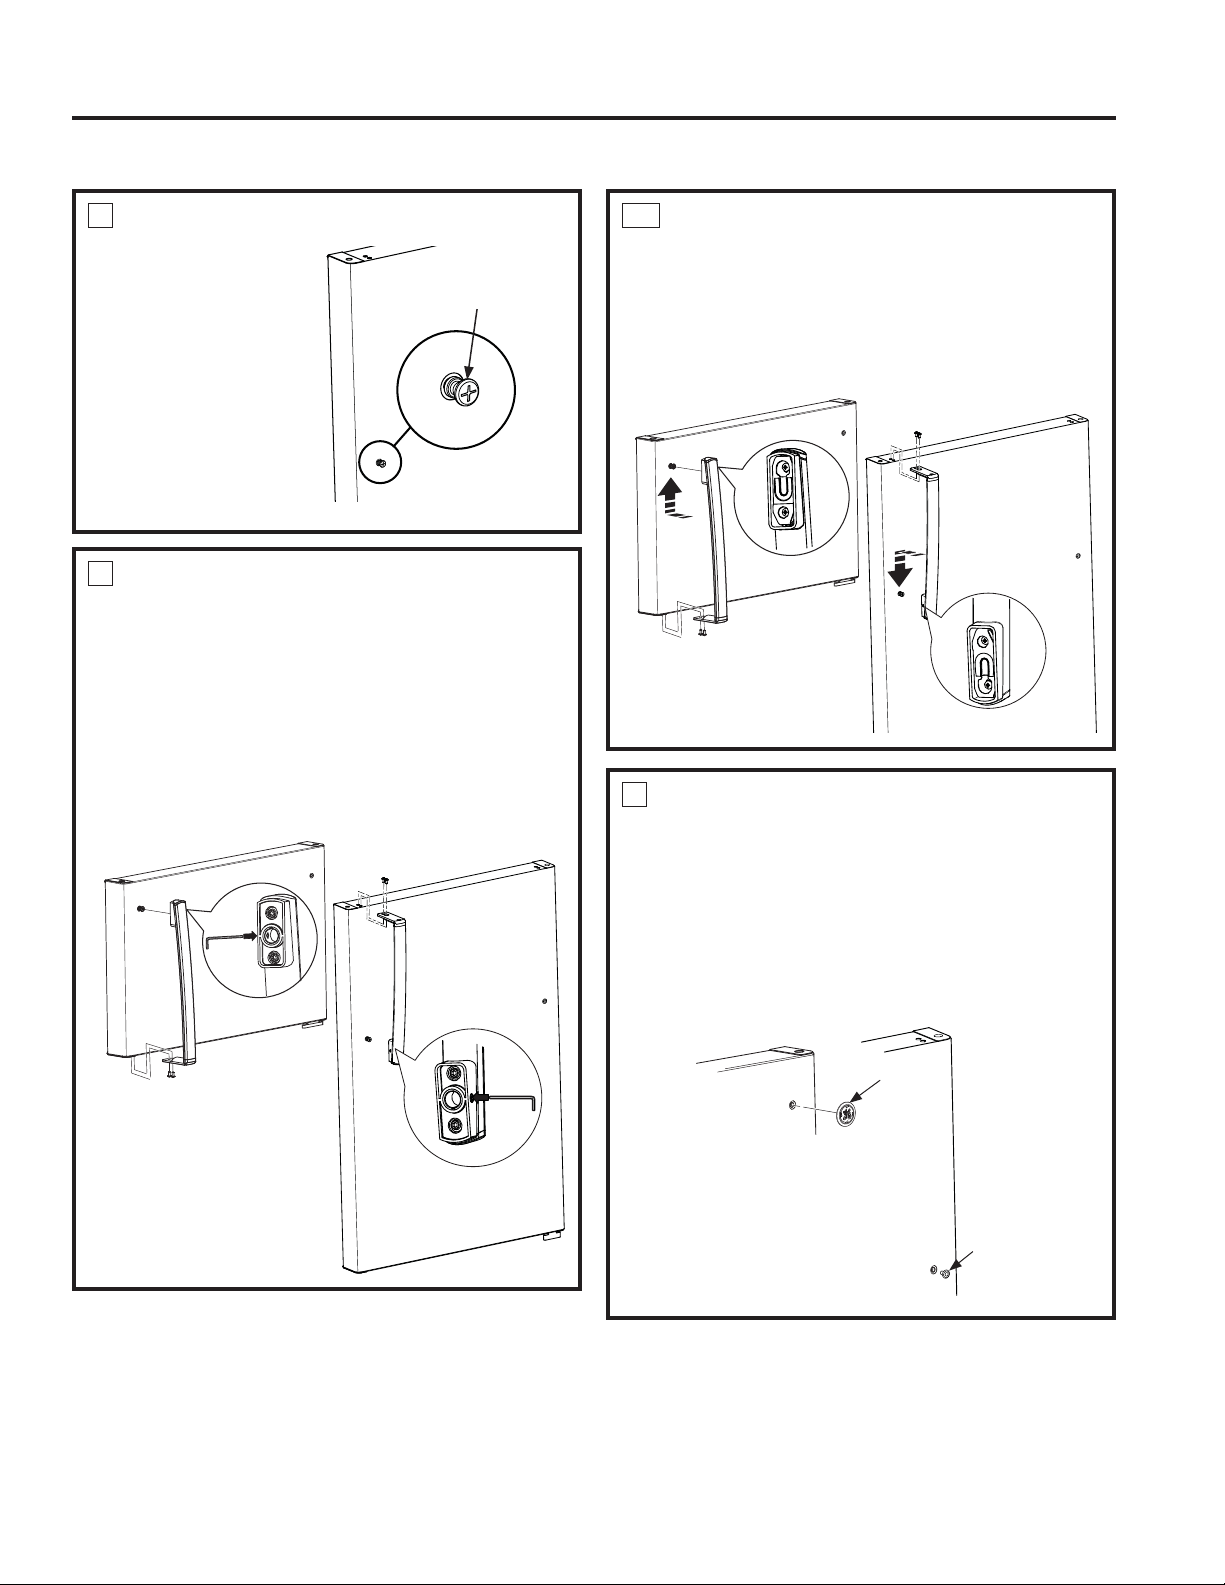
INSTALLING THE DOOR HANDLE
1
INSTALL FASTENER
,QVWDOOWKHKDQGOH
fastener into the hole
RQWKHIUHH]HUDQG
fresh food doors. The
fasteners correspond
with the handle side
(the side opposite the
hinge).
2A
PLASTIC HANDLE
$WWDFKKDQGOHWRIUHH]HUGRRUE\VOLGLQJ
handle up onto fastener and with screws at
the bottom of the handle.
2. Attach handle to fresh food door by sliding
handle down onto fastener and with screws at
top of handle.
2
STAINLESS STEEL HANDLE
$WWDFKKDQGOHWRIUHH]HUGRRUZLWKVFUHZVDW
WKHERWWRPRIWKHKDQGOH8VHWKHLQFOXGHG´
allen wrench to tighten the set screw at the top
of the handle. Tighten until handle is locked
firmly into position.
2. Attach handle to fresh food door with screws
DWWKHWRSRIWKHKDQGOH8VHWKHLQFOXGHG´
allen wrench to tighten the set screw at the
bottom of the handle. Tighten until handle is
locked firmly into position.
3
BADGE AND PLUG BUTTON
INSTALLATION
1. Place a plug button on the opposite side of the
fresh food door across from the handle.
2. Remove the backing on the GE Appliances
badge and carefully place it in the hole
RSSRVLWHWKHKDQGOHRQWKHIUHH]HUGRRU%H
sure the badge is oriented the correct way
before applying it to the door.
+DQGOH)DVWHQHU
NOTE: Be sure to
UHPRYH¿OPEHIRUH
handle installation,
if applicable
NOTE: Be sure to remove
¿OPEHIRUHKDQGOHLQVWDOODWLRQ
if applicable)
Plug
button
Badge
Loading ...
Loading ...
Loading ...