Loading ...
Loading ...
Loading ...
en Appliance door
34
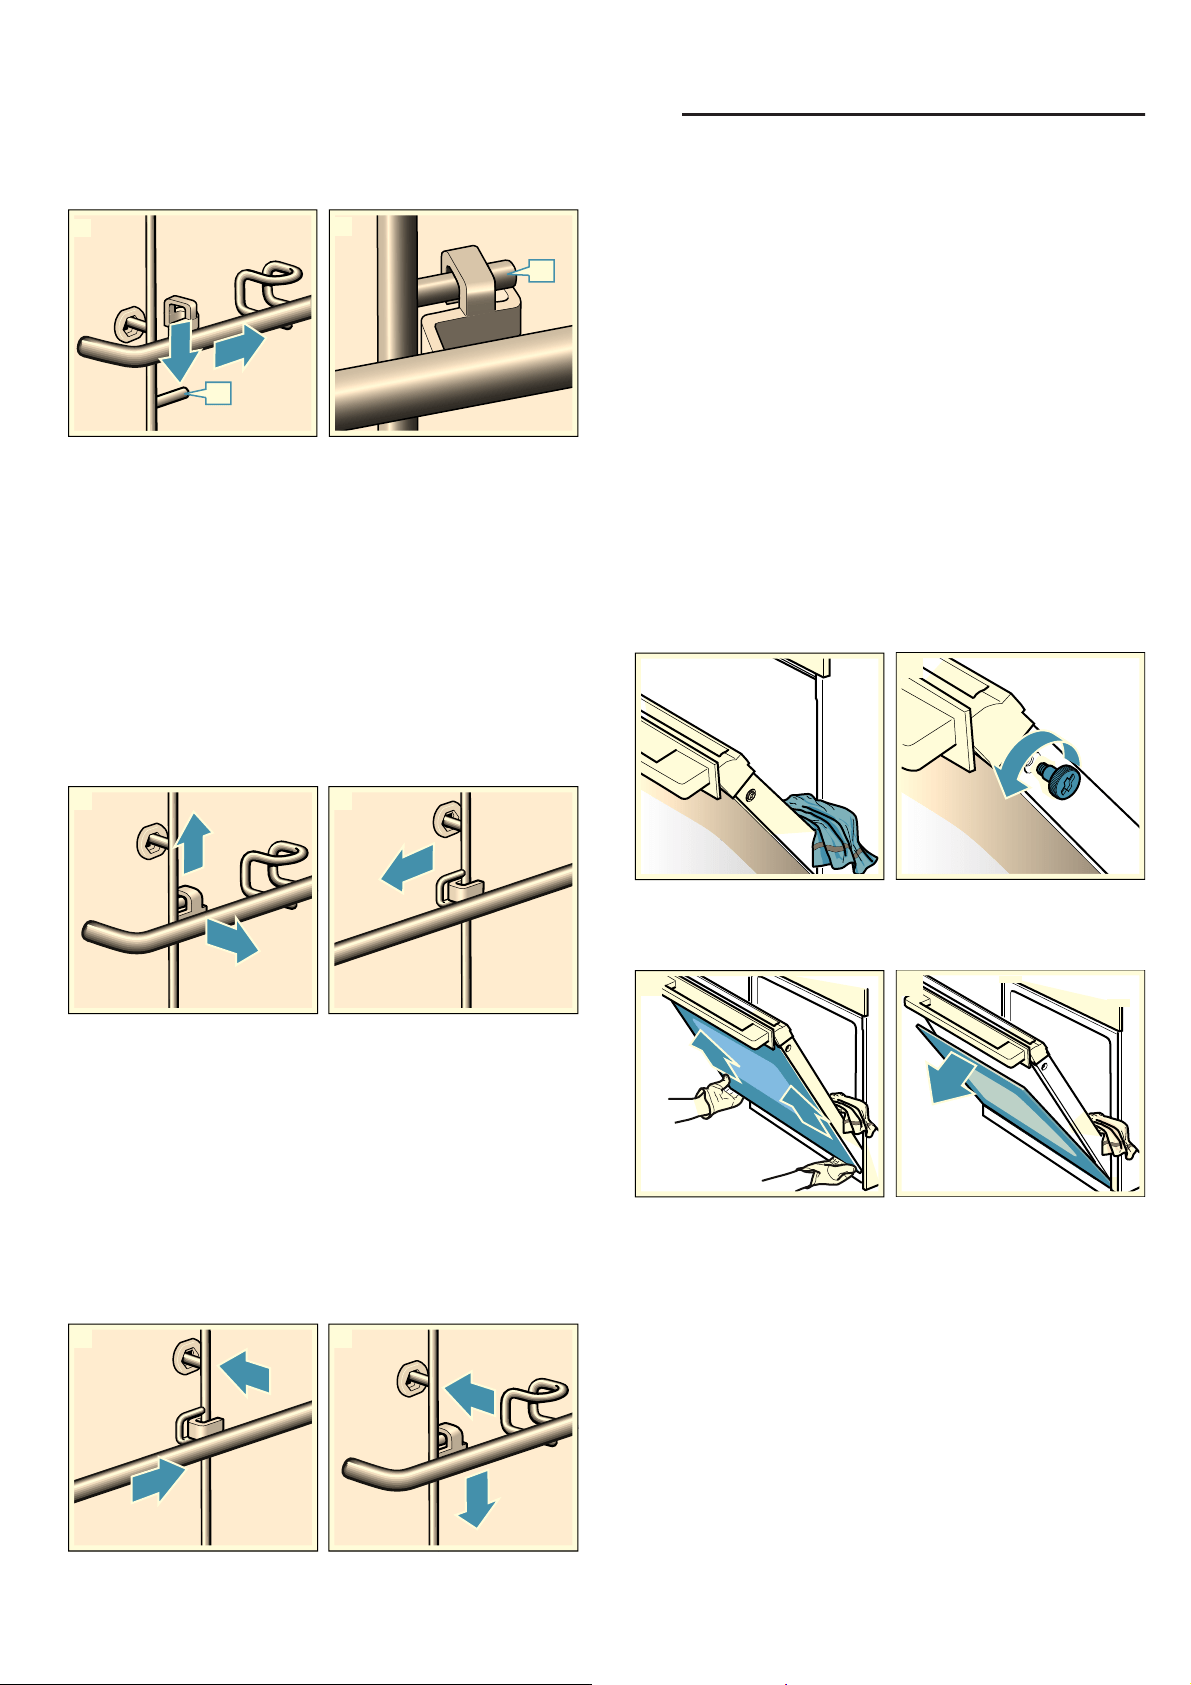
2. Push the bar towards the back ‚ and down ƒ onto
the pin „ (Fig. ").
3. Ensure that the hook is hooked onto the pin „ (Fig.
#).
Detaching and refitting the rails
:Warning – Risk of burns!
The rails become very hot. Never touch the hot rails.
Always allow the appliance to cool down. Keep children
away from the appliance.
Detaching the rails
1. Lift the rail slightly at the front ‚ and detach it ƒ (do
not hold by the accessory holders or the telescopic
shelf) (figure !).
2. Then pull the whole rail towards you and take it out
(figure ").
Clean the rails with cleaning agent and a sponge. For
stubborn deposits of dirt, use a brush.
Attaching the rails
The rails only fit on the right or the left side. The pull-out
rails must pull out towards you.
1. First, insert the rail in the middle of the rear socket ‚,
until the rail rests against the cooking compartment
wall, and push it back ƒ (figure !).
2. Then insert the rail into the front socket „, until the
rail also rests against the cooking compartment wall
here, and press it downwards … (figure ").
qAppliance door
Ap p l i a n c e door
With good care and cleaning, your appliance will retain
its appearance and remain fully functioning for a long
time to come. This will tell you how to clean the
appliance door.
Removing and installing the door panels
To facilitate cleaning, you can remove the glass panels
from the appliance door.
Removal
:Warning – Risk of injury!
Components inside the appliance door may have sharp
edges. Wear protective gloves.
1. Open the appliance door approx. 45° and wedge a
tea towel in the appliance door to ensure that it stays
open (fig.
!).
2. Loosen and remove the screws on the left and right
of the appliance door (figure ").
3. Take hold of the bottom of the front panel on both
sides (fig. #) and push it upwards until it is released
(fig. $).
F
2
F
D
E
2
D
E
1
F
G
2
D
E
1
2
1
Loading ...
Loading ...
Loading ...