Loading ...
Loading ...
Loading ...
14
INSTALLATION
10
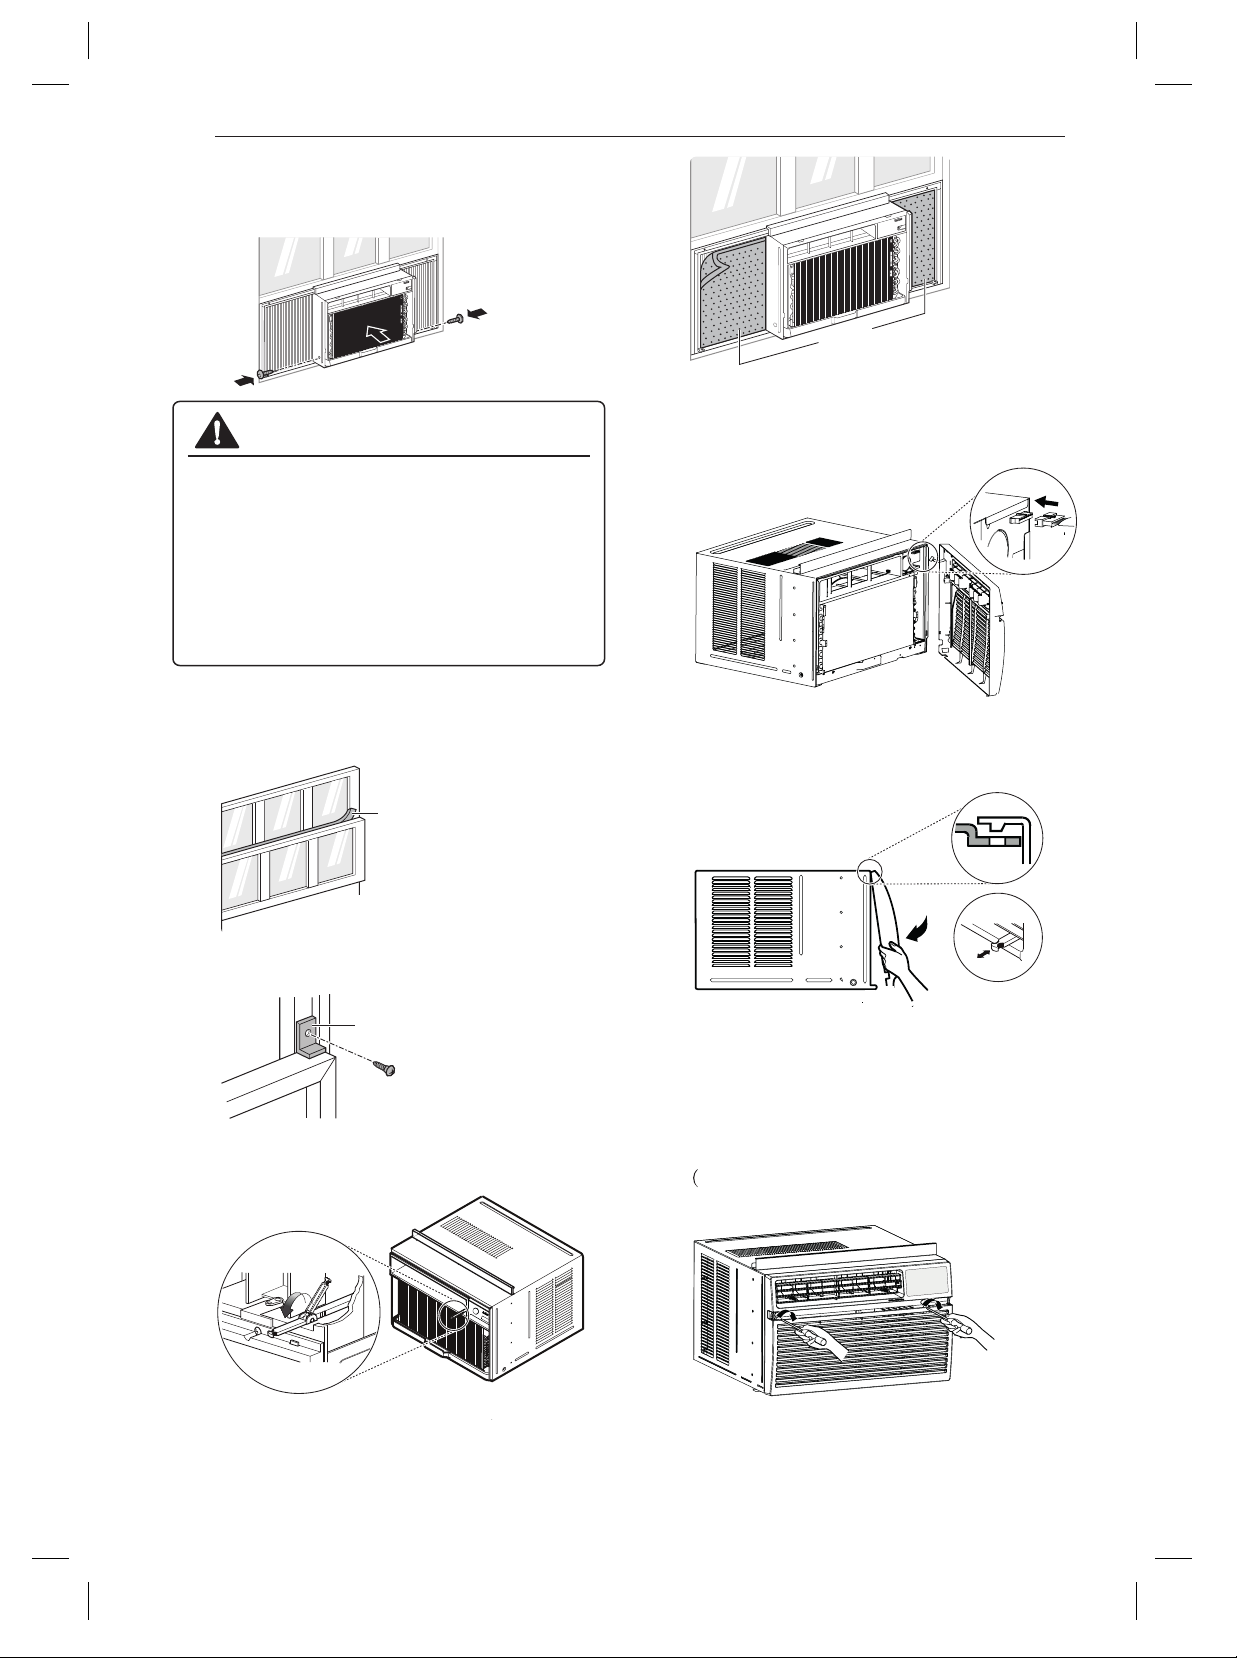
Cut the non-adhesive foam strip to the
proper length and insert it between the
upper window sash and the lower window
sash.
Foam Strip
(Non-adhesive)
11
Attach the window locking bracket with a
type C screw.
Window Locking Bracket
12
Before installing the front grille, pull out the
vent control lever located above the unit
14
Connect the housing.
15
Attach the front grille to the cabinet by
insertingthe tabs the grille into the slots on
the front the cabinet.Push the grille in until
it snaps into place.
13
NOTE
● Guide the lever carefully through the grille
as you push it in.
NOTE
●
NOTE
● See the 'Electrical Data' section for
information on attaching the power cord
to an electrical outlet.
16
Take out the air filter and secure it with 2
type A screws through the front grille.
9
With the aid of an assistant, slide the
unit into the cabinet. Reinstall the screws
removed from the cabinet sides in step 1.
CAUTION
●
The unit is heavy. Use an assistant to help lift the
●
Hold the unit firmly in place until the window
unit and set it in place. Lifting and maneuvering
the unit by yourself could result in injury.
frameis lowered to meet the top surface of the
unit directly behind the upper guide. If the unit
falls from the window, it could cause personal
injury orproperty damage.
control knobs, as shown.
Cut the adhesive-backed heatproof foam
to match the size of the curtain panels.
Remove the backing from the heatproof
foam and attach it to the curtain panels.
Heatproof Foam
Heatproof foam improves the cooling
capability of the air conditioner.
These 2 Type A screws are packaged by
bag on the Front Grille.)
Loading ...
Loading ...
Loading ...