Loading ...
Loading ...
Loading ...
En
4
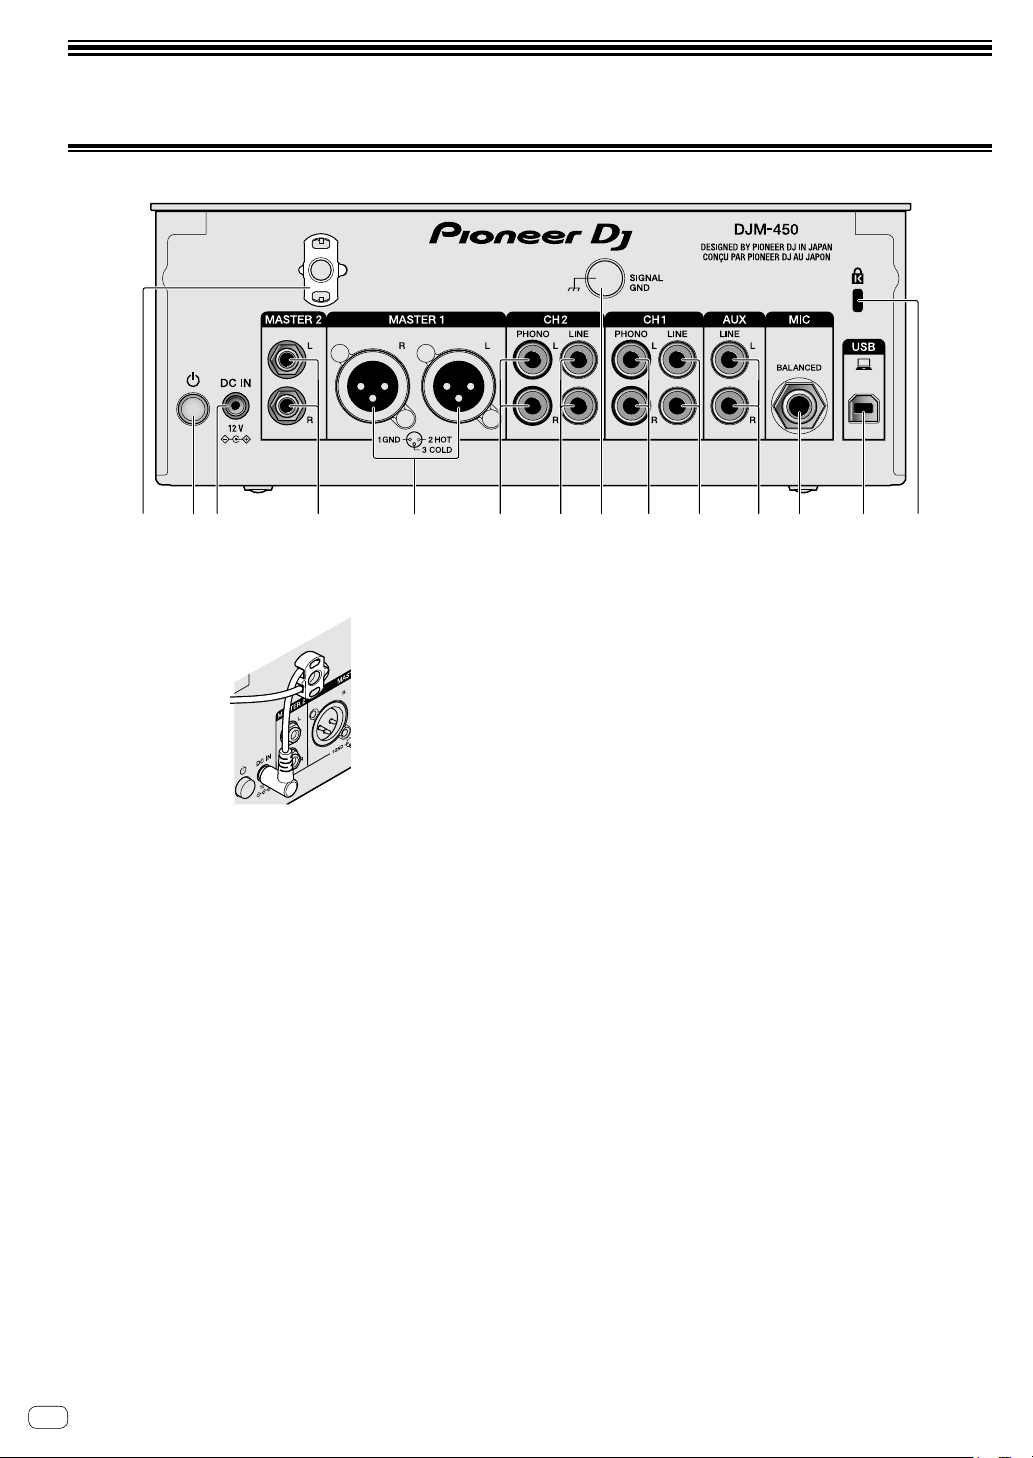
Part names and functions
Rear panel
1 2 3 54 6 7 8 6 7 7 9 a
b
1 Cord hook
Hook the power cord of the AC adaptor to avoid accidentally
disconnecting it from the unit.
2 POWER button (page 9 )
Turn on/off this unit.
3 DC IN terminal (page 7)
Connect the DC plug of the supplied AC adaptor. Connect all other
equipment, then connect the power cord.
Only use the power cord and AC adapter supplied with this unit.
4 MASTER2 output terminals (page 8 )
Connect to the analog input terminals of a power amplifier, etc.
5 MASTER1 output terminals (page 8 )
Connect your equipment, such as a power speaker or a power
amplifier, to the analog input terminal.
Use these terminals as balanced output.
Do not accidentally insert the power cord of the supplied AC
adaptor or the power cord of the equipment.
Do not connect to a terminal which can supply phantom
power.
6 PHONO input terminals (page 7 )
Connect to a phono level (MM cartridge) output device. Do not input
line level signals.
7 LINE input terminals (page 7 )
Connect to a DJ player or a line level output component.
8 SIGNAL GND terminal (page 7 )
Connect an analog player’s ground wire. This helps reduce noise
when the analog player is connected.
9 MIC input terminal (page 7 )
Connect a microphone.
a USB terminal (page 7)
Connect to a computer.
b Kensington security slot
Loading ...
Loading ...
Loading ...