Loading ...
Loading ...
3
PARTS OVERVIEW
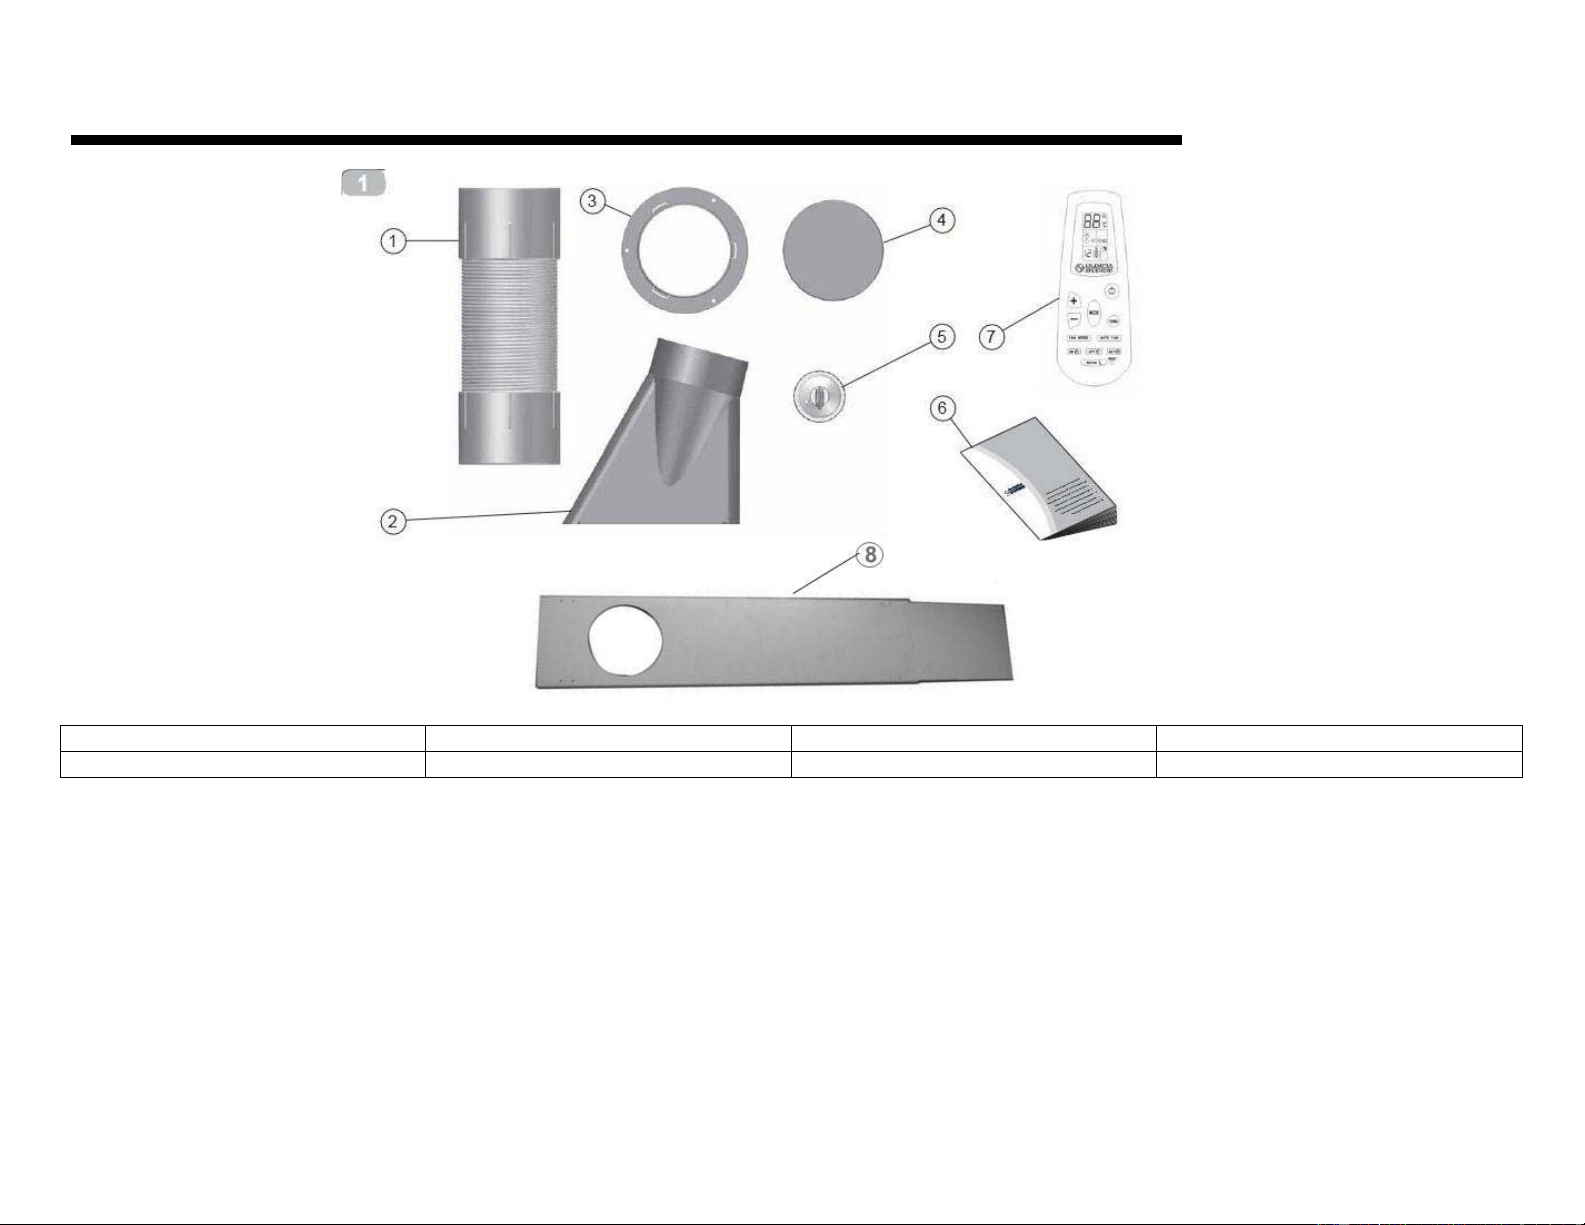
1. Exhaust hose 2. Rectangle Connector 3. Round Connector 4. Round Cover
5. Window Suction Cup 6. User Manual 7. Remote Control 8. Window Slide Bars
For this portable air conditioner to operate correctly, the hot air from the back of the unit must be vented to the outside. Please follow the
instructions below for window kit installation.
1. Extend the exhaust hose (Part 1) at least 6” and insert it to the outdoor exhaust outlet at back of the air conditioner.
2. Attach the round connector (Part 3) to the other end of the exhaust hose.
3. Open your window and place the adjustable window slide bars (Part 8) to the opening of the window. Extend the Slide Bars so it covers the
window opening completely.
4. Lower/Shut the window until it holds the Slide Bars are held in place tightly.
5. Attach the exhaust hose with the round connector to the round opening of the window slide bar.
6. When the air conditioner is not in use, remove the hose from the window slide bars and place the round cover (Part 4) to the round opening
of the bar.
7. For non-permanent installations, such as doors or sliding doors that may need to be opened or closed, attach the rectangle connector (Part
2) to the end of the exhaust hose and place the rectangle connector at the opening of the door.
8. The window suction cup is an optional part which can be used to hold up the exhaust hose to a desired position.
Loading ...
Loading ...
Loading ...