Fig. 1
Fig. 2
Fig. 3
Fig. 4
Fig. 5
Fig. 6
Fig. 7
Fig. 10
Fig. 12
Fig. 8
Fig. 11
Fig. 13
Fig. 15
Fig. 16
Fig. 14
Fig. 9
INSTRUCTIONS FOR THE USE AND
CARE OF WAHL CLIPPERS
RECHARGEABLE OPERATION
CLIPPER USE AND MAINTENANCE
1. A fully charged Lithium Ion clipper can deliver up to 90 minutes of continuous use.
2. When clipper is not in use, it should be connected to the transformer to assure
maximum power whenever it is used. The transformer is designed to charge the
battery, without overcharging.
3. It is normal for the unit to become somewhat warm during normal use.
4. Avoid pressing the blades strongly against the skin, being especially careful around
the ears. (The blades should be directed toward the skin at a right angle, but without
significant pressure.)
5. After cutting damp hair, clean and oil the blades before storing the unit. Place a small
drop of WAHL CLIPPER OIL ONLY on the ends of the blades then move the switch to
the “1” (ON) position.
6. To clean the unit, use either a clean, dry or dampened cloth. DO NOT USE benzine or
thinner to clean the unit.
7. Do not store the clipper in a wet or moist environment.
8. To prolong blade life, do not use clipper on hair that is coated with a permanent wave
solution or hair spray.
9. Do not touch any of the internal mechanisms.
OIL
The blades of your new clipper should be oiled every few haircuts. Simply place a few
drops of Wahl Clipper Oil on the teeth of the blades. Use
only the Wahl Clipper Oil included in the pack. Due to the
high speed of your Wahl clipper, the correct type of oil must
be used. Do not use hair oil, grease or any oil mixed with
kerosene or any solvent, as the solvent will evaporate and
leave the thick oil, slowing down the blades. Wahl Clipper
Oil is a very thin, natural oil which will not evaporate and
will not slow down the blades.
CORD CARE
The cord should not be used to pull the clipper. Since freedom of movement needs to
be maintained, care should be used to keep the cord untwisted and unobstructed. When
stored, the cord should be coiled and the unit placed in original box or storage pouch (if
provided), away from children.
LITHIUM-ION BATTERY DISPOSAL
Do not attempt to remove the battery from unit. Lithium-Ion batteries can explode,
catch fire, and/or cause burns if disassembled, damaged, or exposed to water or high
temperatures. Do not attempt to remove the battery for disposal. Lithium-Ion batteries
may be subject to local disposal regulations. Many locations prohibit disposal in
standard waste receptacles. Check your local laws and regulations. For recycling contact
a government recycling agency, waste disposal service, retailer, or visit online recycling
sources, such as www.batteryrecycling.com or www.rbrc.org.
SAVE THESE INSTRUCTIONS
This Clipper Has Been Designed For Household Use Only
RECHARGING
1. Remove the clipper, recharging transformer and accessories from the packing material.
2. Before the appliance is used for the first time, it should be charged for 3 to 5 hours. It
then takes 3 to 5 hours to fully recharge the battery again. The appliance is charged
by plugging directly into the appliance. During charging, the charging indicator is
illuminated. The charging indicator will begin to flicker when almost fully charged and
may shut off when fully charged.
3. Plug the recharging transformer into any convenient electrical outlet at the correct voltage.
If clipper is on, turn to off position when charging.
4. When clipper is not in use, it may be connected to the transformer and plugged into an
outlet to assure maximum power is available when it is next used. This transformer is
designed to charge the battery without overcharging.
TROUBLESHOOTING
If your clipper does not seem to take a charge, check the following before returning it for repair:
1. Check outlet operation by plugging in another appliance.
2. Make sure the outlet is not connected to a switch which turns the power at the outlet off.
3. Be sure the clipper is properly connected to the recharging transformer, all connections
are secure and the switch on the clipper is turned “OFF - 0.”
4. If your electricity is connected to a master power switch, we suggest the clipper be
disconnected from the charger anytime the master switch is off. Leaving the unit plugged
into a dead outlet or an unplugged charger will drain the battery.
5. If clipper does not run and it is completely charged, turn the unit “ON - I” and pinch or
push the blades manually. (Oil may have dried out between the blades, so they may be
temporarily stuck together.)
SERVICE, REPAIR & GUARANTEE
We guarantee this Wahl product against mechanical defects for
the time period indicated on the clipper package (if used on the
voltage and cycle indicated on the appliance). Damage due to
rough handling or dropping is not covered by this guarantee.
Batteries and broken blades are not covered by this guarantee.
If your Wahl product requires service, do not return it to the
store where purchased. Call Wahl (toll free) at 1-866-787-
WAHL (9245) in Canada or 1-800-767-WAHL (9245) in USA
for the name and address of the Wahl Service Centre closest
to you or send it prepaid with a note explaining the problem to
the address below. Products under guarantee will be returned
postage prepaid.
Wahl Canada Inc.
165 Riviera Drive
Markham, Ontario
L3R 5G6 Canada
For service and repair information, please refer to our website:
www.wahlglobal.com/canada
Wahl Clipper Corporation (USA)
Attn: Repair Department
3001 Locust Street
Sterling, Illinois 61081
IMPORTANT SAFEGUARDS
When using an electrical appliance, basic precautions should always be followed,
including the points listed below. Read all instructions and safeguards before using.
DANGER
To reduce the risk of injury or death by electric shock:
1. Do not reach for an appliance that has fallen into water. Unplug
immediately from the outlet.
2. Do not use while bathing or in a shower.
3. Do not place or store appliance where it can fall or be pulled into a tub
or sink. Do not place in or drop into water or other liquid.
4. Except when charging, always unplug this appliance from the
electrical outlet immediately after using.
5. Always unplug this appliance before cleaning.
WARNING
To reduce the risk of burns, fire, electric shock or injury to persons:
1. Do not crush, disassemble, heat above 100ºC (212ºF), or incinerate
the appliance, due to risk of fire, explosion, or burns.
2. Close supervision is necessary when this appliance is used by, on,
or near children or disabled persons.
3. Use this appliance only for its intended use as described in
this manual. Do not use attachments not recommended by the
manufacturer.
4. Never operate this appliance if it has a damaged cord or plug, if it is
not working properly, if it has been dropped or damaged, or if it has
been dropped into water.
5. Keep the cord away from heated surfaces.
6. Insert only recharging transformer plug into charger receptacle.
7. Do not use outdoors or operate where aerosol (spray) products are
being used or where oxygen is being administered.
8. Do not use this appliance with a damaged or broken comb nor with
teeth missing from the blades, as injury may occur.
9. Always attach plug to appliance first, then to outlet.
To disconnect, turn unit “OFF - 0,” then remove plug from outlet.
10. During use, do not place or leave the appliance where it is expected
to be subject to damage by an animal, or exposed to weather.
WAHL’S GUIDE TO FOOLPROOF ANIMAL CLIPPING
Assemble your supplies:
Clipper, oil, blades, slicker brush, attachment combs and comb, scissors, tear-free shampoo,
dryer, rubber bath mat, nail cutters. Be sure all your equipment is in good working condition
and easy to reach. Grooming should be done on a solid table (about 30” high) with a non-
slip surface to give your dog a steady and secure footing. A grooming post to secure the dog
would be of considerable aid. Good lighting is essential. The light should be adequately bright
and evenly distributed; there should be no shadows.
BEFORE YOU CUT
Brush out coat thoroughly
a) Remove all snarls, knots, tangles and mats.
b) Part the hair and brush on 1” sections-brush from the skin out.
Bath Time
a) Soak the dog thoroughly.
b) Apply shampoo and work into a good lather.
c) Pay particular attention to the rectum and pads (bottom of the paws).
d) Be careful also not to get soap in the dog’s eyes (for safety use a “tear-free” shampoo).
e) Rinse very thoroughly.
f) Squeeze legs, ears and tail.
g) Towel dry
h) Fluff dry or brush and dry.
• Start with the legs using a wire brush and moving up to the body.
• Direct dryer to the area you are brushing. Do one spot at a time.
• Use light, fluffing strokes.
• There should be no snags or tangles when you are done.
CUTTING HAIR
The first time you cut hair, cut only a small amount until you become accustomed to how long
each guide leaves the hair. Depending on your model, the following guide combs may be
included in your kit.
Always start by placing the largest guide comb on the clipper, then use shorter combs if
desired length is shorter.
Guide Comb #1—leaves hair approx. 1/8”
Guide Comb #2—leaves hair approx. 1/4”
Guide Comb #3—leaves hair approx. 3/8”
Guide Comb #4—leaves hair approx. 1/2”
To attach combs, hold comb with teeth up and snap it firmly to the bottom of the clipper blade.
For uniform cutting, allow the clipper to cut its way through the hair.
Do not force it through at a faster rate.
Tips For All Breeds of Dogs
1) Before clipping your puppy for the first time, run the clipper near the puppy’s ear for a short
time so he gets used to the noise.
2) If clipping for the first time, the clipping process will be slow. Try to move with the dog
when clipping. After a few grooming sessions, you will develop your own comfortable style
and grooming will go faster.
3) Take your time when grooming, and use a lot of affection. Dogs know when you’re in a
hurry and will react by getting nervous, making grooming more difficult.
4) It is very important to trim out excess hair on the pads. Otherwise the pads will become
dirty and matted, causing painful walking for the dog.
Grooming Your Poodle
Because their hair grows so rapidly, poodles need to be groomed much more often than other
breeds.
Feet:
1) Have dog sit facing you. Bring rear leg forward (Fig. 1) and clip sides of foot
from nail to end of toes. Clip on top of toes, stopping at ankle joint. Don’t trim up
ankle. Spread toes apart with thumb and forefinger (Fig. 2). Cut hair between toes,
being careful not to nick foot webbing.
2) Spread bottom pads with thumb and clip between toes and pads, being careful
not to nick foot webbing (Fig. 3).
3) Repeat for other three feet. Touch up stray hair with scissors.
Tail:
1) Stand dog with tail toward you. Hold tail with one hand and clip top and sides AGAINST
the grain from the middle toward the body. Clip bottom WITH the grain from the bottom
toward the middle (Fig. 4).
2) Comb out pompon at end of tail and use scissors to trim the largest ball possible.
3) With scissors, carefully clip around anal opening.
Face and Throat:
1) Be very careful around this area-too close of a cut may cause razor burns. Cut AGAINST
grain. The area to be clipped is shown in Figs. 5-8. Bend ears back and use a cloth band to
keep topknot (bangs) out of clipping area. The clipper is not to be used above eyes.
Note: You may want to “rough trim” this area first, cutting WITH the grain.
2) Hold muzzle with your free hand. Cut from ear to the outside corner of eye in a
straight line. Stretch the skin at the outside corner of left eye upward and backward.
Clip CAREFULLY under the eye. (Use Fig. 5 and 6 as your guide.) Repeat on other
side.
3) With free hand, stretch the corner of the mouth with your thumb, using the rest of
your hand to hold mouth shut. Clip around mouth and side of face. Repeat on other
side.
4) Holding muzzle, clip the area between the eyes and down the nose.
5) To clip the muzzle, clip away from the eyes toward the nose. Hold dog’s head, throat
taut, and clip bottom of muzzle (Fig. 8). The Adam’s apple is usually the stopping
point of the cut, but you may clip lower.
6) Clip the rest of the throat area toward the muzzle.
7) If you desire your poodle to have a mustache, clip to angle the top of the mustache even
with the crack of the mouth. Then trim a straight cut around the chin.
Stomach:
1) Stand dog facing you. Lift front legs and clip from a point above the testicles or vulva in
a straight line to the end of the rib cage, using Fig. 9 as a guide. DO NOT clip up leg.
Use light pressure, being careful to not nick vulva, penis, testicles or nipples. Cover
them with your hand.
2) Clip the hair on penis with the grain.
Body:
Tip: Stop frequently while clipping to fluff the hair. It will help keep the hair even.
1) Clip along the back, starting at the base of the skull, and cut down the middle of the
back to the tail (Fig. 10). Shorten all hair as shown in the illustration, starting at the
neck.
2) See Fig. 11. Clip hair between the shoulders and hips. Clip under the chest from
behind the front legs to the end of the rib cage.
3) Scissor trim to touch up.
Rear Legs:
IMPORTANT: Be very careful when clipping around the
“armpit” and the flank. These are areas of skin that are easy to
cut; especially on older dogs whose skin has loosened.
1) Brush the hair on the back legs in an upward and outward motion to fluff. You can
now shape the legs as full or as tapered as you wish.
2) Start by trimming any hair that falls over the foot (Fig.12).
3) Starting at ankle, cut up to hip a little hair at a time (Fig. 13). Once you are at the
hip, blend hair so it tapers into shorter body hair. (When using guide combs on the
legs, complete your stroke; don’t stop midway.)
4) Repeat with other back leg, making it the same size as the first leg.
5) Touch up with scissors.
Front Legs:
1) With dog facing you, comb hair up and out.
2) Trim front legs to match back legs.
3) Comb up hair at shoulders and blend it with shorter body hair.
4) Comb hair on chest and between front legs; trim it to the length of the shoulder and body hair.
Head:
1) With dog facing you, comb hair on top of the head (topknot) upward and forward (Fig. 14).
2) Scissor cut a square or round topknot.
3) Blend lower topknot hair with the shorter neck hair.
Ears:
1) With dog facing you, clip from top of the ear downward. NEVER turn clipper in other
direction.
2) Lay the ear in the palm of your hand. Clip the outside of the ear first, and then the inside
(Fig. 15).
3) Hold ear with your free hand and scissor cut the sides. Be careful not to cut the ear itself
(Fig. 16).
4) Repeat with other ear, and touch up any stray hairs.
Schnauzer
IMPORTANT: Trim your Schnauzer at least once before cropping ears. Otherwise your
dog will probably associate clipping with cropping and make grooming difficult.
1) With dog standing, clip top of back from the base of the skull to the base of the tail.
Clip throat, front and sides of body and tail. Clip these areas with the grain. Clip sides
and back of rear legs toward hock; curve the sides into the hock. Do not clip the front of the
rear legs.
2) Clip stomach from rear to front. Clip penis hair carefully with the grain. Clip skull
from point above eyebrows to the base of the skull and to the ears. Clip from
the outside corner of the eyes to the base of the ears and to the corner of the
mouth.
3) Clip both sides of ears from the base to the tip.
4) Scissor cut and trim front legs to gain a rounded and straight appearance.
Scissor trim rear legs. Scissor trim eyebrows, muzzle and mustache to achieve
a straight and square look.
Airedale, Irish, Lakeland, Welsh and Wire Fox Terriers
If you plan to show your terrier and he has a wire coat, stripping, not clipping, is required.
However, clipping is a far easier method of grooming for both pet and groomer.
Clip the same way as the Schnauzer, except the rear legs which
do not need clipping. Clip to blend sides of the dog into the hips.
Scissor cut and trim the eyebrows, muzzle and mustache to the
recognized standard of the particular breed of dog.
Cockers, Setters and Spaniels
Sporting dogs generally require little clipping. However, long-haire breeds can be more
effective in the field when properly groomed. Dogs should be clipped several weeks in
advance of the hunting season to facilitate better hunting,
offer greater comfort to the dog, and make coat care easier.
Clipping also allows growth of the shorter, denser coat that provides warmth and more
resistance to burrs and stickers.
1) Clipping with the grain, clip the neck, shoulders and chest. Blend the hair
into the body and lower chest. Clip legs and tail.
2) Clip body, if needed. It is suggested that dog’s hair be cut to 1/2” to 3/4”
long. This may detract from the dog’s “looks,” but is sensible for a dog used
in hunting.
3) After a day in the field, comb your dog’s coat. A “tangle-remover” spray will
help get rid of burrs.
Pet Grooming with the
Lithium Ion Clipper
Can No 73535
Part / Partie 94601-3001
©2016 Wahl Clipper Corp.
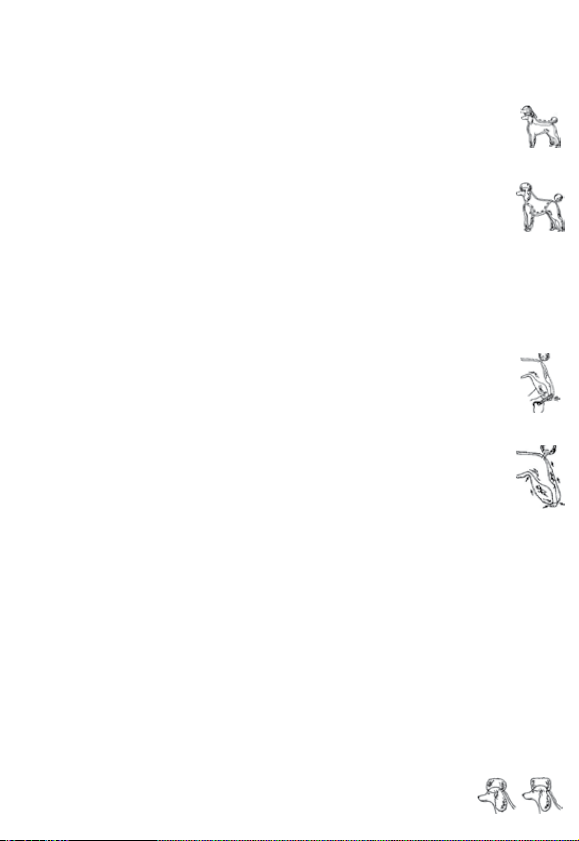
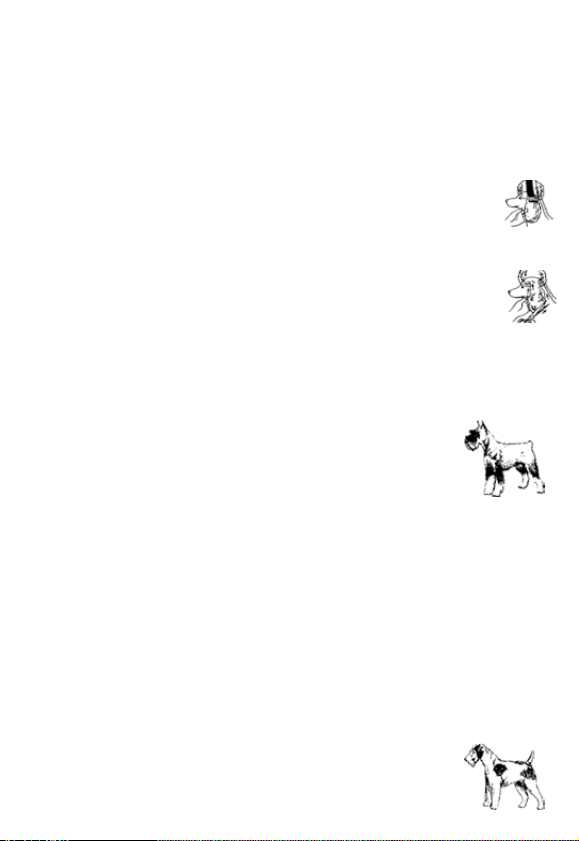
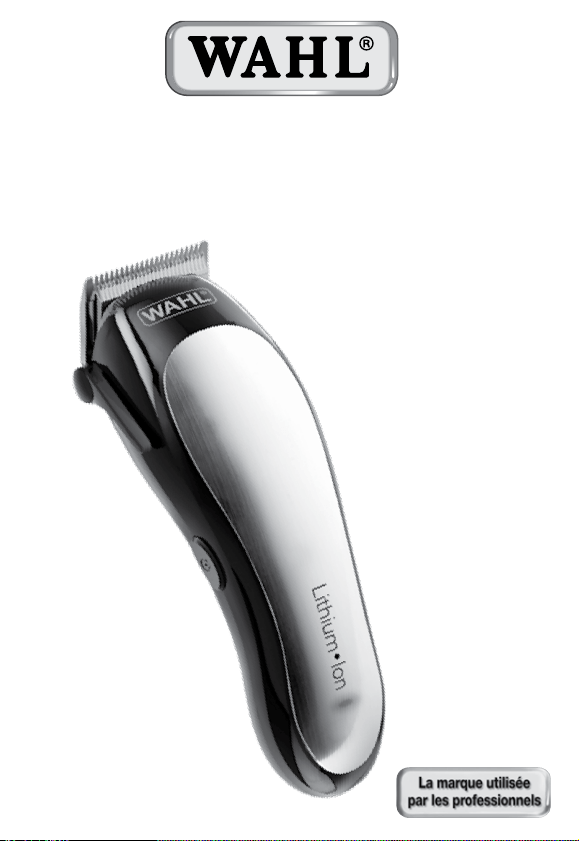
Fig. 1
Fig. 2
Fig. 3
Fig. 4
Fig. 5
Fig. 6
Fig. 7
Fig. 10
Fig. 12
Fig. 8
Fig. 11
Fig. 13
Fig. 15
Fig. 16
Fig. 14
Fig. 9
CONSIGNES D’UTILISATION ET
D’ENTRETIEN DES TONDEUSES WAHL
RECHARGEABLE
UTILISATION ET ENTRETIEN DES TONDEUSES
1. Une tondeuse à pile lithium-ion entièrement chargée peut fonctionner jusqu’à 90
minutes durant.
2. Lorsque la tondeuse n’est pas utilisée, la brancher au transformateur pour que sa
puissance soit maximale lors de sa prochaine utilisation. Ce transformateur est conçu
pour charger complètement la pile, sans surcharge.
3. L’appareil peut devenir chaud pendant une utilisation normale; ne vous inquiétez pas.
4. Évitez d’appliquer une pression exagérée des lames sur la peau, en faisant preuve
d’encore plus de prudence près des oreilles. (Les lames doivent être appuyées sur la
peau avec un angle droit, sans pression excessive).
5. Après avoir coupé des poils humides, nettoyez et huilez les lames avant de ranger
l’appareil. Versez une petite goutte d’HUILE POUR TONDEUSE WAHL SEULEMENT
sur les extrémités des lames, puis mettez l’interrupteur en position « 1 » (ON).
6. Pour nettoyer l’appareil, utilisez un chiffon propre, sec ou humide. N’UTILISEZ PAS de
benzine ou de solvant pour le nettoyage.
7. Évitez d’entreposer la tondeuse dans un endroit humide.
8. Afin de prolonger la durée de vie des lames, n’utilisez pas la tondeuse sur le pelage
enduit d’une solution permanente ou de fixatif.
9. Ne touchez pas aux mécanismes internes de l’appareil.
HUILE
Les lames de votre nouvelle tondeuse doivent être huilées
après vous en être servi quelques fois. Il suffit de verser
quelques gouttes d’huile pour tondeuse Wahl sur les
dents des lames. N’utilisez que l’huile pour tondeuse Wahl
comprise dans l’emballage. En raison de la vitesse de
fonctionnement élevée de votre tondeuse Wahl, il importe d’utiliser le bon type d’huile.
N’utilisez aucune huile, graisse ou huile mélangée avec du kérosène ou un solvant car
le solvant s’évapore et l’huile épaissie ralentit les lames. L’huile pour tondeuse Wahl est
une huile très mince et naturelle qui ne s’évapore pas et ne risque pas de ralentir les
lames.
ENTRETIEN DU FIL
Il ne faut pas se servir du fil pour tirer la tondeuse. Afin de garantir la liberté de
mouvement, il faut prendre soin de ne pas tordre le fil ou gêner son déplacement. Une
fois l’appareil entreposé, le fil doit être enroulé et l’appareil placé dans sa boîte d’origine
ou un étui de rangement (lorsque fourni), hors de portée des enfants.
CONSERVEZ CES
INSTRUCTIONS
Cette tondeuse a été conçue pour un usage domestique uniquement
RECHARGE
1. Retirez la tondeuse, le transformateur de recharge et les accessoires de l’emballage.
2. L’appareil doit être chargé pendant 3 à 5 heures avant sa première utilisation. Il faut
ensuite de 3 à 5 heures pour recharger la pile complètement à nouveau. On peut recharger
l’appareil en le branchant directement. L’indicateur de charge est allumé en cours de
chargement. Il se met à clignoter lorsque l’appareil est presque chargé à bloc. Il peut
s’éteindre lorsque l’appareil est effectivement chargé à bloc.
3. Branchez le transformateur de recharge sur une prise de courant appropriée à la bonne
tension. Si la tondeuse est allumée, éteignez-la lors de la recharge.
4. Lorsque la tondeuse n’est pas utilisée, la brancher au transformateur et à une prise
de courant pour que sa puissance soit maximale lors de sa prochaine utilisation. Ce
transformateur est conçu pour charger continuellement la pile, sans surcharge.
DÉPANNAGE
Si votre tondeuse ne semble pas se charger, vérifiez les points suivants avant de la renvoyer
pour réparation :
1. Vérifiez la présence de courant électrique en branchant un autre appareil dans la prise.
2. Assurez-vous que la prise n’est pas liée à un interrupteur qui en coupe l’alimentation.
3. Vérifiez que la tondeuse est bien raccordée au transformateur de recharge, que tous les
branchements sont sûrs et que l’interrupteur de l’appareil est réglé sur « ARRÊT - 0 » (OFF
- 0).
4. Si le circuit électrique est raccordé à un commutateur principal, nous suggérons de
débrancher la tondeuse du chargeur chaque fois que ce commutateur est éteint. Laisser
l’appareil branché à une prise désactivée ou à un chargeur débranché vide la pile.
5. Si la tondeuse ne fonctionne pas et qu’elle est complètement chargée, mettez l’interrupteur
à la position « MARCHE - I » (ON - I) et pincez ou poussez manuellement les lames. (De
l’huile peut avoir séché entre les lames, ce qui peut les coller temporairement).
ENTRETIEN, RÉPARATION ET GARANTIE
Nous garantissons ce produit Wahl contre tout défaut
mécanique pendant la période indiquée sur son emballage, s’il
est utilisé à la tension et à la fréquence indiquées sur l’appareil.
La présente garantie ne couvre pas les dommages causés par
une manipulation inappropriée ou une chute. Les piles et les
lames cassées ne sont pas couvertes par la présente garantie.
Si votre produit Wahl nécessite un entretien ou une réparation,
ne le retournez pas au magasin où vous l’avez acheté. Veuillez
contacter WAHL (appel sans frais) au numéro 1-866-787-WAHL
(9245) pour obtenir le nom et l’adresse du centre de service
de Wahl le plus proche de votre domicile, ou envoyez-la,
suffisamment affranchie, à l’adresse ci-dessous, accompagnée
d’une note explicative. Les produits couverts par la garantie
seront retournés port payé.
Wahl Canada Inc.
165, promenade Riviera
Markham (Ontario)
L3R 5G6 Canada
MISES EN GARDE IMPORTANTES
Lorsque vous utilisez un appareil électrique, suivez toujours les précautions de base suivantes,
notamment : Lisez toutes les directives et mises en garde avant d’utiliser l’appareil.
DANGER
Pour réduire le risque de blessure ou de décès causé par un choc
électrique :
1. Ne touchez pas un appareil qui est tombé dans l’eau. Débranchez-le
immédiatement de la prise.
2. Ne l’utilisez pas en prenant un bain ou une douche.
3. Ne posez ou ne rangez pas l’appareil à un endroit d’où il pourrait
tomber ou se retrouver dans une baignoire ou un lavabo. Ne le
mettez pas ou ne le faites pas tomber dans l’eau ou dans un autre
liquide.
4. Sauf lors du chargement, débranchez toujours cet appareil de la prise
électrique immédiatement après usage.
5. Débranchez toujours cet appareil avant de le nettoyer.
ATTENTION
Pour réduire le risque de brûlures, d’incendie, de choc électrique ou de
blessure :
1. N’écrasez pas, ne démontez pas, ne chauffez pas à plus de 100 °C
(212 °F) ou n’incinérez pas l’appareil, en raison du risque d’incendie,
d’explosion ou de brûlure.
2. Une surveillance accrue est nécessaire lorsque cet appareil est
utilisé par ou sur des enfants ou des personnes handicapées, ou à
proximité d’eux.
3. N’utilisez cet appareil que pour son usage prévu décrit dans le
présent manuel. N’utilisez pas d’accessoires non recommandés par
le fabricant.
4. N’utilisez jamais cet appareil si sa fiche ou son fil est endommagé, s’il
ne fonctionne pas correctement, s’il est tombé, s’il est endommagé,
ou s’il est tombé dans l’eau.
5. Éloignez le cordon d’alimentation des surfaces chaudes.
6. N’insérez que la fiche du transformateur de recharge dans le socle du
chargeur.
7. N’utilisez pas cet appareil à l’extérieur, ne le faites pas fonctionner
là où des produits aérosols (vaporisés) sont utilisés ou là où de
l’oxygène est administré.
8. N’utilisez pas cet appareil avec une lame ou un guide de coupe cassé
ou endommagé ou encore avec une lame dont les dents manquent
pour éviter tout risque de blessure
9. Branchez toujours d’abord la fiche à l’appareil, puis à la prise de
courant.
Pour débrancher, réglez l’appareil à « ARRÊT - 0 » (OFF - 0), puis
retirez la fiche de la prise.
10. Lorsque l’appareil fonctionne, ne le posez et ne le rangez pas à
un endroit où il pourrait être exposé aux intempéries ou un animal
pourrait l’endommager.
GUIDE DE WAHL POUR LA TONTE À TOUTE ÉPREUVE DES ANIMAUX
Réunissez vos accessoires :
Tondeuse, huile, lames, brosse-lissoir, guides de coupe et guides accessoires, ciseaux,
shampooing sans larme, séchoir, descente de bain en caoutchouc et coupe-ongles. Assurez-
vous que tous vos outils sont en bon état et à votre portée. Le toilettage doit être effectué sur
une table solide (d’environ 30 pouces de hauteur) munie d’une surface antidérapante pour
offrir à votre chien une base stable et sécuritaire. Il serait très souhaitable de disposer d’un
poteau pour y attacher le chien pendant le toilettage. Un bon éclairage est essentiel. Une
lumière éclatante appropriée doit briller uniformément sans créer d’ombre.
AVANT LA TONTE
Brossez le pelage à fond.
a) Éliminez tous les nœuds, vrilles et emmêlements.
b) Séparez les poils à partir de la base et brossez-les pour former des sections de 1 pouce.
Durée du bain
a) Faites en sorte que le pelage de votre chien soit bien humide.
b) Versez le shampooing et massez en faisant bien mousser.
c) Soyez particulièrement méticuleux dans la zone des coussins (bas des pattes) et celle du
rectum.
d) Ayez également soin de ne pas introduire de savon dans les yeux du chien (utilisez un
shampooing sans larme par mesure de prudence).
e) Rincez à fond.
f) Pressez sur les pattes, les oreilles et la queue.
g) Séchez le pelage à l’aide d’une serviette.
h) Brossez pour sécher le pelage ou faites-le sécher en l’aérant.
• Commencez par les pattes en passant une brosse métallique et en progressant vers le haut du corps.
• Séchez en orientant le séchoir vers la zone que vous brossez. Concentrez-vous sur un seul
endroit à la fois.
• Avancez par coups légers en produisant un effet d’aération.
• Il ne devrait plus se trouver aucun nœud ou emmêlement une fois terminé.
COUPE DES POILS
La première fois que vous couperez les poils, évitez de couper trop ras jusqu’à ce que
vous connaissiez la longueur à laquelle le guide de coupe permet de tailler les poils.
Dépendamment de votre modèle, il se peut que les guides de coupe suivants soient compris
dans votre trousse.
Commencez toujours en installant le plus grand guide de coupe sur la tondeuse, puis utilisez
des guides de coupe plus courts si une longueur plus courte est désirée.
Guide de coupe n° 1 – longueur d’environ 1/8 po
Guide de coupe n° 2 – longueur d’environ 1/4 po
Guide de coupe n° 3 – longueur d’environ 3/8 po
Guide de coupe n° 4 – longueur d’environ 1/2 po
Pour fixer le guide de coupe, tenez-le les dents vers le haut et enclenchez-le fermement au
bas de la lame de la tondeuse. Pour une coupe uniforme, passez la tondeuse partout dans le
pelage en suivant son rythme. Ne la poussez pas pour qu’elle aille plus vite.
Conseils pour toutes les races canines
1) Avant de tondre votre chiot pour la toute première fois, passez la tondeuse près de son
oreille pendant un court laps de temps pour qu’il s’habitue au bruit.
2) Pour la toute première tonte, il convient de procéder lentement. Essayez de vous déplacer
avec le chiot pendant la tonte. Après quelques séances de tonte, vous aurez mis au point votre
propre style et vous effectuerez le toilettage plus rapidement et à votre aise.
3) Prenez tout votre temps pour le toilettage et faites montre de beaucoup d’affection. Les
chiens le ressentent lorsque vous êtes bousculé par le temps et ils réagiront en démontrant de
la nervosité, ce qui rendra le toilettage plus difficile.
4) Il est très important de couper les poils de trop sur les coussins. Sans quoi les coussins
s’encrasseront et produiront des emmêlements; la douleur produite gênera la marche du chien.
Toilettage de votre caniche
Les caniches, en raison de la croissance plus rapide des poils, doivent faire l’objet d’un
toilettage beaucoup plus souvent que les autres races.
Pattes :
1) Le chien doit être en position assise, face à vous. Ramenez la patte arrière vers
l’avant (schéma 1) et tondez les côtés du pied, de l’ongle jusqu’à l’extrémité des
orteils. Tondez le dessus des orteils, en vous arrêtant à l’articulation de la cheville.
Ne tondez pas la cheville. Écartez les orteils les uns des autres à l’aide du pouce et
de l’index (schéma 2). Coupez les poils entre les orteils, en prenant soin de ne pas
pincer la palmure du pied.
2) Écartez les coussins inférieurs à l’aide du pouce et tondez entre les orteils et les
coussins, en prenant soin de ne pas pincer la palmure du pied (schéma 3).
3) Répétez pour les trois autres pieds. Faites des retouches avec les ciseaux pour
éliminer les poils rebelles.
Queue :
1) Le chien doit être en position debout, la queue face à vous. Tenez la queue d’une main
et tondez le dessus et les côtés À REBROUSSE-POIL en partant du milieu de la queue et en
progressant vers le corps. Tondez le bas de la queue DANS LE SENS DU POIL à partir du bas
et en progressant vers le milieu de la queue (schéma 4).
2) Passez le peigne dans le « pompon » situé à l’extrémité de la queue et utilisez les
ciseaux pour tailler et obtenir la protubérance qui soit la plus grosse possible.
3) À l’aide de ciseaux, taillez prudemment autour de l’anus.
Visage et gorge :
1) Faites très attention car le fait de couper trop ras à cet endroit pourrait occasionner
une blessure ressemblant à une brûlure. Coupez À REBROUSSE-POIL. La zone à
tondre figure sur les illustrations 5 à 8. Renversez les oreilles vers l’arrière et utilisez
un chiffon pour garder la houppe (franges) hors de la zone de tonte. Il ne convient pas
d’utiliser la tondeuse au-dessus des yeux.
Remarque : il se peut que vous désiriez d’abord « enlever le plus gros des poils » en
tondant DANS LE SENS DU POIL.
2) Tenez le museau avec votre main libre. Passez la tondeuse en ligne droite, en
progressant de l’oreille jusqu’au coin extérieur de l’œil. Étirez la peau du coin extérieur
de l’œil vers le haut et l’arrière.
REDOUBLEZ DE SOINS autour de l’œil. (Servez-vous des schémas 5 et 6 pour vous
guider). Répétez pour l’autre côté.
3) Avec votre main libre, étirez le coin de la gueule du chien à l’aide du pouce, en
vous servant des autres doigts pour lui garder la gueule fermée. Tondez le côté du
visage et autour de la gueule. Répétez pour l’autre côté.
4) En tenant le museau, tondez la zone entre les yeux en progressant vers le bas du nez.
5) Pour tondre le museau, tondez en progressant des yeux vers le nez. Tenez la tête du chien,
tendez la peau de la gorge et tondez le bas du museau (schéma 8). On s’arrête habituellement
à la pomme d’Adam, mais vous pouvez passer la tondeuse plus bas.
6) Tondez le restant de la surface dans la région de la gorge en progressant vers le museau.
7) Si vous voulez que votre caniche ait une moustache, tondez le dessus de la moustache
pour qu’elle affleure la commissure des lèvres. Puis pratiquez une coupe droite autour du
menton.
Abdomen :
1) Le chien doit être en position debout, face à vous. Mettez les pattes avant à un
niveau supérieur et tondez à partir d’un point situé au-dessus des testicules ou de la
vulve en suivant un tracé droit jusqu’à l’extrémité de la cage thoracique, en vous servant
du schéma 9 pour vous guider. NE tondez PAS le haut de la patte. N’exercez qu’une
faible pression en faisant attention de ne pas pincer la vulve, le pénis, les testicules ou
les mamelons. Couvrez-les de votre main.
2) Tondez les poils du pénis dans le sens du poil.
Corps :
Conseil : arrêtez-vous fréquemment pendant la tonte pour aérer le pelage. Cela
contribuera à garder le pelage uniforme.
1) Tondez le long du dos, à partir de la base du crâne, et tondez à partir du milieu
du dos jusqu’à la queue (schéma 10). Raccourcissez l’ensemble du pelage tel que le
montre l’illustration, à partir du cou.
2) Voir le schéma 11. Tondez les poils entre les épaules et les hanches. Tondez
sous la poitrine à partir de l’arrière des pattes avant jusqu’à l’extrémité de la cage
thoracique.
3) Faites des retouches aux ciseaux.
Pattes arrière :
IMPORTANT : soyez très prudent lorsque vous tondez autour des « aisselles »
et du flanc. Ce sont des zones où la peau peut facilement subir des coupures;
particulièrement en ce qui concerne les chiens plus âgés dont la peau manque de
tonus.
1) Brossez le pelage des pattes arrière dans un mouvement vers le haut et vers
l’extérieur de manière à aérer le pelage. Vous pouvez désormais donner la forme
désirée aux pattes, soit en augmentant le volume des pattes ou en les effilant.
2) Commencez en tondant les poils qui tombent sur le pied (schéma 12).
3) Commencez par la cheville, en progressant vers la hanche en n’éliminant que peu de
poils à chaque coup (schéma 13). Une fois que vous vous trouvez au niveau de la hanche,
amincissez les poils pour les effiler et raccourcir l’ensemble du pelage. (Lorsque vous vous
servez des guides de coupe sur les pattes, progressez sans vous arrêter à mi-chemin).
4) Répétez pour l’autre patte arrière, en reproduisant le même volume de la patte précédente.
5) Faites des retouches aux ciseaux.
Pattes avant :
1) Peignez le pelage vers le haut et vers l’extérieur, le chien étant en position debout, face à vous.
2) Tondez les pattes avant de manière à imiter l’apparence des pattes arrière.
3) Peignez les poils des épaules et amincissez-les pour raccourcir l’ensemble du pelage.
4) Peignez les poils de la poitrine et ceux situés entre les pattes avant; raccourcissez-les pour
les égaliser avec la longueur des poils des épaules et du corps.
Tête :
1) Le chien vous faisant face, peignez les poils sur le dessus de la tête (houppe)
vers le haut et vers l’avant (schéma 14).
2) Coupez la houppe avec des ciseaux en lui donnant une forme carrée ou
arrondie.
3) Amincissez les poils de la houppe inférieure pour qu’ils se confondent à ceux plus courts
du cou.
Oreilles :
1) Le chien vous faisant face, tondez à partir du dessus de l’oreille en progressant
vers le bas. N’orientez JAMAIS la tondeuse dans l’autre sens.
2) Déposez l’oreille dans la palme de votre main. Tondez d’abord l’extérieur de
l’oreille, puis l’intérieur (schéma 15).
3) Tenez l’oreille de votre main libre et coupez les côtés avec des ciseaux. Prenez soin
de ne pas couper l’oreille (schéma 16).
4) Répétez pour l’autre oreille, et faites des retouches avec des ciseaux pour éliminer
les poils rebelles.
Schnauzer
IMPORTANT : tondez votre Schnauzer au moins une fois avant que la
chondrotomie auriculaire soit pratiquée sur le chien. Sans quoi votre chien fera
probablement l’association entre la chondrotomie auriculaire et la tonte, ce qui
rendra le toilettage difficile.
1) Le chien en position debout, tondez le dessus du dos à partir de la base du crâne jusqu’à
la base de la queue. Tondez la gorge, l’avant et les côtés du corps de même que la queue.
Tondez ces zones dans le sens du poil. Tondez les côtés et l’arrière des pattes arrière vers le
jarret; incurvez les côtés dans le jarret. Ne tondez pas l’avant des pattes arrière.
2) Tondez l’abdomen de l’arrière vers l’avant. Tondez méticuleusement les poils du pénis
dans le sens du poil. Tondez le crâne à partir du point au-dessus des sourcils jusqu’à la base
du crâne et près des oreilles. Tondez à partir du coin extérieur des yeux jusqu’à la base des
oreilles et jusqu’aux commissures des lèvres.
3) Tondez les deux côtés des oreilles depuis la base jusqu’à l’extrémité.
4) Taillez aux ciseaux les pattes avant pour obtenir une apparence arrondie et nette. Taillez
les pattes arrière avec des ciseaux. Taillez les sourcils, le museau et la moustache avec des
ciseaux pour réaliser une apparence nette.
Terriers Airedale, irlandais, Lakeland, gallois et Wire Fox
Si vous prévoyez présenter votre terrier lors d’une exposition et que celui-ci
possède un pelage métallisé, il faut procéder à un décapage et non à une tonte.
Cependant, la tonte est une méthode de toilettage à la fois plus facile pour les
animaux et la personne responsable du toilettage. Tondez-le comme si vous tondiez un
Schnauzer, sauf que vous n’avez pas besoin de tailler les pattes arrière. Tondez pour amincir
les flancs du chien au niveau des hanches. Taillez aux ciseaux les sourcils, le museau et la
moustache pour convenir à la norme reconnue pour la race canine en question.
Cockers, Setters et épagneuls
Les chiens associés à la pratique de sports n’ont généralement besoin que d’une
tonte légère. Cependant, les races à long poil peuvent être plus efficaces sur le
terrain lorsqu’elles ont fait l’objet d’un entretien approprié. Il convient de tondre
les chiens plusieurs semaines d’avance au cours de la saison de chasse pour améliorer le
rendement sportif, offrir plus de confort au chien et faciliter l’entretien du pelage. La tonte
favorise également la croissance d’un pelage plus court et plus dense, ce qui permet de garder
l’animal au chaud et lui procure davantage de résistance aux bourres et aux érythèmes.
1) Tondez le cou, les épaules et la poitrine dans le sens du poil. Amincissez les poils du tronc
et de la poitrine, dans la région inférieure. Tondez les pattes et la queue.
2) Tondez le corps, au besoin. Il est suggéré de tondre le pelage du chien à une longueur de 1/2
à 3/4 pouce. Cela peut dévier de l’apparence que présente habituellement le chien, mais cela
convient à celui qu’on utilise pour la chasse.
3) Une fois la journée de chasse terminée, peignez le pelage de votre chien. Une solution
vaporisée pour éliminer les nœuds contribuera à vous débarrasser des bourres.
Toilettage pour animaux de
compagnie réalisé avec la
tondeuse au lithium-ion
ÉLIMINATION DE LA PILE AU LITHIUM-ION
N’essayez pas de retirer la pile de l’appareil. Les piles au lithium-ion peuvent exploser,
s’enflammer ou causer des brûlures si elles sont démontées, subissent des dommages
ou sont exposées à l’eau ou à des températures élevées. N’essayez pas de retirer la pile
de l’appareil pour pouvoir la jeter. Les piles au lithium-ion sont assujetties à la législation
locale relative aux déchets. Dans de nombreuses localités, il est interdit de mettre les
piles aux poubelles. Consultez les règlements et la législation de votre localité. En ce
qui concerne le recyclage, communiquez avec une agence gouvernementale responsable
du recyclage, un service d’élimination des déchets, un détaillant ou encore consultez les
documents relatifs au recyclage en ligne, entre autres, ceux disponibles aux adresses
www.batteryrecycling.com ou www.rbrc.org.
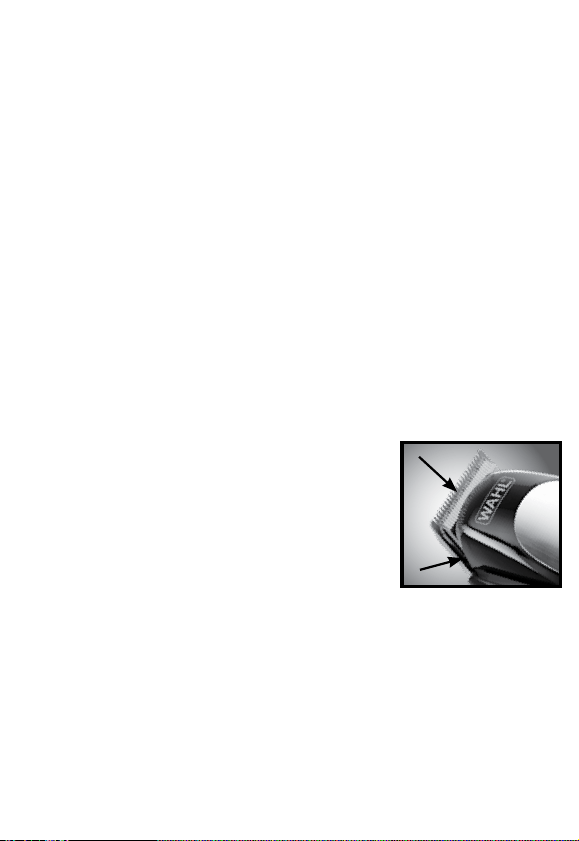
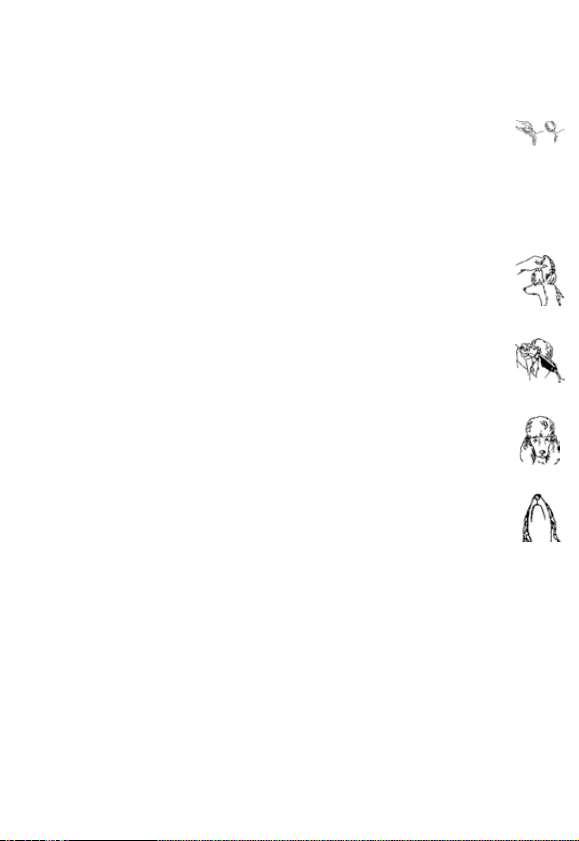
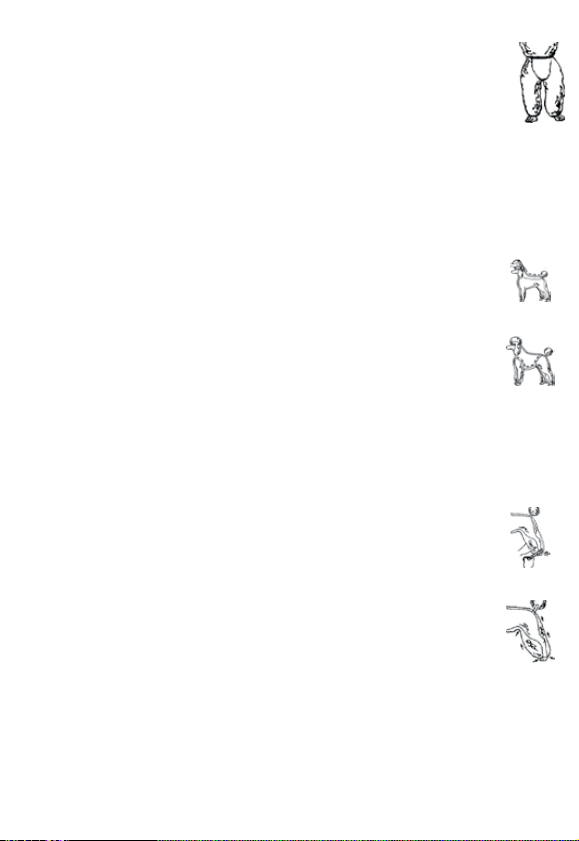
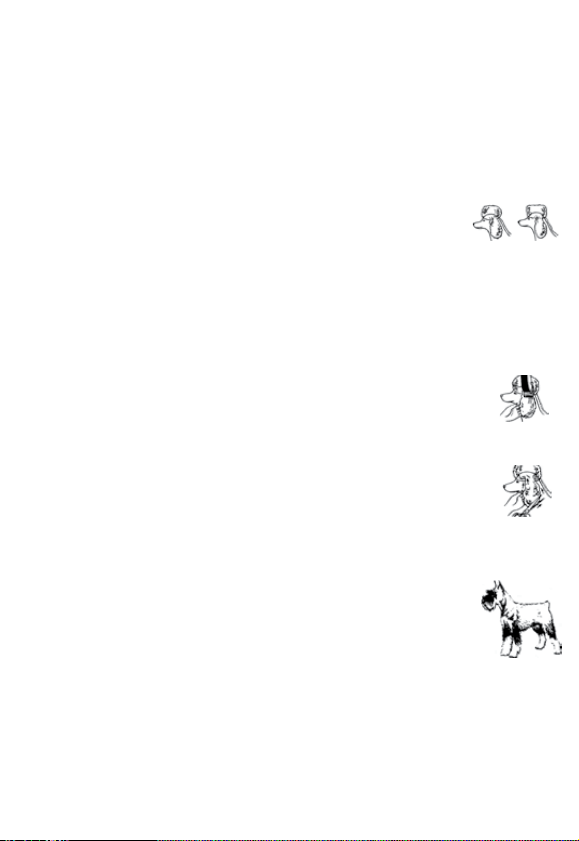
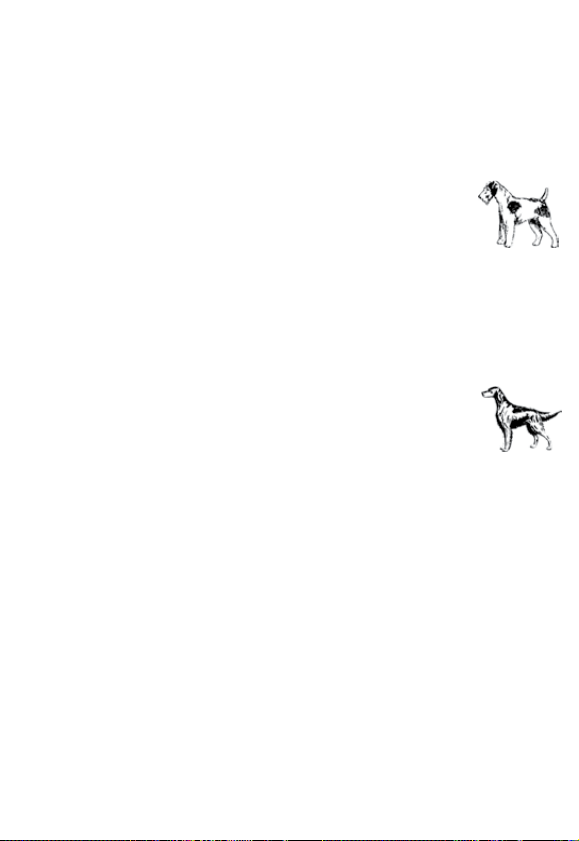
