Loading ...
Loading ...
Loading ...
6
When using serving pans, make sure the pan support rails are
properly installed in the locator notch before inserting pans.
WARMING DRAWER CARE
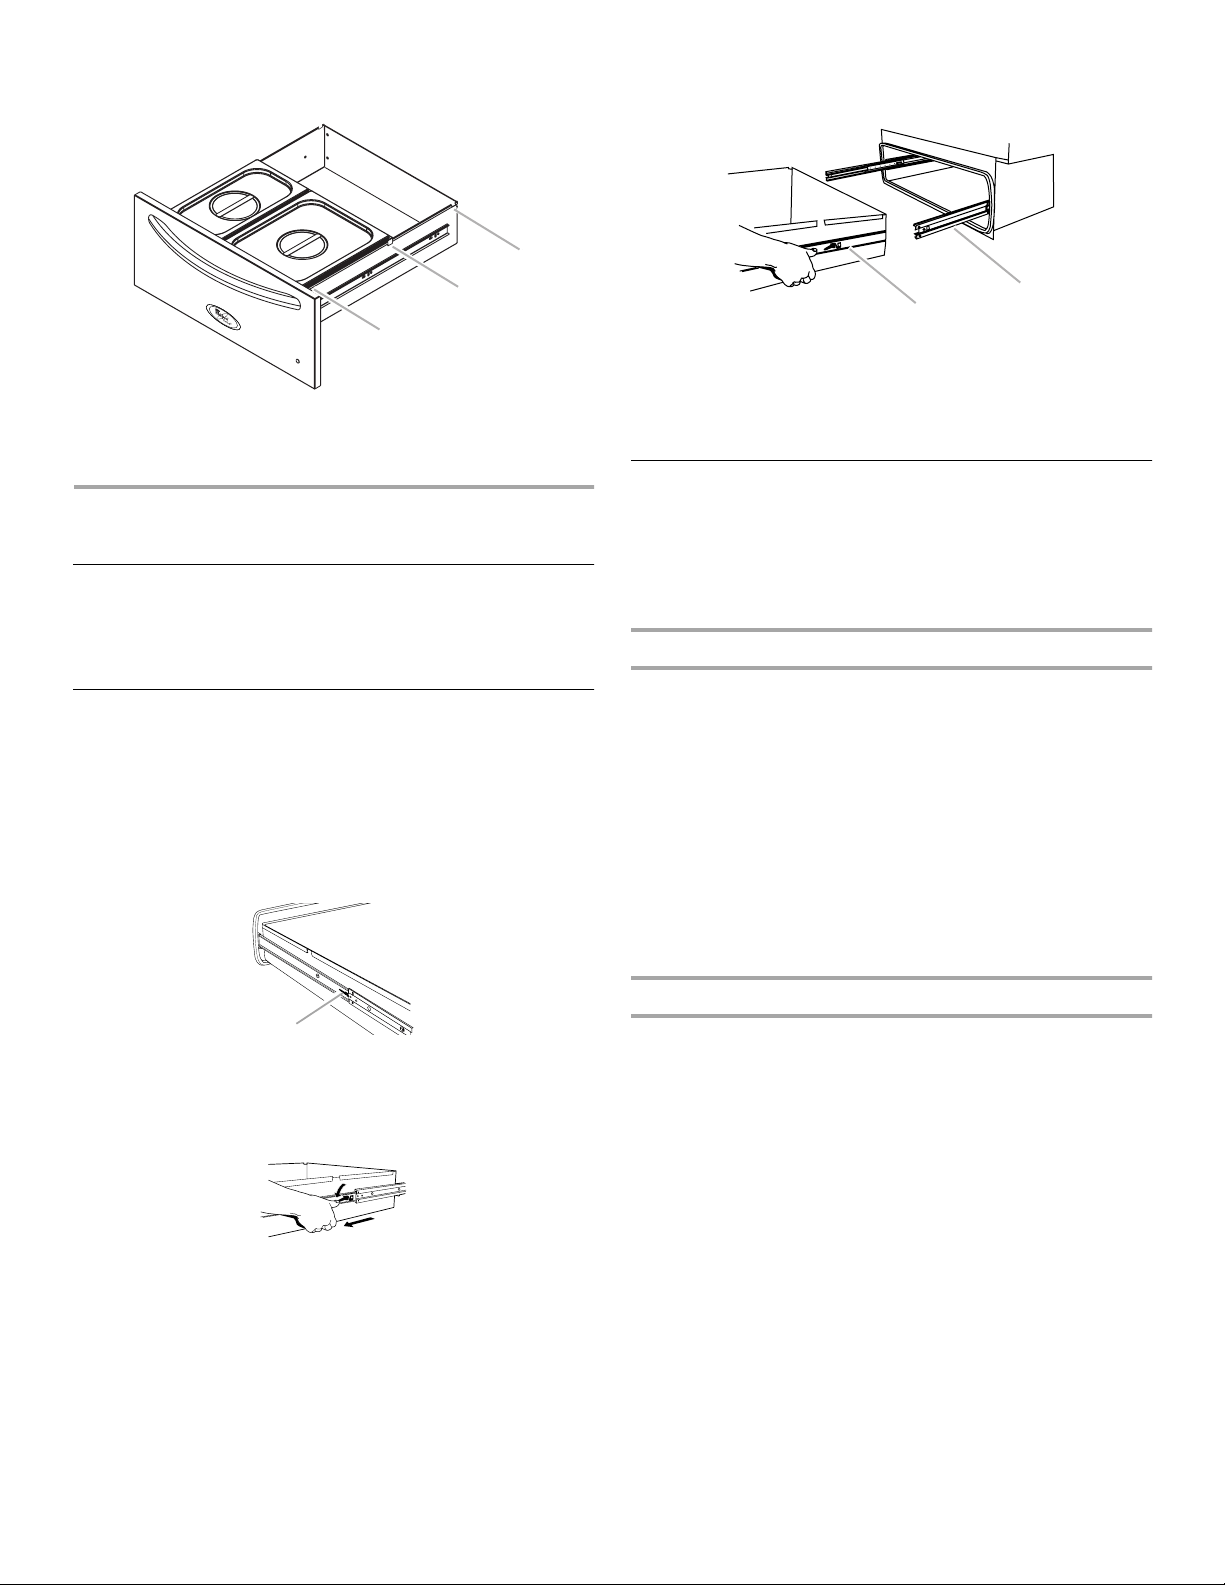
Drawer Slides
The drawer slides allow you to fully extend the drawer for easier
cleaning. If necessary, the drawer can be removed.
NOTE: Load capacity for the drawer is 100 lbs (45 kg).
Warming Drawer
Remove all items from inside the warming drawer, and allow the
warming drawer to cool completely before attempting to remove
the drawer.
To Remove:
1. Open drawer to its fully open position.
2. Locate the black tabs on both sides of the drawer.
3. Press the tab down on the right side of the drawer and lift tab
up on the left side of the drawer at the same time. Then pull
drawer out another inch to disengage latch.
4. Hold the drawer by the sides (not by the front). Pull it slowly
all the way out.
To Replace:
1. Align the drawer rails with the receiving slides.
2. Push drawer in all the way.
3. Gently open and close the drawer to ensure it is seated
properly on the slides.
General Cleaning
IMPORTANT: Before cleaning, make sure all controls are off and
the warming drawer and the drawer accessories are cool. Always
follow label instructions on cleaning products.
Soap, water and a soft cloth or sponge are suggested first unless
otherwise noted.
STAINLESS STEEL SURFACES
To avoid damage to stainless steel surfaces, do not use soap-
filled scouring pads, abrasive cleaners, Cooktop Polishing
Creme, steel-wool pads, gritty washcloths or some paper towels.
Rub in direction of grain to avoid damaging.
Cleaning Method:
■ Stainless Steel Cleaner and Polish Part Number 31462
(not included):
See “Assistance or Service” section to order.
■ Liquid detergent or all-purpose cleaner:
Rinse with clean water and dry with soft, lint-free cloth.
■ Vinegar for hard water spots
CONTROL KNOB
Do not use steel wool, abrasive cleansers or oven cleaner.
Do not soak knob.
When replacing knob, make sure knob is in the OFF position.
Cleaning Method:
■ Soap and water:
Pull knob straight away from control panel to remove. Wash,
rinse and dry with a soft cloth.
A. Position 1 pan support rail locator notch
B. Position 2 pan support rail locator notch
C. Position 3 pan support rail locator notch
A. Tab
A
B
C
A
A. Drawer rail
B. Drawer slide
A
B
Loading ...
Loading ...
Loading ...