Loading ...
Loading ...
Loading ...
WARNING WARNING
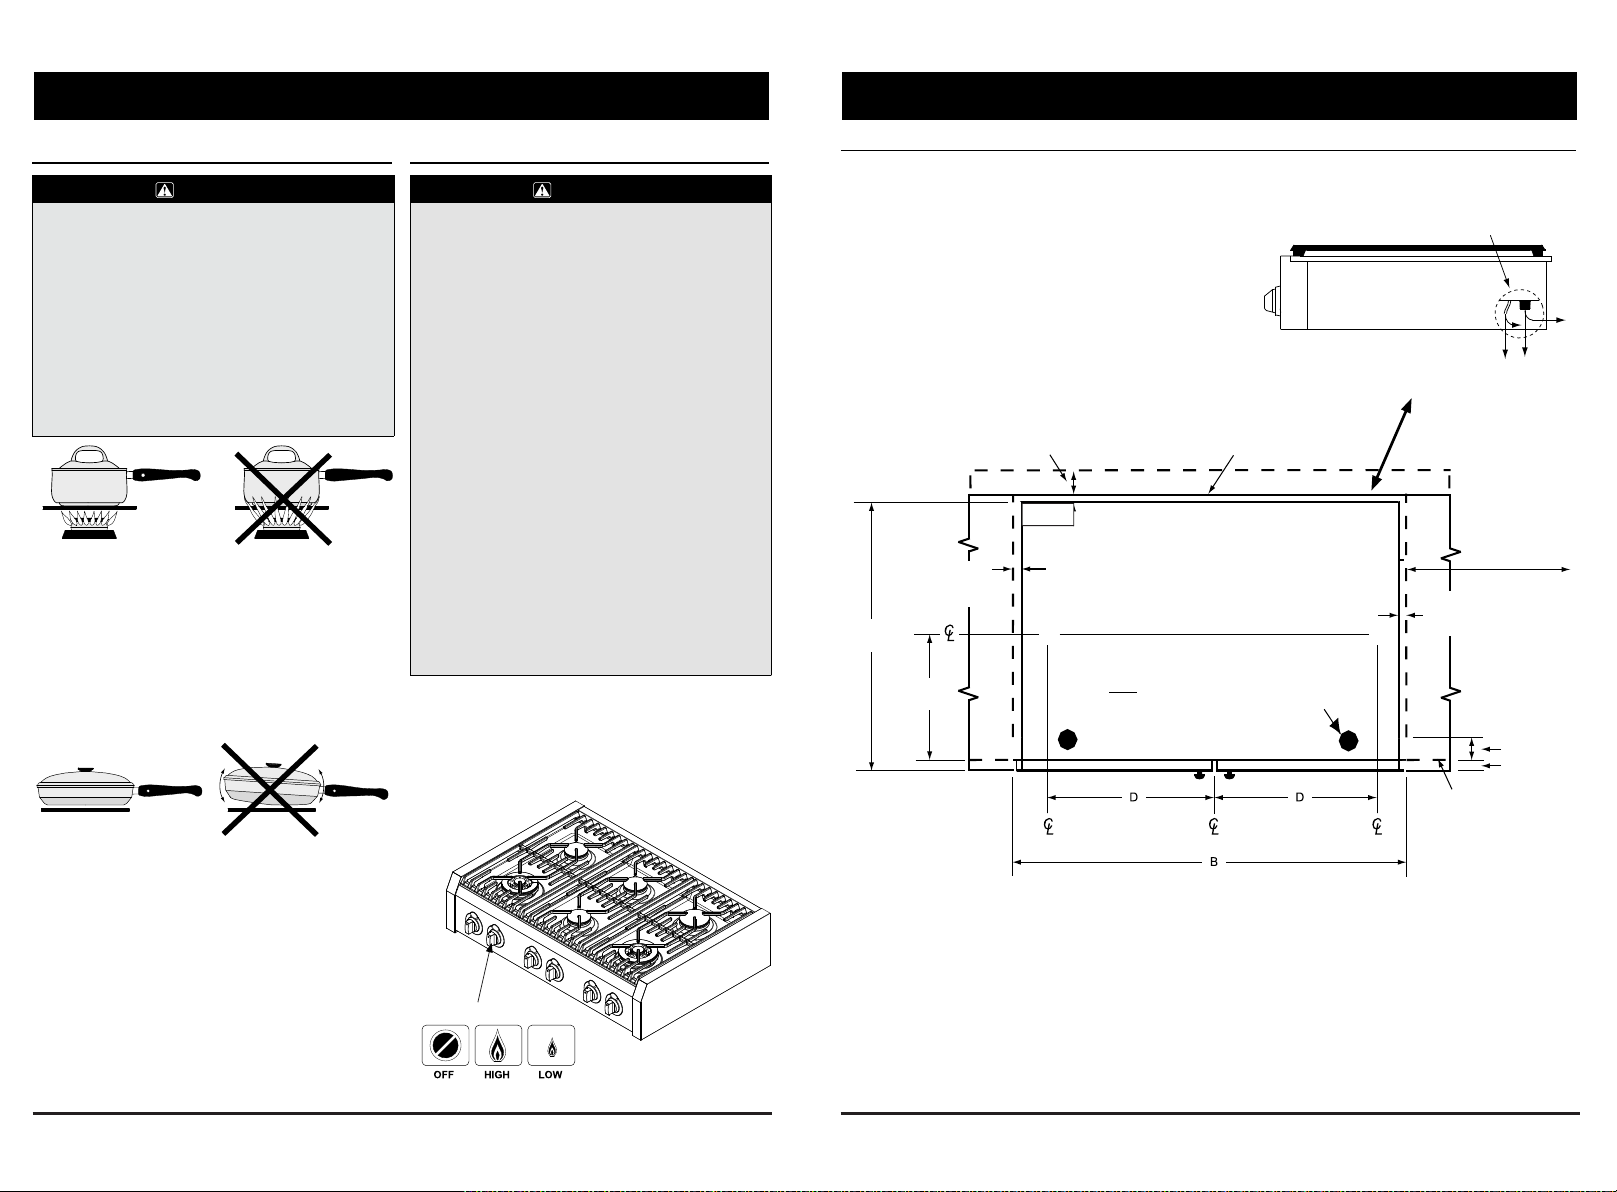
Burner knob settings
Operating Your Cooktop
Selecting the Cookware
• To avoid burns and scalding, always turn pan handles
to a position where they cannot be easily hit. Also,
handles should not extend over adjacent burners.
Always set utensils gently onto the grates and center
them so that they are well-balanced.
• Do not drag cookware across the grates. Sliding may
damage the finish. Lift utensils to reposition them. Do
not drop them on the grate.
• Cookware with rough bottoms can cause permanent
damage to the coated surfaces on the grates.
• To avoid burns or a fire hazard, reduce the flame level
if it extends beyond the bottom of the utensil. Flames
extending up the sides are potentially dangerous.
For overall safety and best cooktop performance,
select the correct cooking utensil for the food being
cooked. Improperly selected cooking utensils will
not cook evenly or efficiently.
Use cookware that:
• Has flat, smooth bottoms.
• Is well balanced.
• Has tight fitting lids to keep heat, odors and steam in.
IMPORTANT: Avoid spills as much as possible.
The porcelain surfaces of the grates, spill trays and
burner caps are acid-resistant but not acid-proof.
Some foods can cause permanent damage if allowed
to remain on porcelain surfaces.
Lighting a Burner
• To avoid the chance of fire, explosion or carbon
monoxide poisoning, do not attempt to use your
cooktop without the burners completely and properly
assembled (see page 5). The burner rings spread the
flame evenly around the burner cap. The burner rings
must be properly seated for proper burner lighting and
operation.
• In the interest of safety, always light the burner before
putting the cooking utensil on the grate. Turn the
burner knob to the OFF position before removing the
utensil. Always check the position of the control knobs
to make sure the cooktop is off when you are finished
cooking.
• Do not turn the knob farther than the HIGH position
until lit. Doing so may result in a burst of flame that
could cause burns or damage to the surrounding area.
• Do not touch any part of the burner while the igniter is
sparking. An electrical shock could result.
• Never light the burners with a match or other open
flame.
• Always check to make sure all control knobs are in the
OFF position when you are finished cooking.
• If the gas does not ignite after four seconds or if the
flame goes out and gas escapes when attempting to
light a burner, turn the knob to the OFF position. Open
a window and allow at least five minutes for the gas to
dissipate. Then, repeat the lighting procedure.
Each burner control knob has a small diagram
next to it
1. To light a burner, push in gently on the knob and
turn it counter-clockwise to the HIGH position.
The igniter will spark (click) repeatedly until the
gas ignites. The burner should light within four
seconds.
11
Installation RequirementsInstallation Requirements
8
Cabinet/Countertop Dimensions (cont.)
Cutout tolerances +1/16” -0 (+1.6 mm, 0) unless otherwise noted.
Gas and electrical connections
Gas connection and power cord may be
routed through bottom or back of chassis
Increase countertop and overhang
additional 2 1/2” (64 mm) Min. for
combustible rear wall above
countertop
Non-combustible
rear wall, rear of
mounting platform
Gas/electrical utility cut-out in left rear corner of
mounting platform 203 mm X 152 mm,
if gas and electrical are routed through bottom
3/8” (13 mm)
countertop overhang
½” (13 mm)
countertop
overhang
598 mm
11 7/16”
(291 mm)
/ ” di
bolt
1” thick mounting platform Min.
Cabinet face
below countertop
overhang
2” (51 mm)
1” (25 mm)
Cabinet/Countertop Cutout Dimensions - Top View
Please wait to obtain appliance prior to cutting dimensions.
10” (254 mm) min.
to combustible wall
above countertop,
both sides
Not actual position
of gas/electric
Loading ...